Pineapples and Crowns made it into the Viewer’s Choice section of the Festival.
Please remember to vote for your favorite this week!
Please remember to vote for your favorite this week!
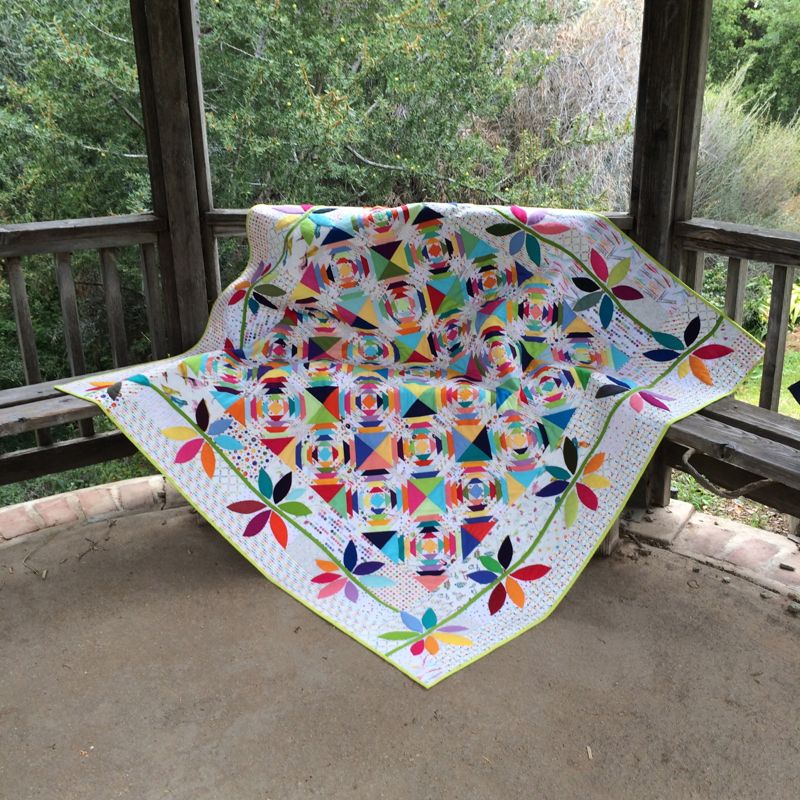
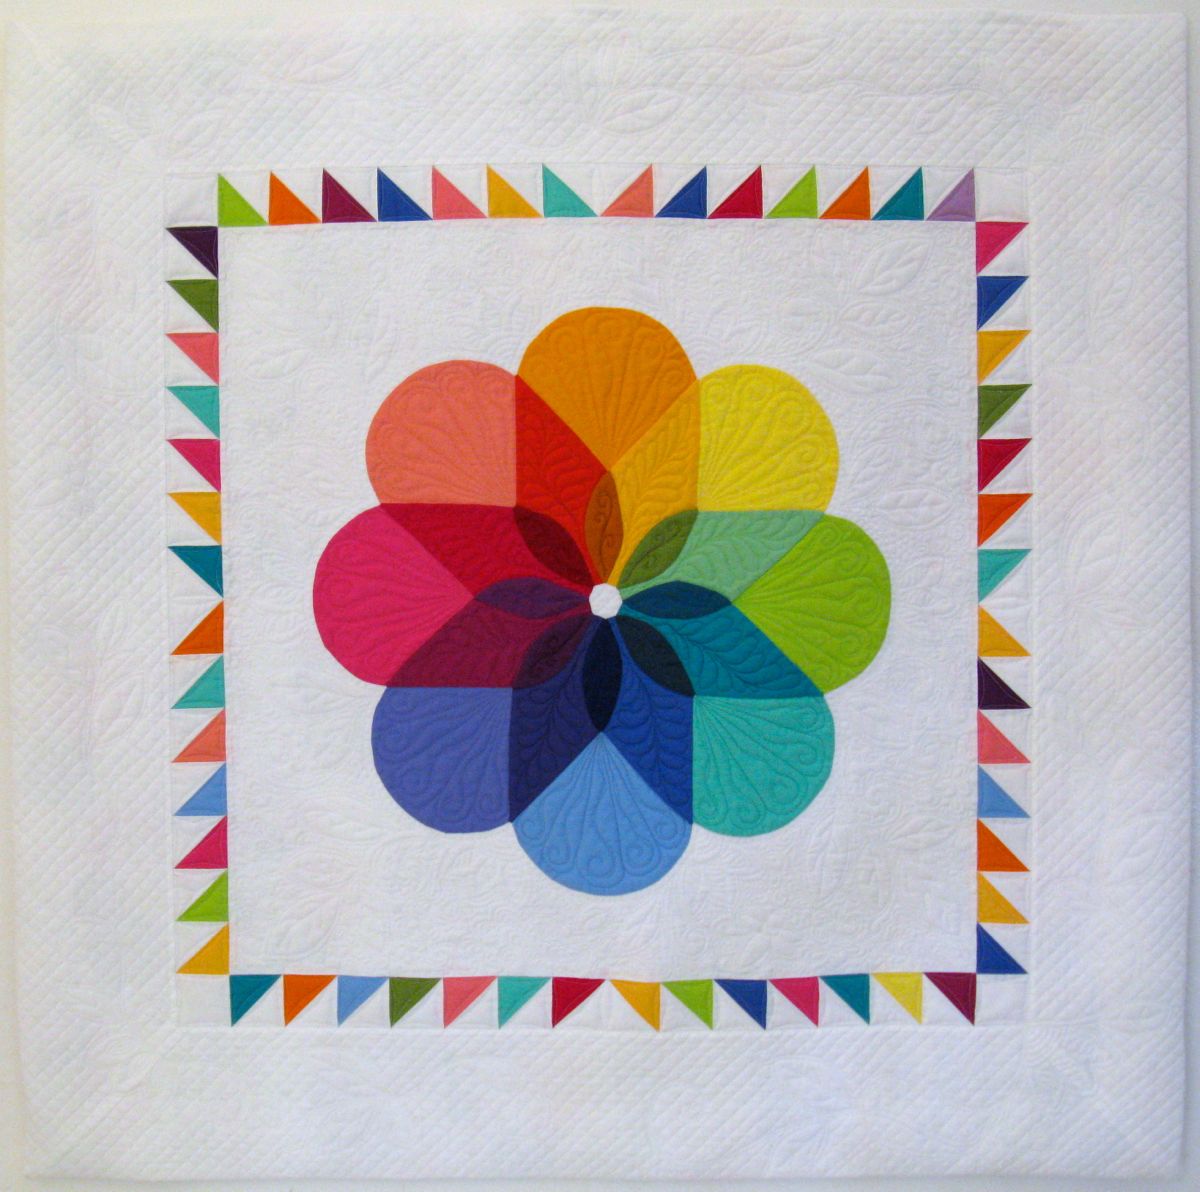
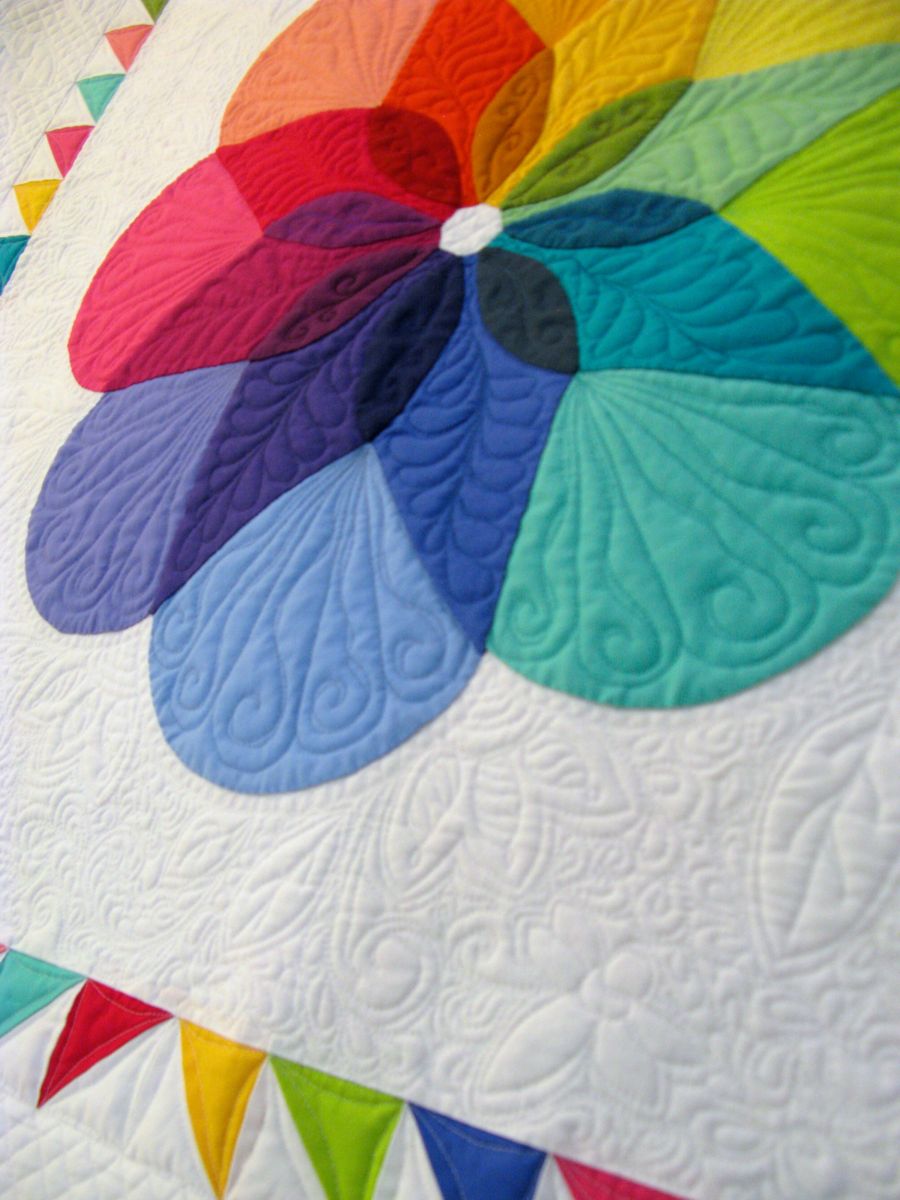
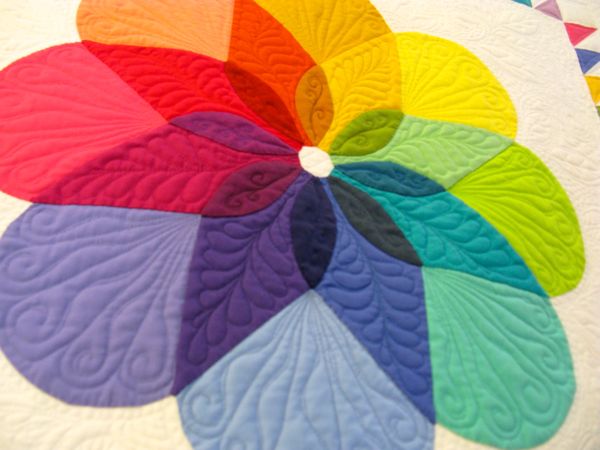
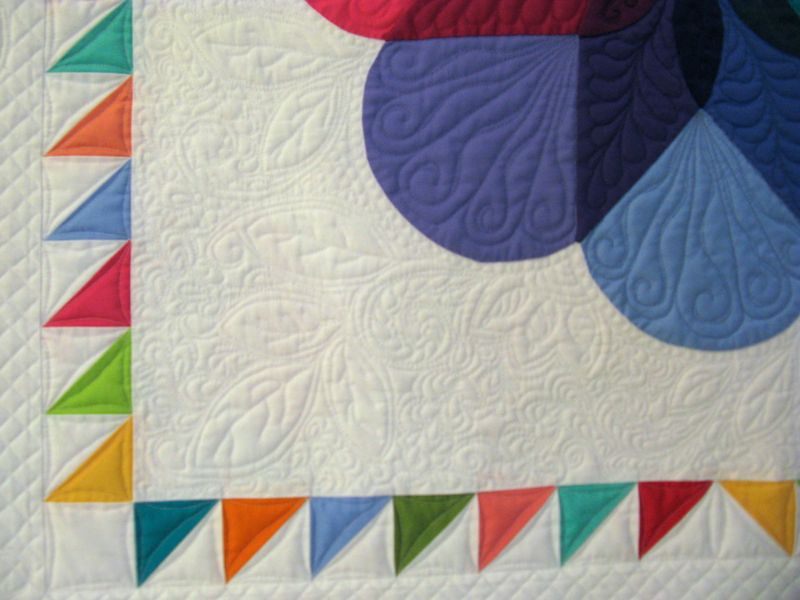
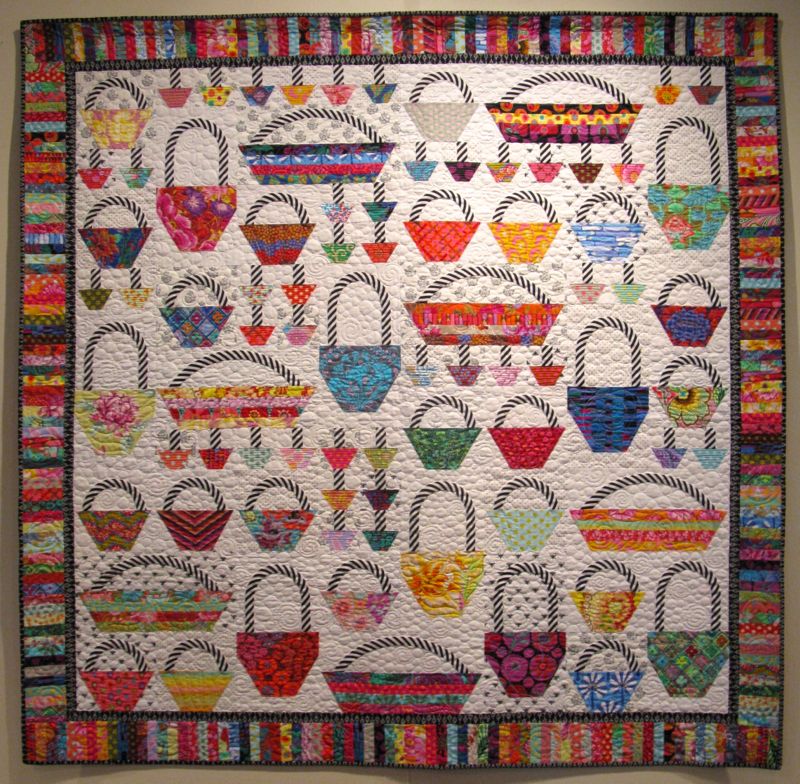
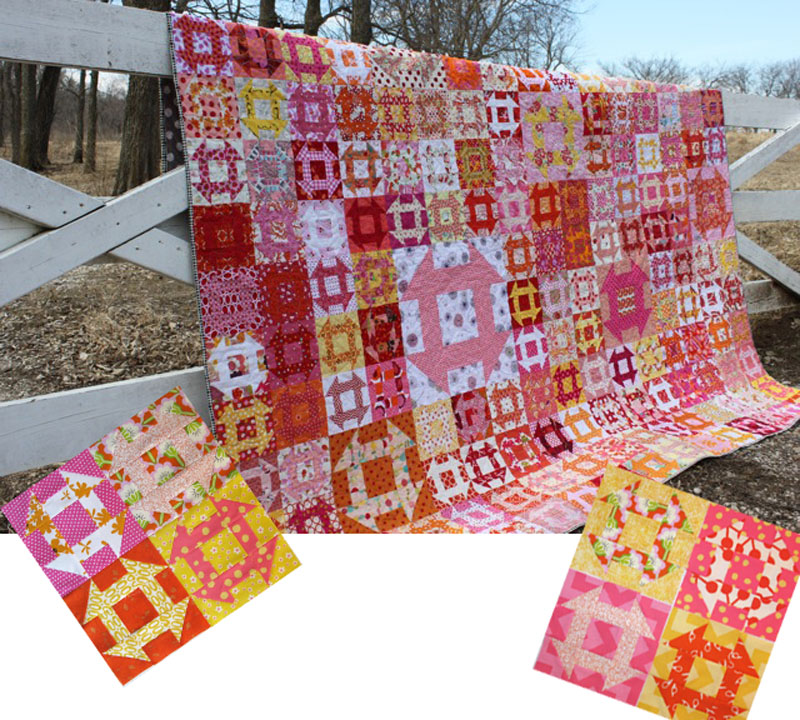
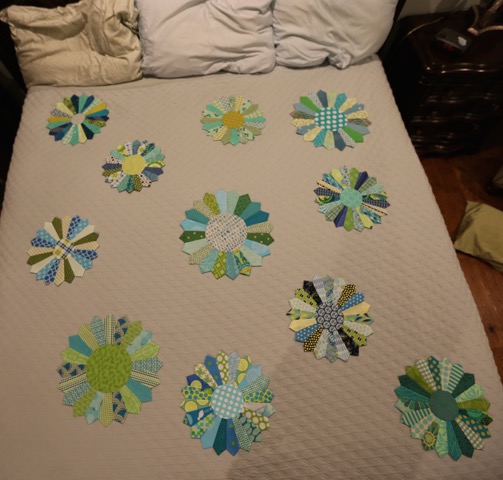
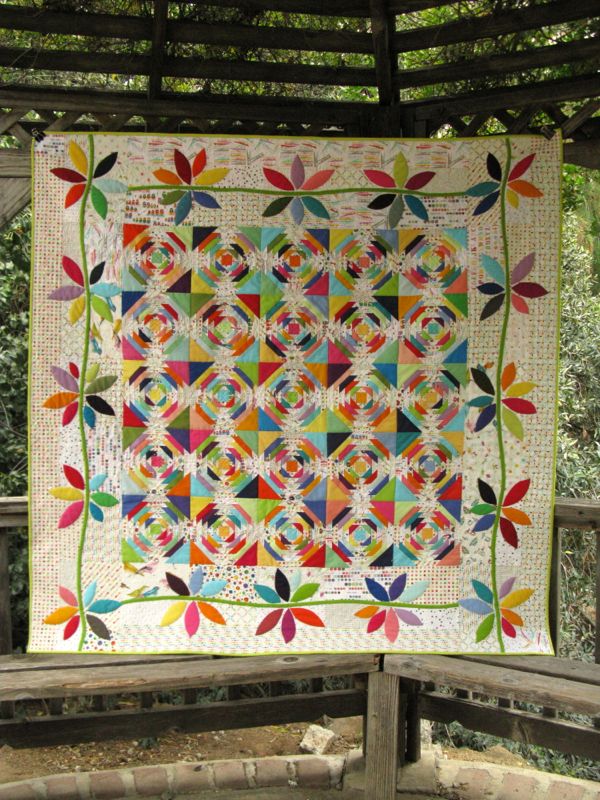
Pineapples and Crowns, 61″ square
I am entering in Amy’s Blogger’s Quilt Festival, and I apologize for my regular readers who have already seen this quilt. But she requests a blog post written the week of the festival, so as some one who is totally rule-bound (*cough, cough*) I am writing a new post. The original post is *here.*
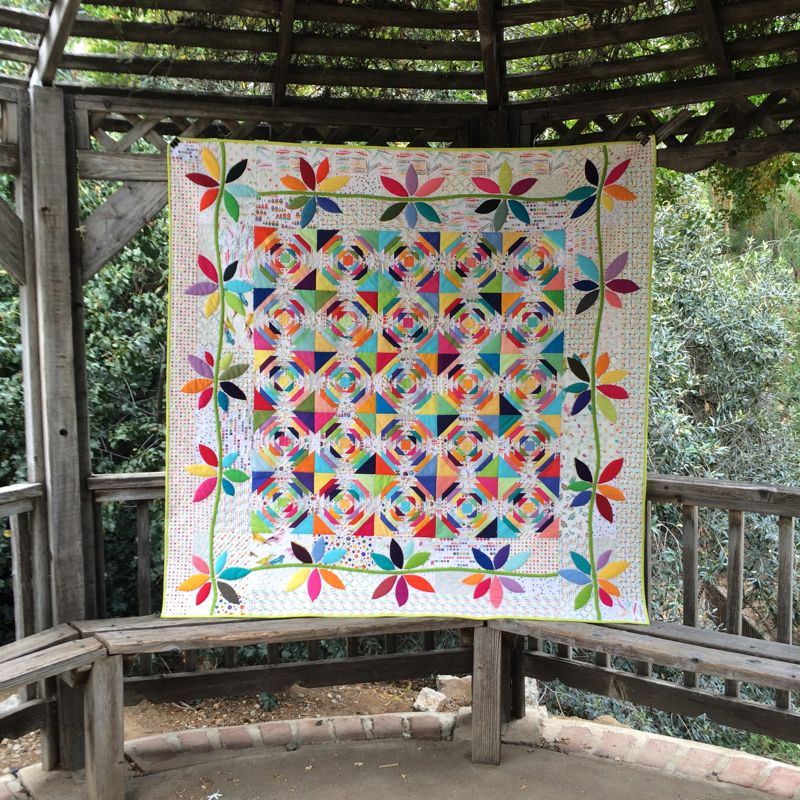
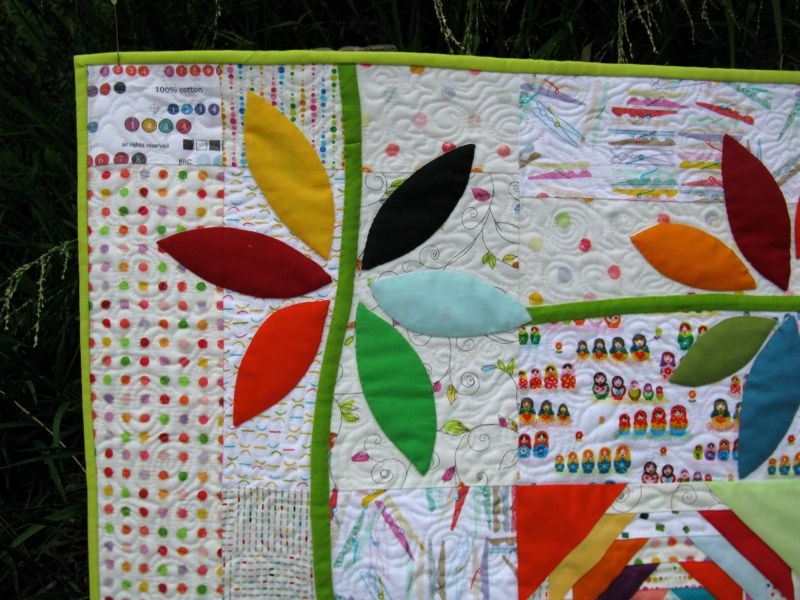
The inner pineapple blocks were made for me by two sets of bees, but the outer border, of the pineapple crowns is all hand-appliqued. I went back and forth between all the categories, looking for the “mixed technique” category, but finally entered it in the appliqué category, if you want to help this quilt become a winner–that’s where to go (*shameless plug*).
It could have gone in “scrappy” or “large” for just like our children, we can categorize our quilts as one thing or another, depending on if they’ve kept us up all night, sick and crying, or if we see them decked out in their Sunday best, playing the timpani drums at the end-of-school concert, like my eldest granddaughter just did. (Way to go, Keagan!)
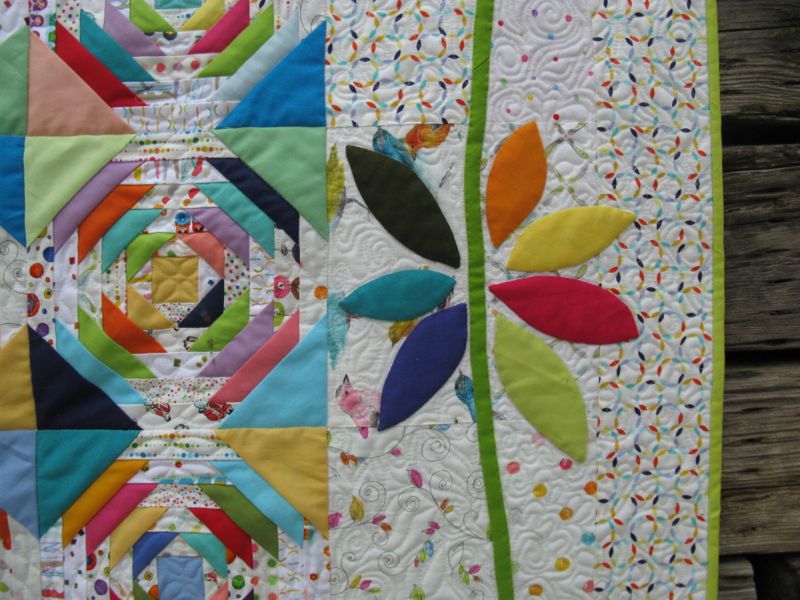
But, as always, the best thing to call quilts is done, ready for display or enjoyment or to take to a botanic garden and take pictures of them, which I did recently. I love the mix of scrappy white-background fabrics and the rainbow of brights. I placed warm bright petals in the outermost border, and cool petals in the inner border. It’s not really noticeable overall, but I needed to organize these blossoms somehow, and I chose to do it with color.

I hope you’ll take a few minutes and head back to Amy’s Blogger’s Festival to see all the other terrific quilts that are showing up there, and to vote for your favorite in each category. The voting begins May 22nd, and you can also vote for Viewer’s Choice as well. Enjoy the online quilt festival!