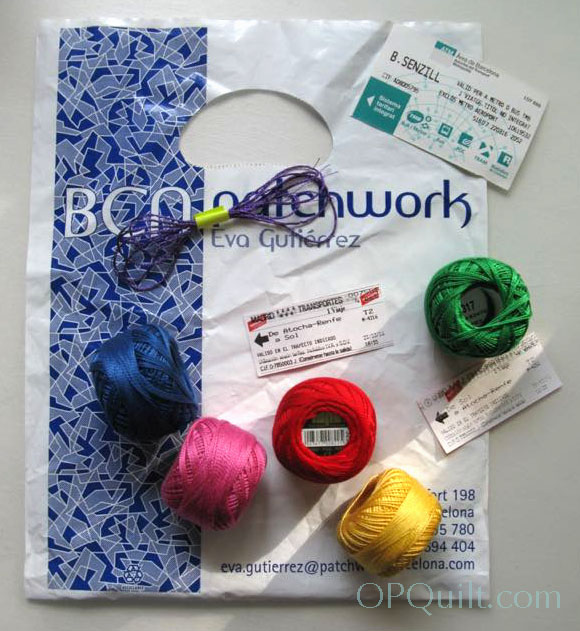
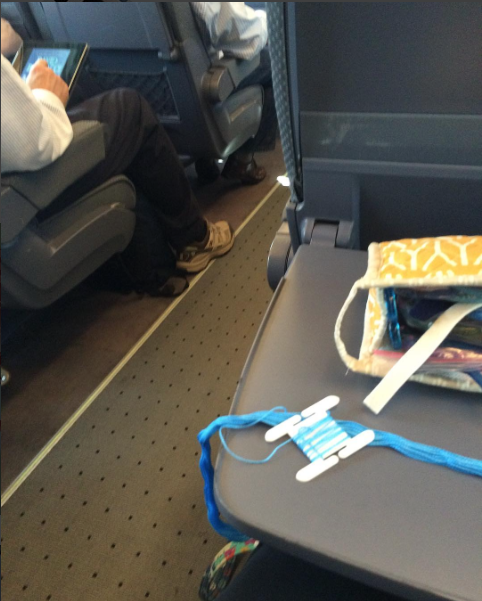
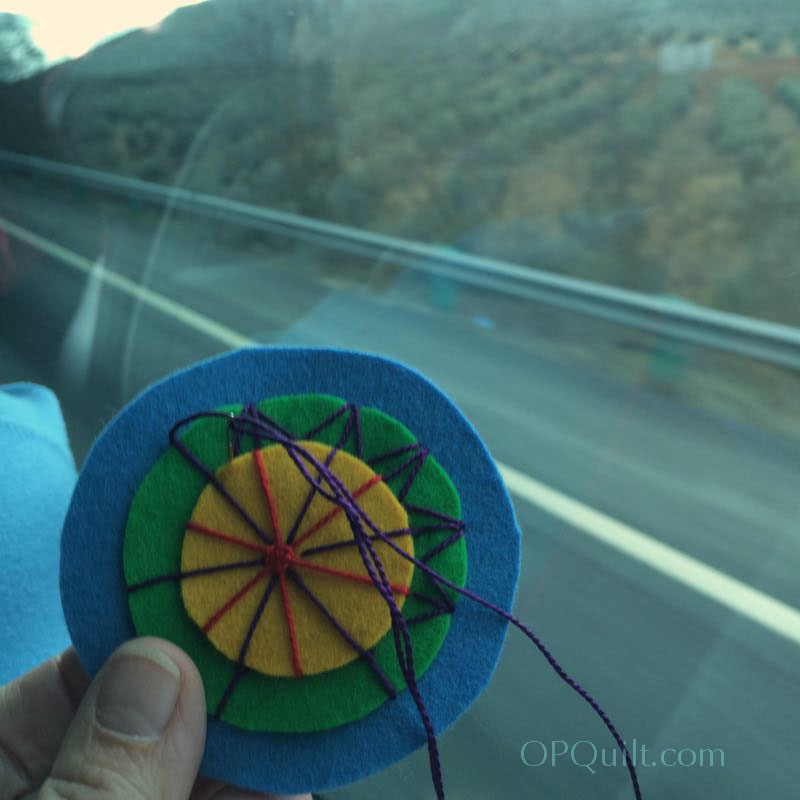
The title of this post came from Cathy, one of my Instagram readers, after I posted the above photo. I was on a train, in Spain, wrapping thread onto a little organizer. It totally cracked me up, so I thought I would write a bit about my trip, and the hunt for threads. In an interesting ironic twist, it rained all that afternoon.

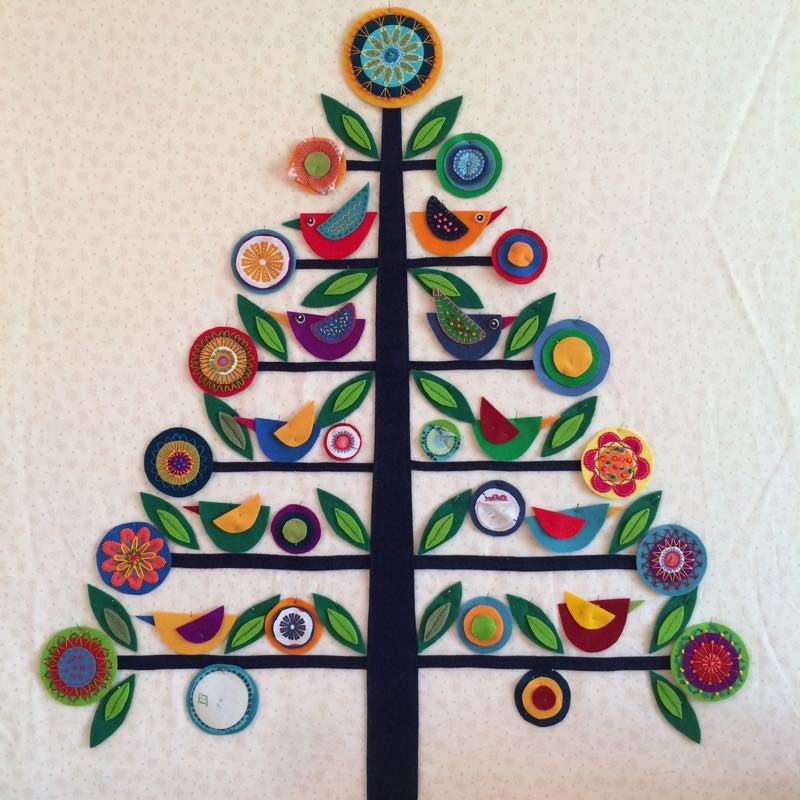
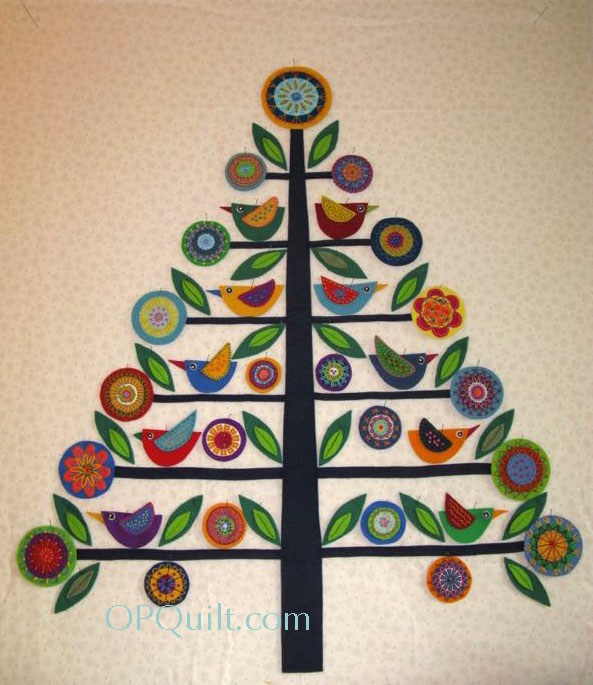
It all started here, with me packing a few of my Oh Christmas Tree hand-sewing pieces along on our trip to Spain and Portugal. I crammed everything into a wee bag and am so glad I did.
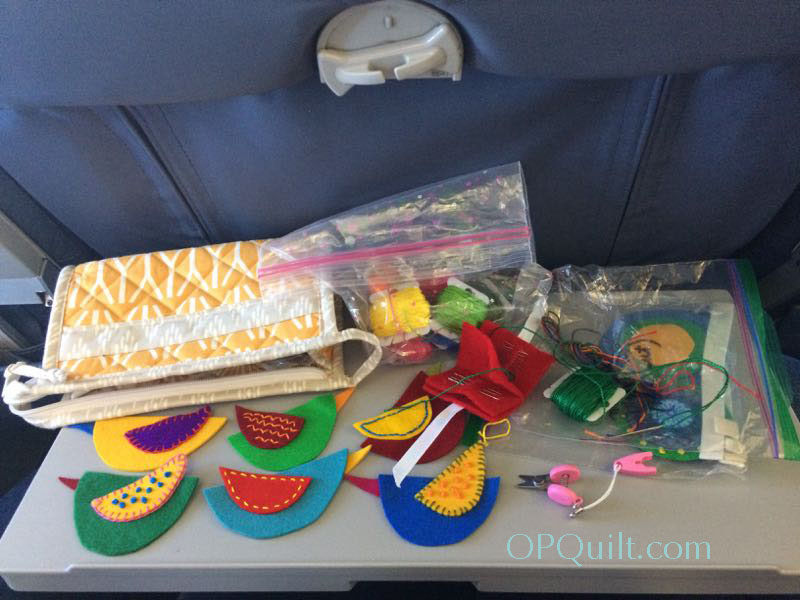
 It helped keep my sanity while on the long flight over and on our various ground travel segments while in Spain and Portugal. Like a train (above).

Or a bus from Antequera-Santa Ana Train Station to Granada (they were working on the rails so we had to be bussed in).

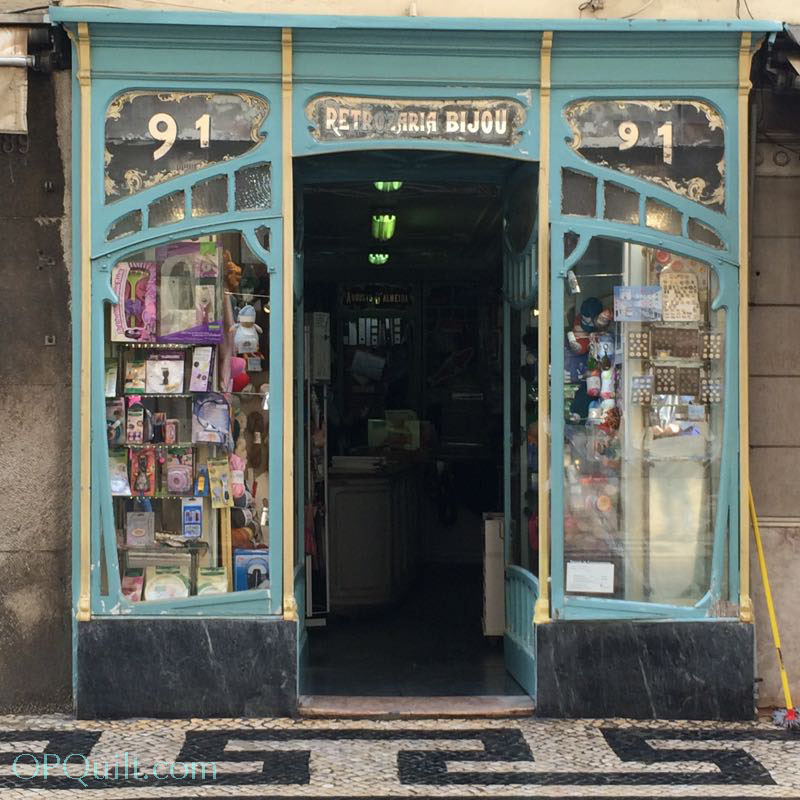
We first went to Lisbon, and I thought I’d brought enough threads for what I needed, but when my husband spotted this little shop, I couldn’t resist going in and buying a couple of more.
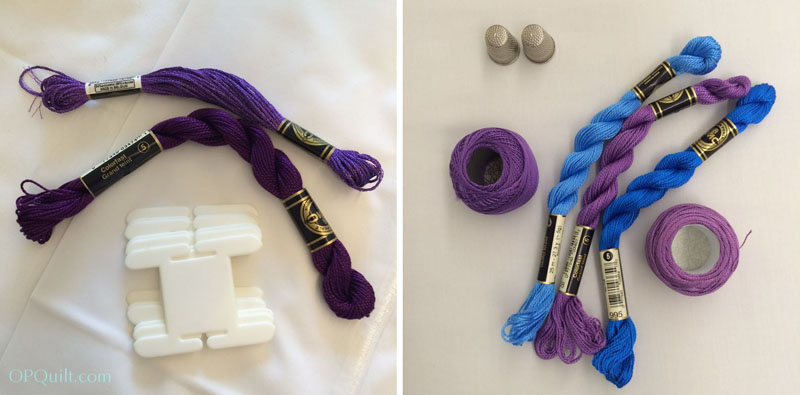
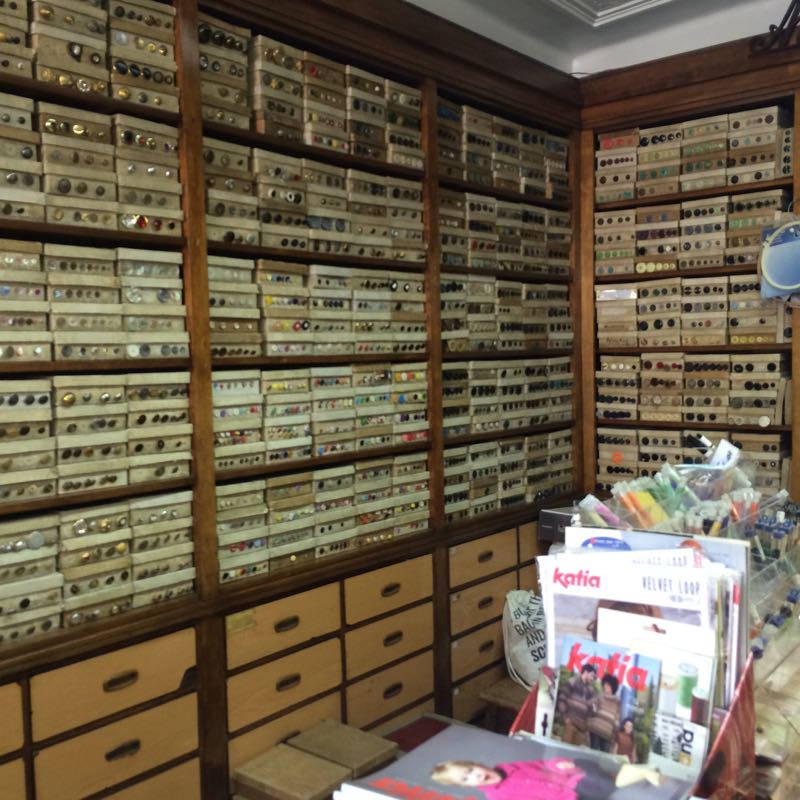
 I definitely needed some purple threads. Check out those larger organizers, which is what they called them. Nice big tabs so the threads don’t fall off.

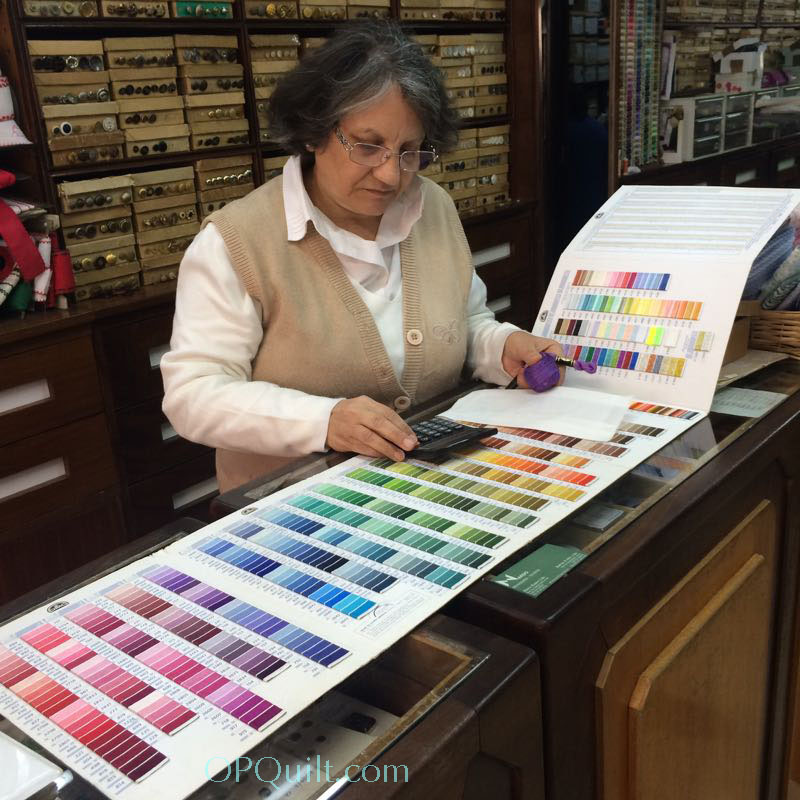
This shop was next door, and to buy threads, she pulled out her color card, scurried to the back room, and brought back a flat box of DMC, from which she selected one for me. The first shop I went into, I had a hard time communicating what I wanted because they spoke Portuguese and I didn’t. I mimed a sewing action, and somehow they figured out what I wanted.

This was from another shop next door to that one, and I chose a couple of skeins. I found out they had metallic embroidery floss in colors–something I’d never seen in the States–so purchased some purple. It’s a bit like sewing with rods of steel, but I split the floss apart into 3 threads; it makes a fun accent on my flowers and birds. 

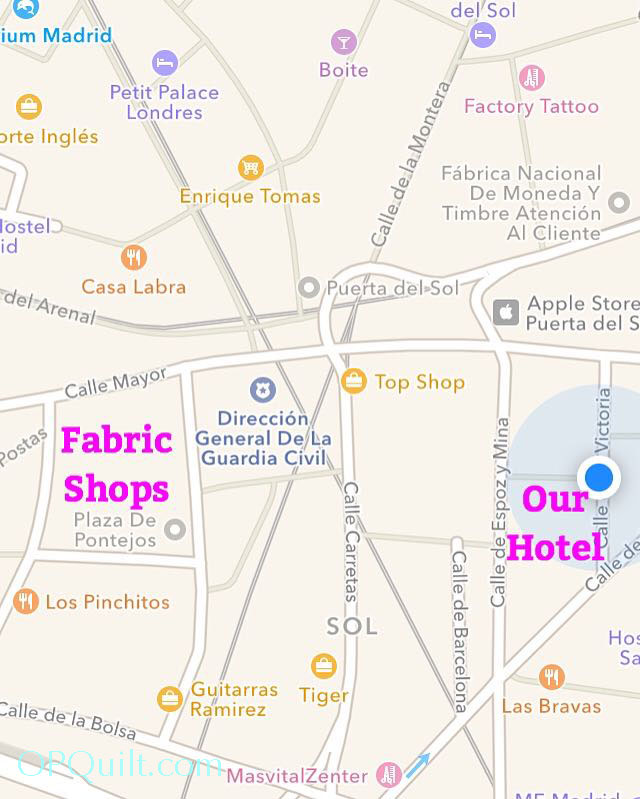
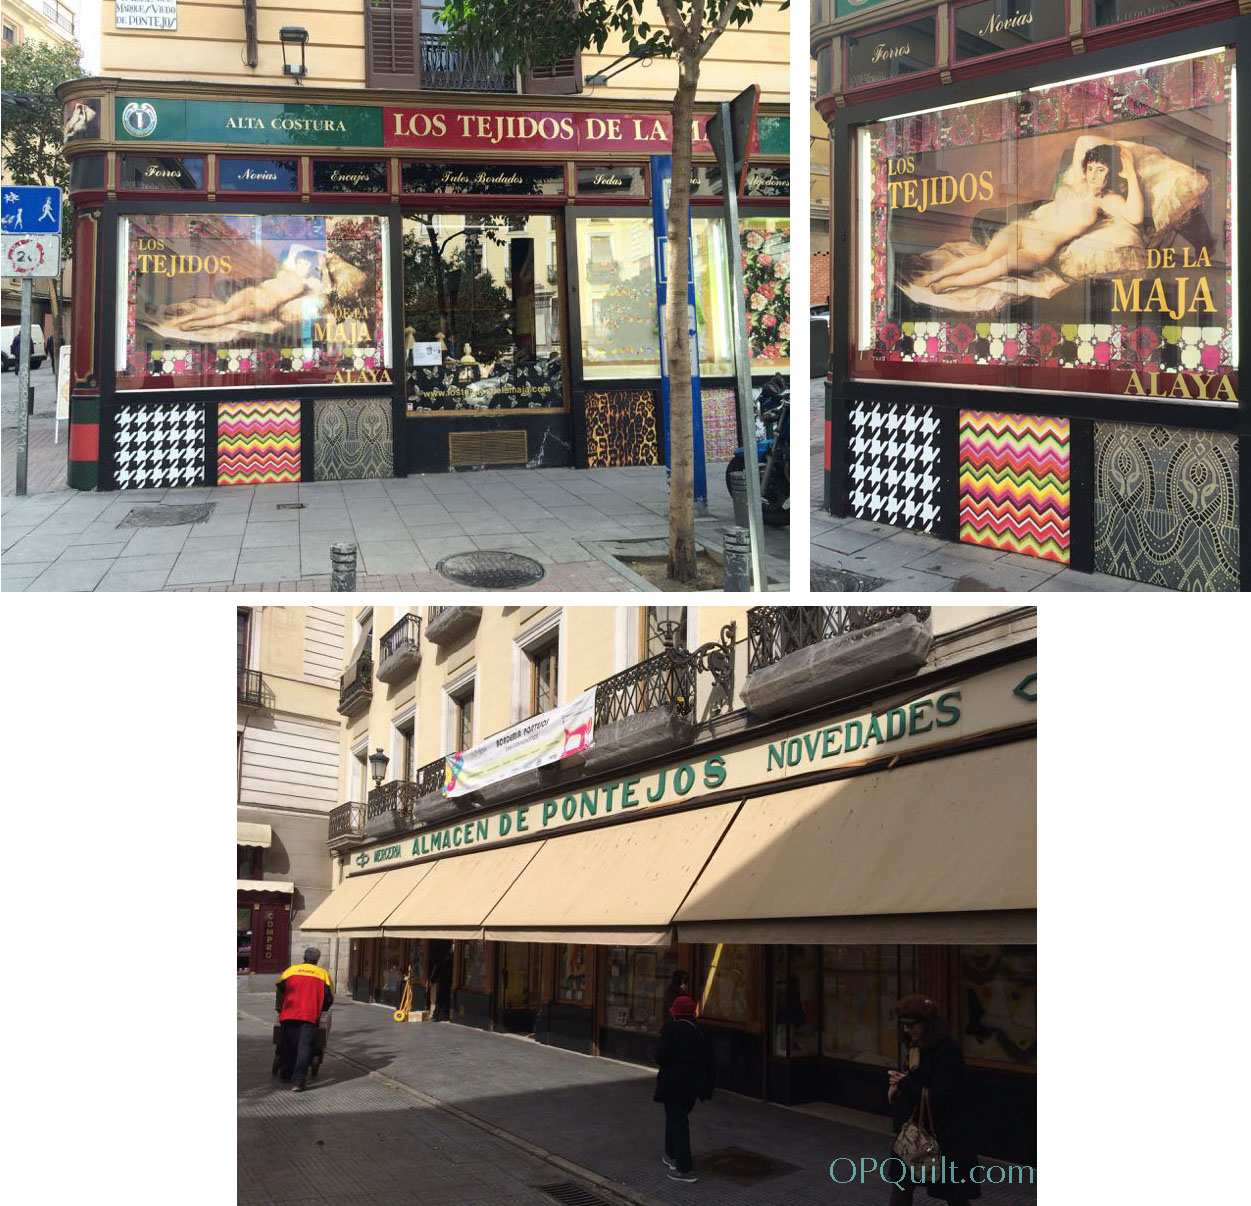
The next city I went hunting for thread was Madrid. In case you ever go there, here’s a map. I needed regular thread for the appliqué centers of the Oh Christmas Tree flowers, and had left my spool of thread at home (or else it had already gotten lost, which is entirely possible).
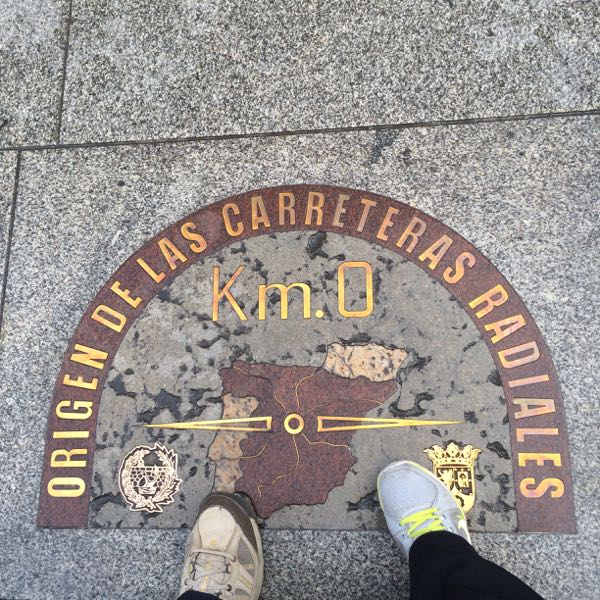
 It’s all near the Puerta del Sol, which is the center beginning point of All Points in Spain, which of course, is where the fabric shops are located.
As I joked on Instagram, we quilters need a sultry babe like the Maja to be our pitchwoman. (This comes from a famous painting in the Prado Museum, which is in Madrid.) So this time I had looked up how to say “pearl cotton” in Spanish, tried it out, and even though I’m no slouch in the accent department (having lived in Peru when I was a teenager and having progressed through 7 years of Spanish), they had no clue what I was asking for.

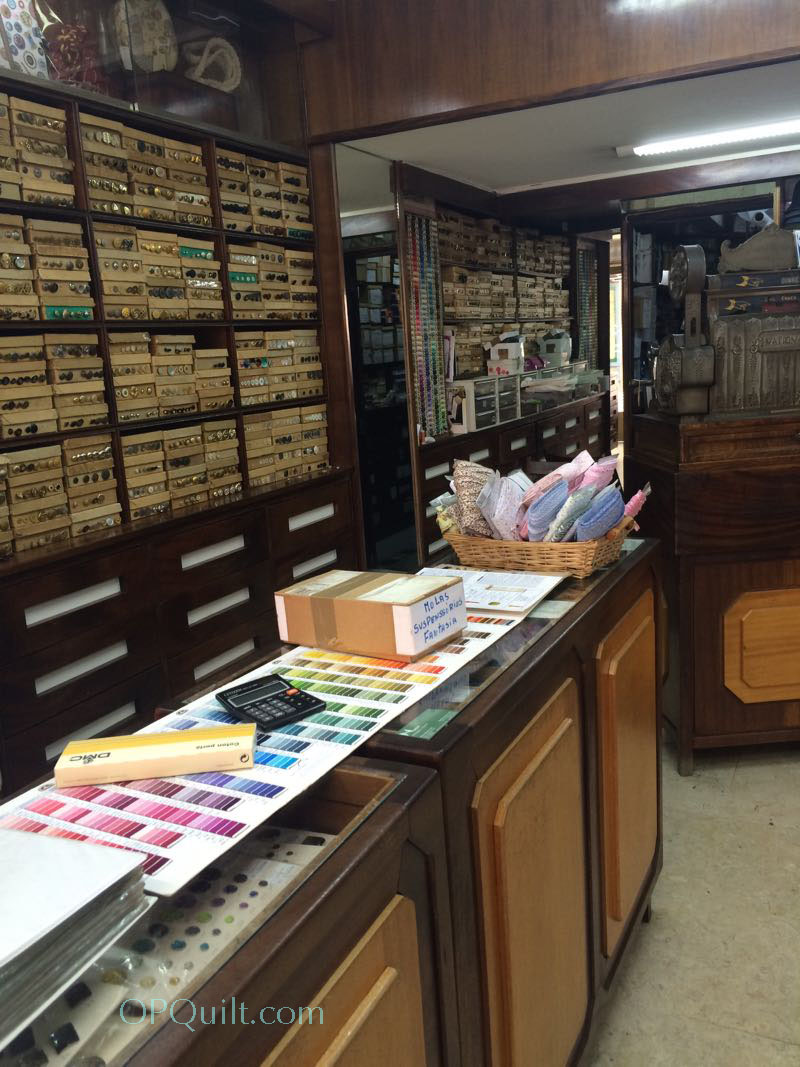
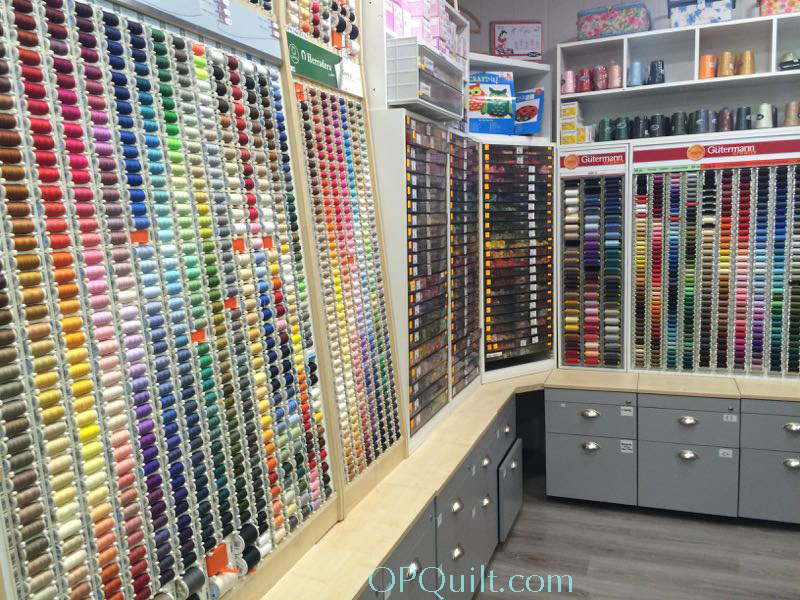
This lovely woman came to my rescue. Stephanie is an ex-pat American who has lived more years in Spain than in the US, and took me around to three other shops, all in the same block, helping me find my thread and of course, I bought another couple of balls of pearl cotton. The selection is amazing there!

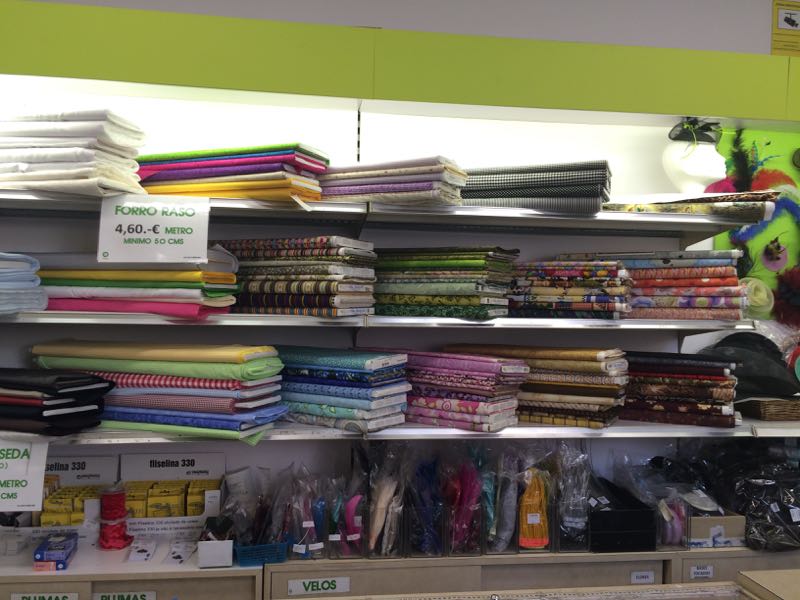
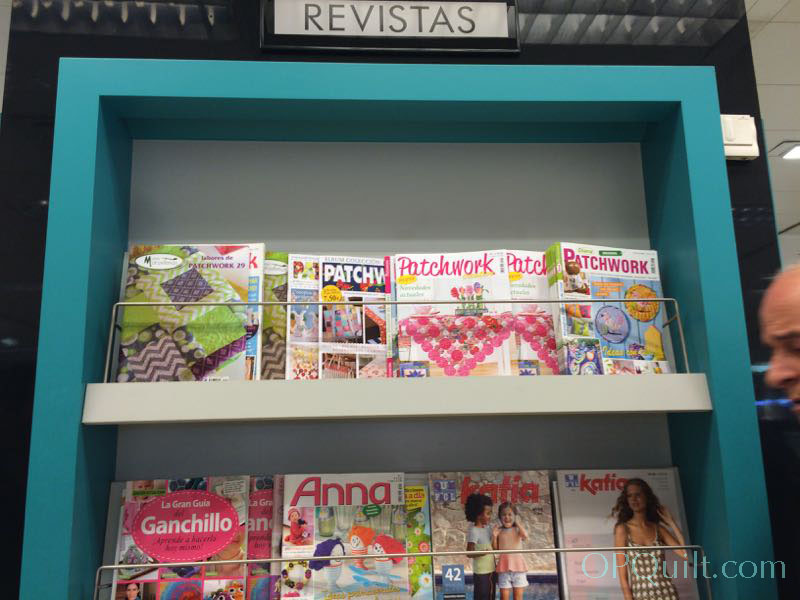
I was excited when I saw the signs for “patchwork.” This selection on the shelves. . .is it. 
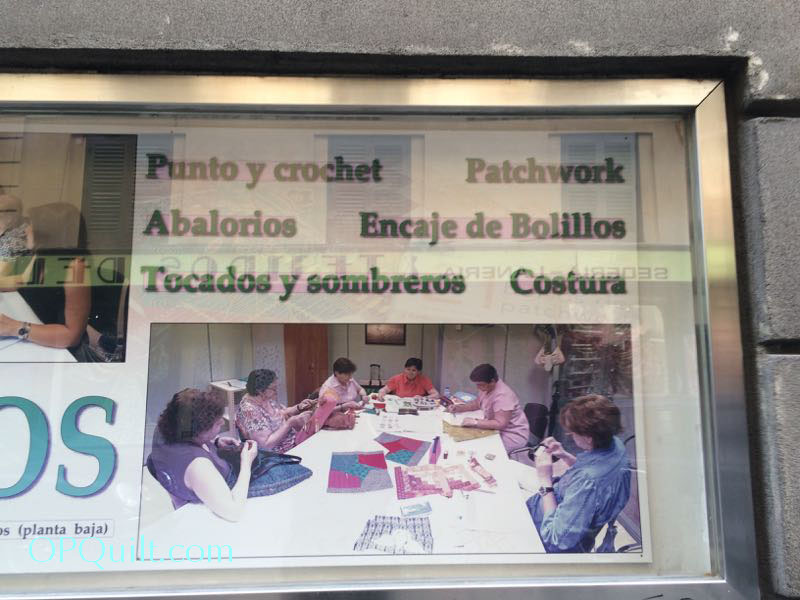
In the photo, one woman is doing embroidery, one is doing lace making, one is making a log cabin and the rest are just sort of looking busy for the camera. Stephanie told me that lace making, with all the bobbins, is big there, and that she’d made an entire tablecloth.
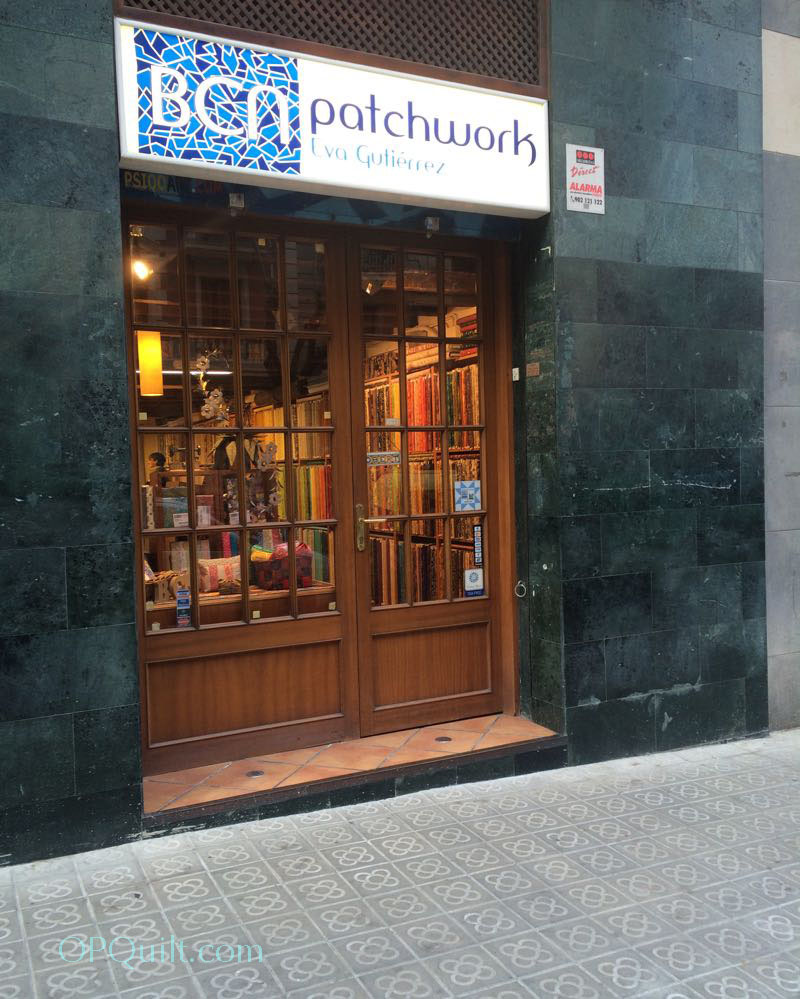
And then we went to Barcelona, where Anna of @annaorduna, met me. She and I had corresponded on IG, and she was teaching a class here at BCN Patchwork. Notice the interesting flower tiles in front of the shop. That’s the emblem of Barcelona and I saw it everywhere (check my IG feed, to the right).

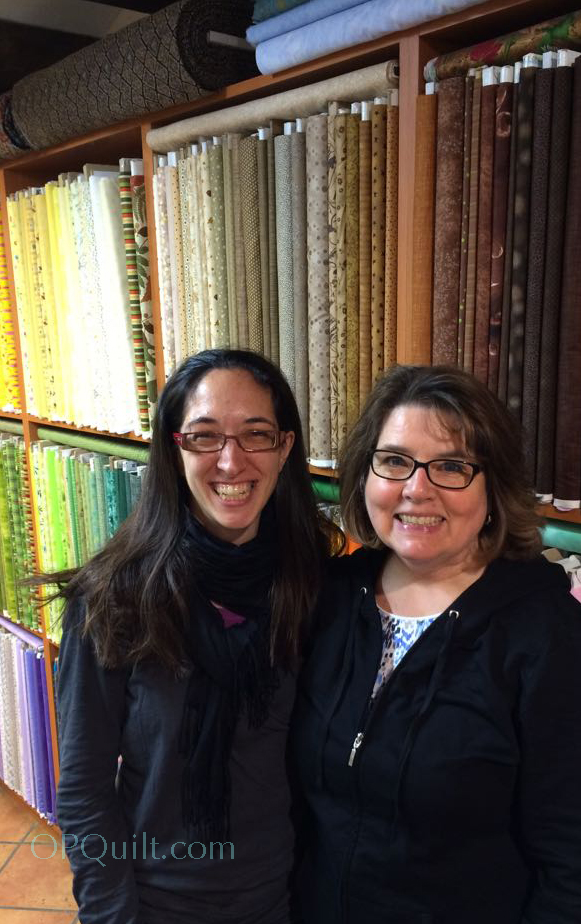
She was lovely, and she and her class of two women, the shop owner and another employee gave us great suggestions for places to go and see and to eat dinner. I also asked if she had pearl cotton (this seems to be an obsession with me right now) and they did! The shop employee asked me what color and when I said “all colors,” she brought down from their storage room 7 different trays of pearl cottons. I selected a few for the giveaway for my Oh Christmas Tree post (coming on Saturday), and then one more luscious golden orange color for me.


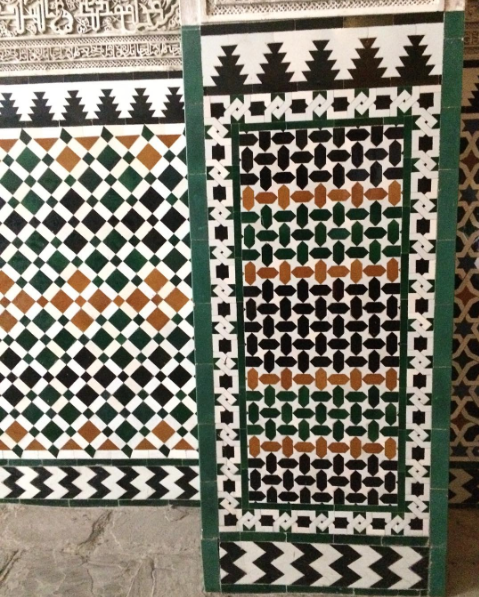
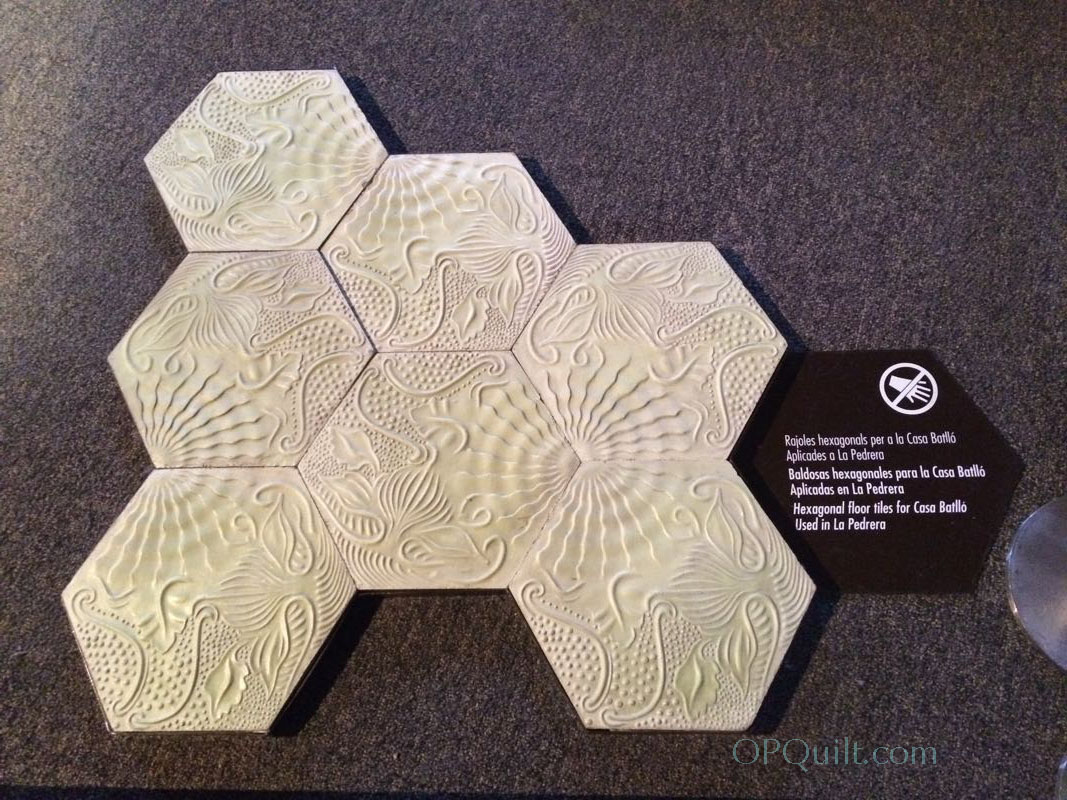
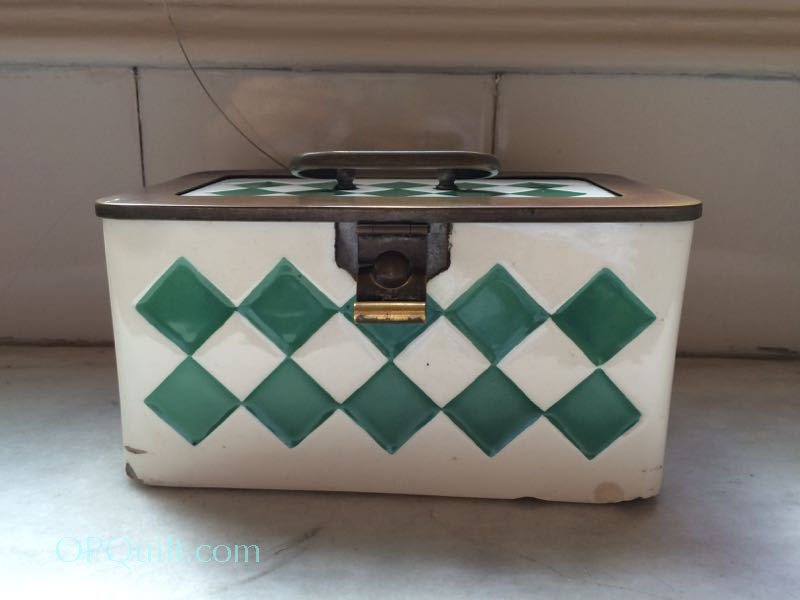
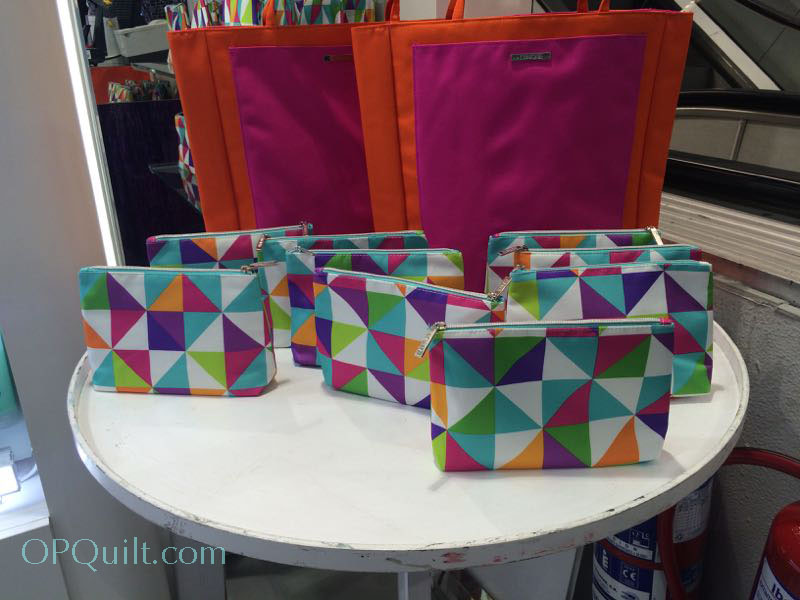
 Other quilts-related things I saw were hexagonal tiles, designed by Guadi for one of his houses, a sweet little ceramic bin with a simple checkerboard-on-point in the historic La Pedrera house, a series of Patchwork Magazines in El Cortes Ingles department store and lastly, a Clinique Giveaway. Oh, how I wanted that one (why do we always get the flowery Clinique pouches–I want this one!), but with the prices for American cosmetics roughly double what I would pay here, I had to leave it in the store. But now I’m determined to make one for myself, in just those colors. Actually I saw tons and tons of tile designs, all over Lisbon and Spain, giving me lots of inspiration for future quilts.

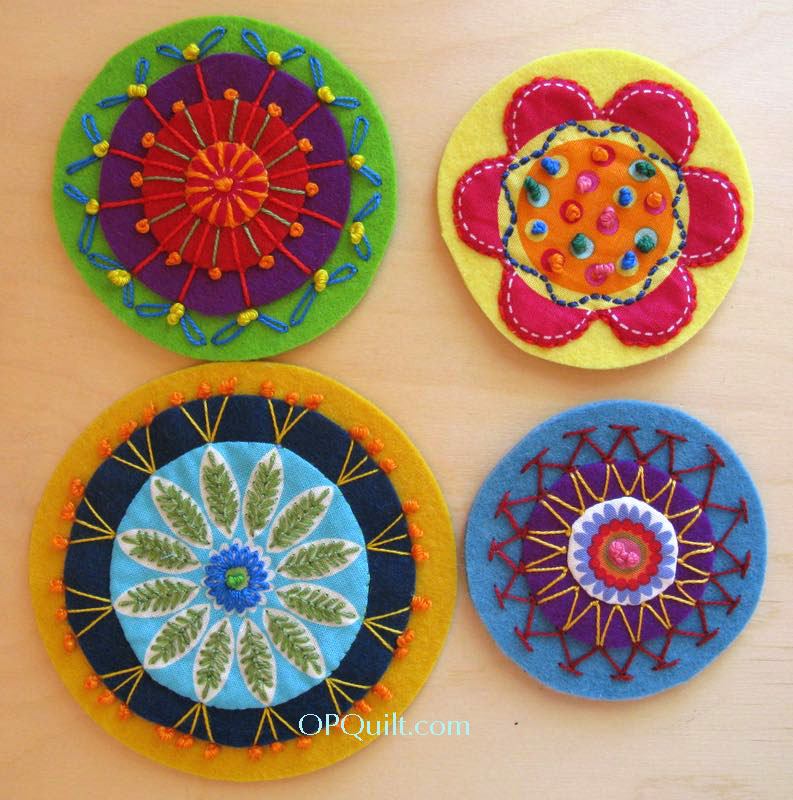
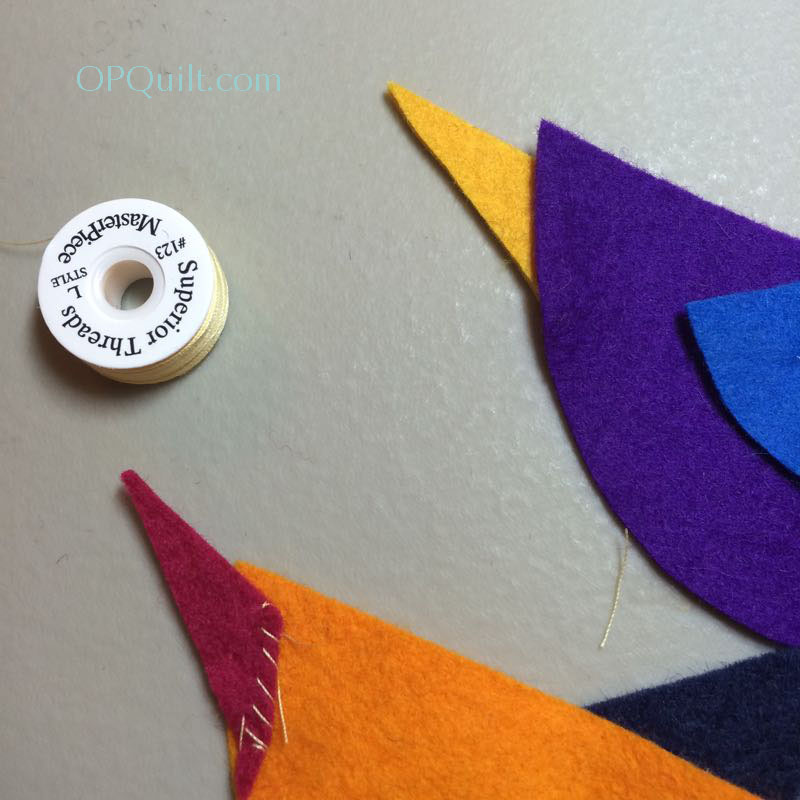
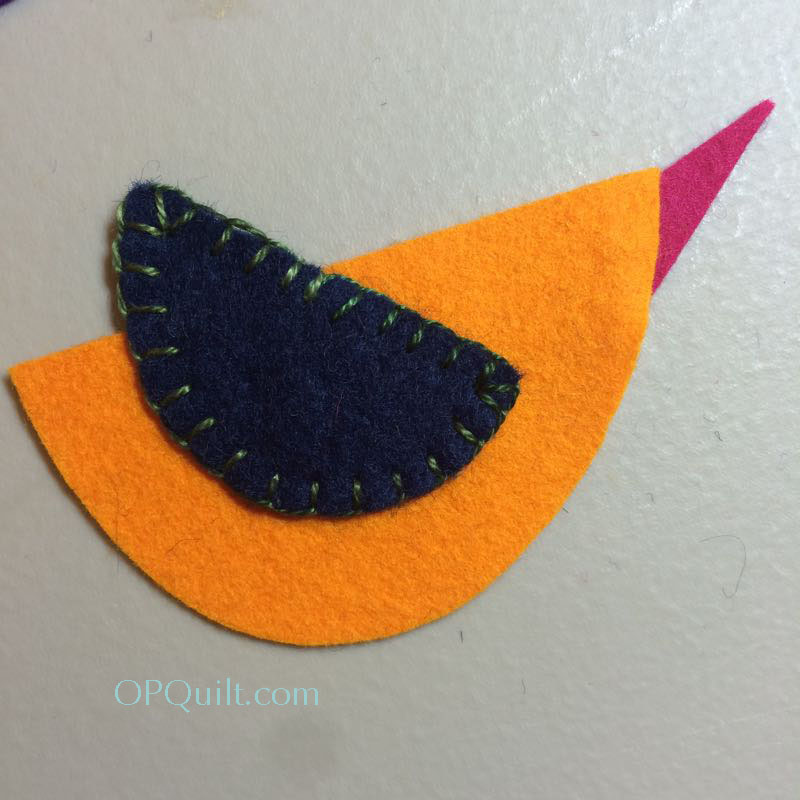
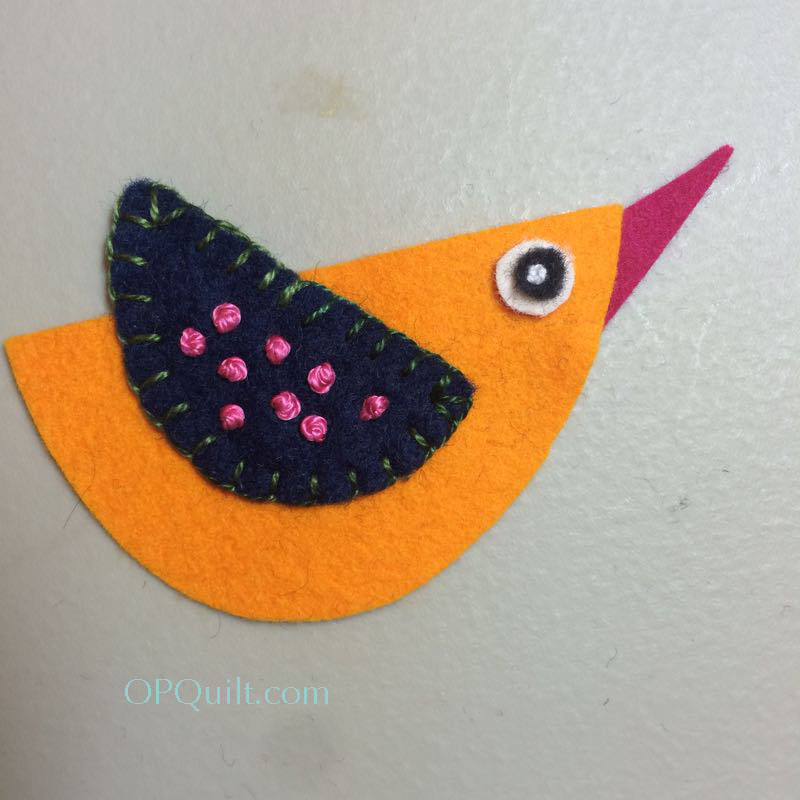
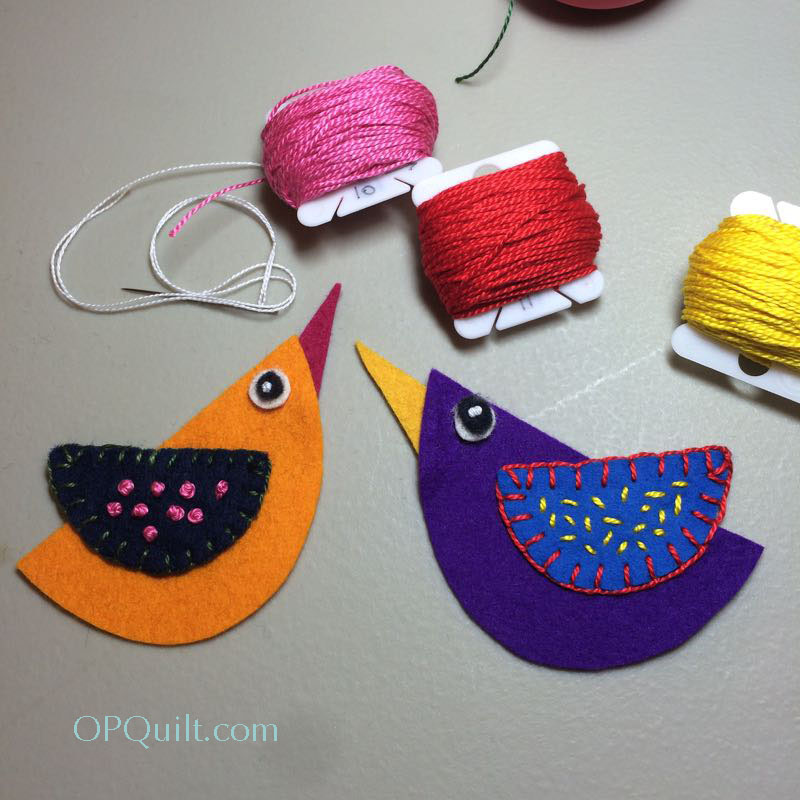
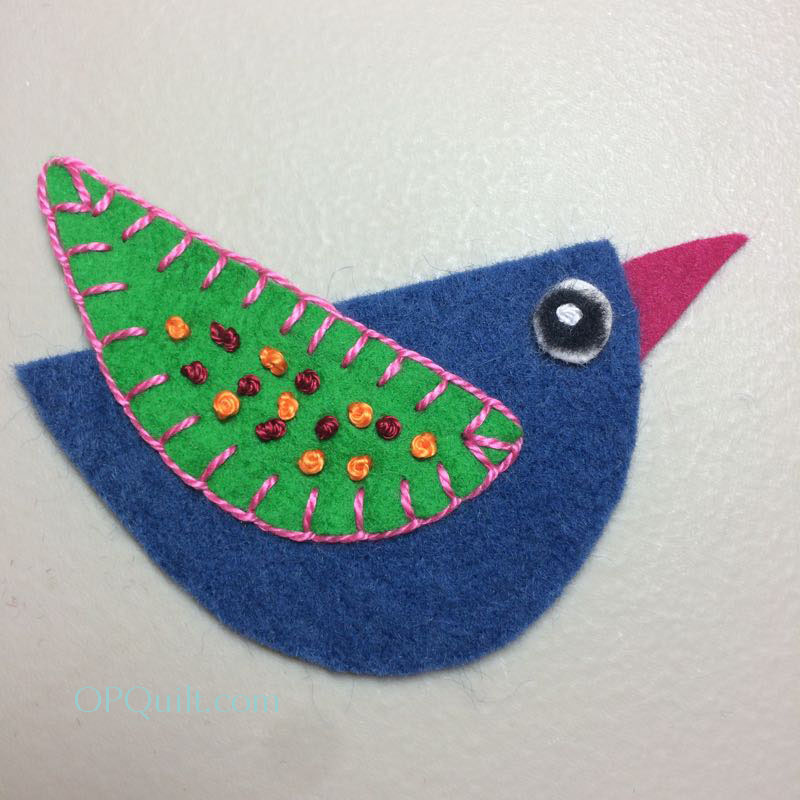
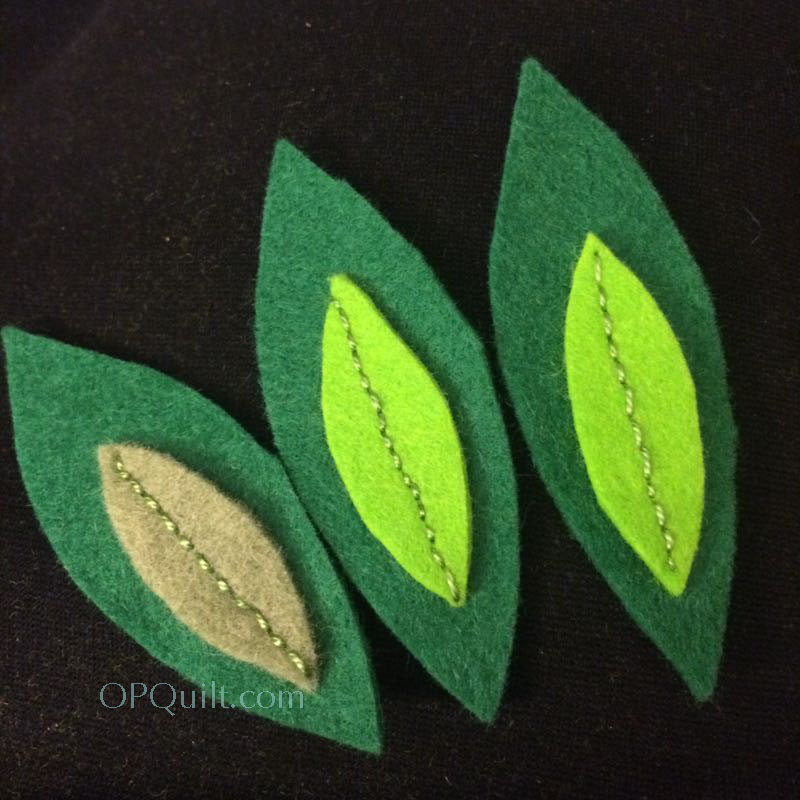
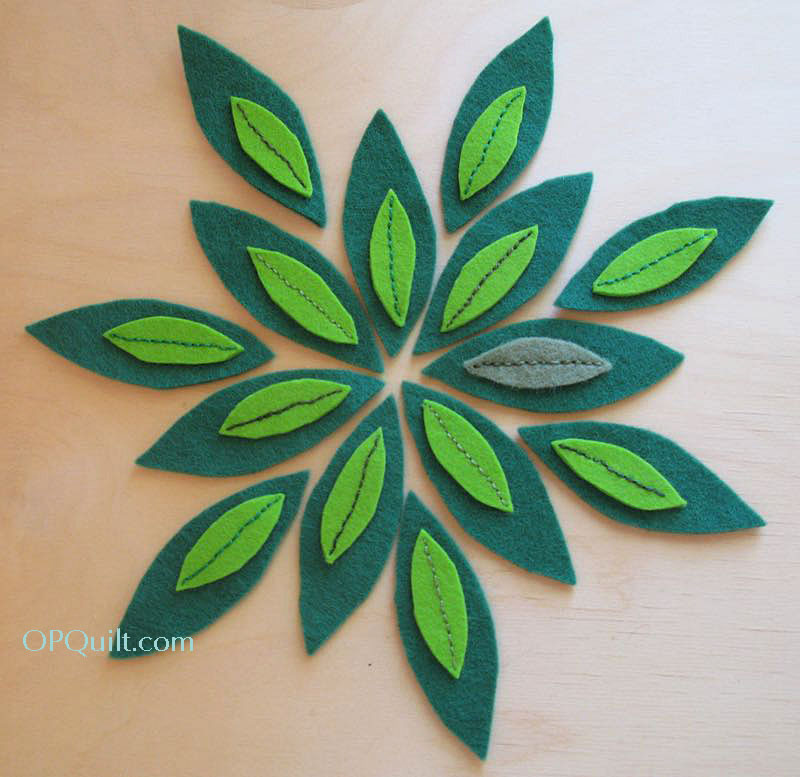
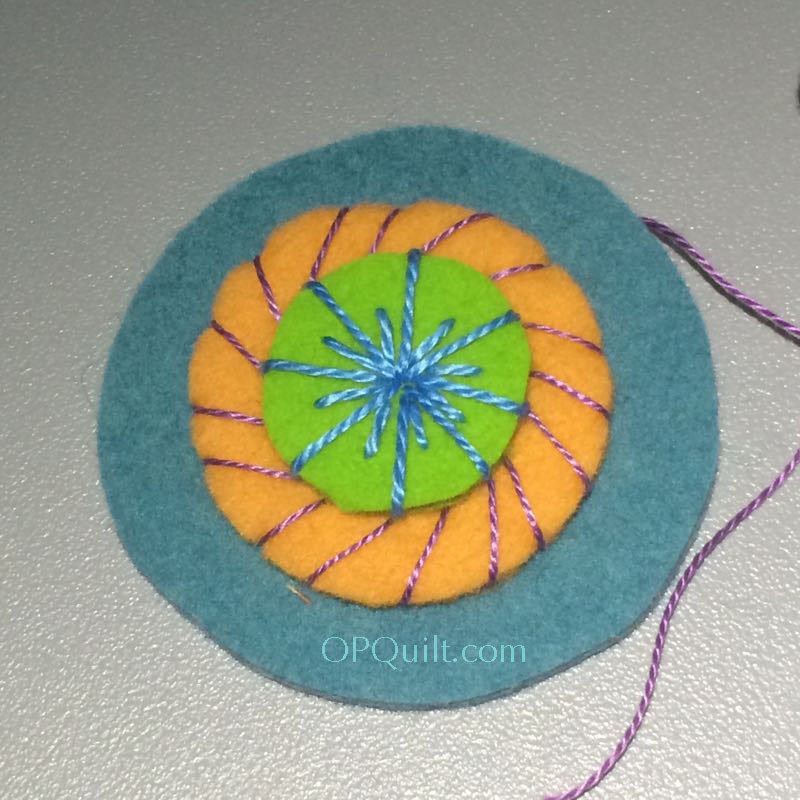
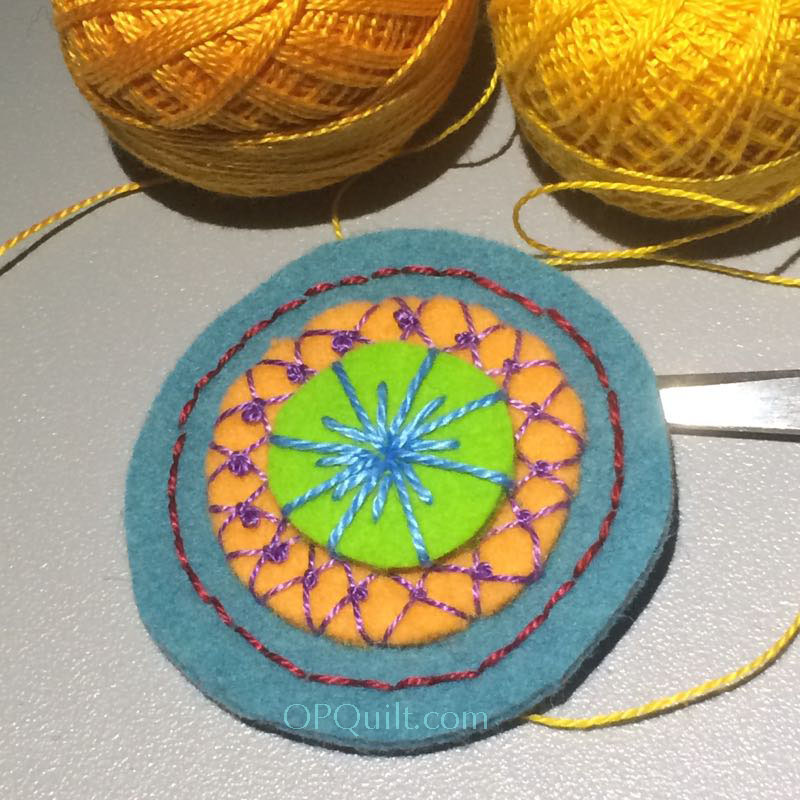
Still stitching. I hated this yellow chain stitch, so I took it out. Below is what finished up with, then sewed to another larger felt circle when I got home (I didn’t carry any felt with me, and although I saw lots of felt in Madrid, it was all acrylic–yuch).

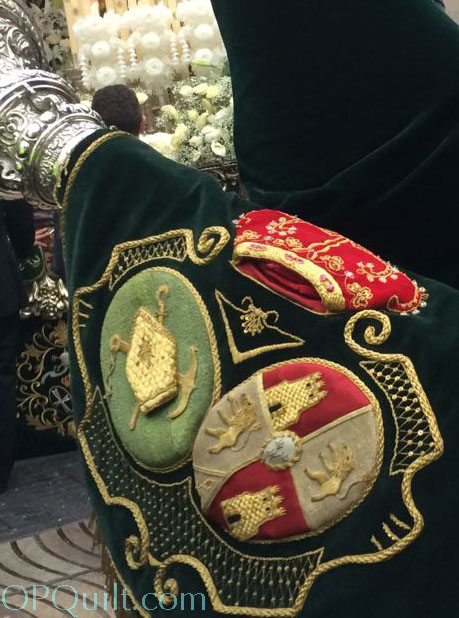
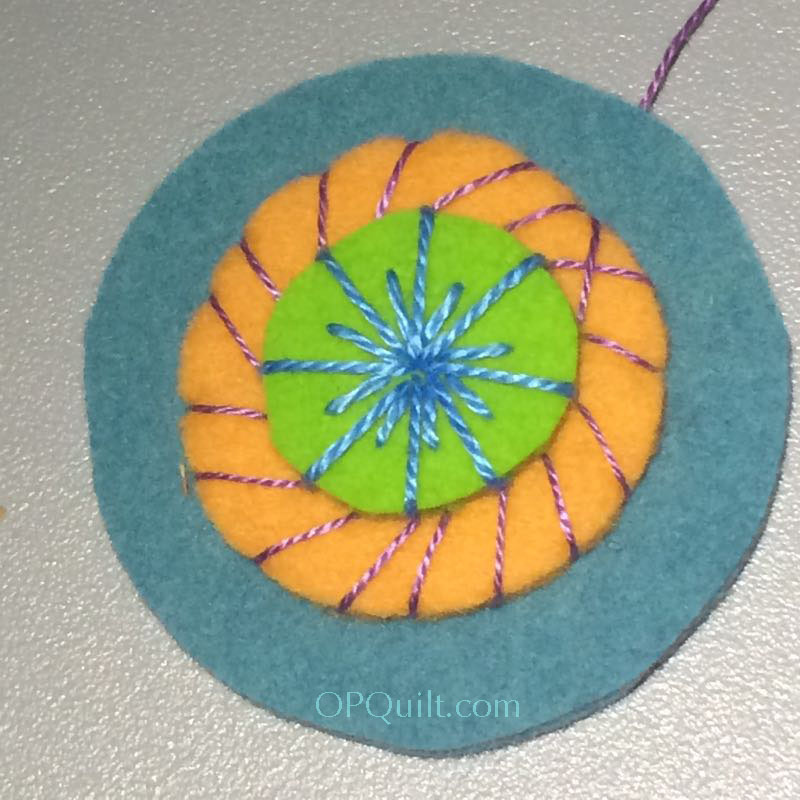
Another place I got inspiration from was the costumes of the participants in the Procession in Barcelona. See that gridded lace-like background? Why couldn’t I try that on one of my circles?
I started by marking the divisions of the circle with pins, then stitched it, as shown, moving from a lower point on the inside to a shifted-over point on the outside.
Went back in and subdivided those.
Now I’m working going the other way, so that it makes an intersection.
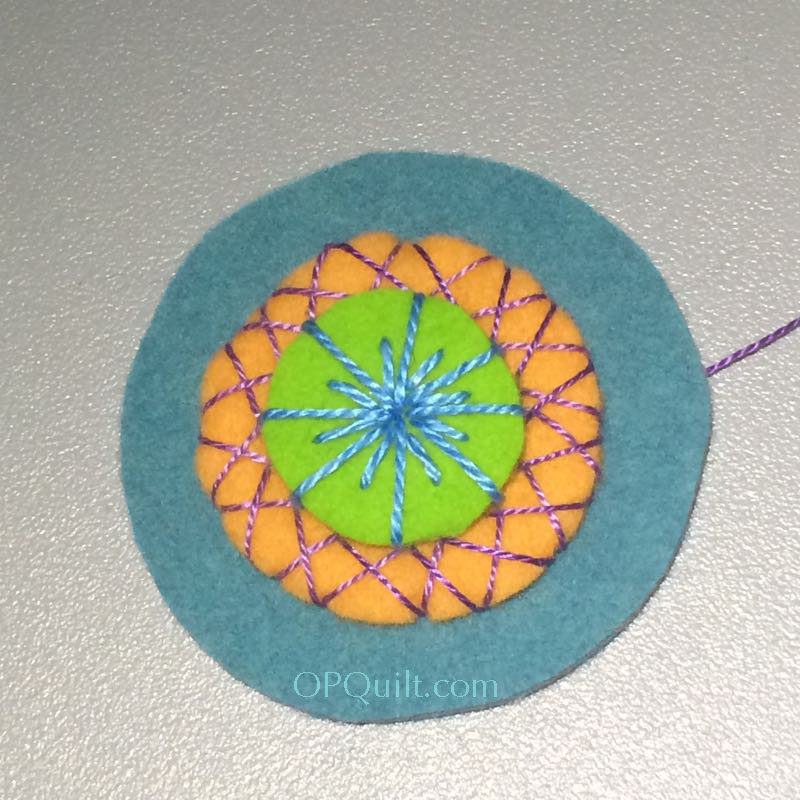
All done.
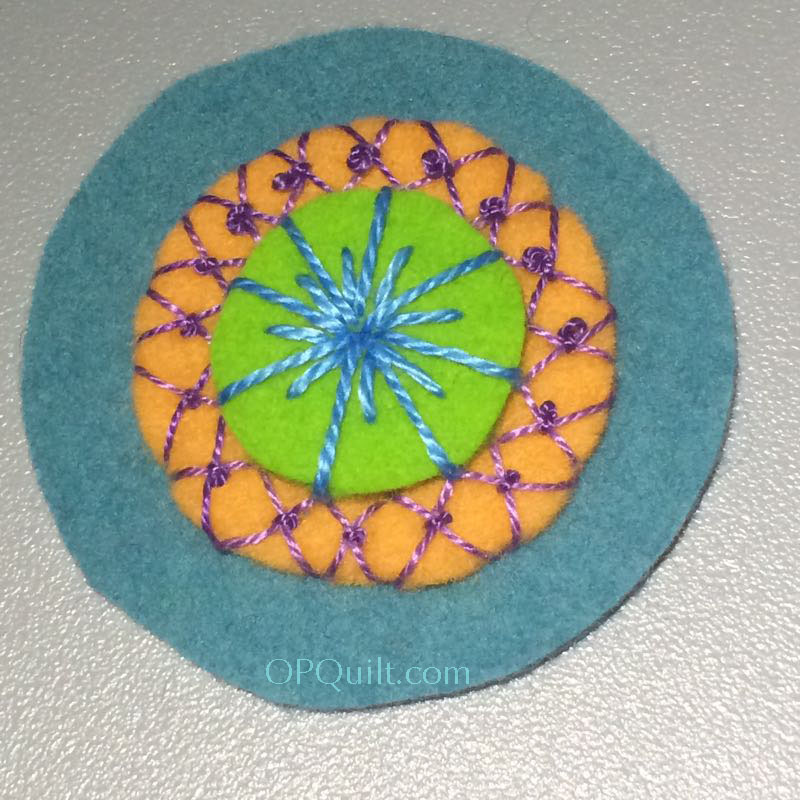
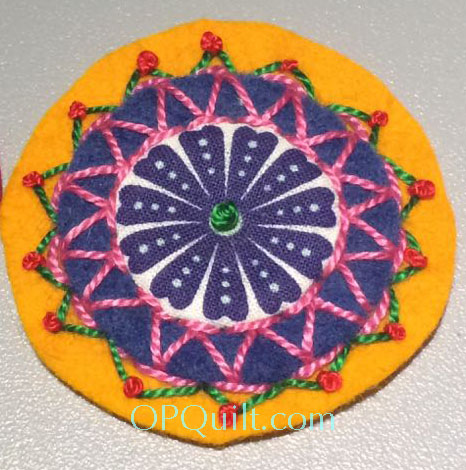
Now I went in and put little French knots at each intersection. I started out with three-wraps of thread, but it was too big, so went down to two-wraps of thread. And no, I didn’t take out the first few. There is so much going on in these flowers, I didn’t worry about being perfect, and I’m guessing you didn’t notice at first that some knots were bigger and some were smaller. Now you can. This is another reason NOT to point out flaws in our quilts to anyone else.
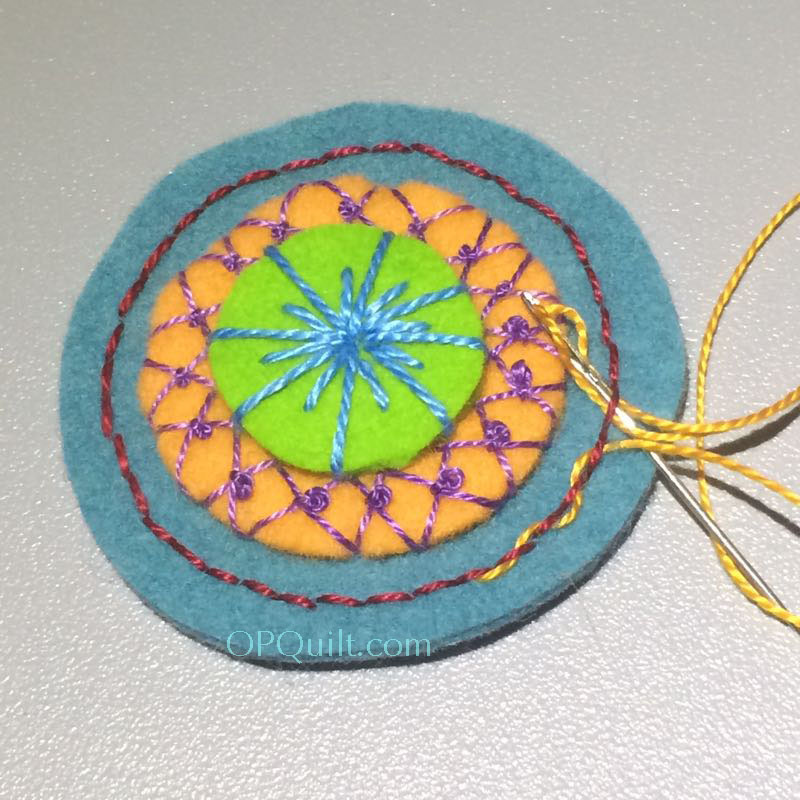
Now for another type of border, one that I learned when I was 12 years old. (Thank you, Mom, for teaching me how to embroider.) Begin by doing a simple backstitch around the circle, shown here in red. Bring up your needle in a different color just in the middle and using the eye of the needle, weave your thread in and out those stitches, as shown.

Don’t pull them too tight–you want a lovely little serpentine loop to show.
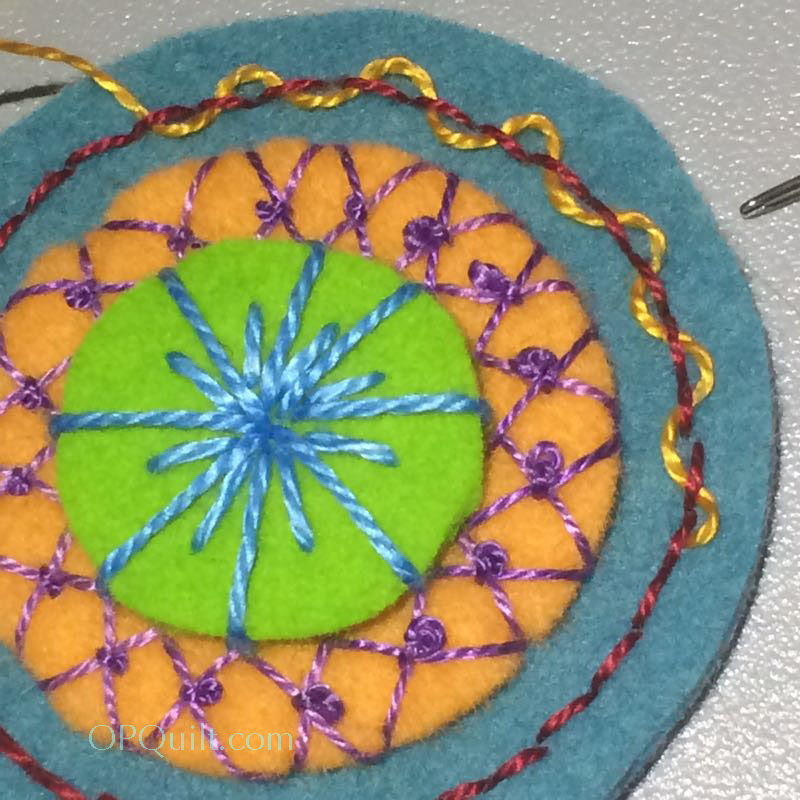
I chose a slightly different color (because I had tons to choose from) but you could use the same. Bring up your needle where you did in the first one, then weave in the opposite direction, completing the loopy design. Or you could just stop with one thread. 
I was worried that I was supposed to do an even number of backstitches. . . or an odd number of backstitches, but decided not to worry about it and just make it work. Can you see where the problem was? Yes, now that I’ve told you, but you couldn’t see it before. Just make it work, and don’t worry about it.

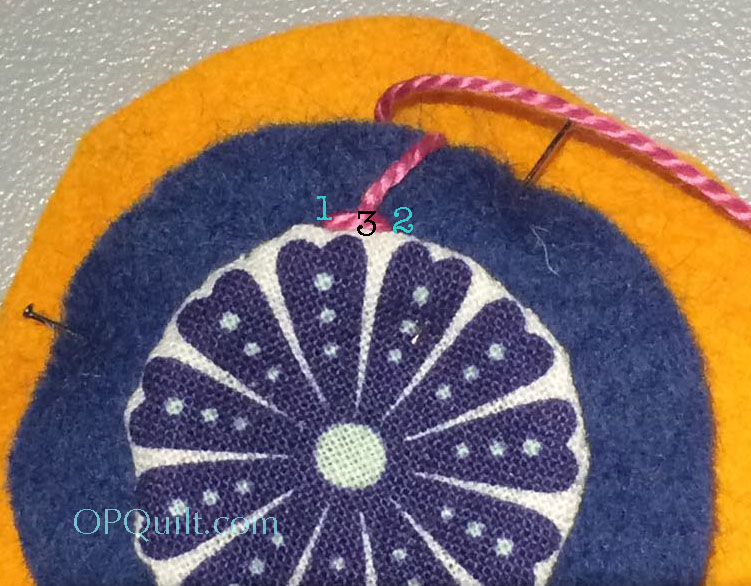
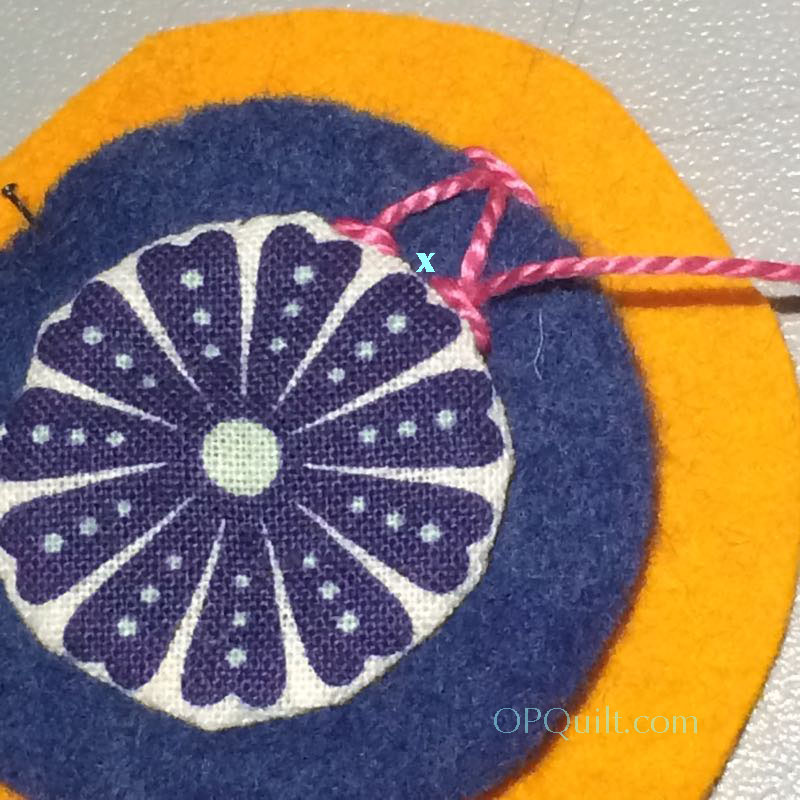
Here’s another stitch: the herringbone, my style. (I’m sure there’s an official name for this.) I numbered the sequence for you. Start by bring your needle out at 1, then poke it to the back at 2, then before you’ve pulled the thread all the way through, bring your needle up at 3, right in between 1 and 2. Now tighten up the thread.
Go up to the outside edge, and poke your needle down at 4, then out at 5.
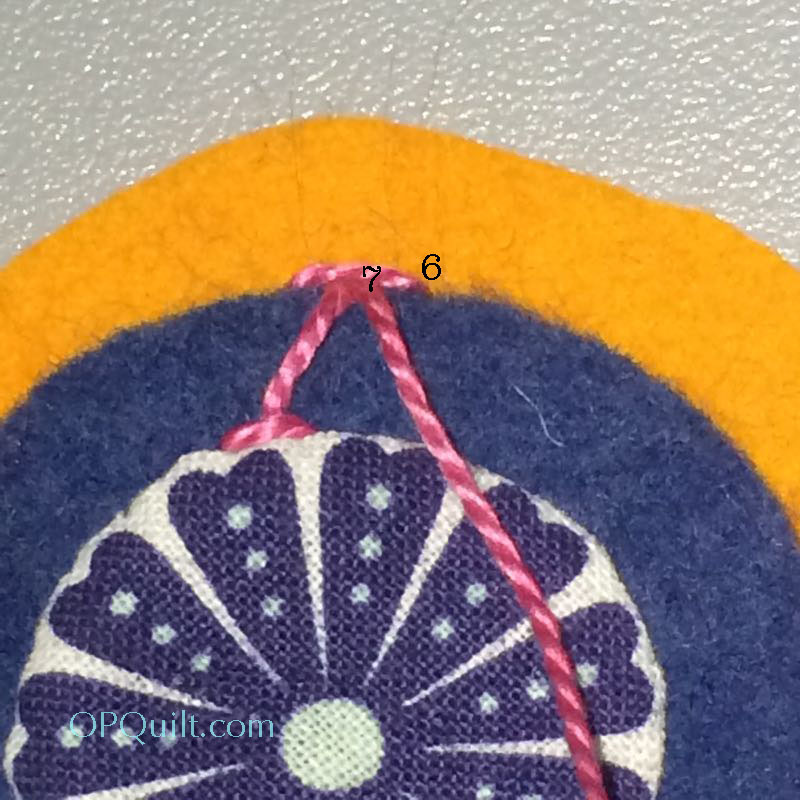
Complete the stitch by poking it to the back at 6, then bringing it back out before you’ve drawn it completely through, at 7.

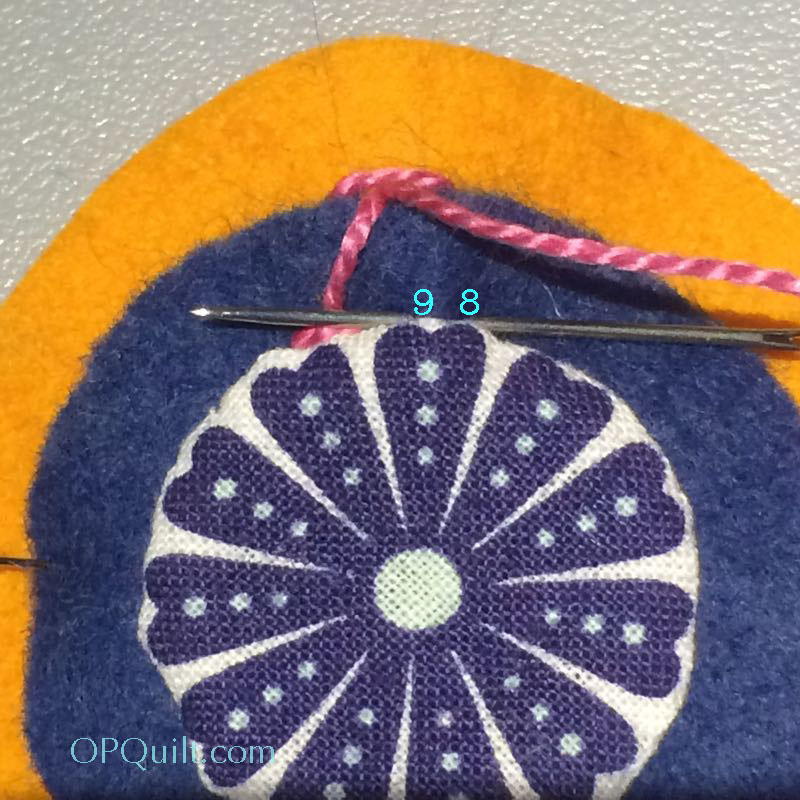
We’re repeating now, but I’m showing you how I catch the two points with one slide of the needle. Go through at 8 and come out at 9.
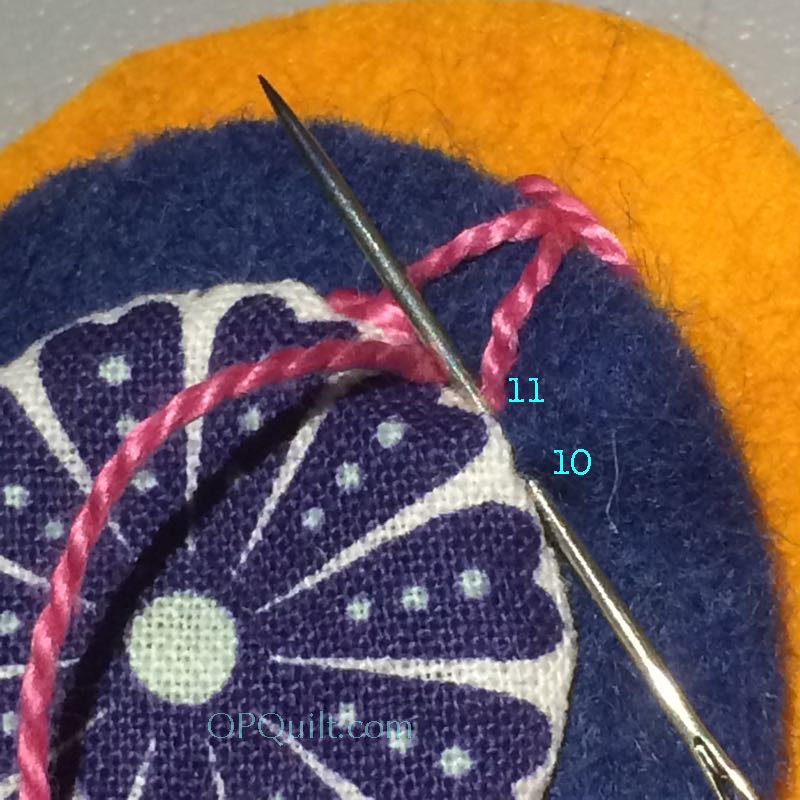
Then over to 10 and out at 11.
You can start to see the completed stitch here. I don’t mind the little gap at “x” but if you don’t like it, close it up by taking bigger “bites” of your needle.
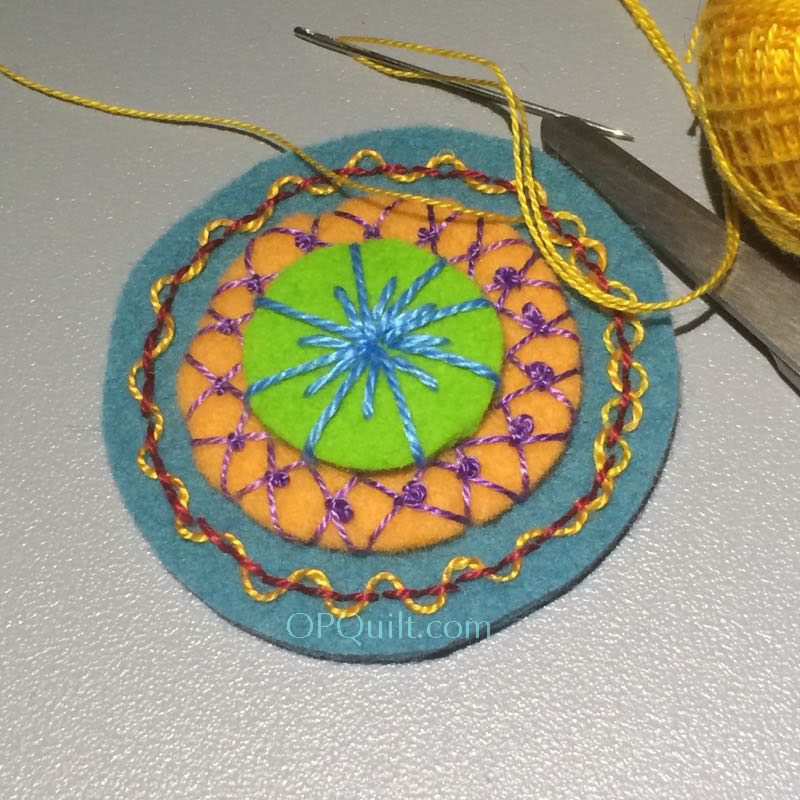
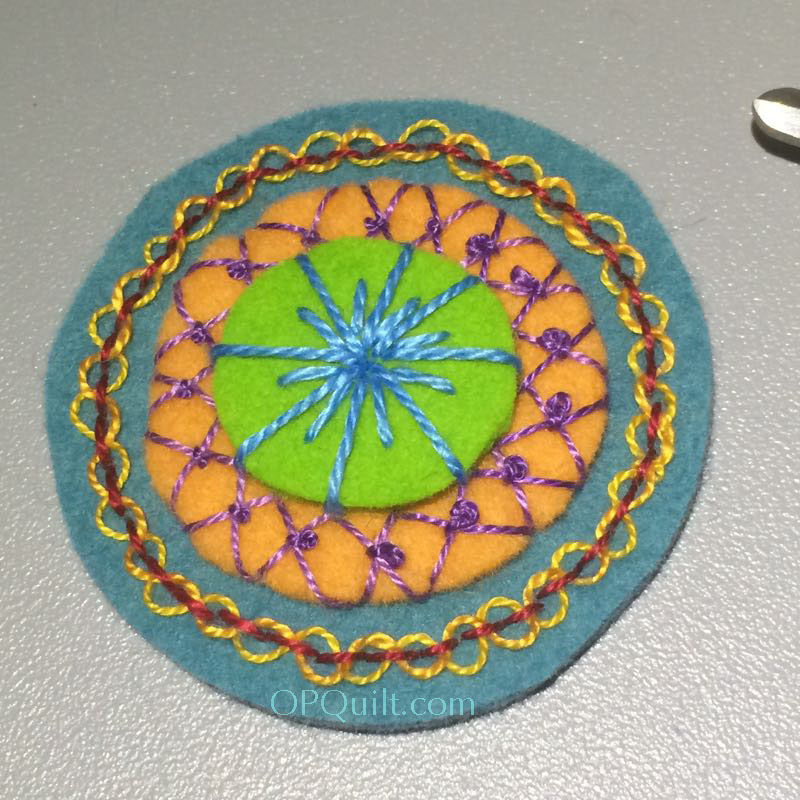
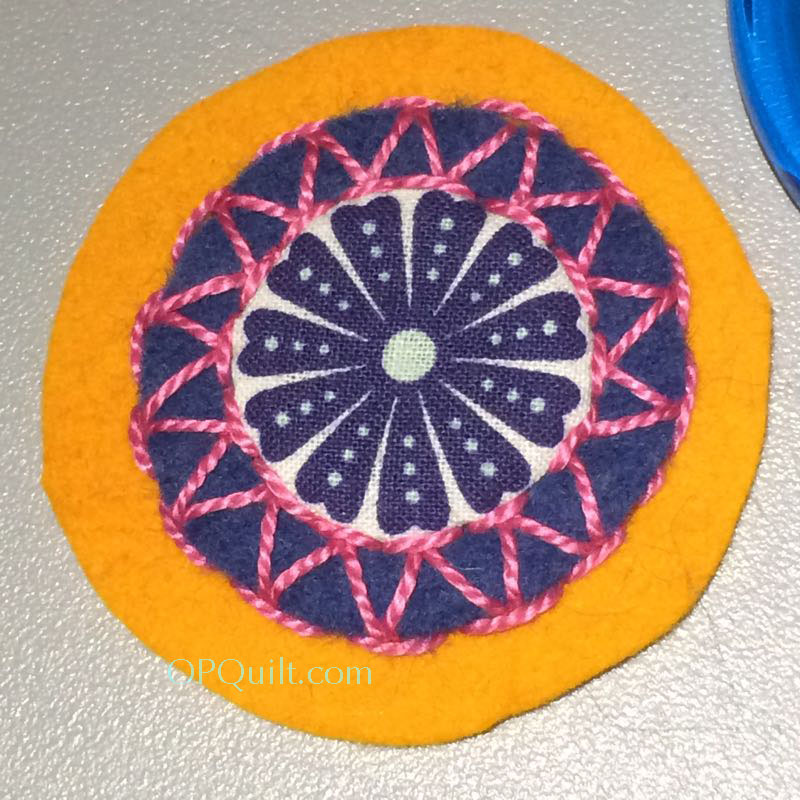
Here’s the completed stitch all the way around this circle. I worked this in size 5 pearl cotton–big and fat.

Finished!

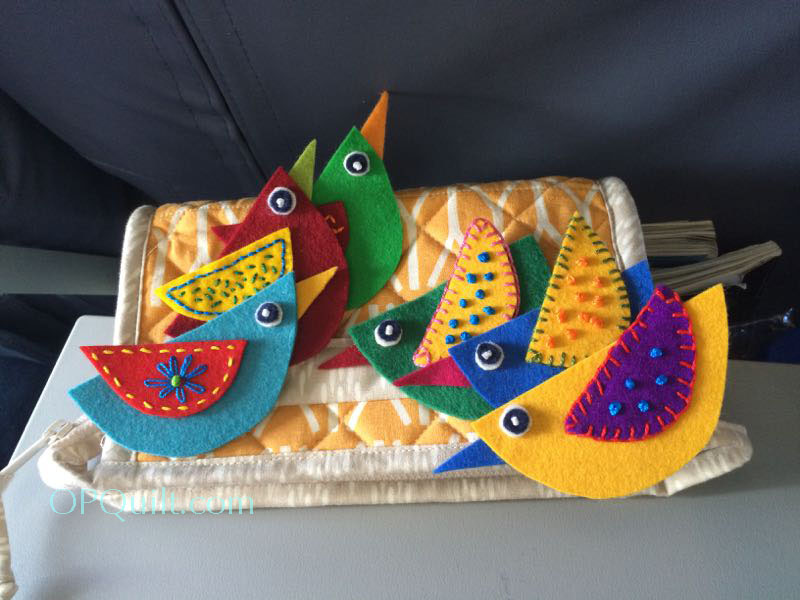
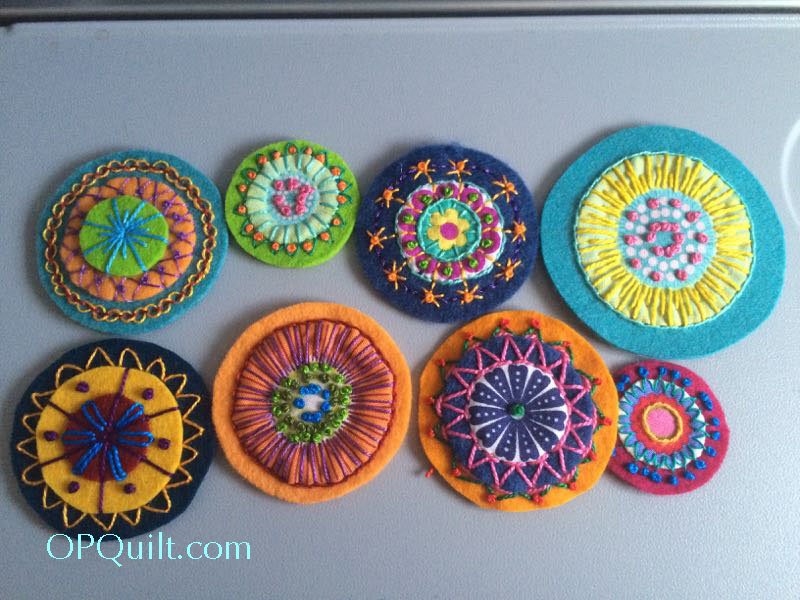
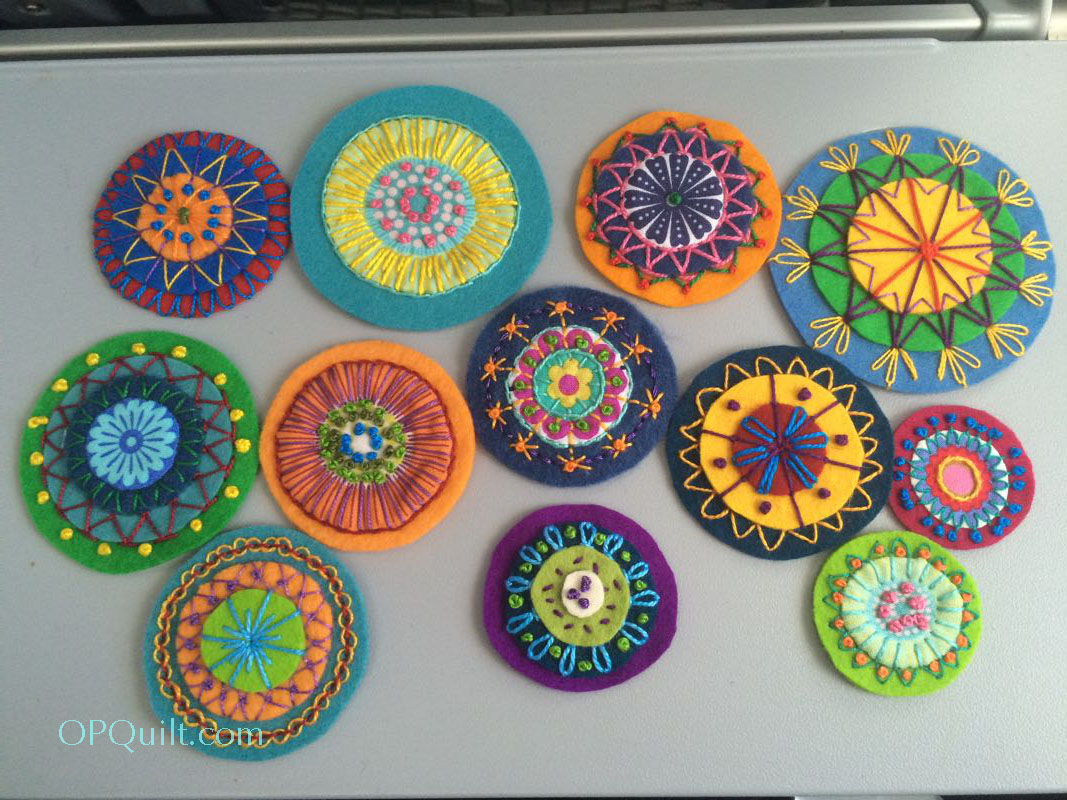
On the way home, a ten-plus hour flight from Frankfurt to LAX, I couldn’t sleep. So I watched movies I’d already watched before, flicked on my overhead light and kept stitching and stitching. I finished all of these on the plane home.
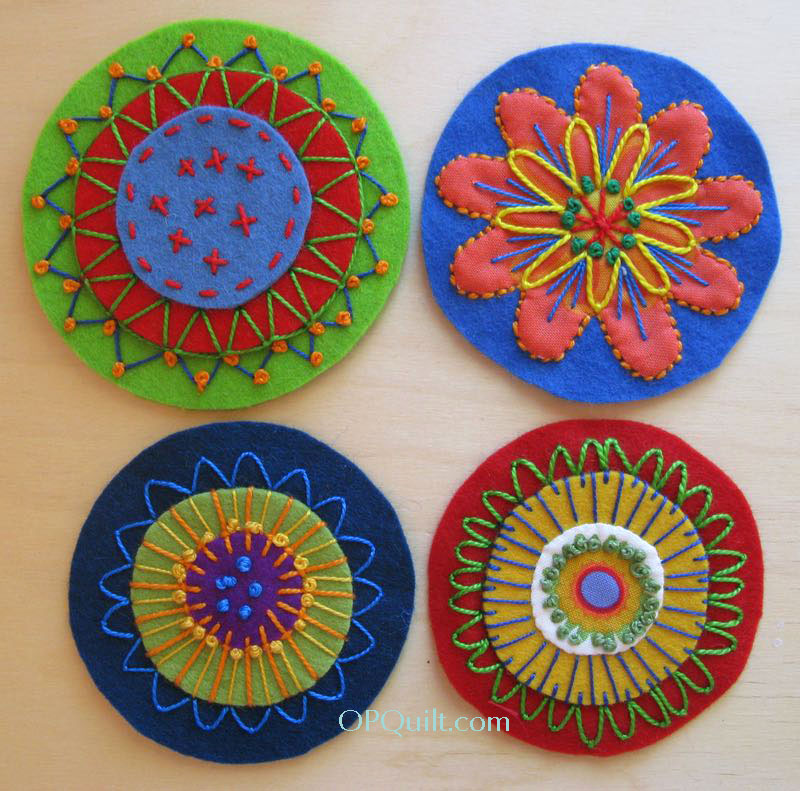
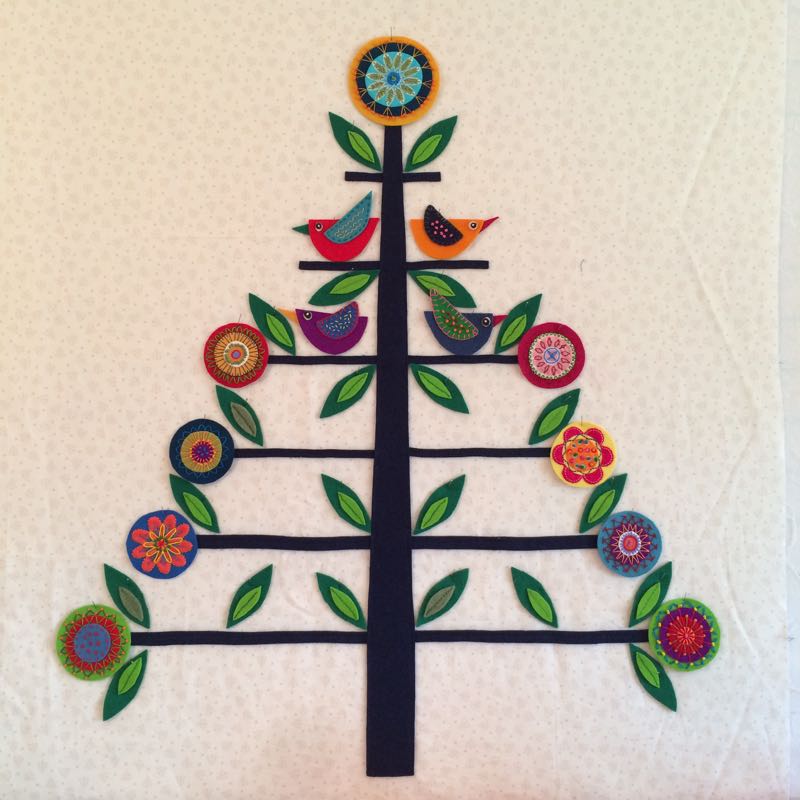
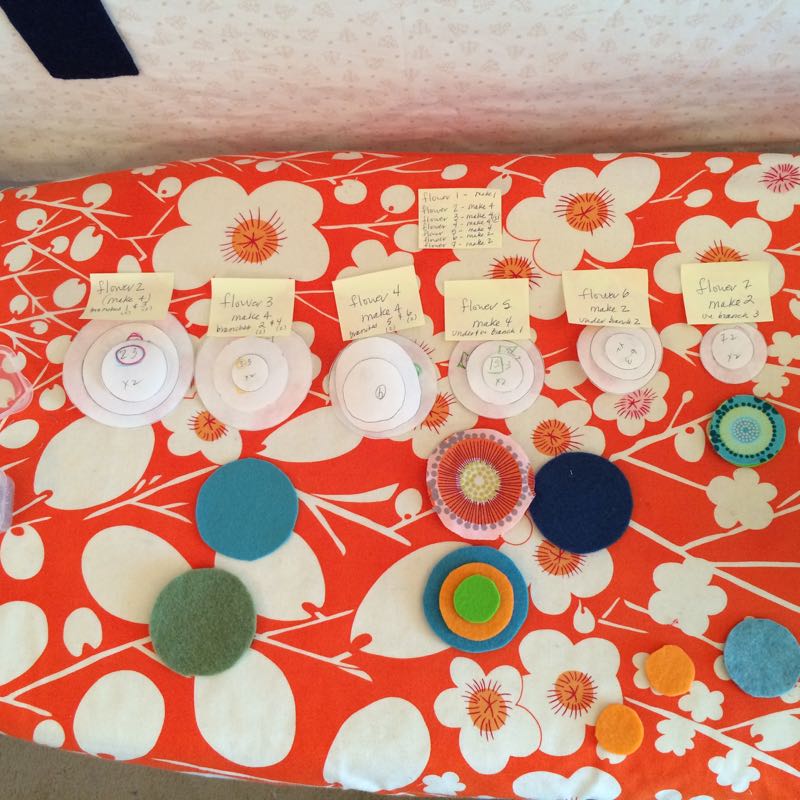
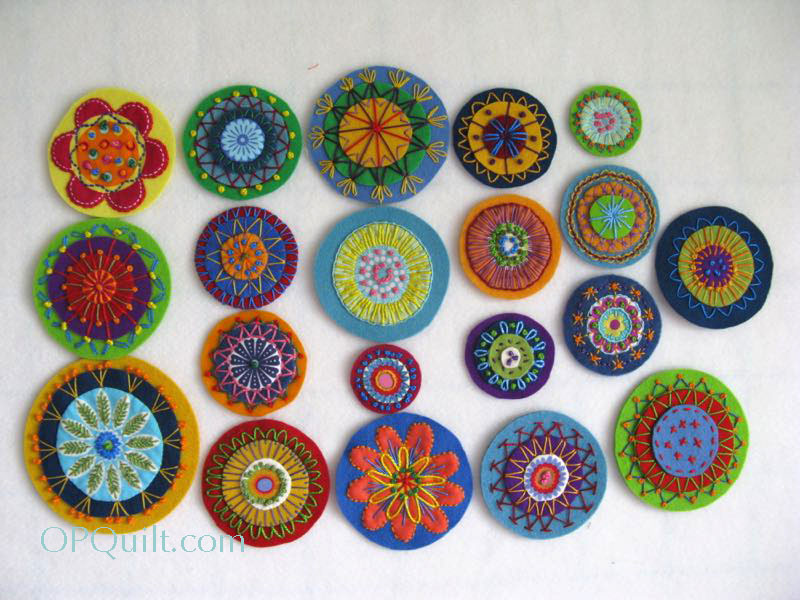
Here, posing in all their beauty on an airplane tray table, are all the flowers I finished on our trip. I hope you are posting them on IG with the hashtag of #startyourneedles or #ohchristmastreeqal so we can all borrow ideas from each other. Keep stitching–don’t worry if yours are not finished. We still have a couple of months to go, so just take them with you and add another round wherever you can. I’ll show the completed set of circles and the tree, all mocked up (again) on my next post on April 2nd, plus I’ll be hosting a giveaway for those Barcelona size 8 threads.

(posing here with metro tickets from our trip)
I’m glad to be home, and looking forward to our next part of the Oh Christmas Tree Quilt-A-Long!