Updating you on my Chuck Nohara block progress. I finished off the incredibly complicated floral wreath block in the upper left. Susan and I (and Bette) are working together on this, with Susan choosing two/month and me choosing two/month. Yes, I chose that one (never again). But June was finished up.
July’s blocks were interesting. I did the sunglasses on the road to my Gwen Marston class. I did the lower two blocks at the quilting retreat, and promptly had to re-do them again. But I could now cross July’s blocks off the list.

I launched into August early because of some planned travel, and hit my first roadblock with a Dresden-plate block.
I drafted my own little Dresden template, then proceeded the way I always do.


I had prepped up the bird before our road trip to two family reunions, but lost it somewhere between my sewing room and the great state of Utah, so I prepped up a second one, stitching it to completion while watching the Olympics opening ceremony. Yep, I changed a few things, but here they are, all done. I need to get them all up on the design wall, all together. Next week.

My friend, Laurel, showed us her COMPLETED New Hexagon Millefiore Quilt, so I thought I should resurrect that project and get it going again.

So I laid it out on the bed in the extra bedroom. . . (warning–lots of nighttime quilting pictures ahead)
. . . found the package with all the pieces and tried to make sense of it. I hated disliked the strong star shape of that rosette (seen here in Katja’s quilt), so after studying Laurel’s rendition, I made some changes, combining some pieces.


Now comes the fretting part. Will it work in the bluesy-purpley combo I have going?

Luckily I hadn’t cleaned up the stuff of the extra bed yet, and so I laid it out, section by section. I think it will work! I said to my husband, then packed it all away to take traveling with me. It was hard to get going on this, as I’d forgotten how much trial and error is involved in the making of these rosettes.


Here’s three sets of bee blocks for the Mid-Century Modern Bee (top is Mary, middle is for Sherri, and the bottom is for Rene). Can’t wait to see what they do with them!

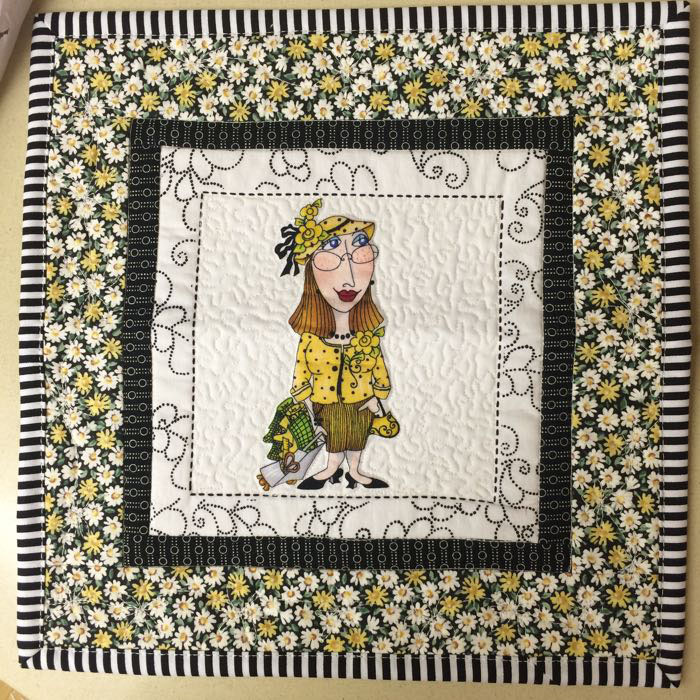
I did finish Simone’s Spelling Bee Block for July while at the retreat, and it was the one thing I didn’t have to re-do. You’ve seen this before, but since this is a round-up post, I wanted to include it.
I made an extra set of words for Kerry for her Canadian Provinces list of Spelling Bee words. Okay, we are almost to the end (I’ve been saving all this up for a while).

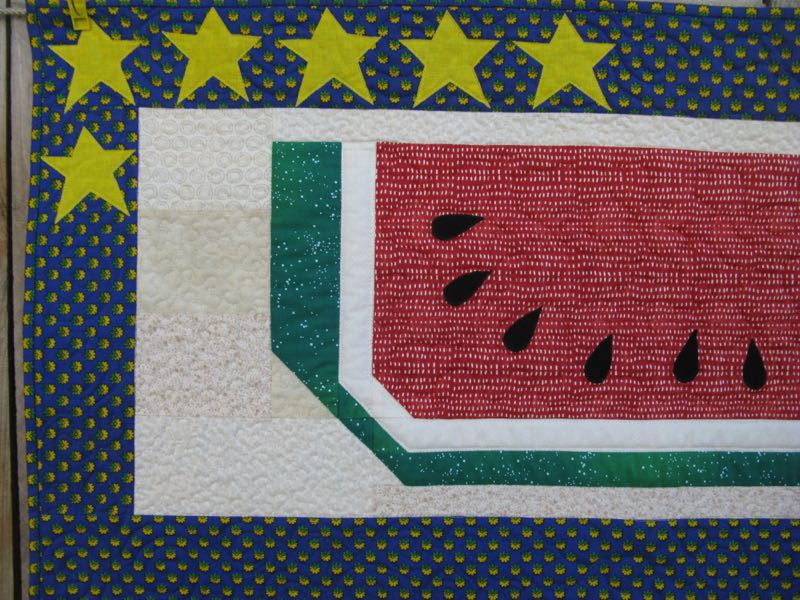
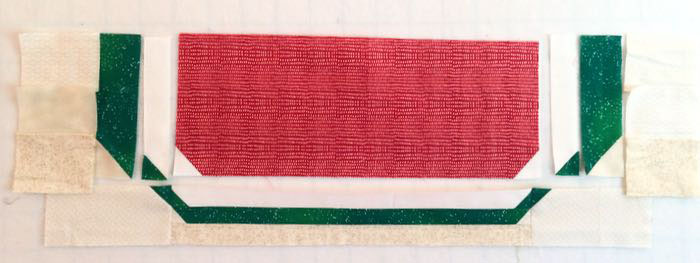
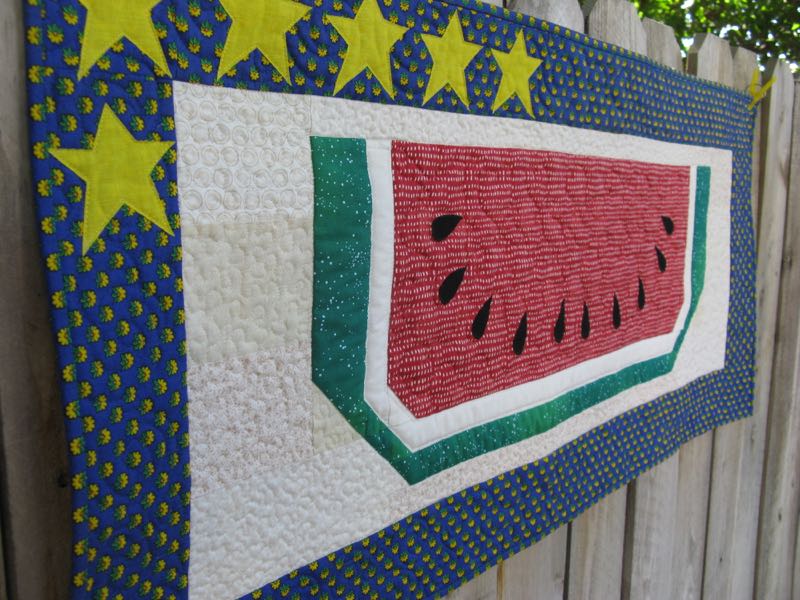
In looking at the looming deadline for Road to California entry, I kept pushing forward on getting this quilt finished.

Which led to many rounds of this on my aching shoulder, and a trip to the doctor’s office. I’ve not stitched much since then, which is like tying my hands behind my back and not letting me use them.
So instead, I read a lot, finding this “Cap Slogan Generator” on the Washington Post website, and thinking that THIS is the slogan we all need to see more of.

And since once an English teacher, always an English teacher, I corrected all the logical fallacies in the questionaire sent to me by one of the major political parties (such errors in faulty reasoning!) and yes, I sent it back to them (they had, after all, provided me with a postage-paid envelope). 
I won’t leave you with politics, after all I do have a heart, but instead with this little shot of the shelves above my computer. I’d sent Marsha of #quilterinmotion some of my scraps and as a thank-you, she sent me my first-ever fabric postcard. (I was so excited.)
So, summer’s almost over. Enjoy the last few days of the Olympics, avoid politics, and keep quilting!


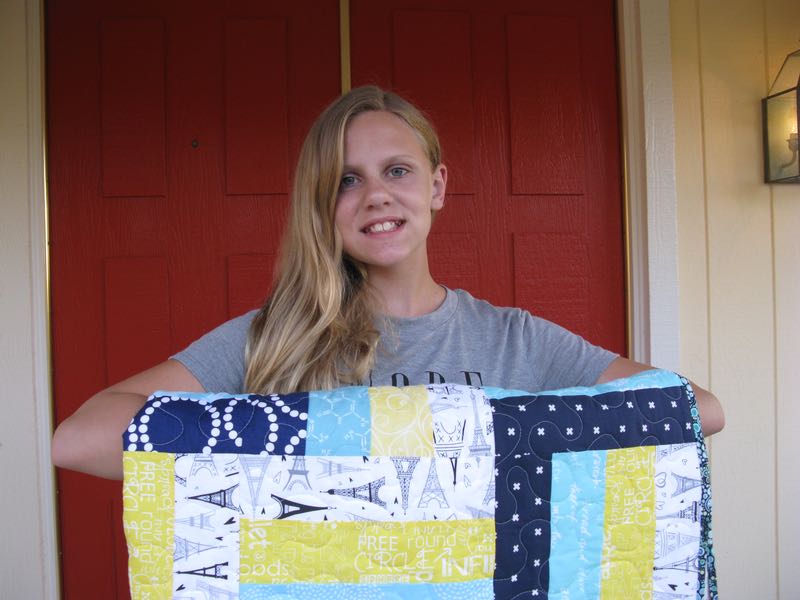
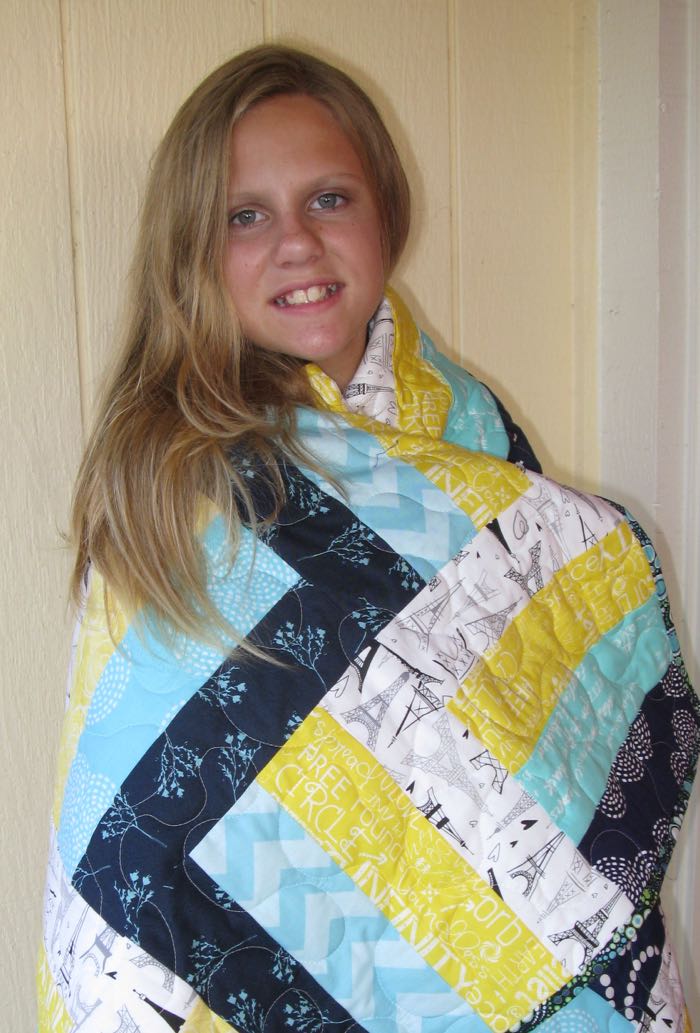
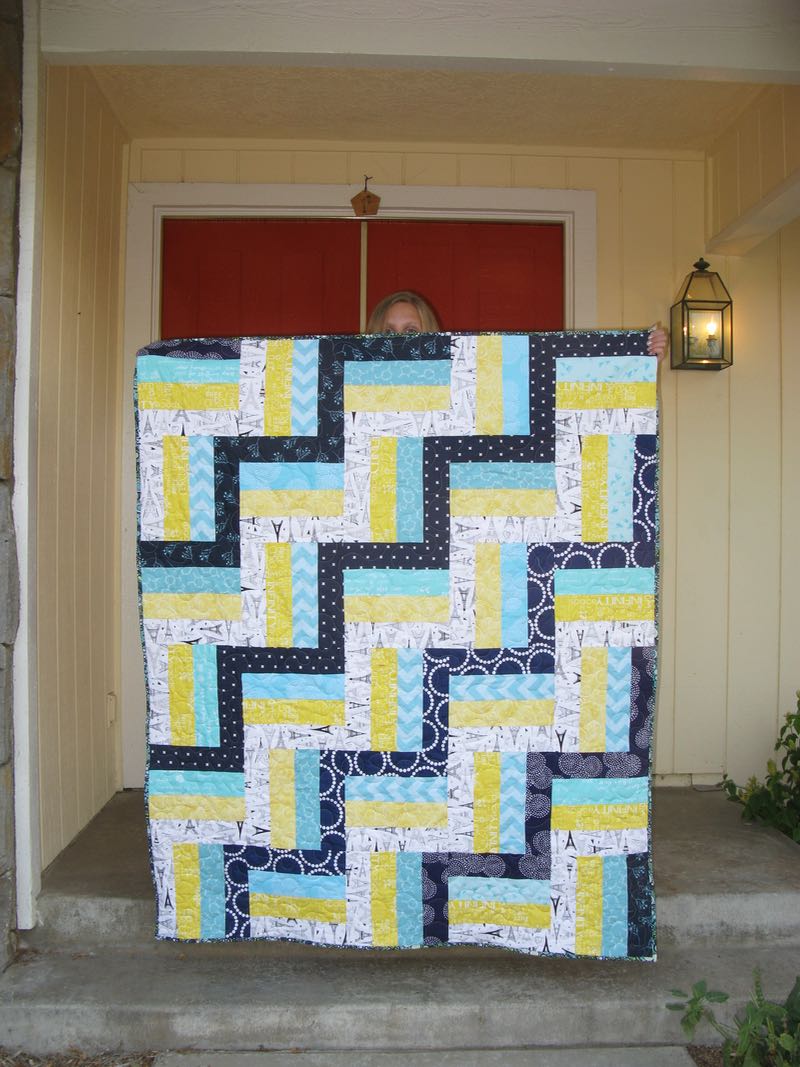
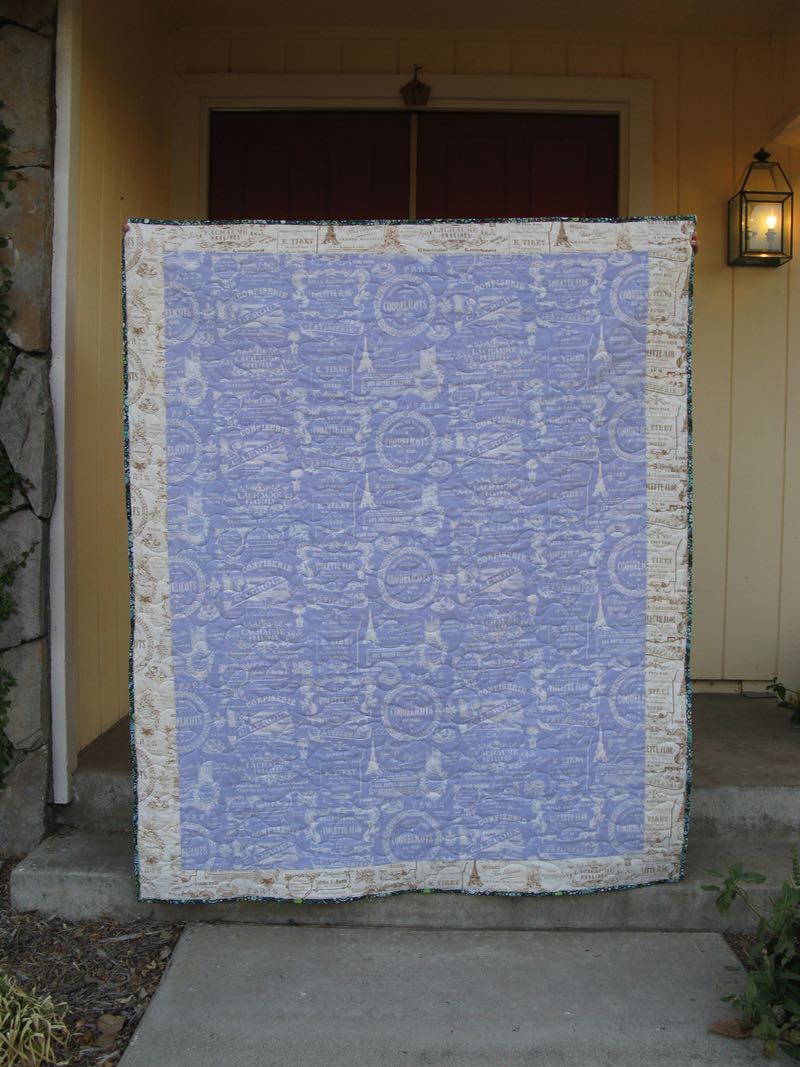
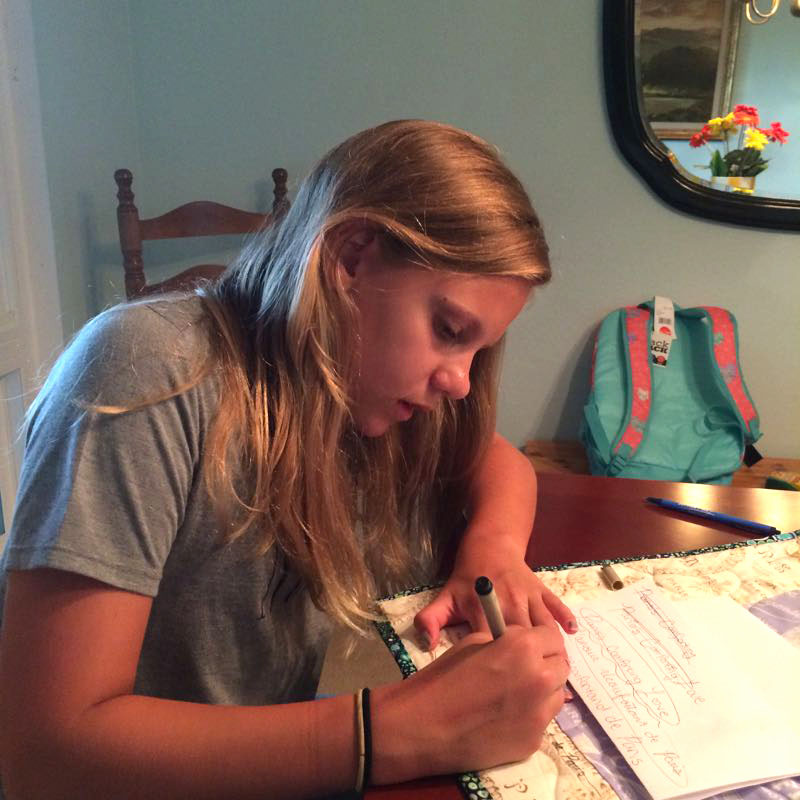
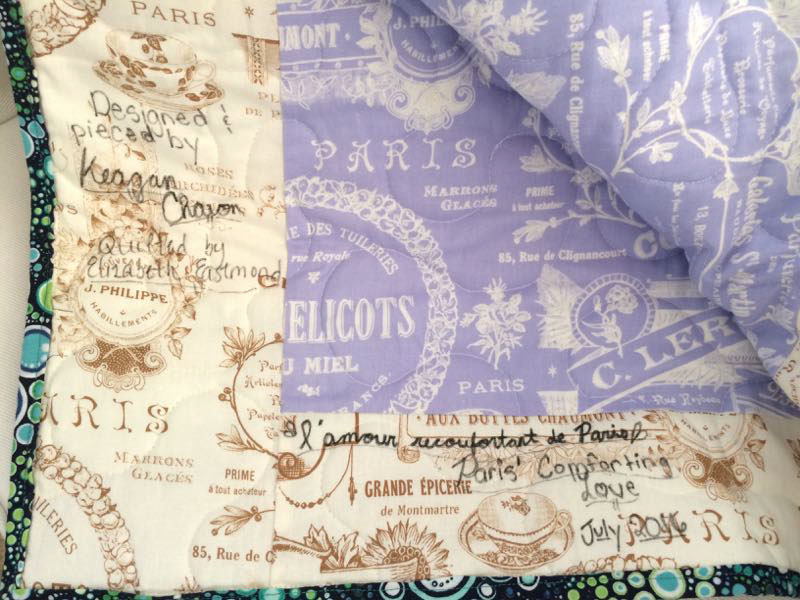
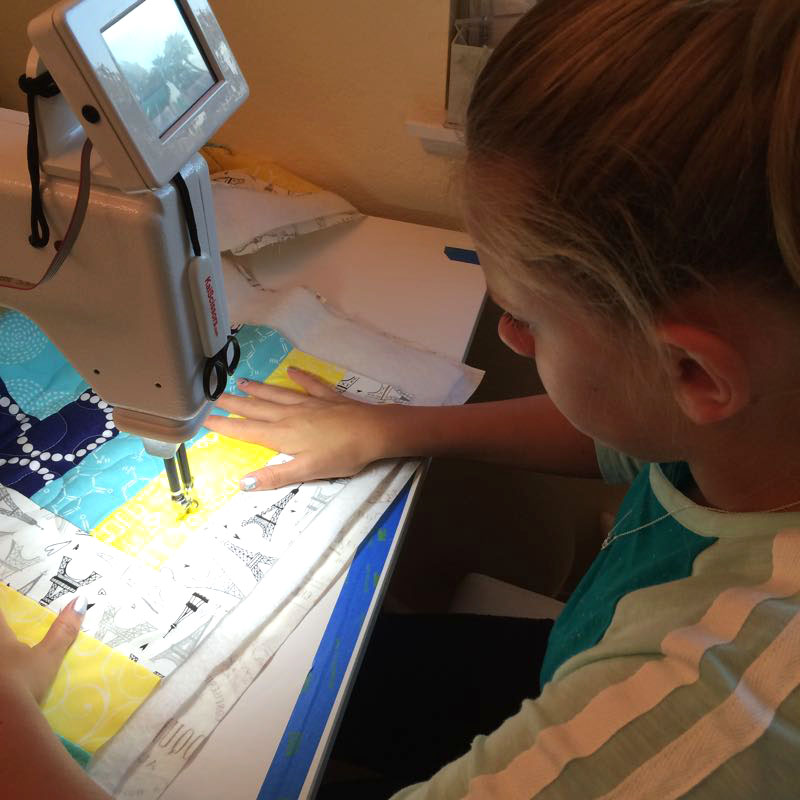
 We got all the pieces cut out, then I had to go and Take Care of Things, and when I came back, this was the design she’d carefully put together on the design wall. We sewed the pieces together–me on my regular machine, and she beside me on the Featherweight– and we put the top together. Her brother Riley helped iron the blocks; it was a team working together.