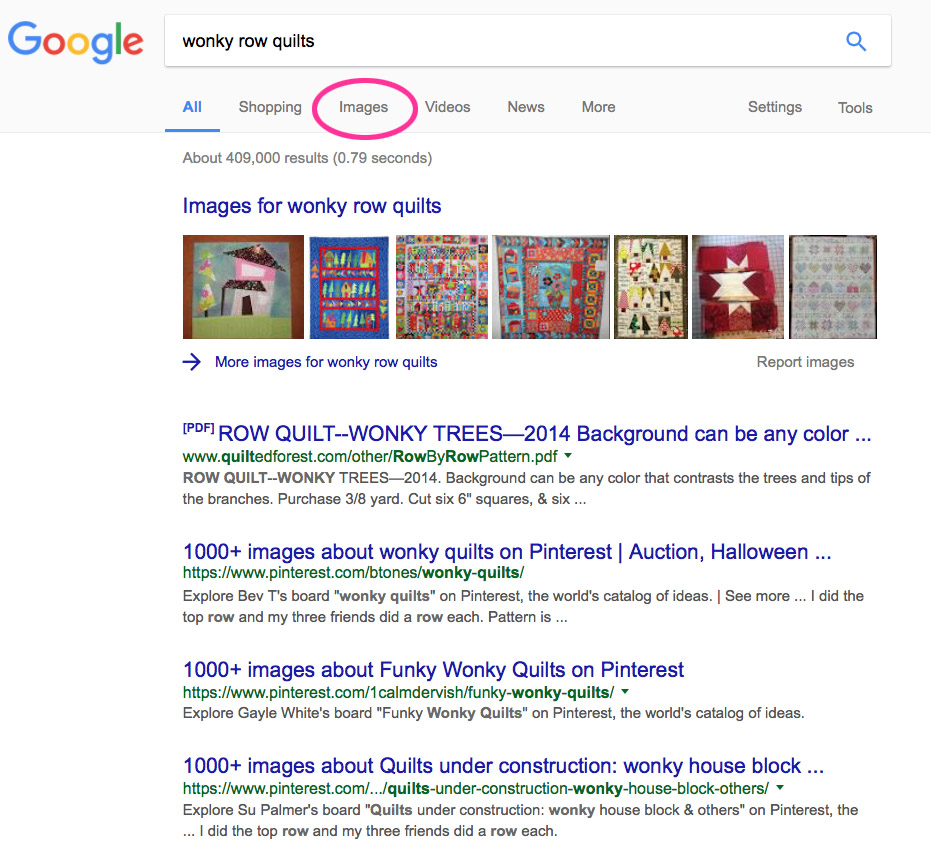
But I also hate Pinterest when I’m trying to do an image search. I recently was searching for “wonky row quilts” and everything took me right over to a Pinterest page, which is a crazy way to try to find something. You have landed on this interminable page of images and then you have to search the page again, without the benefit of Google’s search engines. So this is now what I do.
Your type your key words into the splash page (the first page in a website) that looks like either the one above or the one below.
You are used to the above two views, where you can find your way to an image library. I included the first view so you can see how maddening it is to get all those Pinterest results (and no, I don’t think the Pinterest’s search engines are better than Google’s, but then that’s another post).
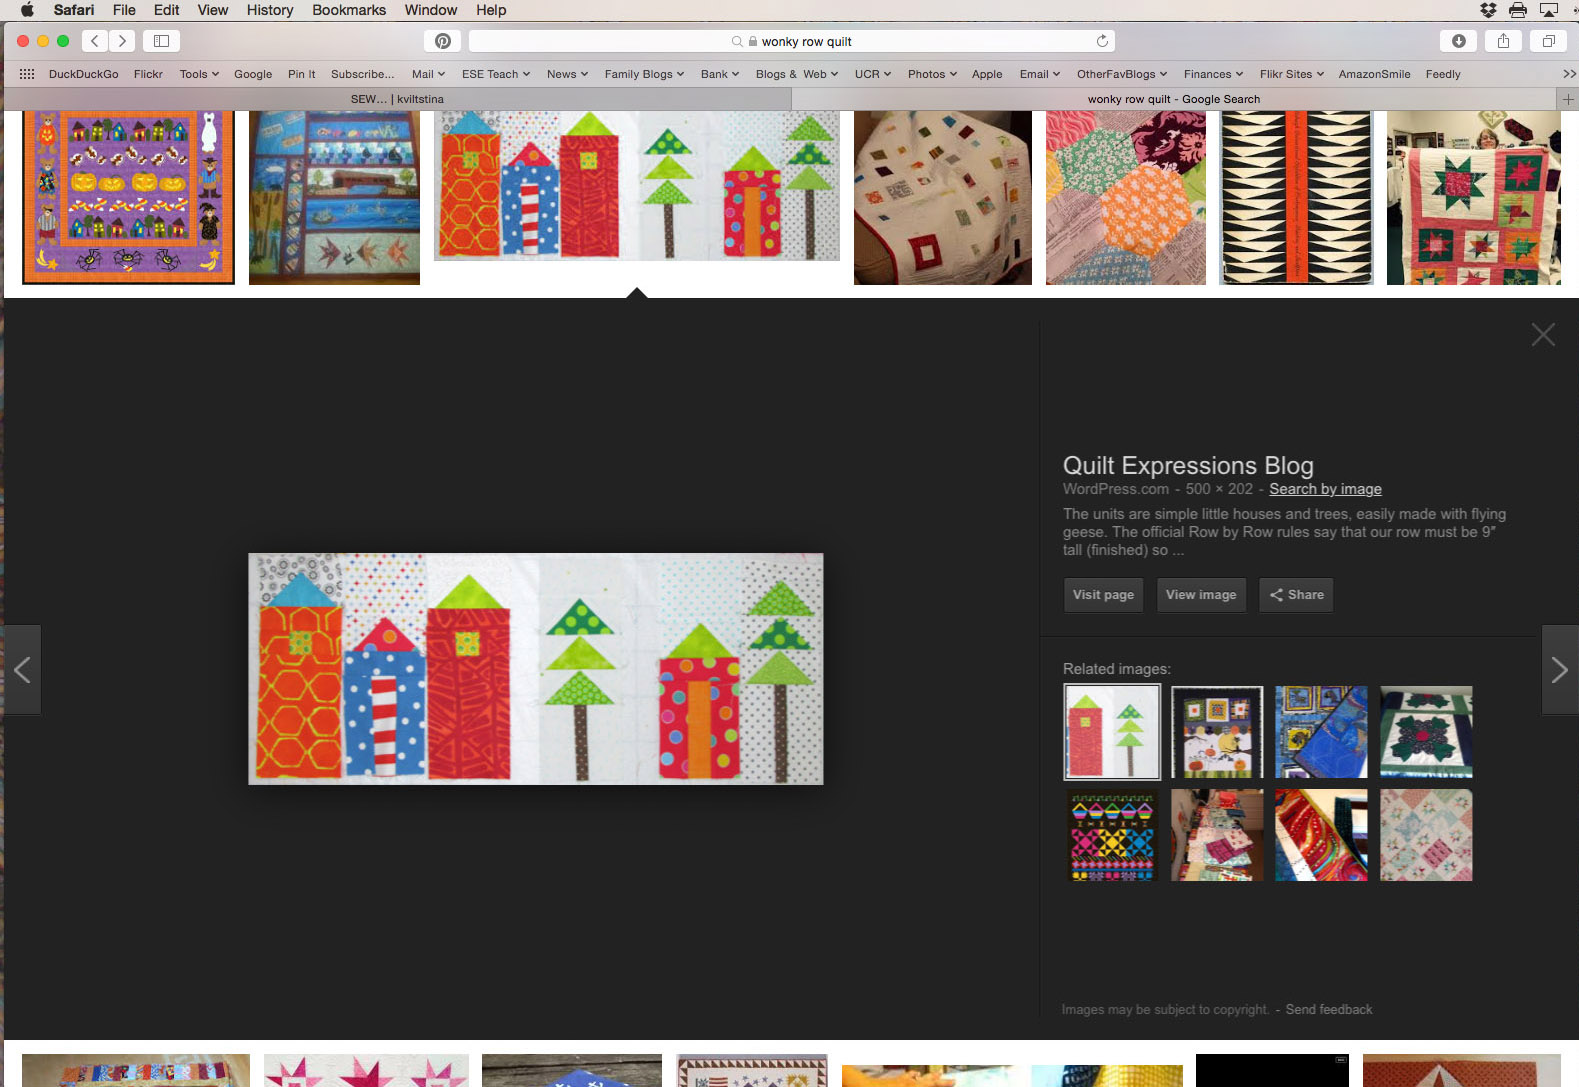
You’ll see lots of images, and when you click on one, the screen will split to highlight your choice.
Head to that link up there at the top, the one that says “Search by Image.” Click on it to be taken to this page:
There are several basic subdivisions of this page, and they can be helpful, at times, but I’m looking for a source that doesn’t refer me back to Pinterest. These results are usually in the “Pages” section. Avoid any Pinterest listings, and head for pages that have an address that starts with “https.” You may not need to drill down like this, but in the case that you are looking for the origin of a specific image, these tips may help.
Want to find out if something has been posted from your blog?
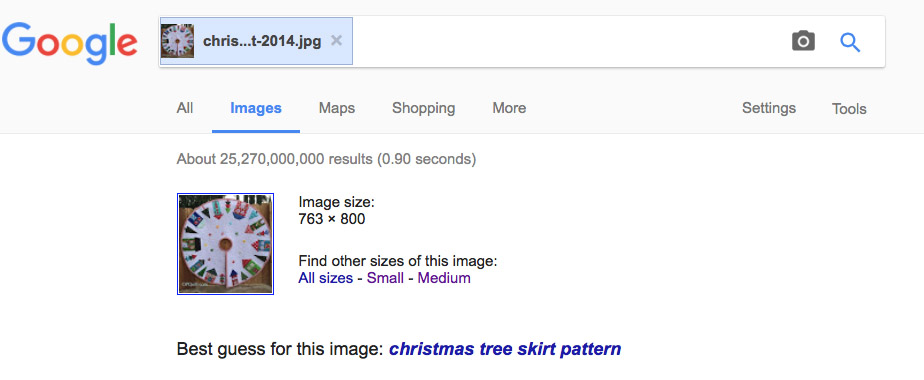
In Google Image Search, click on the camera.
From the desktop, drag into the box a photo (or paste in the photo’s URL if you know it). I’ll do my Christmas tree skirt, which I know has gone a lot of places.
This is the result. While there are multiple results, most of them were for other Christmas Tree Skirts.
But in the Pinterest results below, I did notice it’s been pinned nearly 3,000 times. (This photo gets around.)
Another reality of the Google Image search is for personal security. Say you want to find out where an image of your grandchild or child has gone to? Pop in their picture. Many images are lifted from Facebook, so please be careful about what you post, and never post a child’s image without their parent’s permission.
Hope this helps in your searches.
UPDATE: If you know how to use Boolean Operators, you can also add -Pinterest.com to your search terms. (That’s a minus sign before the term you don’t want to show up in your search.) I have mixed success with these, so I didn’t write them into my post, but one of my commenters mentioned it. Try it, to see if it works for you.
I am the Queen Bee this month for the Gridsters Bee, and thought and thought and thought of what I could do. I happened on this design while surfing the blogs, and something about it just made me smile. Since I am one month post-op on my interminable rotator cuff repair recovery, I realize that it’s probably because I just needed some happy-cheery-goofy-fun in my life.
Yes, I made the tutorial and wrote it all up before I went in to surgery, perhaps anticipating the need for something happy-cheery-goofy-fun. To start us off, here’s something to get you in the mood for making my block this month (stop it about 3:00):
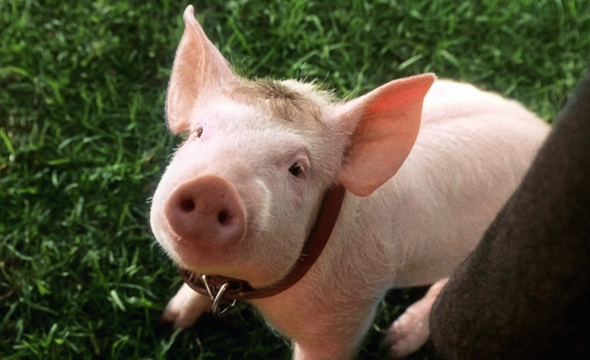
For those of you who can’t see the link, it’s from the movie Babe, The Gallant Pig, completing his “sheep” trials. (Go to the blog if you want to see it.)
Yep. Somehow little piggies have gotten in my heart and under my skin and I want a whole quilt of them, although I may add a barn or tree to break things up. I first found them on Gayle’s blog, Mangofeet, where it says she is a bonafide farmer. She found them on Sally’s blog, The Object of Design, which is where I found a tutorial for littler guys. And I found Gayle, by following a link from Bonnie Hunter’s Quiltville’s Linky Party for her En Provence mystery quilt. Connections everywhere!
Before I leave all the attributions, please visit Sally’s tutorial page, where she has other tutorials for bunnies and fish and all sorts of creatures.
But mine are slightly different, both in size and in style, so I wrote up atutorial for what I want. Since they are small, I’d like you to make me two, if you wouldn’t mind. I used Gayle’s post for inspiration (also look *here.*). To make it easier on yourself, make them both the same, but if you get adventurous, it’s okay to flip the orientation of the piglets, or make one going up and one coming down. But really, keep it simple so you aren’t calling me names in the middle of this process.
Again, while Sally has a tutorial (linked above) and she is the designer of this block, I changed up a few things (like the dimensions), so please follow along and make my piglet according to my tutorial. The piggies are all scrappy, but I do need:
sky–a consistent low-volume or “background–no need to make them the same fabric, but the do need to be the same lightness: pale blue, cream, white, tan, low-volume with grey/tan/etc. prints. Avoid prints with too dark of text or design so that it throws it to a muddy tonality. Some background prints are fun and will make the quilt more sparkly. It’s okay to mix up the borders, but I’d probably stick to the same fabric around the piglet.
body–a medium value fabric: small print or geometric, floral, Kaffe, but avoid fabrics that look “splotchy” when cut this small (such as cutting a giant polka dot in half)–generally anything in your stash. Have fun. Make me some colorful piglets.
ears, feet, snout–a darker-toned fabric that stands out from the body fabric
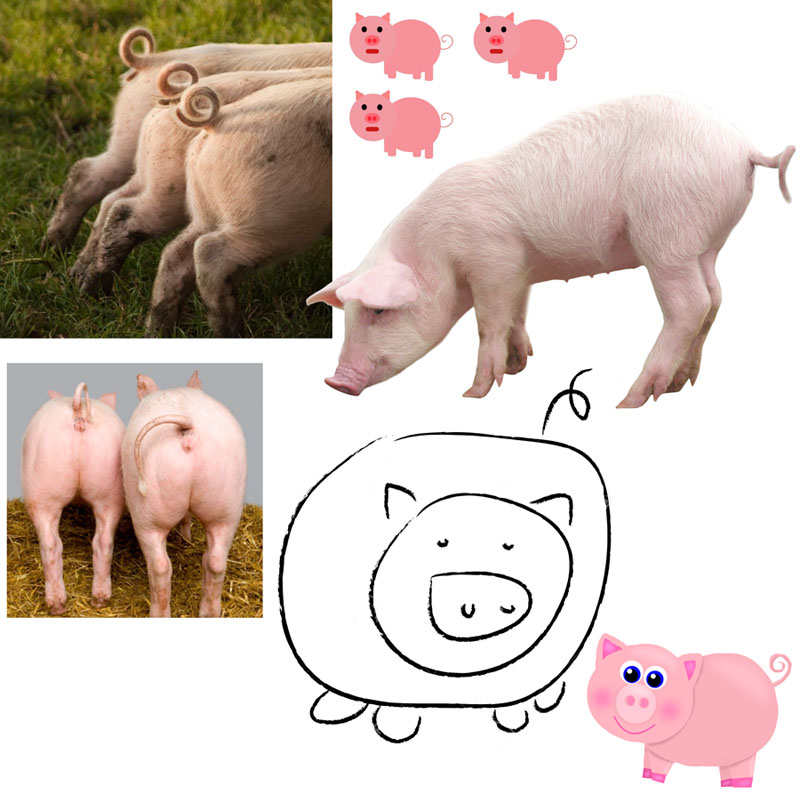
tail–embroidery floss/Perle cotton to match your piglet, to embroider the tail. Pattern is not given for this, but below are some piglet tail ideas. Please use a back stitch. More info in the tutorial.
Gayle showed hers on a tilting grassy hill, which I like quite well, so that’s what I’m asking you to make for me. Copious amounts of photography and images and text follow, but really it isn’t too hard. The following directions yield one piggie, so cut everything out double, out of two different piles of scrappiness.
Lastly, I follow standard print journalism standards: the caption in UNDERNEATH the image (MQG had theirs backwards on their award-winners page and I was so confused!)
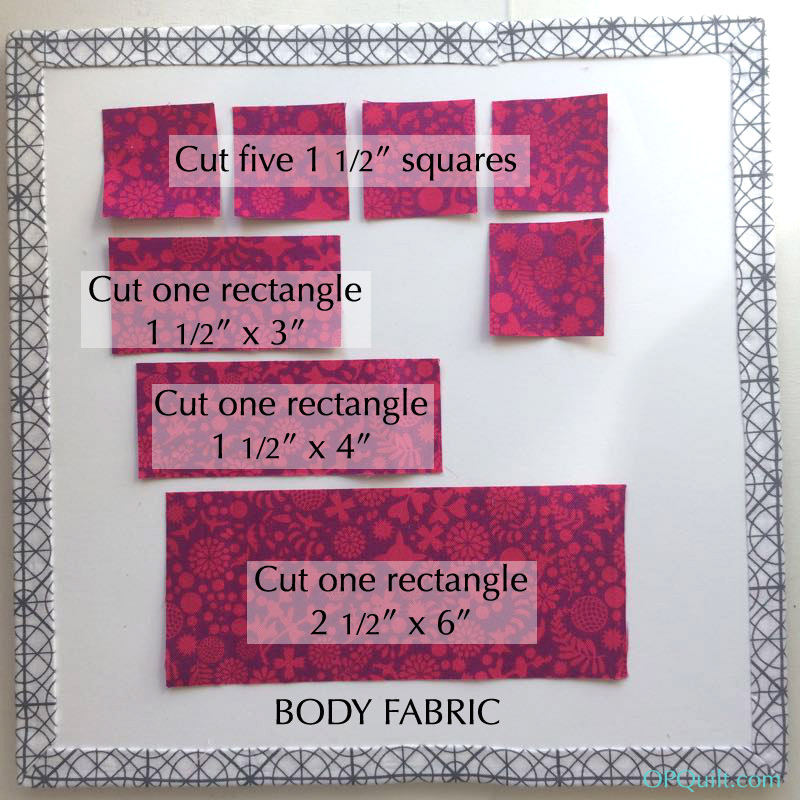
Cut the background (sky).
Cut the body fabric.
Cut the accent pieces of snout, ear and feet.
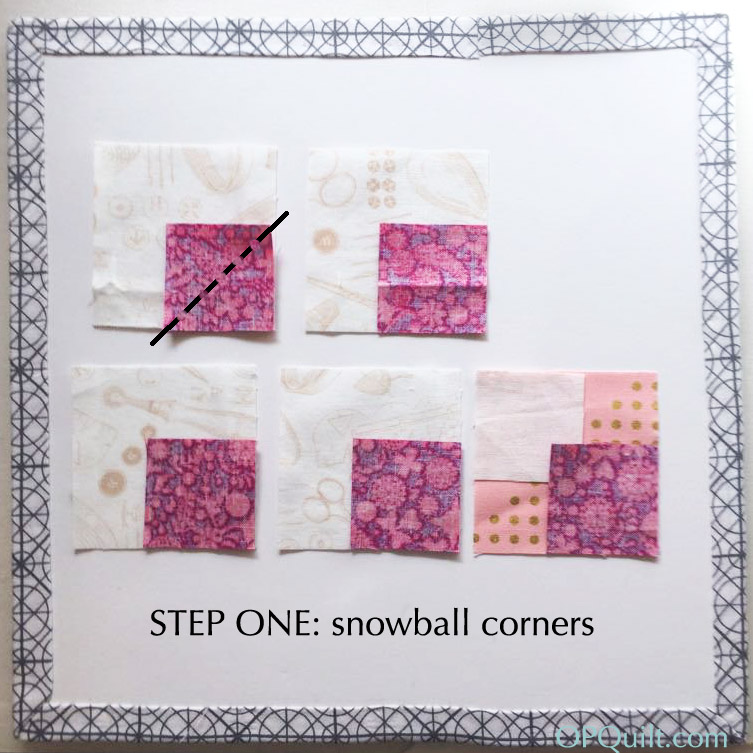
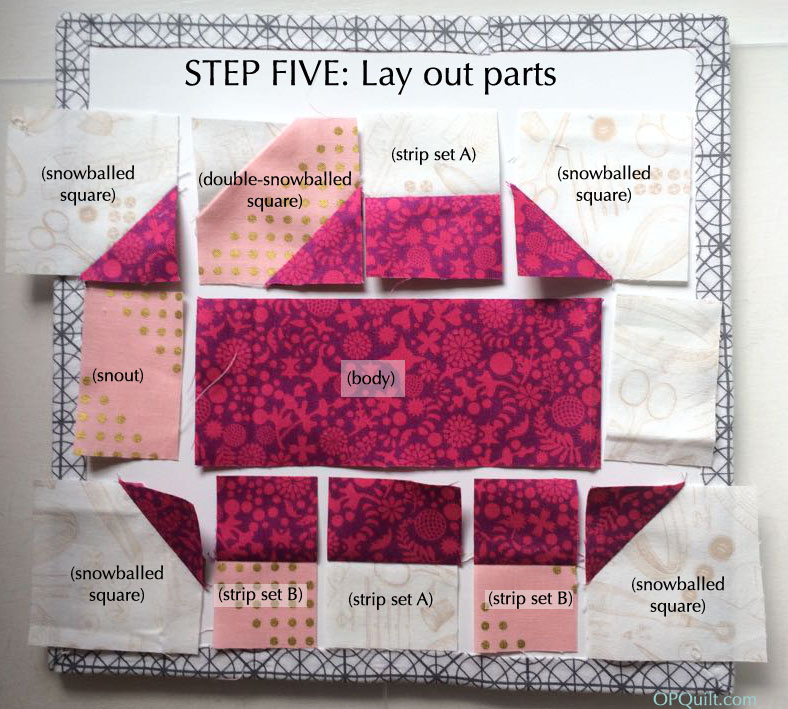
Step one is to snowball body fabric onto the background fabric, using the 2- 1/2″ square pieces of background and the 1 -1/2″ square pieces of body fabric. Then the last snowball is a double: use one 2- 1/2″ square of accent fabric and snowball on one 1 -1/2″ square of background and one 1- 1/2″ square of body fabric. Press the snowball corners to the dark side, and trim after pressing. With the double-snowball, you’ll press one square’s seam allowance toward the accent fabric and the other toward the body fabric.
Step two is to gather the other pieces together: Line up the 1 -1/2″ x 4″ pieces in body and background, AND the 1- 1/2″ x 3″ pieces in body and accent. Place on the front accent piece (snout) and the back background piece on the large body piece (lowest piece).
Step three: sew the strips together and then press to the dark side on the top one. I don’t care which way you press the bottom one, but I went towards the dark as well.
Now cut those strips in half. Exactly. The top strip set (A) will yield two with body and background fabric that will measure 2″ across. The bottom set (B) will yield body and accent fabric that will measure 1 1/2″ across.
Step Five is to lay them all out. If you were going to make a reverse-direction pig, you’d need to fiddle with that ear (double-snowball) piece to sew that up differently, otherwise, everything else is the same/can be moved around. (See second pig at the end.)
Sew the top row together, then the middle and yes…sew the bottom row of pieces together. Pressing instructions are in a minute, but generally press towards the dark. PLEASE DO NOT PRESS THE SEAMS OPEN.
Babe!!! Babe!!
This is how I pressed the seams. I just realized I pressed the legs the wrong way. Oh well. Either way is fine, but just not open. [NOTE: I show it correctly in the second pig, at the end.]
Time to tilt this little guy. Start by sewing on a 2- 1/2″ strip of ground–can be green for grass, or flowery for a meadow, or brown for forest floor or purple for Outer Space. It just has to have contrast to the background and side strips.
Sew on three side strips, by FIRST sewing on the top, then the two sides, all 2 -1/2″ wide strips.
UPDATE FOR MY BEE MEMBERS:
Please do not trim. After sewing on borders, just send untrimmed, untilted.
Now back to our regular programming.
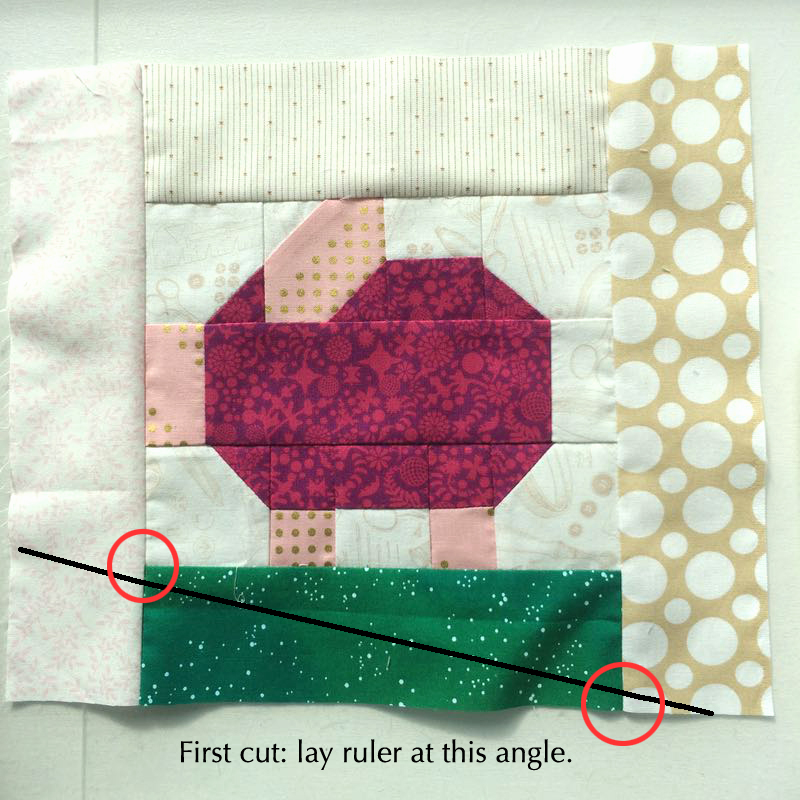
Now to cut. Please check the areas in those red circles to make sure you are leaving 1/4″ seam allowances (one above the line, one below the line). Lay your ruler with the edge along the black line, above. Cut.
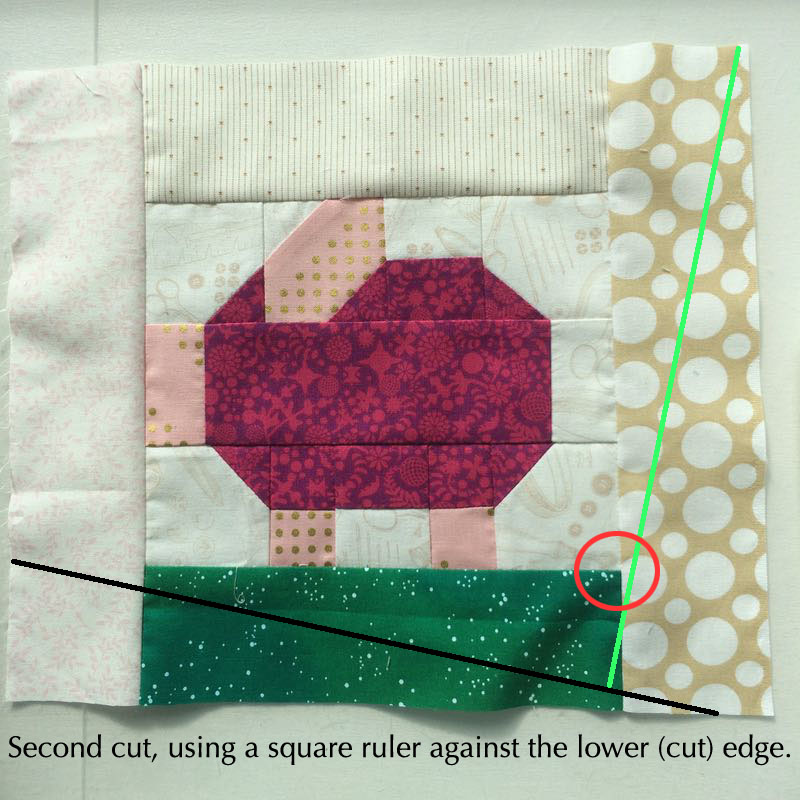
Now lay a square ruler at the bottom (newly cut) edge. Now play with the adjacent side it a bit, making sure to leave that 1/4″ in the circled area. Cut.
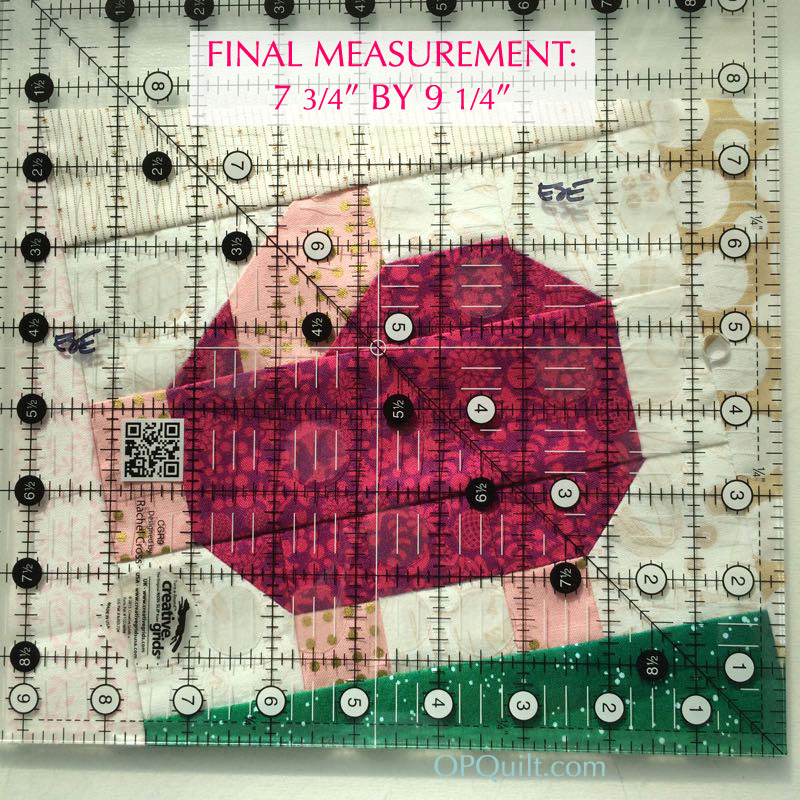
Now think about it as a beginning rectangle. Turn the piglet 1/4 turn clockwise so that the newly cut green line is at the bottom of the mat and the black line is to your left. Measure over 7 3/4″ from the black line; cut.
Measure 9 1/4″ up from the green line; cut.
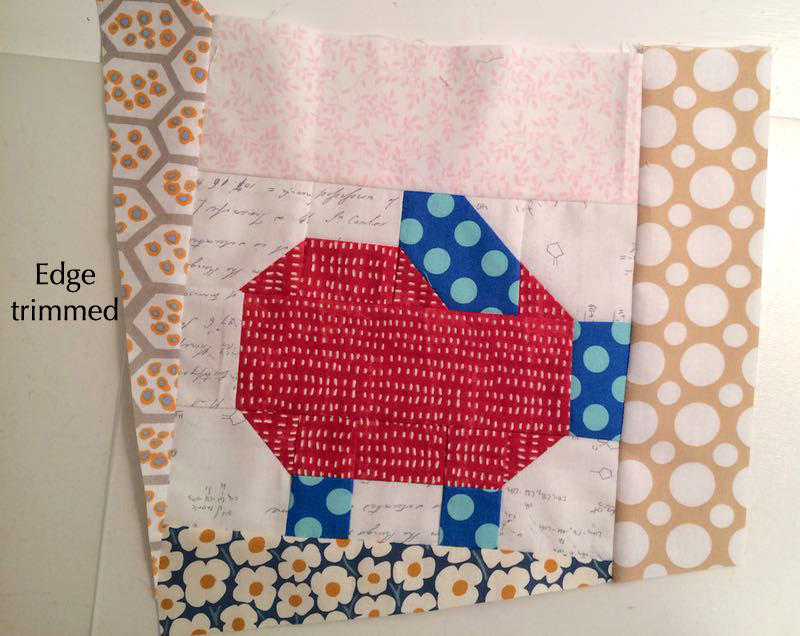
Tilt the pig back to a proper vertical and it should look like this:
The piglet’s rectangle will measure as shown above: 7-3/4″ high by 9-1/4″ wide..
Again, this is the most important corner when you cut for the tilt. It’s so the ground will look merged together when seamed.
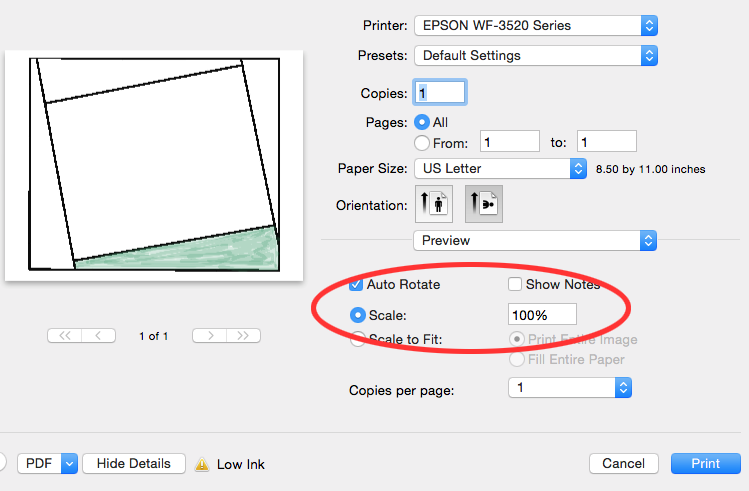
I made you an overlay, if you are nervous. Download the PDF file: piglet-tilt-overlay1 and print it out on vellum paper, or make a template out of this (too much trouble, I think). It will help you get the right angles.
Please print it at 100% or you will again find yourself cursing.
If you are really truly too nervous to cut this pig, send it back to me untrimmed and when I get better, I’ll be happy to trim it up.
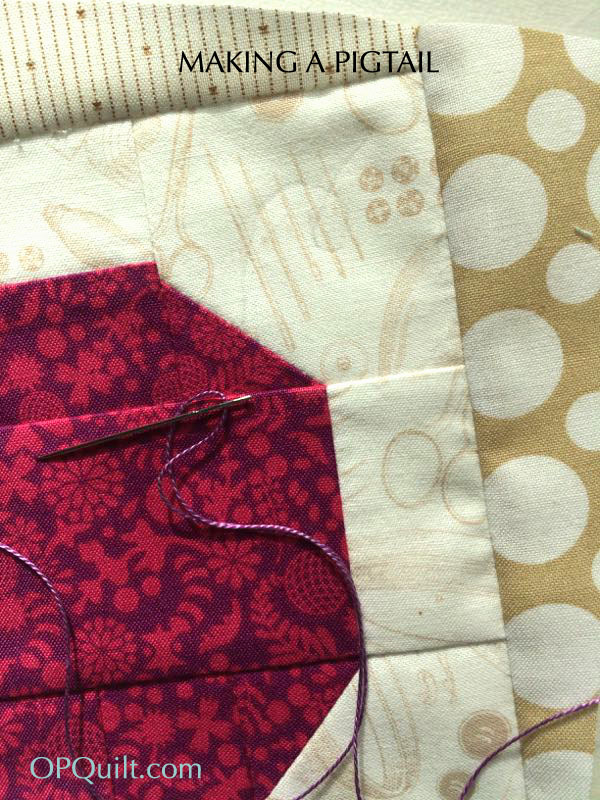
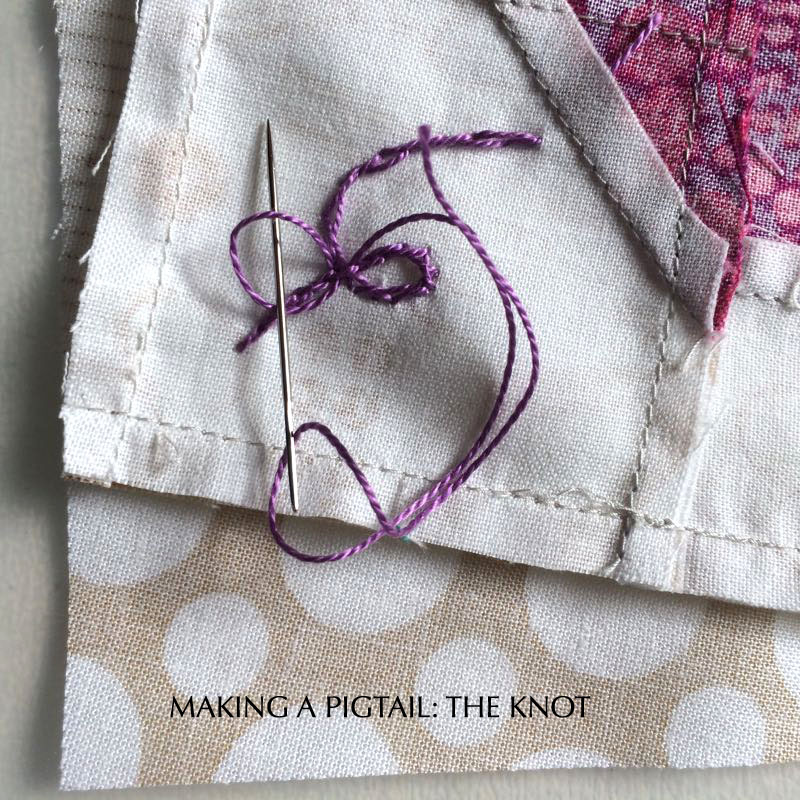
Now let’s add the pigtail. Draw on a squiggle, originating from the pig’s backside edge. My drawn line is really faint, above because I don’t want to have to figure out how to get the pencil off. Sometimes I’ve just eyeballed it. Sometimes I’ve just scratched it in. See the picture at the top of the post for pigtail ideas.
Tie a knot in your perle cotton (I used size 8, but 5 or 12 is fine, too) and bring it out at the fold, at the beginning of your drawn line, hiding the knot in the seam.
Take one stitch (#1) and then skip a stitch, coming out as shown in the photo on the left. Now put your needle in the same hole as where you came out on your starting stitch (#2) and backtrack and stitch that empty place, which will put you on the road to backstitching the piglet’s tail on.
Insert the needle in the last stitch and pull it to the wrong side.
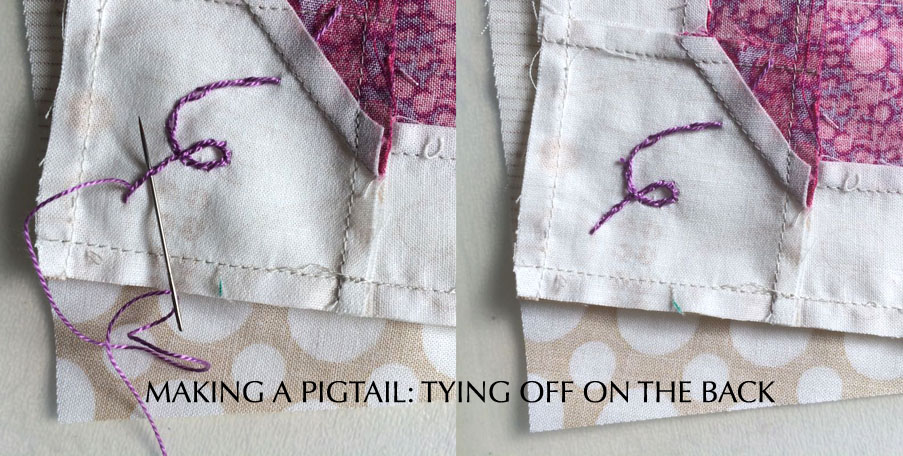
On the wrong side, weave your thread down from the top , then make a knot (below) by making a loop and drawing your needle through it. Continue weaving your thread for one or two more stitches, then cut it off.
Okay, let’s do it again, but with the pig flipped to the other side.
You can see how the ear needs the double-snowballed corners switched.
And the back, showing the pressing, this time with the correct pressing for the legs.
You have to think on this step: do you want your piggie going uphill? Or downhill?
I voted for downhill since I already have an uphill.
Here’s how I laid my ruler, keeping an eye on those 1/4-inch seam allowances.
Now you can see how I use my square ruler to find the next edge.
It’s really straight, even though the photo doesn’t look like it.
I put the ruler on as I described above, and worked it until I had the correct measurements of 7-3/4″ by 9-1/4.” I ended up trimming off a slice of a previous cut to get those dimensions. Then I do the tail.
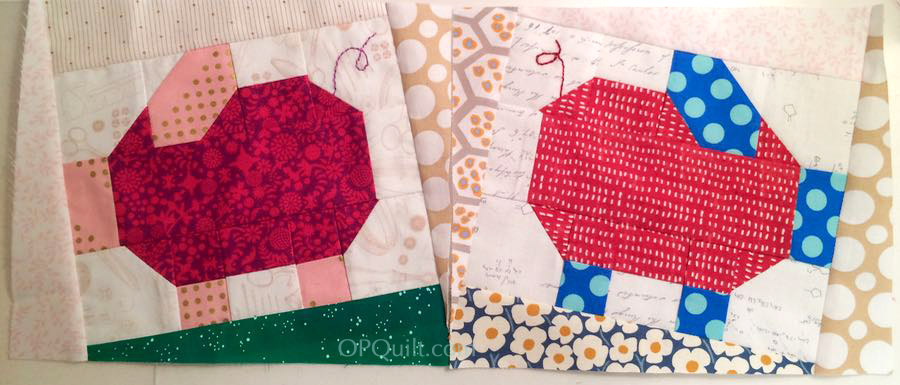
Here they are together, but not sewn together.
That’ll do, Pig.
Thank you everyone! I look forward to a whole farmyard of little piggies, running around my design wall. While I attribute all these ideas to two very fine quilters: Gayle, of Mangofeet (she is hilarious to read) and Sally of The Objects of Design (who has made a stunner of an En Provence Mystery Quilt), all the photographs and instructions above are my own. Please do visit their blogs to see all the fun piglets that are running around there.
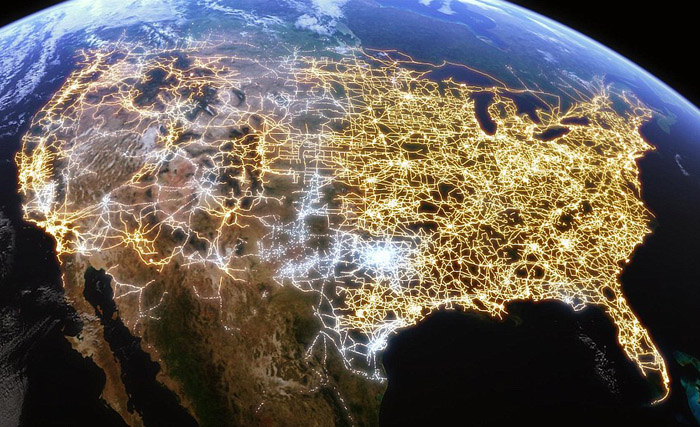
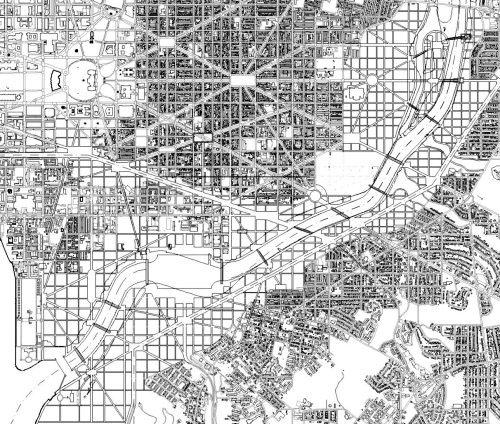
When I say the grid, you probably think of something like the image above: a rendition of the electrical grid in the United States.
Or you might think of a street grid, or the computer grid, or any other type of connected web.
I also think of the grid we use in making our quilts. Above is my example of a regular grid, using a 9-patch variant. This style of quilt — that of using repeated blocks set in a grid — didn’t become popular until the 1840s, as earlier quilts were more whole-cloth, medallion, or broderie perse styles.
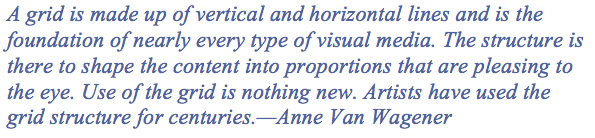
The name of our Gridster Bee is a nod to the idea of the grid, and since I’ve had some non-sewing time, I did some research about the grid, finding its origin in the way that text was laid out on the printed page. (Note: Where the quotes are unattributed, I could find no source for them.)
This method of intersecting lines and angles, known as the Van de Graaf canon and used medievally, was popularized by Jan Tschichold in his books discussing classical book design, and became the standard for book layout. You can see the proportions at work in the magazine layout (above) on the right.
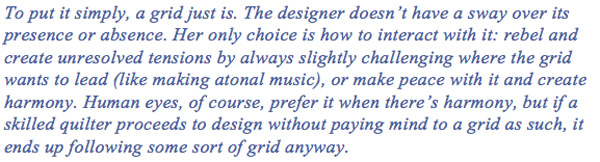
Some myths about the grid:
Grids are a design trend
Grids impede creativity
Grids are confining, and can only be used for certain designs
The grid is a static, even, regular subdivision of the surface both vertically and horizontally
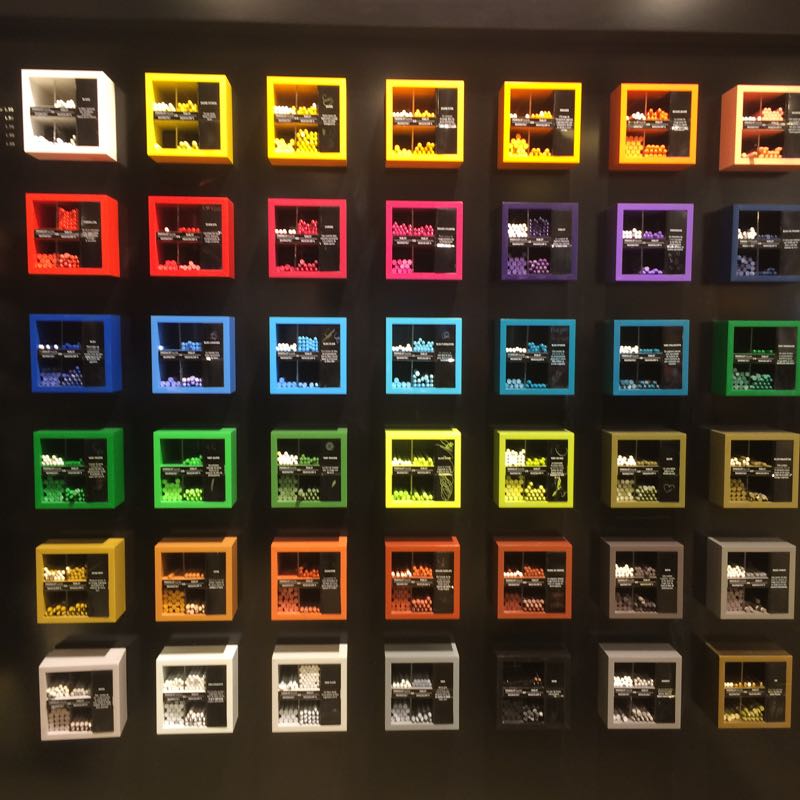
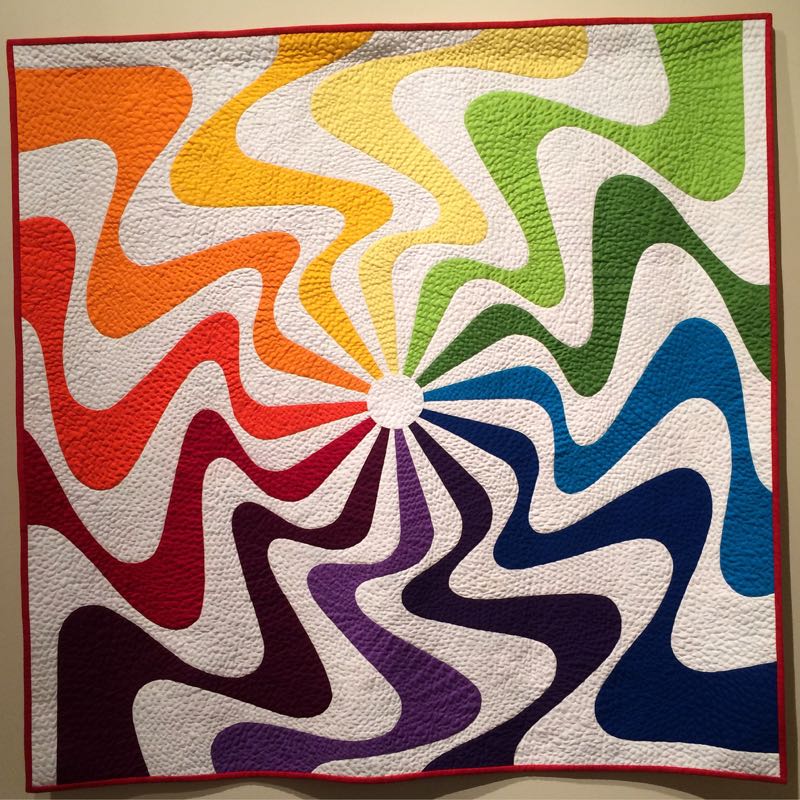
There are all types of recognizable grids, such as those above, and in the images below:
Patricia Walker Rusk’s Sunset Gardenspencil cubbies in a shop in SwitzerlandBullseye by Vicki RuebelUpward Modbility by Stephanie RuyleChrista Watson’s Square in a SquareLisbon Subway TilesCindy Wiens’ Delta BreezeThree versions of my Neighborhood Quilt, by my students
(more designs from Spain and Lisbon)
Velda Bowen’s Fractured Rainbow
(circular grid used, both above and in combo with a regular grid, just below)
(A diagonal grid, both in Shutty’s and Van Orman’s quilts) )
Tesselation by Jenn Van OrmanStephanie Ruyle’s Embers
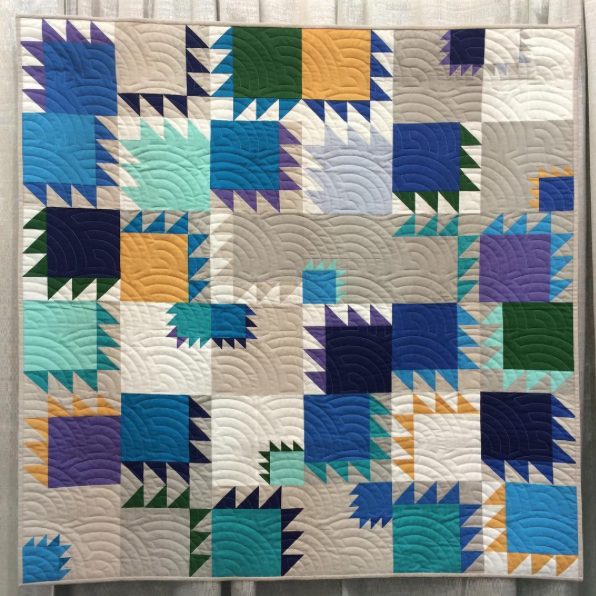
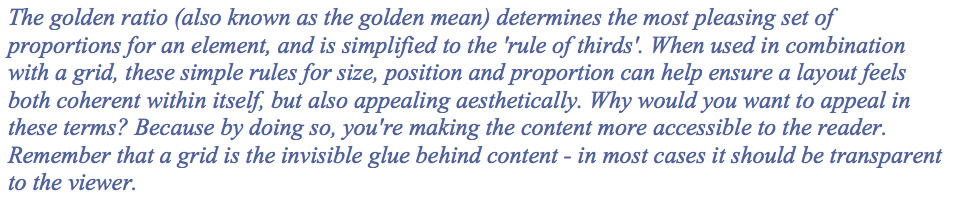
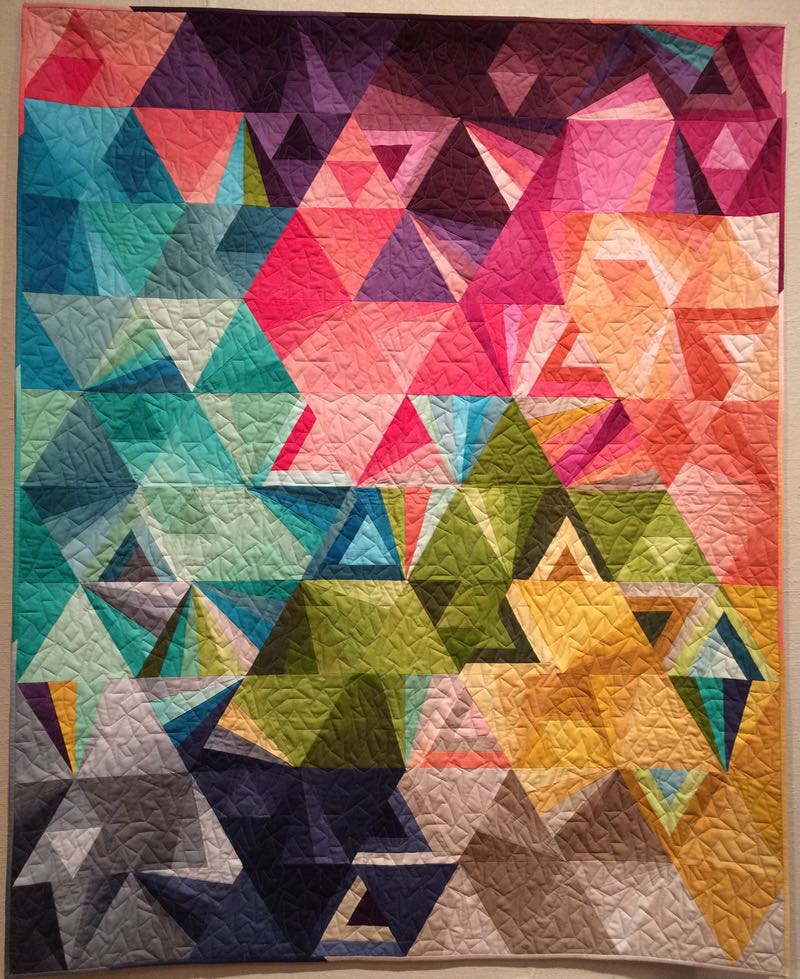
I love the grid, as ultimately, the function of the grid is to help determine and define proportion, such as the last two quilts, which seem to have some unseen glue holding them together. That’s why some quilts that seem to use no grid at all can either make us shake our heads in confusion, or can capture our gaze.
And that’s why we’re the Gridsters — not just those in the bee — but all of us in the quilt world.
And a little bit of news.
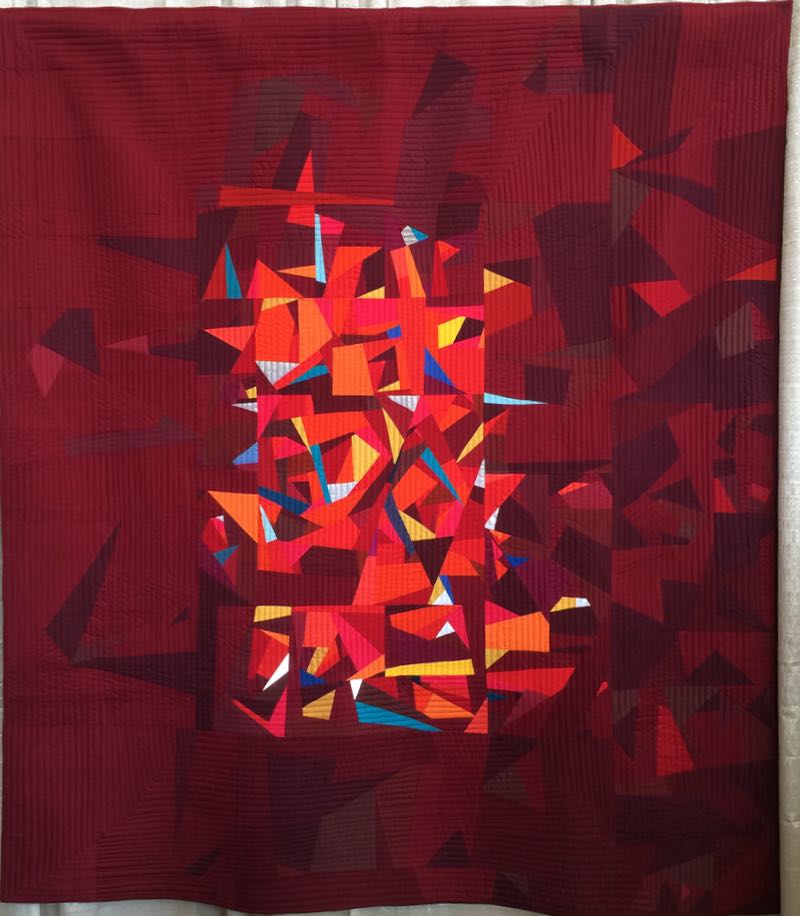
I wake up everyday and see this:
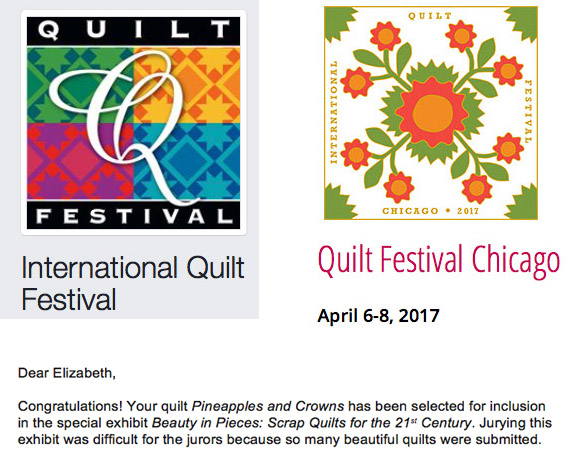
On some of my harder days, it has crossed my mind that I won’t ever sit there again, happily stitching away, and I feel so far away from the quilting world that I love. Cue the tears and the Sturm und Drang. And then I received this:
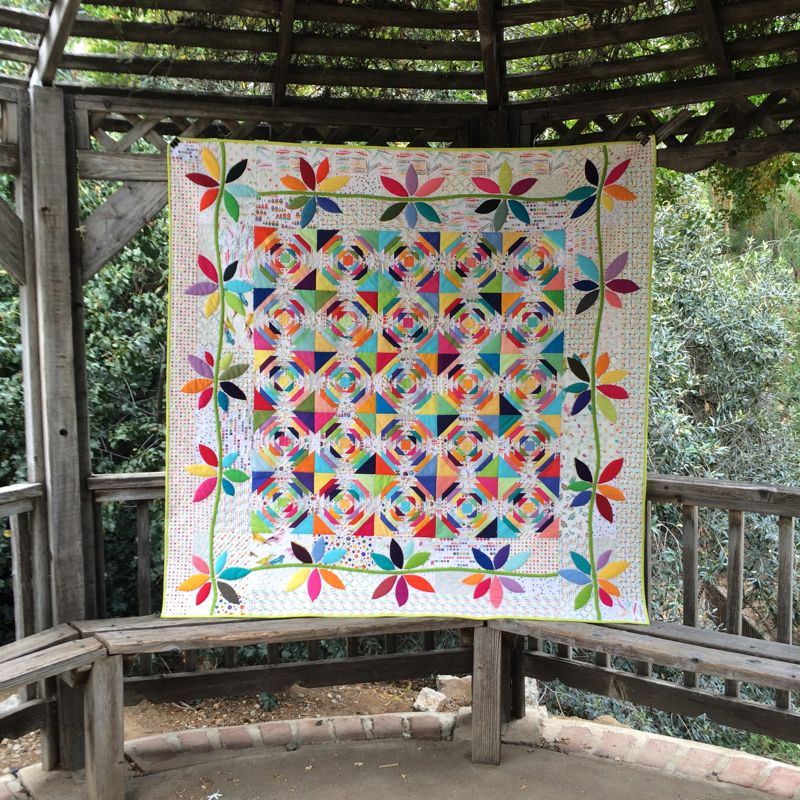
Guess the universe doesn’t want me to give up yet. (If you’ll be there at Quilt Festival-Chicago, please take a photo of my quilt, and tag me on IG [occasionalpiecequilt].) And I was also asked by our guild, The Raincross Quilt Guild, to present a Trunk Show on May 16th. I’m pretty excited about this, and have been working on my program notes.
So…guess I’ll be a good girl and keep all my Physical Therapy appointments so I can get back to quilting.
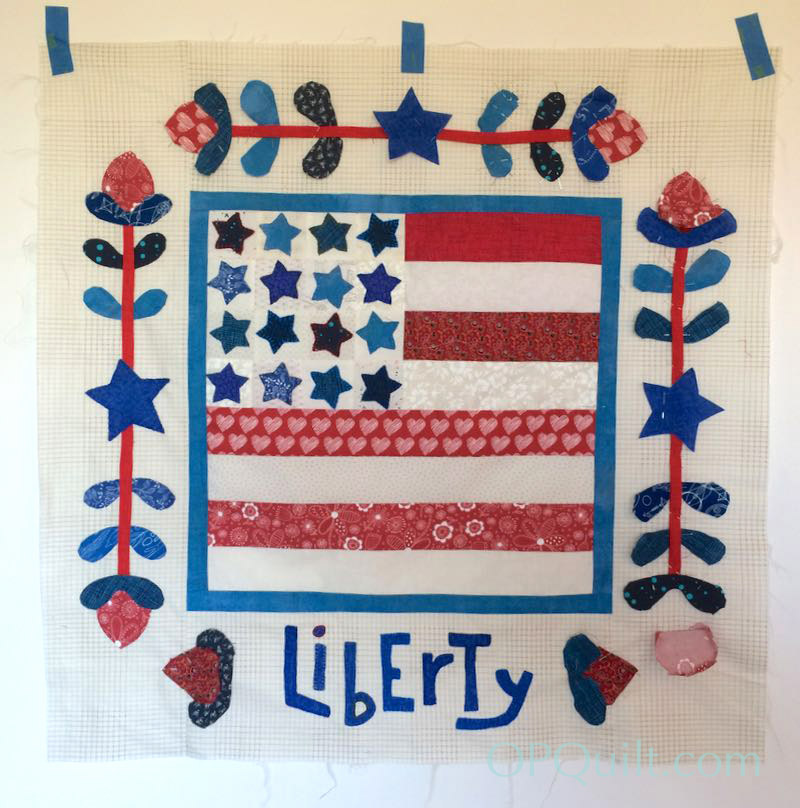
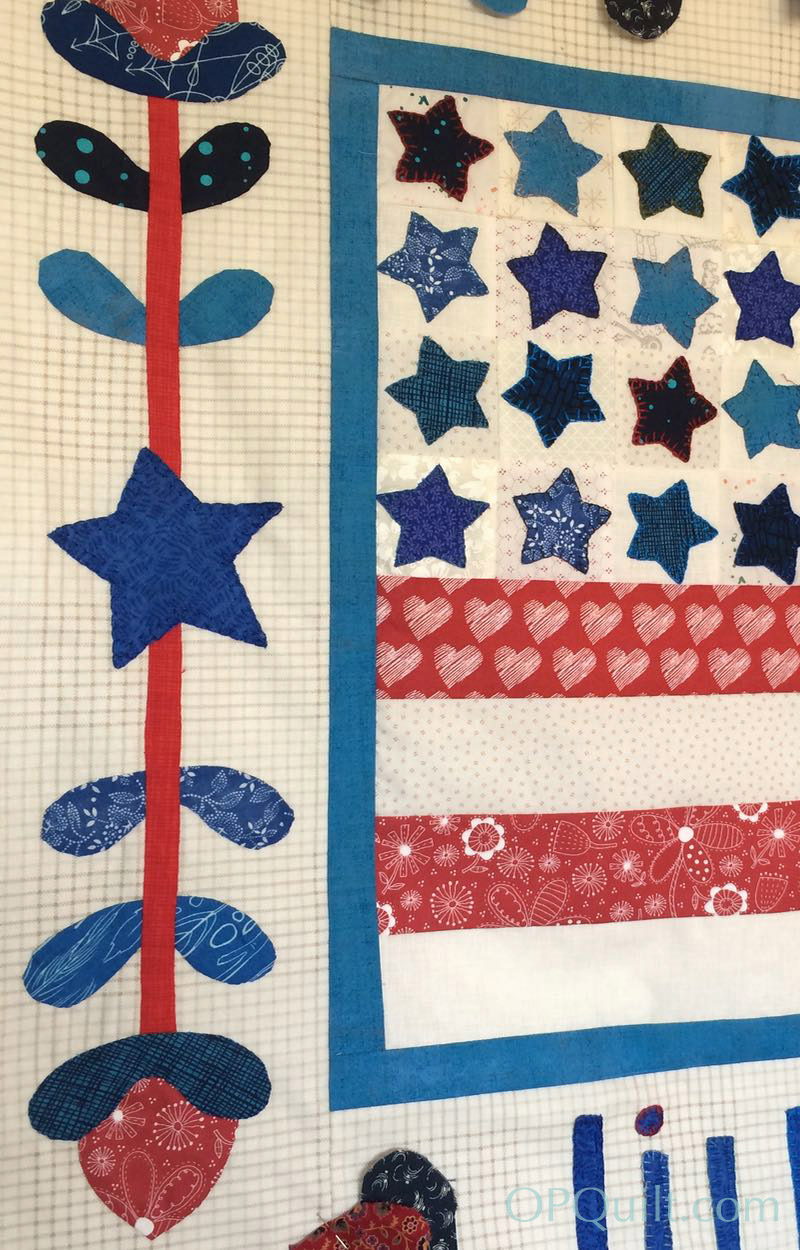
I’ve made some progress by getting the first (left) side sewn down.
It’s pretty wonky, but I’m leaving it as a testament to this wonky time in my life.
In my pain-killer-addled brain the day I mapped this out, I resorted to doing the freezer paper appliqué method, so everything looks pretty 3D-ish when laid out. In hindsight, I probably should have done it differently, but the quilt will still get done this way. Better to move forward, than to take too many steps back.