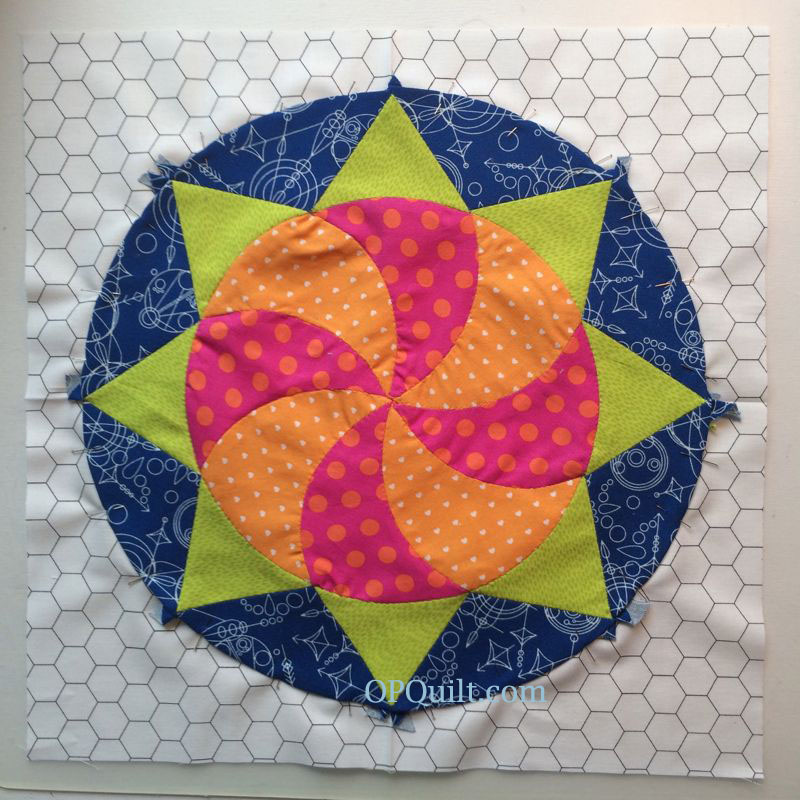
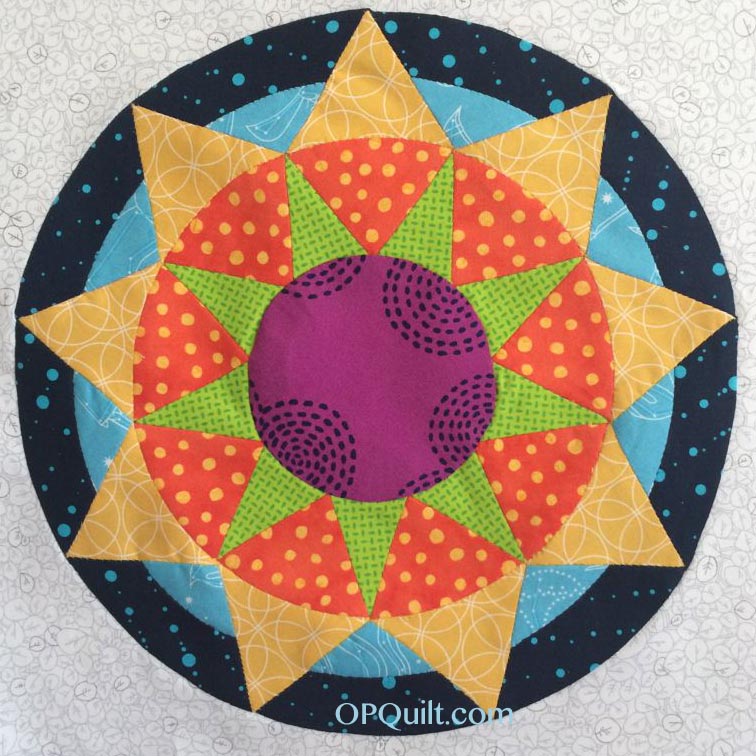
EPP · Shine: The Circles Quilt

Circles Block #14–EPP Sew-A-Long

Circles EPP Button

Circle Block 14_OPQuilt

Peppermint Candy
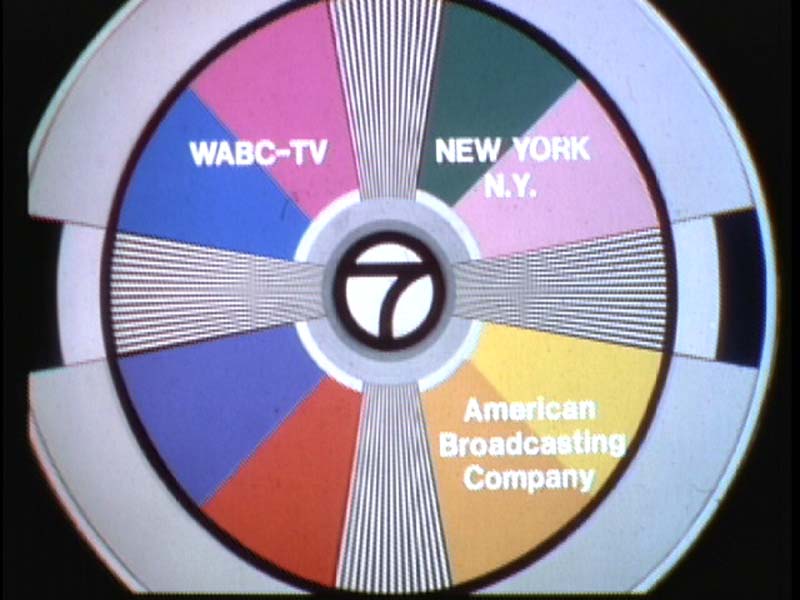
Circles Block #14 in the Circles Sew-A-Long

Yes, I know Peppermint Candy isn’t orange and pink, but the swirl — a bit fat swirl, this time — reminded me of unwrapping crinkly cellophane and seeing those fun swirls on the candy before I popped it in my mouth.

I had to steel myself to get going on these last four, as I was a bit fatigued, but when you want something — (like a peppermint, which I’m hunting for in the desk drawer as I write this) — you want something, and I wanted a sixteen-block arrangement for my Circles Quilt.

I have the final four patterns as a group up for sale on  Payhip.  I will post the tutorials each month until the set is complete.  The finishing instructions pattern for Shine: The Circles Quilt is also listed on Payhip.

(Note from the 2020 Elizabeth: A new, revised pattern is coming soon, so I’ve removed the old ones from the previous posts.  Many thanks.)

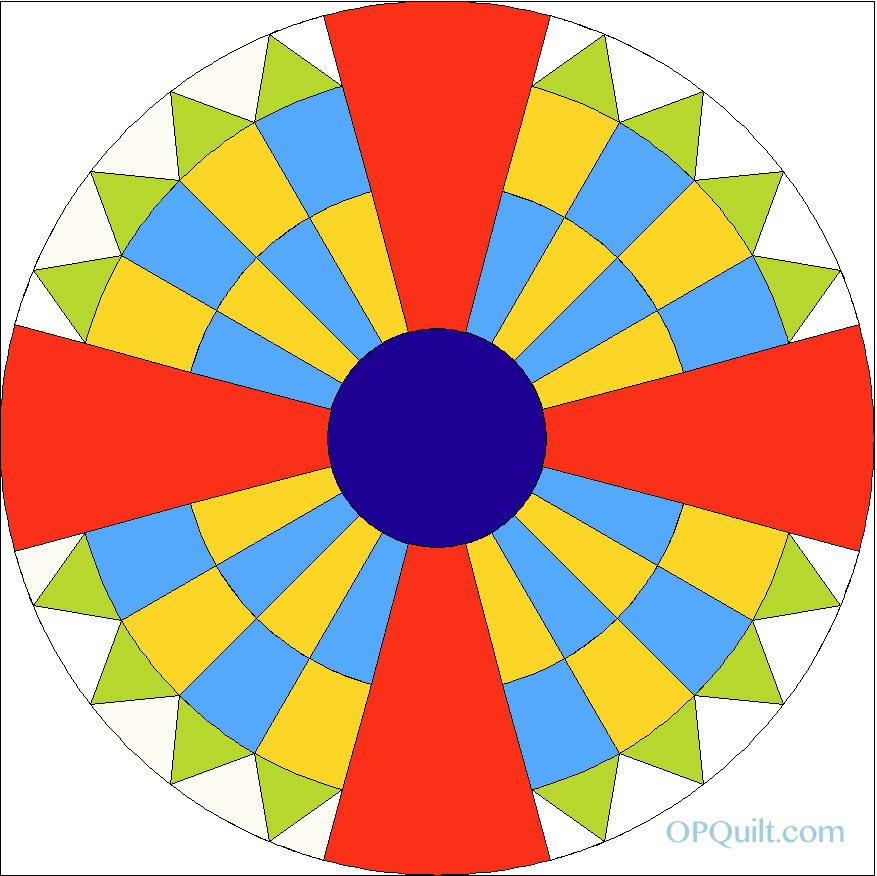
The usual caution applies about making sure that your printer settings are set to 100%; please print off four copies of this pattern.  Surprise! There is no center circle this time, as we’re going for glory and piecing it as accurately as we can.

The tricky thing is the swirls.  I had no idea that FAT swirls are harder than the thin ones, but they are.  There is more bias, more clipping needed, and more care as you lay them out.  But the block’s upside is that there are fewer pieces, so that’s got to count for something.

Circles 14_2fabrics

Fabric selection is getting easier because I am more practiced?  Or maybe that the fabrics I like are on the top of my stack?

Circles 14_3printing down

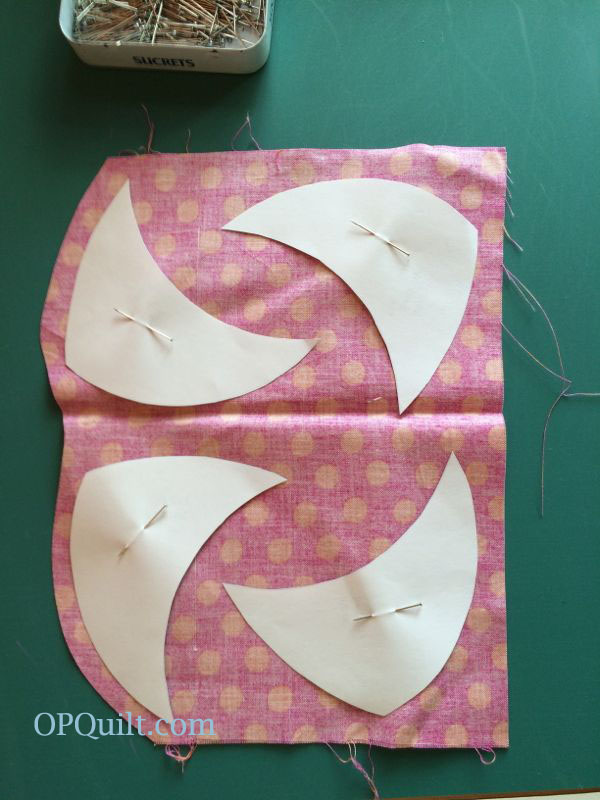
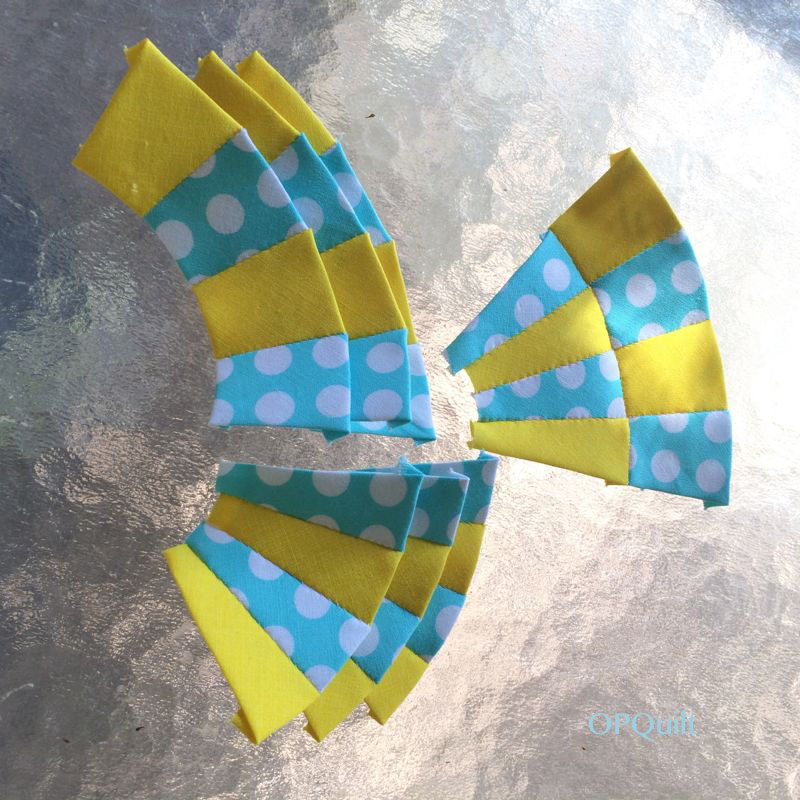
If you want your swirl to go the direction of the pattern’s swirl, lay the pieces FACE DOWN on the wrong side of the fabric.  Pin, then slice around them with a rotary blade.

Circles 14_5printing whatever

Since the outer wedges have no direction, you can place them face up or face down.  If you are just coming right at this pattern from the Internets, and have not made any of the other circles, there are lots of tips and tricks in the other circle block posts.  You can find them in the tab above, labeled Shine: The Circles Quilt.

Circles 14_4clip curves

I took time to do a bit of clipping as I glued down my seam allowances over my paper.  If you don’t, your edge won’t fit neatly with the other swirl’s edge, and will leave puckery bits.  Clip.  You’ll thank me later.

Circles 14_6layout

I like this!  This is always the jumping-off place.  If I like it here, I’ll proceed.

Circles 14_7in bag

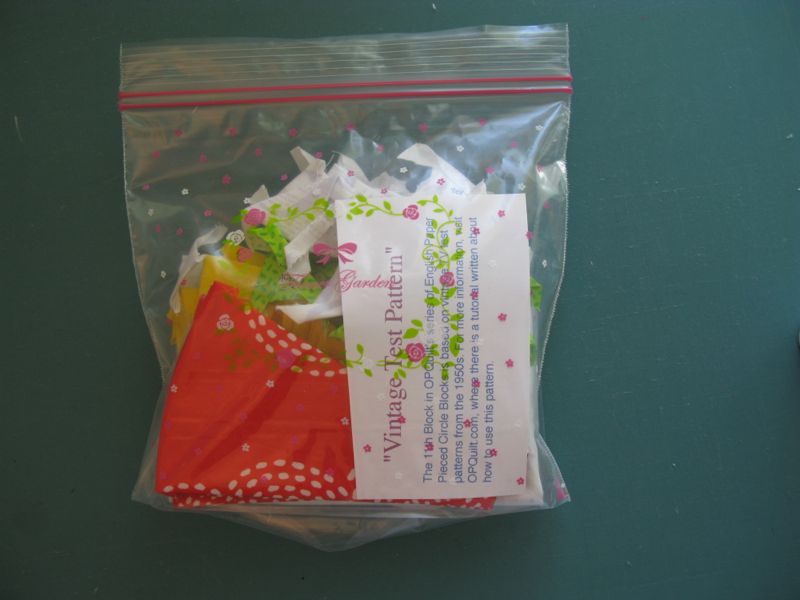
I bag the pieces up with a printout of the block (below) to help me with color and placement.

EQ7 Block 14Circles 14_8beginning sewing

I just did not know how to go about putting this together, as the swirls are so swirly.  I finally figured out that old adage: just begin at the beginning (above), so I did. Remember there is almost no easing–just add a stitch and curve it around as you go.

Circles 14_8a
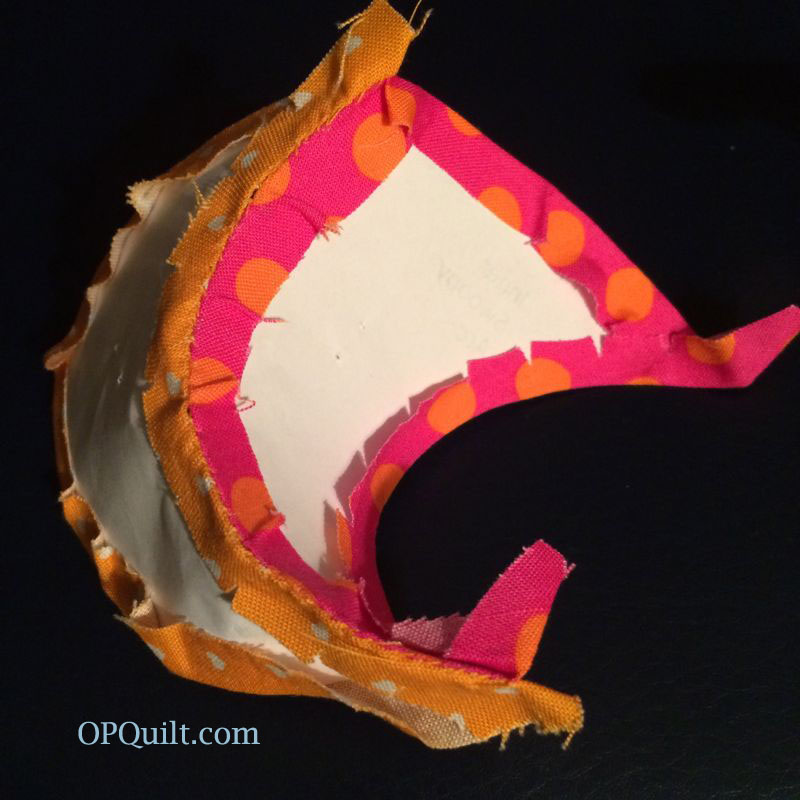
It will curve up in your hand, and this is normal and to be expected.  It will lay flat once you get all the sides sewn.Circles 14_9sewing together

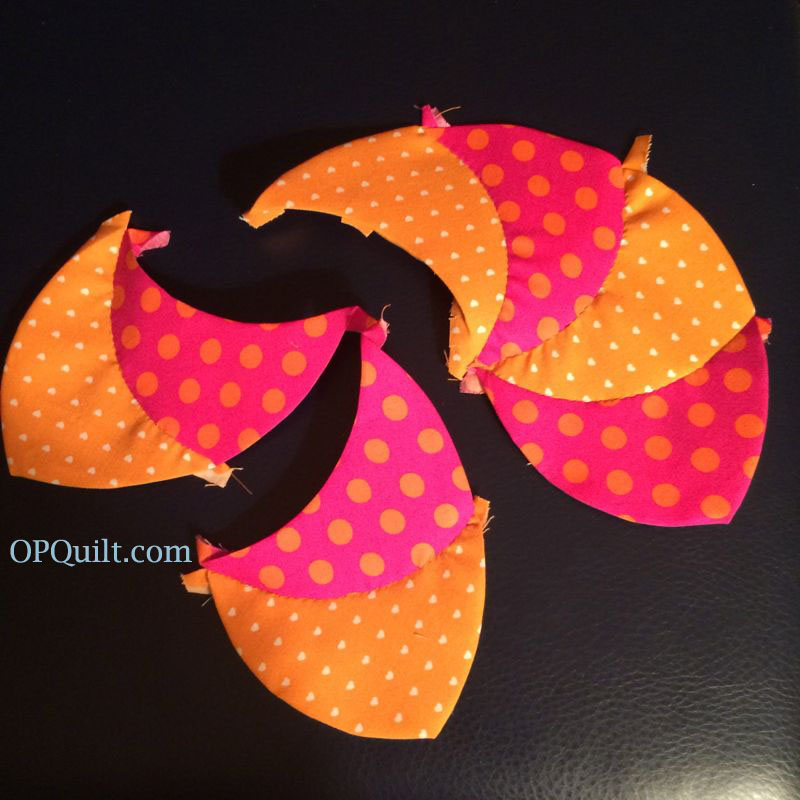
Once you get the sets of two done (making sure you are consistent as to which side the dark color is on), sew the twofers into a set of four, as above. Repeat.Circles 14_10whoops

Then you’ll have two half-circles, which should look like they fit.  Keep going.Circles 14_11alltogether

Now . . . finish sewing it together.

Circles 14_12inner points

Now the points.  Curves against curves–these babies just seem to be opposites today.  Again, start at one tip and move along to the other, letting the piece cup into your hand in an arch as you go.  Circles 14_13hook together

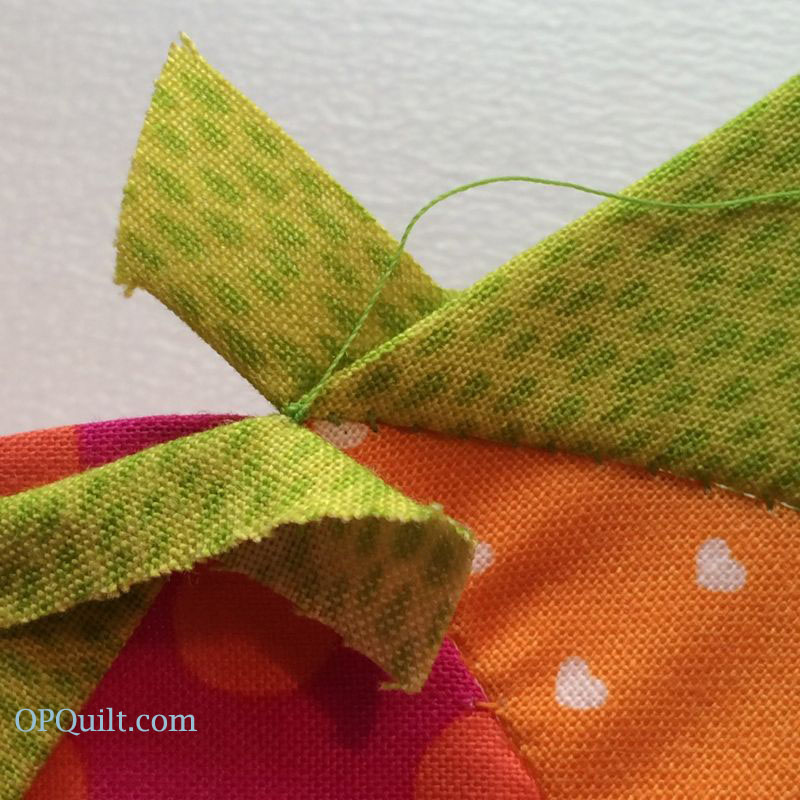
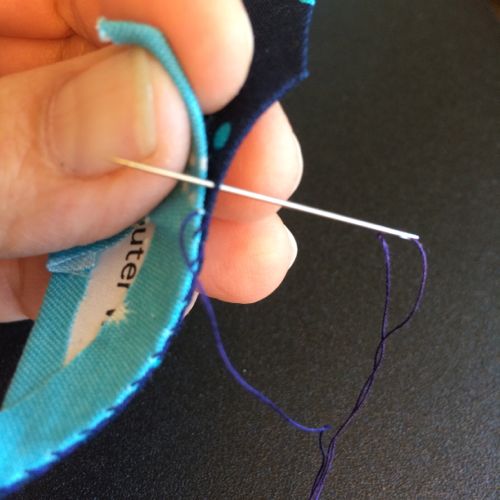
I always like to hook my pieces together, so up above, I’m taking a stitch or two to nail those green points together before I start sewing the next one on.  I think it gives the block some inner support once all the paper is gone.

Circles 14_14before pressing

Points on.  Now, for those of you who believe that fabric is the same as paper, you are going to be freaked out by the little puckers and pfhlttts you see in the photo above.  But here’s the truth: fabric is NOT paper, and it will move and shift and make you worry until you take out the paper at the end and give it a little bit of steam and the fabric settles into itself and you breathe again.

Circles 14_15 back

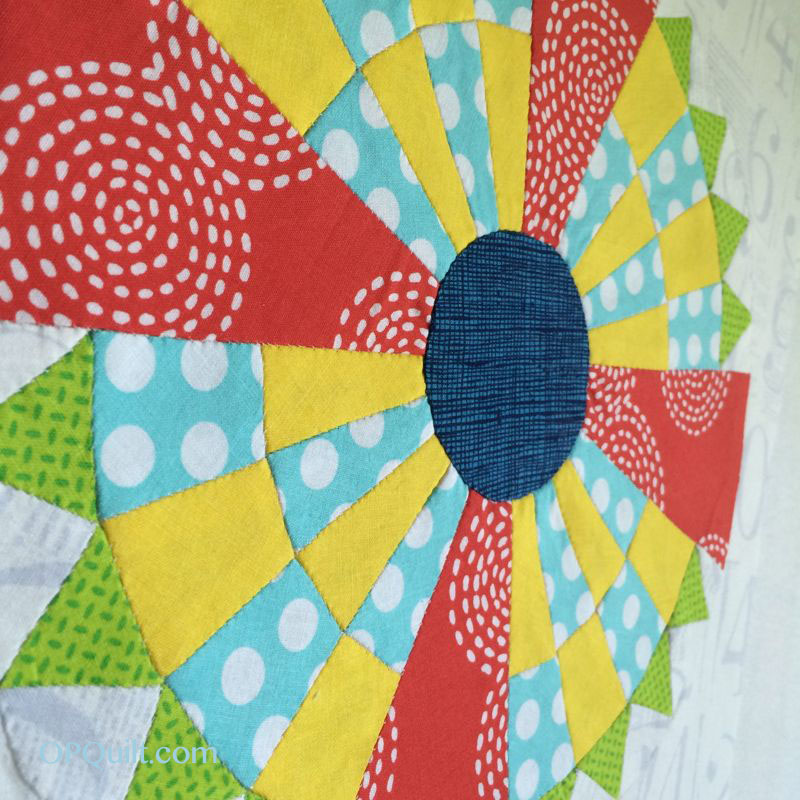
Beauty Shot, showing how pretty all those little seams look.Circles 14_15afterpressing

Okay, I pressed it with the paper in.  Still a few puckers and pfhlttts, right?  That’s why we make quilts–once you get this thing over batting and get stitching on it, you won’t even see them.

Circles 14_16hollow up

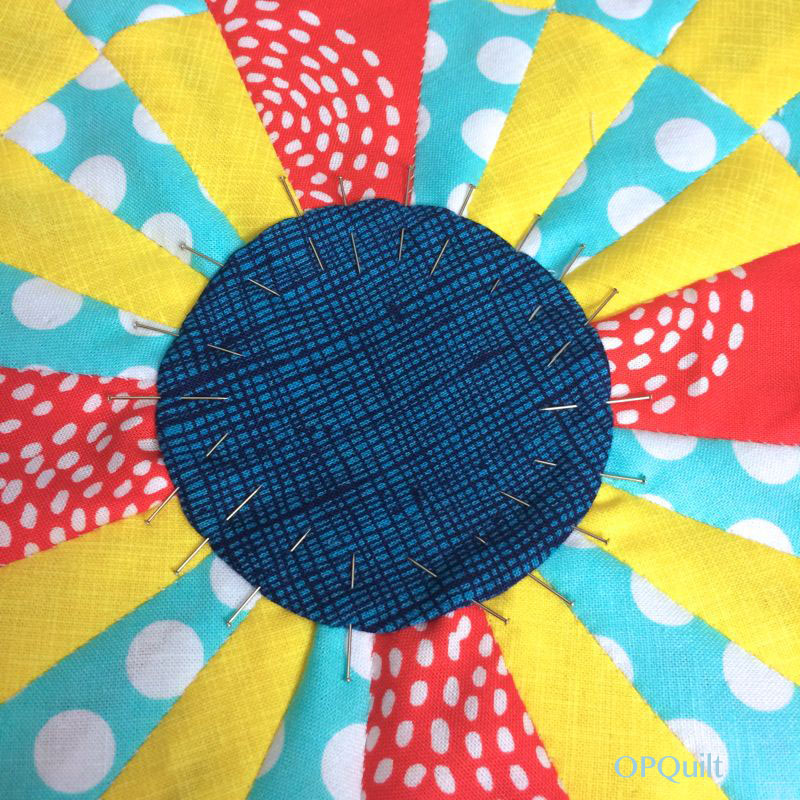
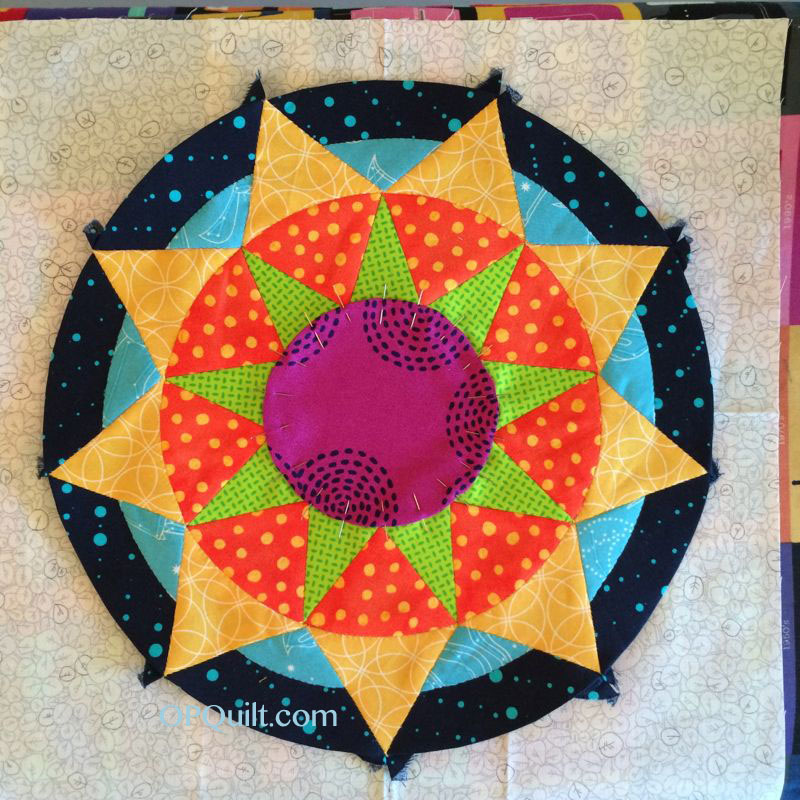
Stitch on the outer wedges, then remove the papers from the green points and the swirls and it’s Decision Time. Hollows up? (above) or Points up? (below)Circles 14_17point up Circles 14_18background fabric

Cut a 14 1/2″ square of background fabric, fold it in fourths, and press in a registration mark so you can get your circle placed in the center.
Circles 14_19pinned for applique
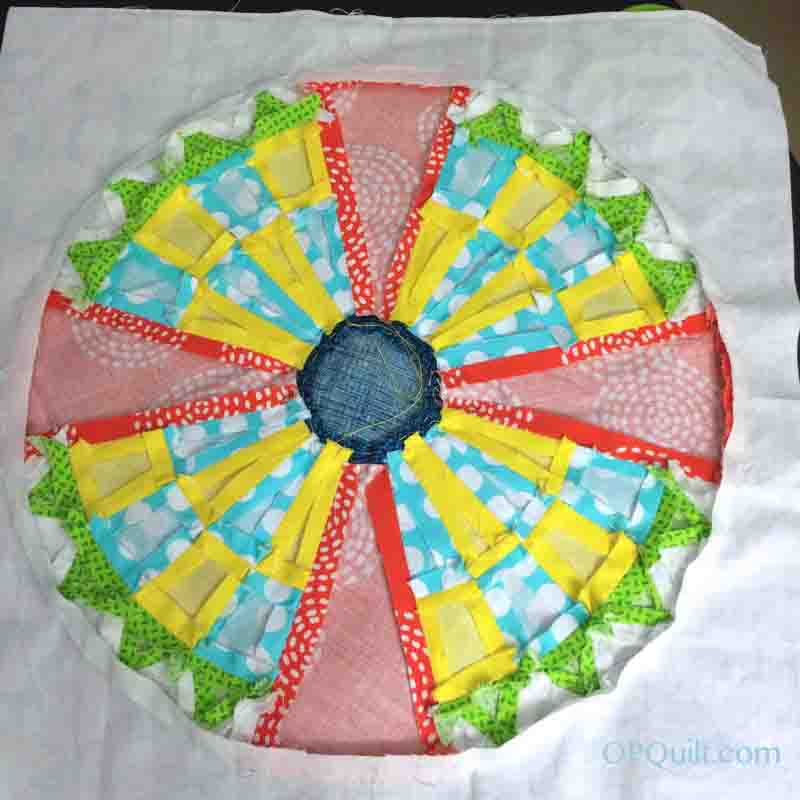
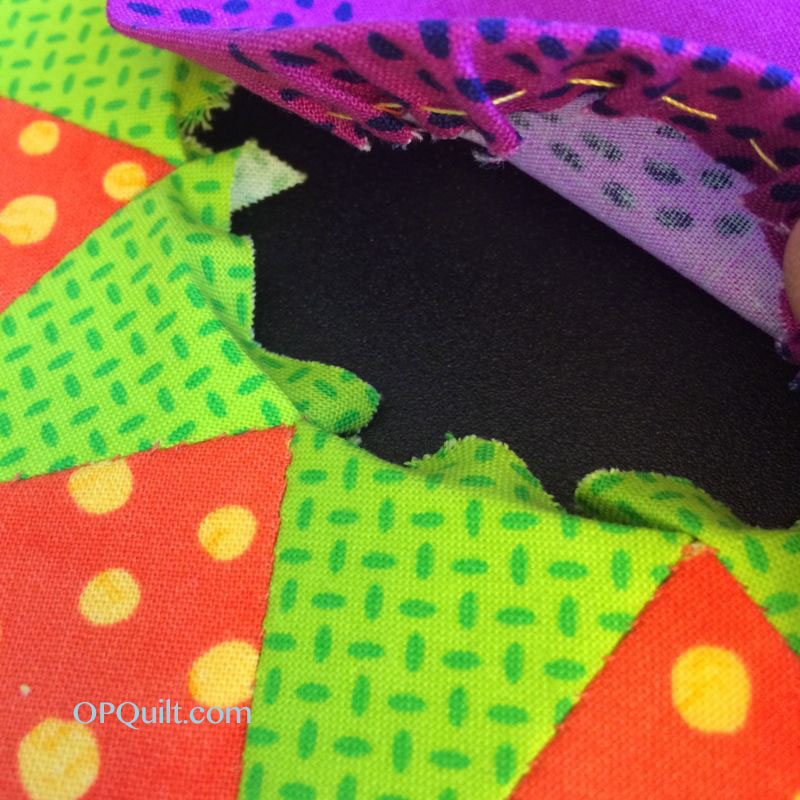
Pin the circle down, and appliqué it onto the background, tucking in the points as you go.  Flip it over, and cut out the back 1/4′ away from your hand-stitching line.  Remove all the remaining papers, then give it a good press on a padded ironing board, face down, then face up.  Let it cool, and admire!

Circle Block 14_OPQuilt

2c_Fifteen Circles

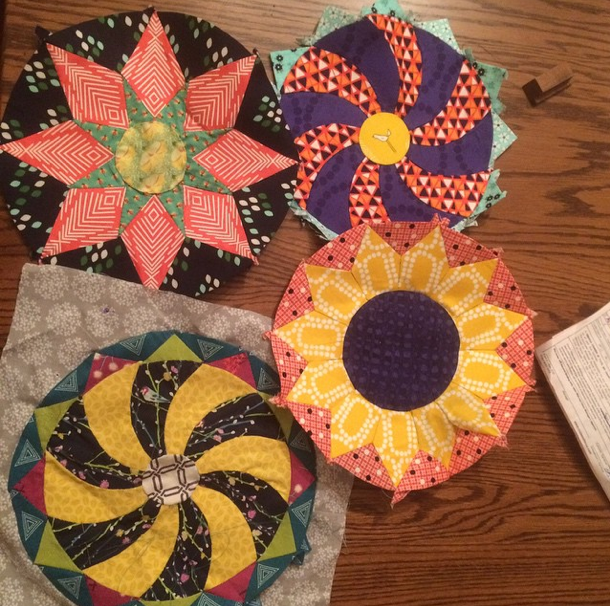
Okay, this should give you encouragement.  While you’ve seen all of the blocks in the Shine: A Circles Quilt post, I still think they are look fun  to look at like this, all together.  Now I think you can see about how the fabric choices up to this point dictate what I can and can’t throw in–and that’s okay with me.  Only two more patterns to go!!  The tutorial for Number Fifteen will be released September 1st, or, if you can’t wait. . . you know where to find them.

EPP · Shine: The Circles Quilt

Shine: The Circles Quilt

Shine-waving

Shine: The Circles Quilt
66″ square
First block started June 2014 • Top finished June 2015

I’ve finished my quilt top and am happy to release it into the world today.  I started sewing these English Paper Piecing patterns after I’d finished Kaleidoscope and needed a new hand project.  I was also sick of straight lines, and though I’d do some circles.  Those of you who have followed along know that I took a lot of inspiration for the circles from a church my husband and I had visited while traveling in Slovenia, the art finding its way into fabric.

Shine_Quilt Top Final800

I named it Shine because of all those circles, those suns, those compass points, radiating out from the quilt.  I could see this all done up in solids, too.  I’ve seen a few of your starting your project.  Please tag me on IG (occasionalpiecequilt) or drop me an email with a photo so I can see what you’ve begun.

I’ve now completed the instructions for this quilt, and have it available for purchase in my PayHip shop, listed as Shine: Circles Quilt Finishing Instructions, so you can finish off your quilt.

The last four circles — numbers 13 to 16 — are also available as a PDF download pattern: Final Four Blocks from Shine, but because the tutorials are image-heavy, I’ve kept the instructions for the circles on the blog.  I’ve loved creating these and sharing them for free, so I hope you’ve enjoyed grabbing them and making them.

Shine Sashing inspiration

Where did I get the inspiration for the finishing?  One day when I was walking around San Diego, I looked up and saw the facade of the building and thought, aha! — those crosses with circles would be perfect in between my circles.  I ended up leaving off the circles as my quilt had a lot going on , but your quilt may be different, so you decide (the option is in the pattern).

Zagreb doorway design churchAnd the border?  I started here, in this archway from the church in Slovenia, with those triangles.  But again, I wanted my circles — and all that handwork — to stand out, so I simplified it with trapezoidal pieces in between the triangles.

Refer to the main SHINE: The Circles Quilt page, for links to each block.

Thanks for all your support and EPP love while I’ve been working on this project. Happy Piecing!

EPP · Shine: The Circles Quilt

Circles Block #12–EPP Sew-A-Long

Circles EPP ButtonCircle Block #12_OPQuiltNine-pointed Compass Rose Block

This is the twelfth block in a series of Circles Blocks.  Why circles?  Mainly because I had done some English Paper-Pieced projects and I was sick of straight lines.  And hexies, although I quite enjoy them both.  The other eleven blocks are available above, under the tab Shine: The Circles Quilt EPP.

Sometimes the inspiration in this series has come from other sources, but this one came out of my head.  And a creative mistake I made when designing another circle, yielding a circle has NINE points, whereas most any other circle you find in the world is divided up into an even number of points.  I liked it and went with it.

shine-rwb-block_12

The free patterns are now returning (Red, White & Blue version is above).  Again, I request that you not distribute them, but send people here to this website to get them.  Click to download a PDF file: 

SHINE Block 12 pattern_opquilt

Please remember to set your printer settings to 100% and check the little scale square included on the pattern.  It should measure 1″ in size. Illustrations below are with the OLD version of the pattern, so it may vary from what’s included now.

This is an easy block to sew, I think.

Circles 12_1 OPQuilt

Fabric auditioning.  This one was pretty straight forward, without any substitutions along the line.

Circles 12_2 OPQuilt

I cut out all the pieces, glue-basted them on (see earlier Circles Blocks for tip and tricks for this series).

Circles 12_3 OPQuilt

I like to print out a picture of my circle, gather the threads I’ll use, and collect everything into a ziploc baggie for easy toting.

Circles 12_4 OPQuilt

When hand sewing the curves, it’s okay to let the pieces curve in your hand.

Circles 12_5 OPQuilt

Step one: Sew the smaller “sky” piece (light blue) to the larger “sky” piece (dark blue).

Step two: Stitch the points and wedges together in groups of two (and one three) each, as shown above.

Circles 12_6 OPQuilt

Step Three: Sew the bright orange triangle points to the smaller green triangle points, in groups of two or three.

Step Four: Attach these to a corresponding yellow triangle/sky combo.

Circles 12_7 OPQuilt

Step Five: Start stitching the units together, however, not like I did above.  Keep track of where the orange/yellow units go, so they all mesh together.  It might be helpful if you lay out half of the circle when you start putting the units together, just to keep track.

Remember: I make the mistakes so you don’t have to.  (Although you can make new ones if you want.)

Circles 12_9 OPQuilt

Since EPPing center circles and I don’t get along, I appliqué them all now.  Fluff out the seam allowances on the green so you can appliqué on the large center circle. (I should have thought this one ahead.  Okay.  A new mistake.)

Remove all the papers except those at the outer edge in the dark blue (you’ll need them in the next part when you put the circle onto its background).

Circles 12_10 Point Up

This time, I pinned on the center circle first, then auditioned it on the background, a square cut to 14 1/2.”  Yes, this will give you a little extra room around the edges, handy for when you decide to finish this thing.  Fold the background in fourths, iron a bit of a crease, then align the circle with those creases.  Usually this is easy, but since this is a nine-point star, you may want to measure in from each edge to get it evenly spaced on your background..

Do you want point up on the upper edge (above), or. . . valley up (below)?

Circles 12_10a Valley Up

Yeah, okay.  You know I already went point up.

Stitch down the circle to the background, folding in the point areas as you come to them to make a smooth line.  Trim away the background, one-fourth inch away from the appliqué stitching line.

Then appliqué on that center circle.  I also like to trim away fly-away seam allowances, especially on those points, getting rid of unnecessary bulk.

Press lightly (face down on a padded ironing board is probably the best–use a light hand as they are hand-stitched and you don’t want to iron them into oblivion.  Any puckering that you see will be gone after quilting this thing, so no fretting unless you have pleats. . .

Double Sunflower

Here’s the drawing of the block in case you want to print it out for a guide.

Twelve Circle Blocks Shine.jpg
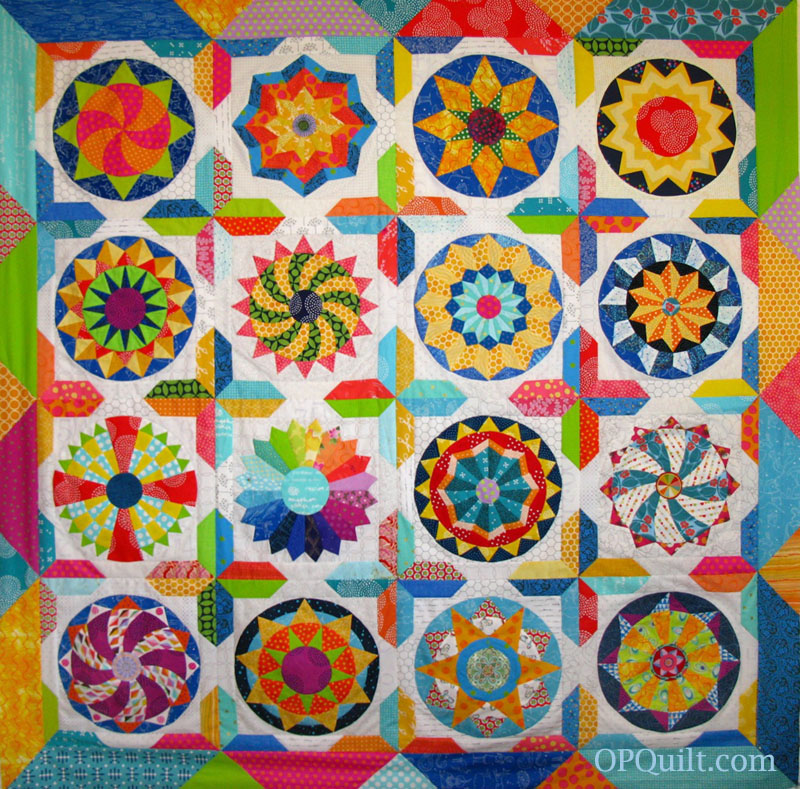
Here are all twelve circles.  You can either finish your quilt now, or keep going.

Shine Nine Extra Blocks

I have designed nine more blocks for SHINE, so you can pick and choose, and some of them are different than what is shown in my quilt.  They are available from my PayHip, my pattern site.

*Full Shine Quilt titled_final I also have a Finishing Pattern, which includes details on how to sew the inner and outer sashing, plus one bonus block. This has also been newly re-designed, but if you purchased it before, you should be able to just download a new version.

I hope you have enjoyed this series of circles as much as I’ve enjoyed creating and sewing them.  Please drop me a note as you make yours, sharing a photo or two.

IG circles blocks

Karen tagged me the other day on Instagram, and I about flipped over with happiness that someone had found these useful.  I love her colors and combos–so fun to see!

Mary_NeedledMomEPP

And here’s another from Mary who blogs at Needled Mom.  I love her colors, too–the pop of that lime in the red star points is terrific against the blues.

There are also Christmas block versions, made by my friend Linda.  You can see them in this post.

Happy Quilting!!

EPP · Quilts · Shine: The Circles Quilt

Circles Block #11–EPP Sew-A-Long

Circles EPP Button

Circle Block #11_OPQuilt

Circle #11: Vintage Test Pattern

This is the eleventh block in a series of twelve circle blocks, conceived and created when I needed another hand-sewing project, and wanted something beyond hexagons.  I had several sources of inspiration for this one:

Vintage TV Test Pattern

TP-WABCcolor

2012-Ma-June-044

1960s-Color-TP-v1As a child, I remember these “television test patterns” on the tube when I’d get up too early, before the station had signed on.  And I liked the Greek Cross reference, too, since many of these circles were designs taken from a Greek Orthodox Church in Ljubljana, Slovenia (from our vacation last year).  So I give credit to both sources of inspiration.

The free patterns are now returning (I did not do Red, White & Blue version of this block).  Again, I request that you not distribute them, but send people here to this website to get them.  Click to download a PDF file: 

SHINE Block 11 pattern_opquilt

Please remember to set your printer settings to 100% and check the little scale square included on the pattern.  It should measure 1″ in size. Illustrations below are with the OLD version of the pattern, so it may vary from what’s included now.

Circles Block Eleven

Here’s the circle drawn up in my quilt software.  I’ve taken to printing out this little color drawing and putting it in a small bag with all the glued-up pieces.  I like referring to the drawing as I work.

Circles 11_1Choosing Fabric

Picking fabrics–I always lay them out.  I jumped the gun and cut the cross-bars early, as I have another circle with that fabric and while I wanted these circles to be different from one another, I still wanted them to be able to have a conversation, so I repeat fabrics here and there.  When you cut out your center circle piece, cut it about 1/4″ bigger than it is.  See Circles #10 for some tips on the center circles.

Circles 11_2points layout

Once I got all the little points around the top of the circle printed out, I noticed that it would be hard to figure out where the “curve” of the triangle was, so I drew little arrows on every one of them.  As it turned out, I was okay about figuring out how they went, but if you think you might need the extra assist, do it now.

Circles 11_3glued points and raysKind of looks like a tomato with leaves.

Circles 11_4 pieces laid out

As is my habit, I lay out all the glued pieces for one final check before I start sewing them together.

IMG_4762

Then I loaded them all up in my little bag with the drawing and went outside to the patio to stitch, while listening to my audio book.

the-last-chinese-chef-cover

This time it was The Last Chinese Chef, and I was craving Chinese food by the time I finished listening to this.  But not Americanized Chinese food; I wanted the food in the book.

Circles 11_5 first units stitched

Stitch the upper row sections together, then the lower, then join them, keeping those seams aligned if at all possible.  Notice that I have not glued down the lower edges of the lower section to their papers (the innermost part of the circle), as I want to appliqué the center circle onto the piece, and it’s a lot harder if I’ve folded the edges and glued them down.

Circles 11_6 more bits laid out

Then, line up four green triangles with their curved edges at the bottom, and the points that go in-between them (three pieces). Lastly, lay the half-triangle on each side.  NOW sew them together.  You don’t want to be sewing on a full-triangle on those outer edges; ask me how I know.

Circles 11_7 crown stitched

When sewn together, it should look like this.  It’s now after dinner and I’m inside, still listening, but sewing by lamplight, instead of by sunlight.  I couldn’t stop listening to that book, nor stop sewing.  These get addicting.

Circles 11_8 crown onto first unit

Join a checkerboard unit to the triangles unit.

Circles 11_9 rays to first units

Then stitch one of those ray-sections to the checkboard units, making sure you are attaching it to the same side on all four units. In this photo you can clearly see the raw fabric edges of the lower checkerboard pieces.  Sew together two of these units, then sew those two units together to create a full circle.  At this point, you can remove all the papers, except any that are at that outer edge.  If the papers are hard to slip out because they are glued, use the tip of your small scissors or a stiletto to loosen the fabric (so you won’t have to tug and pull).

Cut a 14 1/2″ square of backing fabric.  Yes, it is bigger than the circle, but I want to make sure I have enough to work with when I figure out how I’m setting all these together.  (I have no clue at this point!)  Now it’s decision time.  This version, with the red rays arranged North-South-East-West, or. . .

Circles 11_10 OPQuilt

Circles 11_ 10aAlternate Circle. . . this version, with the rays arranged like a flower?  I marked the centers of my large backing square, and set down the circle, pinning it for appliqué.  I went with the traditional version (North-South-East-West).

Circles 11_11 OPQuilt

Cut away the backing fabric, leaving a 1/4″ seam allowance. I love these little Karen Kay Buckley scissors, as the tips have little teeth that grip the fabric, holding it while trimming even the smallest bit of fabric.

Circles 11_12 OPQuilt

Pin on, then appliqué the center circle.  See Block #10 for some appliqué tips.  I should have placed that “weave” pattern aligned straight up and down, but instead I just slapped it on.  As a result, I always want to tip my head to the side when looking at the center circle.  I’m sure no one else will notice (well, now you will) so I’m not redoing it.  Keeps it real, keeps it interesting.

Circles 11_13 OPQuilt

Remove all the papers, and admire your work.

Circles 11_14 OPQuilt

Circles All Eleven by Ironing BoardHere are they all are, lined up on an ironing board that is obviously used for other things than ironing.  (Anyone else have to clear off their ironing board in order to iron something?) I think they do play well together! I’m posting this circle block a wee bit early as we have our Quarterly Four-in-Art Reveal in two days, on May 1st.

4-in-art_3

I hope you’ll join me then for our little gallery of art quilts!