Blog Strolling · Creating · Quilts

Funnies

I spent most of yesterday–the Fourth of July quilting.  Pedal-to-the-metal type quilting.  Red-Pepper-Quilts-type quilting.  But first, I put in two tomato plants, some basil and some herbs.  That’s pretty funny to do it on the hottest day of the year, a full six weeks behind schedule.  But that’s because I vowed No Garden this year, given our usual crop of $60 tomatoes, an old joke on how much it costs to do home gardening.  The possum and raccoons are kind of ticked off at me for closing the kitchen this year, tipping over pots on the patio in search of the usual canteen.  So we tilled the soil a couple of days back and amended it today with Miracle Gro (I need some stuff called Miracle Quilt, as does the granny in the cartoon) and little green plants are wilting and wavering in the hot breeze.  I’m calling this a preparation-for-winter garden, with some summer enhancements.
More funnies are in how stiff a body can get while sitting quilting.  The foot hurts from up, down, poise and the shoulders ache, even though I’ve propped up my machine with two door stoppers at the back to guarantee a good angle.  So I have to take a break every once in a while–as the more elderly woman at our quilting bee once advised.  She had a timer strung around her neck, purchased after her doctor said to take a break every 30 minutes.  So we’d sit there at the table, quilting and chatting along when all of sudden we’d hear a bell, and she’d jump up and stride around our U-shape of tables, arms swinging high as her cropped hair all the while she encouraged us to “get off our duffs” and stretch.  More encouragement every thirty minutes until at last, by the end of the bee, we were in need of some stretching and allowed ourselves to be bullied into moving our duffs at least back and forth in place.

Five years later, I still think of her, and try to schedule a break from the machine to read Sunday’s leftover paper, get a drink of water, change the laundry, and yes–write a blog post.

Here’s a photo of the fireworks in black and white–a new twist on our traditional (4th of July) event.  They shoot off our fireworks on top of the local mountain–and every once in a while, like tonight, a rocket goes haywire and burns Mt. Rubidoux.  No worries, billions of fire trucks are there and are prepared with fire cannons, sirens and a little excitement.  We left our downtown viewing spot, winding our way home along all the clogged streets to our quiet house.  Much later we heard the cannons going off, and we watched the end of the show from our upstairs bedroom window, the lights flashing for the grand finale, with the thundering sounds arriving seconds later.  A  good 4th, this year, I think.

Quilts

WIP–Red/White Blocks, Etc.

It’s Work In Progress Wednesday!

Nothing fancy today–just the red/white squares for my mini-challenge.  Three are in, and I need to get these made and sent off to those who have already finished.  Thanks, ladies for meeting your August 1st deadline early!

My tip for the day occurred to me while I was trimming up bulky flying geese units for this block.  Sometimes on seam-heavy patches, if the ruler is sliding around a lot, leave part of your hand halfway-on and halfway off the ruler (my lower thumb, above) in order to anchor it better.  Then you can successfully trim up the unit.

And then there’s this. I got it back from CJ Designs (my quilter) as we’d worked out that she’d quilt some and I’d quilt some.  I’d been putting it off for a while because I didn’t quite know how to begin.  Yesterday I went to Leah Day’s Free Motion Quilting Project website, looked at some of her designs and clicked on her videos of how to make those designs happen.

This one’s called Curvy Key.

I like this one too: Overlapping Arches.

But I woke up this morning thinking about this one: Lollypop Chain.  If you have never been to Leah’s site, click on the Lollypop Chain link and watch her quilt up her sample.  She is amazing (and so is her quilting).  So maybe I’ll try this one.  Ruth McDowell suggested taking some transparent paper (doctor’s examining table paper, architect paper, or those waxy deli squares you can buy that they use to grab things with) to try out the quilting.

Draw out your design on the paper and place it over the area you want to quilt.  This does two things: let’s you “see” the quilting on your quilt before you decide, and also puts it into your muscle memory, so when you do start to quilt, it’s not completely foreign.  It also wouldn’t hurt to first try the design on a scrap quilt sandwich before you begin on your quilt.

Now I’m off to go look around at what you all have been doing!

Quilts

Munich’s Garden Gate

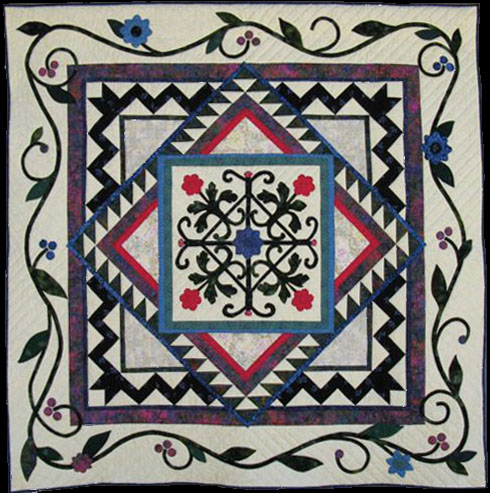
Because the experts always say to have a better chance of accomplishing a goal, I have started thinking each week what I want to finish.  I realized that this week, because my red fabric for my Red/White Challenge hadn’t arrived (my planned finishing item), I would have to think of something else.  It was this quilt.

We went to Munich in 2004, and I shot 300 photos, digitally.  And some time in April 2005, I erased them all.  (!)

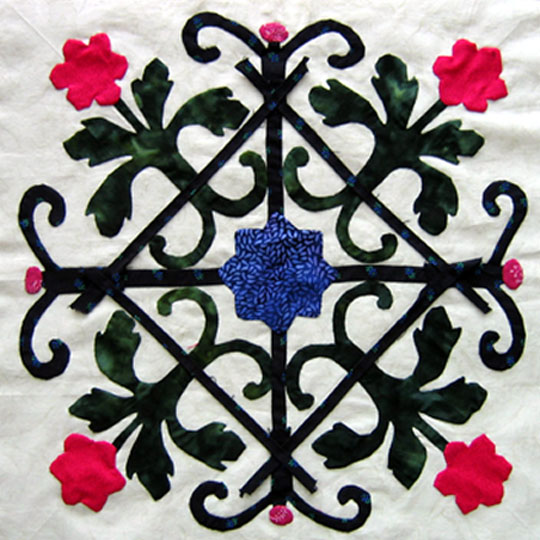
But I had already planned to use this photo for the center for a project I was working on with my guild: a medallion quilt, so had moved it to my desktop.  It’s the only remaining image. I carried on, blowing it up, figuring out the flowers and what colors I wanted them, as I had carried home a sack of scraps from a small fabric shop in Munich that made dirndls for Oktoberfest.  We had been there shortly after that season, and they sold me the bag for about 25 bucks.  Many of the fabrics in this quilt are from Munich.

Here’s the central medallion, almost finished.  Then the hard work of figuring out the borders–always a dance.  I invested in a couple of used books, and slowly, border by border, I built the quilt.  We were on sabbatical in Washington, DC at the time, and I was able to finish my quilt top before we left to return home; I quilted the top all the way across America, finding more thread in Albuquerque when I ran out.

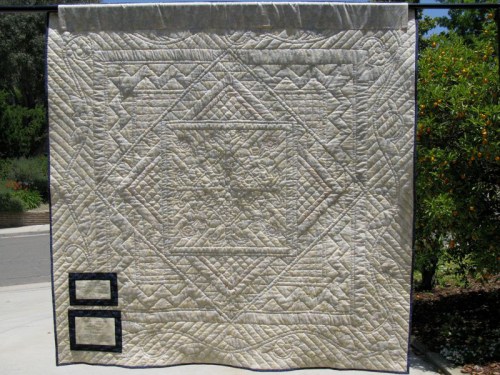
It sat, quilted, for a while and when I came across it again, I decided to add more quilting.  Back at it with the blue painters’ masking tape until I finally got fed up with it all and started drawing light lines of pencil on the top.  I finished that quilting, then it sat again, until I started the photography project.  I dug into the stash, found the binding, made the label and finished stitching around it in time for this week’s Finishing School Friday.  I HAD to have something finished!

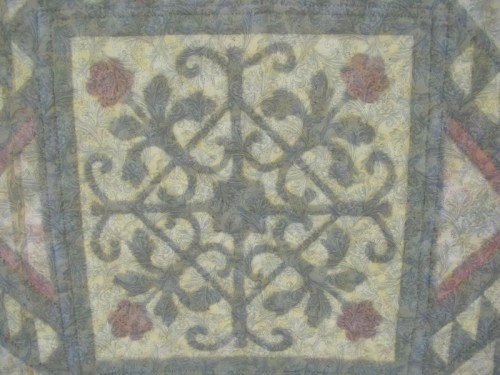
When I went out to photograph it, the wind was moving the quilt back and forth, and it flicked into the sun, creating this translucent effect.

All the hand quilting–think of it as if every state along I-40 has a bit of itself in this quilt!

The labels, all stitched down.

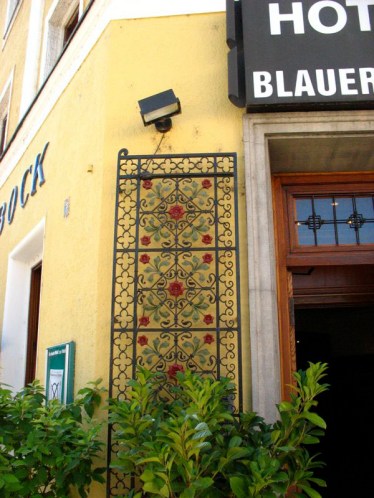
Five years later, we went back to Munich, and this time I didn’t erase all my photos (back it up, people, back them ALL up!).  I didn’t ever find the original gate, but I did see this grillwork alongside a building near the dirndl shop, near the beer garden downtown, with the same central motif.  It felt like I was seeing an old friend.

Quilts

Quilt Label

What am I working on today? Quilt Labels!

I used to be very diligent about getting labels on all my quilts, but somewhere between the last child getting off to college and grad school and beginning teaching, I sort of forgot to keep doing this.  So this summer, one of my Works In Progress is to get labels on all my quilts.  I thought I’d share with you my favorite method.  Come back Friday for Finishing School Friday to see what I’ve completed this week.

I’m completely in love with Jaybird’s labels, printed up at Spoonflower, but it you want a personalized label for each quilt, you’ll have to make each one individually.  There are tons of ways to do this, but here’s one I use and am comfortable with (because it’s easy). The printer method works best for wallhangings that won’t be washed a lot.  I have an Epson inkjet, and have done test samples on both machines about what happens to the fabric in the laundry. The inkjet holds up better to washing, if you are not going to go to the trouble of using BubbleJet Set on your fabric.  If you really want the wording on the label to stick around on a quilt that will be washed a lot, I think that the Bubble Jet is mandatory.

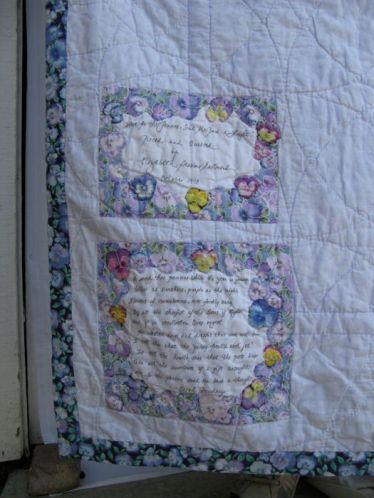
Or, get out your pigma pens and WRITE the label.  I’ve done the latter several times.  This was a label for a quilt by our little quilting group: The Good Heart Quilters.

Here’s a more elaborate one (the lower part is a poem) which I bordered, then cut out the pansies and appliqued them around the border.  Both of these quilts have been washed a lot of times and the print is still fine and readable.  It’s just the photographer who is shaky!

But for the printed label, write up what you want on your label in a word processing program on your computer.  My basic items are the name of the quilt, who made it and quilted it (sometimes there are different quilters and it’s only fair they should get some credit).  Then after that it varies.  I generally always put the date I finished and sometimes I put the date I began.  I learned also that having the size of the quilt was handy for when I wanted to enter it into quilt shows.  Sometimes I add the name of the city (I’ve moved a couple of times) as it all shows some of the quilt’s history. I like to write a little blurb of one or two lines about the quilt, but sometimes this blurb gets out of hand.  Then I’ll call it History of the The Quilt and break it out onto a separate label.

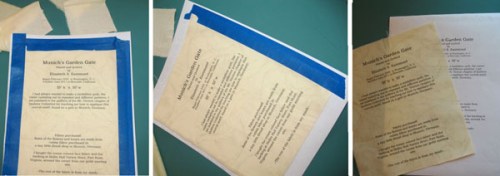
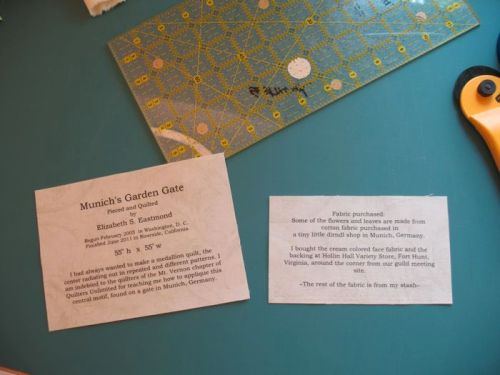
At any rate, when you finish that, print this out on your printer using regular paper (to check spelling, placement, etc.).  Cut a piece of fabric the size of your words, back it with freezer paper and place it right on that paper you just printed out.  Tape it down on three sides with masking/painter’s tape (Picture 1).  Run it through your printer, then peel off the tape (Picture 2).  You now have a printed label (Picture 3).

To “set” the label, get out a few more sheets of plain paper, lay over the top and press, with a bit of steam.  I do this several times with several sheets of paper until I see that there is no transfer of ink onto the blank paper.  I’m still cautious after that about laying my iron down on the laserjet printing, as it’s kind of “plastic-y” and you can melt it with a hot iron.

Trim up the label.  Use a gridded ruler to keep  the edges square to the printing.  On the label, I keep a 3/4″ margin all the way around.  On the History bit, I use a 1/2″ margin.

Trimmed.

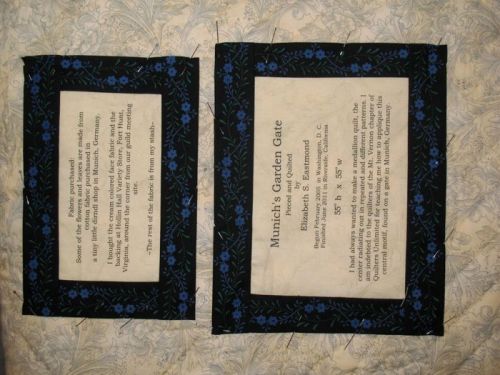
 I like to border my labels.  On the left, sewn.  On the right, sewn and ironed into shape.  Trim off extra fabric, leaving a 1/4″ inch edge to be ironed under.

Here it is pinned onto the quilt.  I like to place my labels so that, when facing the quilt and if the right hand lower corner was picked up, you would see the label.

Here’s one of my quilts from the back (I used a tea towel from France as the backing) and you can see the label placement. Here are some more examples:

I don’t know if you can tell, but I made a little flap (the upside-down people) for this quilt label.  When you enter a quilt show they like you to cover up your name (for judging purposes).

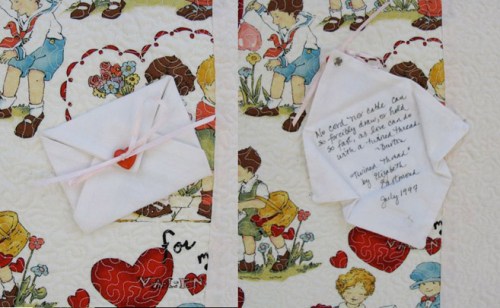
This was one of my favorite labels: an envelope on the back of the Valentine’s quilt about hearts being drawn together like “Twined Threads.”  And that was the name I gave to the quilt. A snap keeps the envelope shut.

And that’s what I’ve been working on–Quilt Labels! Click *here* to see what everyone else is doing.