

Circle #6: Star of Wonder
(but stay tuned. . . another variation of Circle #6 is coming in a couple of days)
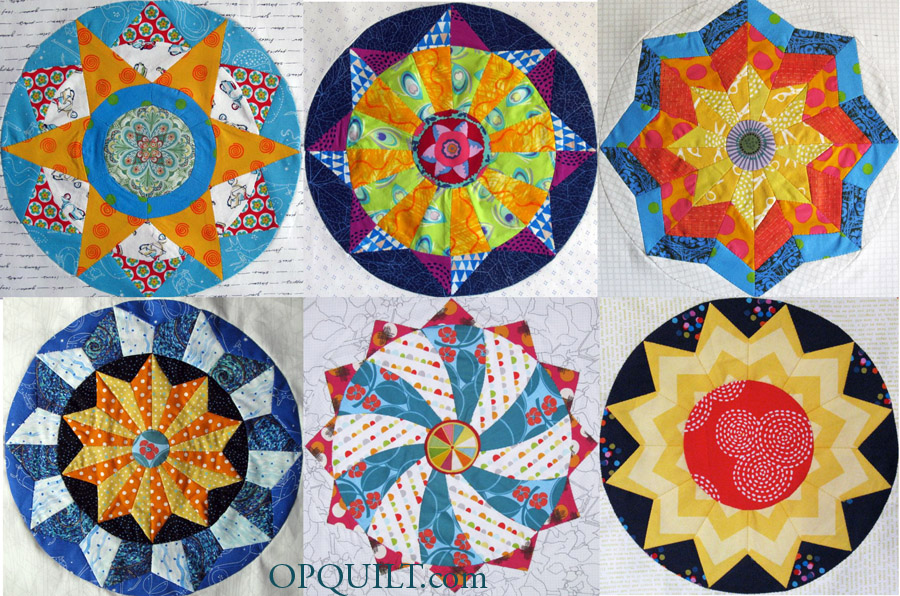
Welcome to my series of English-Paper Pieced Circles! I decided some time ago that I needed a new hand-work project for those night when you just want to sit around and stitch and watch TV or a movie. I liked circles, and hadn’t found any EPP versions, so decided to create my own. All my patterns are hand drawn, but they are free. I do test-make them to get rid of any quirks before I present them to you. I’ve already done five circles and this post gives you the sixth. Here they all are together:
This sixth circle, based on a six-pointed star, is all English Paper-Pieced, except that I do appliqué the larger circle onto the background square, as the results are better that way. And since this center circle does not need go over a series of joining seams, it can be paper-pieced right into the circle. I can’t remember where my inspiration for this one came from, but I do like that secondary star pattern that forms in-between the golden star points. The center of this star is suited to a medallion-type piece of fabric, so drag out those large prints and see which one works.

As usual, these blocks start with a hand-drawn circle, and then I trace off the patterns. And then I realize that it would be better if I had one more of THAT star point and one less of THIS arc.
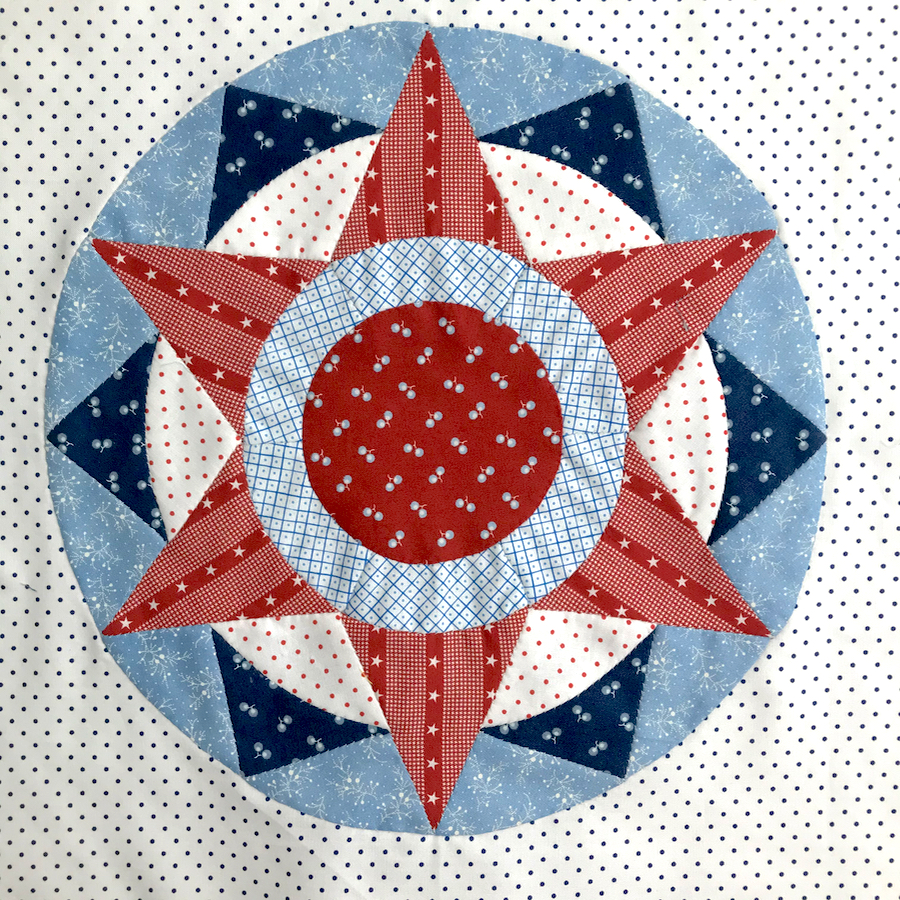
The free patterns are now returning (Red, White & Blue version is above). I request that you not distribute them, but send people here to this website to get them. Click to download a PDF file:
Please remember to set your printer settings to 100% and check the little scale square included on the pattern. It should measure 1″ in size. Illustrations below are with the OLD version of the pattern, so it may vary from what’s included now.
This time I didn’t staple the wad of three sheets together, as I used to in the past, but instead cut more carefully around each piece. Tedious, but they go together better at the end, I think.
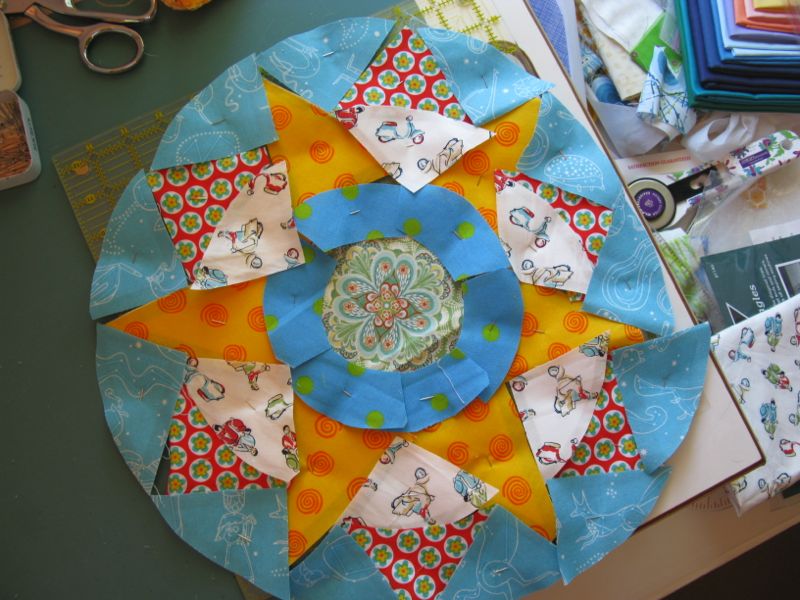
I’ve pinned the pieces on, cut around them, then I lay them out to check for color/pattern. I liked it so I moved forward.

I did this circle in three different states at five different houses and a hospital room. EPP travels very well. Here I have stitched the ring pieces together, sometimes attaching them to the circle as I go. Now I’m starting to attach the star points. I think it looks like a clown hat at this juncture.

I try all the points on, lining up with the seams in the blue-and-green polka-dotted ring. I stitched them on, one by one and set it aside.

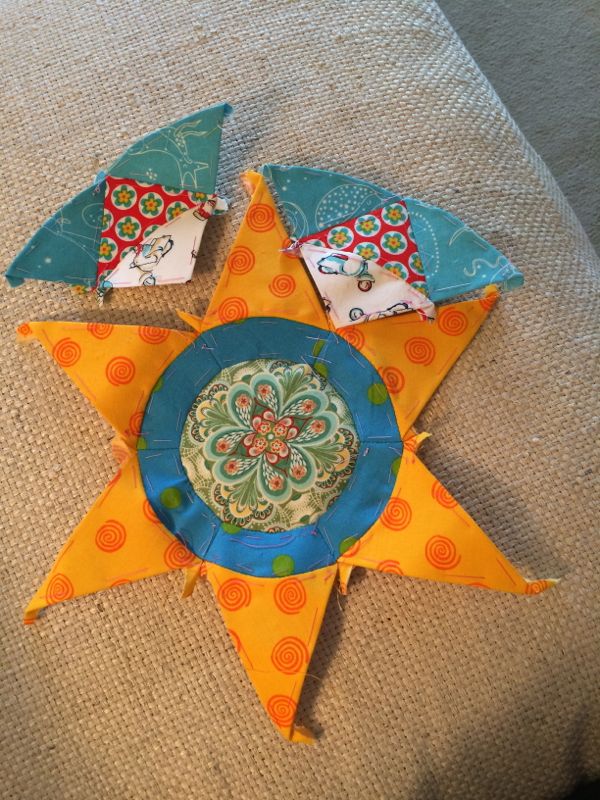
Next is stitching the inner sections together. First join the upper small star point (red) to the lower wedge (white). Then attach one (blue) arc to the side, then the other. The first time I tried this I got all confused, but remember to lay the longer flat side of the arc along the small star point and you should be fine.
Trying this out.
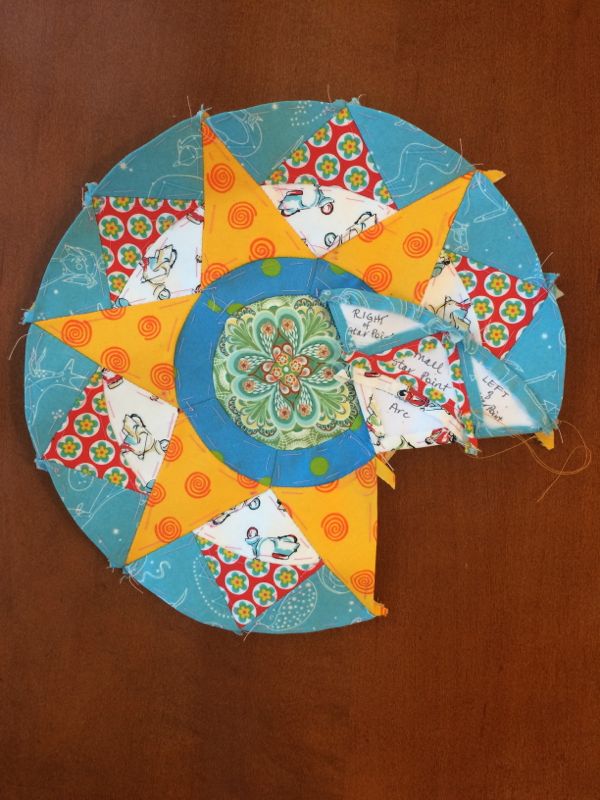
I took this photo to show how I attach those inner wedges: first one side, a stitch at the point, then the other side. I also take a stitch at the top of the blue arcs, holding one to the next.
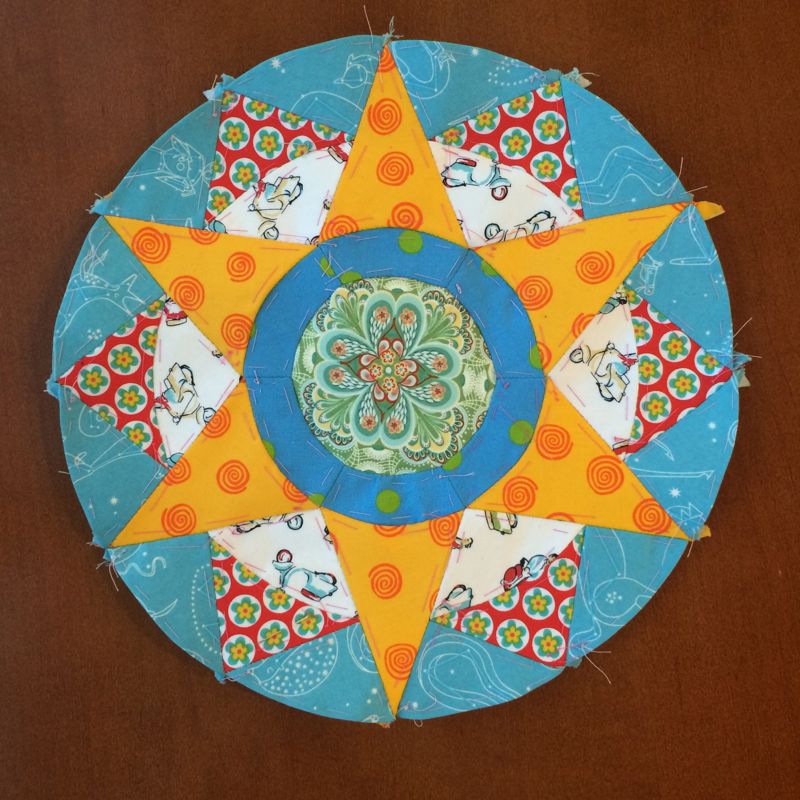
Ta-DONE!
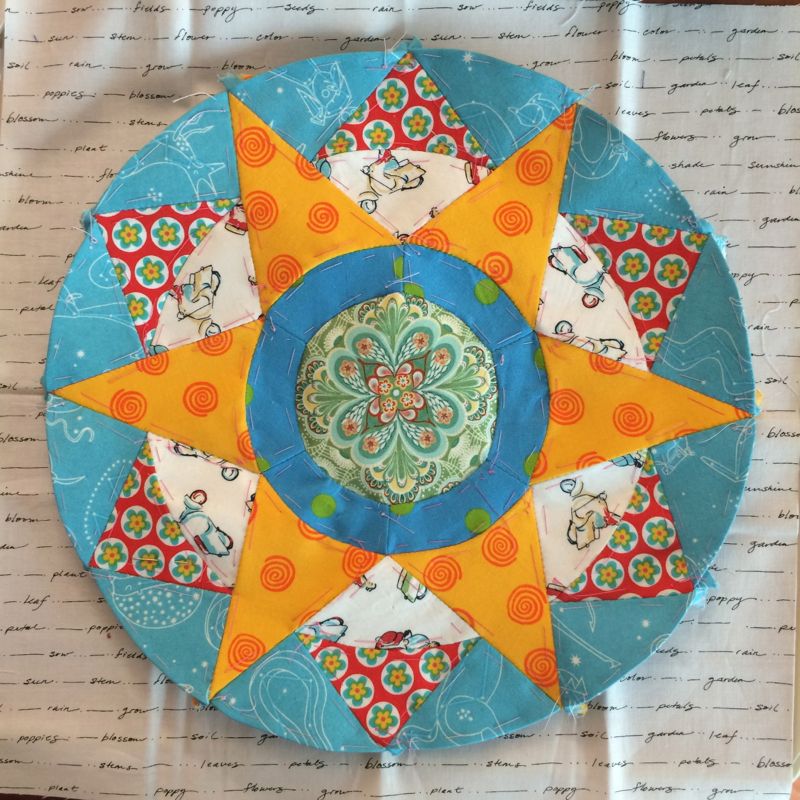
I lay the circle on my 14 1/2″ square of background fabric. I’m visiting a brother-in-law in the hospital at this point and am doing this on his bedside table while he is sleeping, so instead of being able to iron four neat creases into the background fabric to help guide me for placement (as before), I finger-pressed in what I could and eyeballed the rest. As you’ve noticed, there is a bit of extra fabric all around the circle, so I’ll be able to correct any missteps later. It was at this point I realized that my center medallion was not centered on its axis. It was kind of keeling on its side, pointing a bit to the Northwest. AAAGH. I still appliquéd the circle down and checked my suspicion with my husband when I got home from traveling. Yep. It’s a re-do.

The circle without its center. I just snipped loose the stitching (it’s amazing how easy it was) and centered it again. This time I loosely (about a stitch per seam) basted in the center and checked it often as I did the regular EPP stitch. I did this step as we drove to see our grandson at his eighth birthday. Circles on the move, I say.
So here it is. . . all done, and ready to go into the quilt. I made this circle up in a different coloration and will show it to you at the next post.
But here are the first six, arranged digitally. I hope you have been able to keep up with our progress, but these patterns will be here for a while if you haven’t.
Now come back for the next post, where I show a completely different look to this circle.
˚˚˚˚˚˚˚˚˚˚˚˚˚˚˚˚˚˚˚˚˚˚˚˚˚˚
Also linking up to Live A Colorful Life’s Choose Your Own Block-Along.
˚˚˚˚˚˚˚˚˚˚˚˚˚˚˚˚˚˚˚˚˚˚˚˚˚˚

Discover more from OccasionalPiece--Quilt!
Subscribe to get the latest posts sent to your email.

Beautiful. I recognize that red fabric with the turquoise and yellow flowers inside the white circles. It’s in my granddaughters’ quilts!
Thank you for another lovely block. The instructions are great for someone like me…I’ve only used EPP for hexagons up until now.
This is a beauty Elizabeth! I admire your tenacity in stitching your way around the country! It is a well-travelled Circle 6! And pretty too!
I just love these circles! Haven’t started one yet and just realized they will be a great project for the “cross country tour”. You are such a great teacher to share these – thank you!!!
I’m thinkin’ that Circles block #1 is still my fave…..and would be perfect in red/white (like a piece of Christmas candy!). I am in need of hand work pieces in the upcoming days and these would be quite nice!!!!!!! Hugs……………..
Lively. Bold. Beautiful. I think you got all the creative genes in our family.
Your blocks are looking wonderful! You mentioned fancy software…I have purchased three now and can’t find time to learn any of them! That’s on my to do list for this winter! I preferred paper and pencil as you’ve done for my latest design. Nothing wrong with doing things the old fashioned way now and then!
Another GREAT one. I love seeing them all together like that.
I’m really enjoying this series of EPP. Nice to see the creativity in your set of blocks. I am working on a bag of 30s fabric hexies that a quilter had cut out but not gotten sewn together. My first foray into EPP, and I love the portability of it. Haven’t decided what my setting will be, but since it is a slow process, have lots of time to think about it. Thanks for sharing your patterns.
Another great block. They look fabulous together! Thanks for sharing your work with us!
Gorgeous! I really think you should consider writing a book that features these. I haven’t seen a book on circle paper piecing.
These are so beautiful! I’m so impressed with your work.
So inspiring! Still, how do you sew the curves? I’ve only seen straight-line epp, where the two pieces are held right-sides-together, edges lined up.
I like the idea of this project for evenings watching TV with my husband.
Gosh. All these designs are so beautiful. And so intricate! You’re blowing me away!
beautiful and intricate blocks.!
where’s the November home decs?
Hi ,you have the #5 and not# 6 pattern on the website . Nelli Sent from my iPad
>
Elizabeth, first want to tell you how much fun I find these circle blocks. Haven’t done them yet, but they are on my “to try” list. One question. Do you use needle turn applique when you attach the circle to the background? On this last block, the points seem to go right to the edge with no turn under allowance. Is it just the photo? Second: have you ever tried to piece the circle into the background. I learned from Ruth McDowell how to machine piece circles into holes in the background fabric, and it seems it would work with this EPP approach, too. You wouldn’t have to support the entire background with freezer paper — just a wide enough ring around the circle to give enough stability for the piecing. Just thoughts that have occurred to me tonight, FWIW.
They are all so nice I have a hard time deciding which is my favorite. Maybe someday I’ll motivate for EPP.