
STEP TWO: CUT!!
Happy March 13th! My friend Leisa and I got busy this month, cutting up our fabrics so we could show you this step. I’ve made some alterations to our Master Plan (below). If you’re not making this quilt–see you at the next post!

Yep, we got a little goofy on some of the cutting, but don’t worry! We made it through, and so can you. Remember that Leisa and I are doing only NINE blocks of the original twenty as we want wall-sized quilts, so if you are making the big one, your numbers and cutting time will increase (I know that’s a duh.)
HOWEVER, at the end of this post, I’ve included a smallerized version of this quilt, thanks to Mary Burton, one of my readers, who often “shrinks down” quilt patterns in order to make the full compliment of blocks. So you can make a smaller quilt, by also making smaller blocks. More, later.
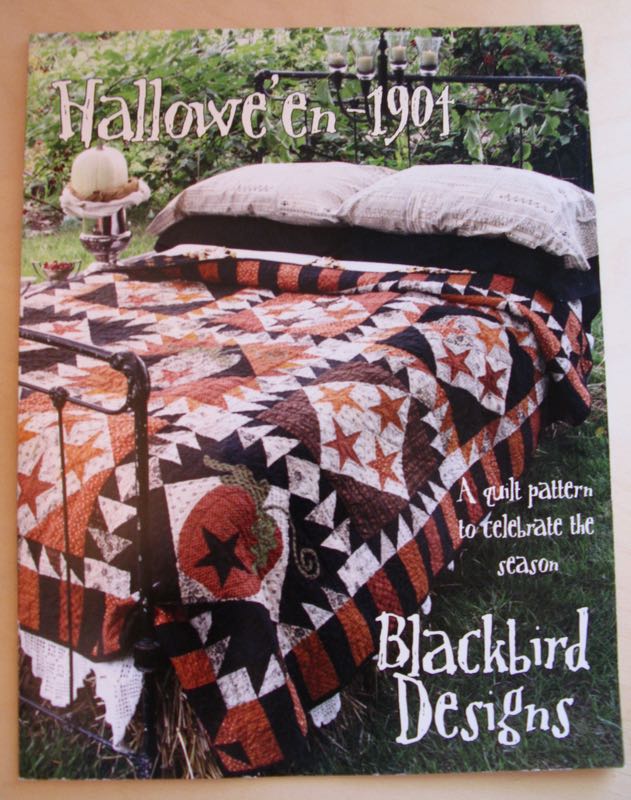
As a reminder, we are following this pattern by Blackbird Designs, so of necessity, to protect the pattern designers, I won’t show complete measurements. But where I’ve deviated or made up my own pattern, I’m happy to share.
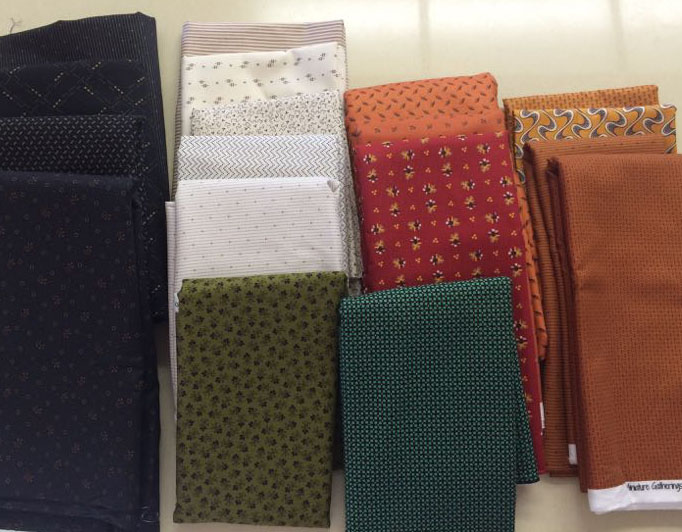
We started here. I didn’t have the pattern when we were buying, so we went a little overboard on some things, but amazingly, we ended up fairly on target for most of the fabrics. I would probably add another green, if I were doing it again. Download and print out the PDF of the cutting chart: Cutting Chart for Halloween Quilt
Here’s a part of it:

Across the top I identify the piece, then the color of the fabric and the number (#) of those pieces for one block. Then I added my column of number (#) for 9 blocks. You get to fill in your info on the last column. Keep reading. . . while you enjoy this wonderful quilt from Thelma, of Cupcakes ‘n Daisies:

As you look at YOUR chart, you’ll need to decide how many star blocks you want, how many appliqué blocks you’d like to make. Then, further subdivide your appliqué choices into how many pumpkins? how many cats? how many moons/whatever? The pattern includes the pumpkins, stars and moons, but for the cat, you’re on your own (that’s what we have Google Image for–just type in silhouette halloween cat). Thelma’s owl is referenced in *this* post. Leisa and I are making 5 star blocks, 1 cat-on-a-pumpkin block, 2 pumpkin blocks, and 1 moon block.
We are doing the 8-way method of making half-square triangle blocks (HST)–more on this in the next post–but for the size of HSTs we need to go around the outside edge, we need to cut 7″ squares. Since there are 24 HST around the outside of one large block, you’ll need three sets per block of these 8-way HSTs–three of a dark (orange or black) and three of a light (tan/off-white). I couldn’t decide ahead what I wanted where, so I planned to cut 27 of each (dark, light) and I’ll figure it out as I go along, but then I’m okay if I have to mix orange and black HST points around the outside. Refer to the chart. Quickly, here’s all that we cut:

Cut seven-inch squares on this step, half in light and half in dark (orange/black) fabrics.

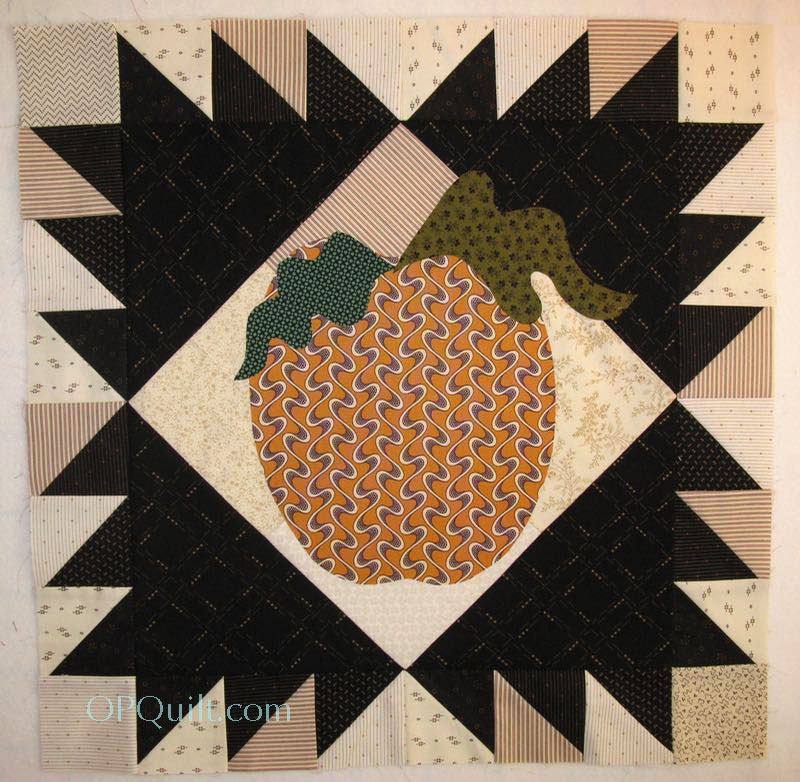
Then to make sure I was on track, I thought I’d better sew up one of these 8-way HST things and cut the triangles for the corners around the appliqué just to make sure it all worked. It does. I’ve put on the leaves on my pumpkin, but not the curlicue stem (that, and appliquéing them down will come later–I’m just testing). By the way, this block measures 19 1/2″ (finished)– just to compare it to Mary’s version of 9″ (her instruction sheet further down; keep reading).
ATTENTION: If you are going to appliqué down your stars onto the center of your background blocks, skip ahead to the next section. This next discussion (somewhat confusing until you start the actual construction, but I’ll do my best to explain it now) is for those who want to make wonky stars.
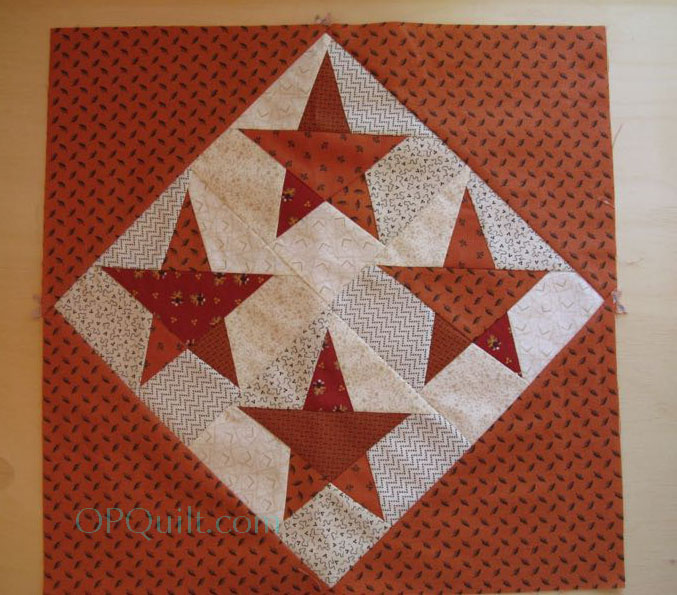
Let’s talk about the Wonky Stars. Here’s a sample (without the HSTs) to see how the fabrics are all placed around. There are four pieces for the star centers, and five pieces that make up the star backgrounds. Sew them together, trim and you have our block. 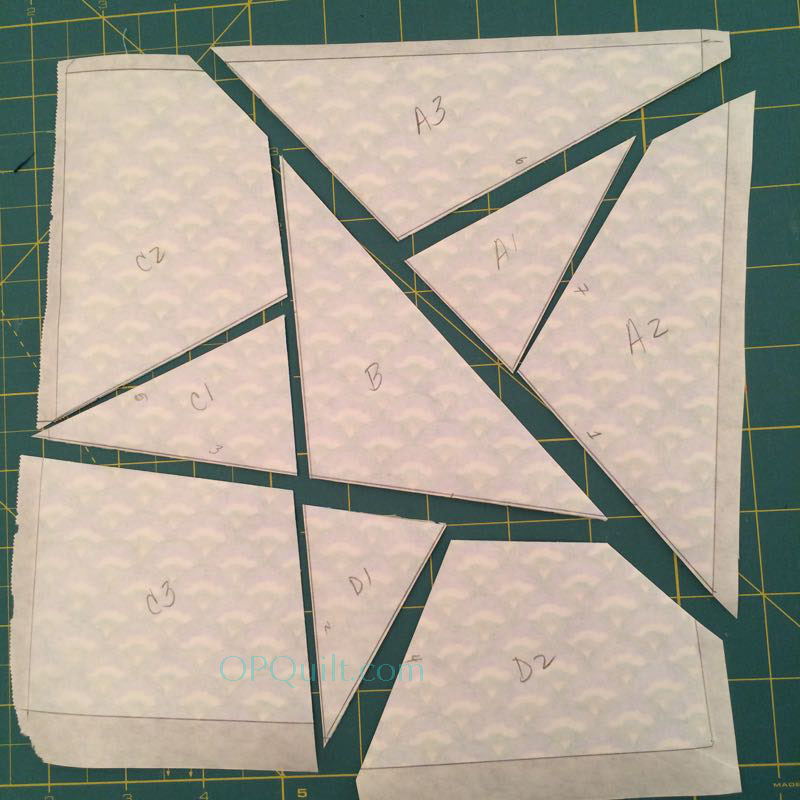
While this cutting-bigger-and-shuffling thing was big in the 1980s when we’d make wonky nine-patch blocks, it’s currently being taken to new heights by the Buggy Barn. But generally you make a pattern for the star bigger than you need, then sew it together after shuffling the pieces. I’ll give you this template next month, but above you can see one of the earlier prototypes.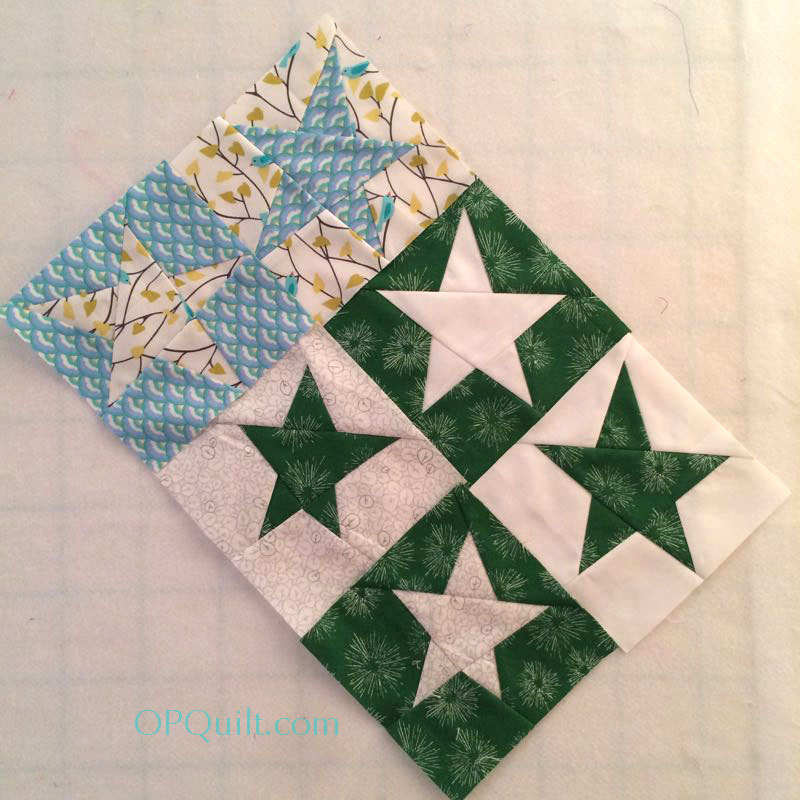
The stars in the blue/light print are my first prototype and you can see I cut off the points. Re-draft. The next set (the lower green/white) just looked weird. Re-draft. I am pretty happy with the top two stars (green white) as their proportions look okay to me, and when I did them up in the fabrics of the blocks (above), they still looked okay. So, how did we figure out what to cut?

First, following Thelma’s lead, I made plastic templates for each piece, then divided them up by star-center and star-background. Leisa laid out the templates on the cutting board, trying to see how economically we could fit them onto a strip of fabric. She came up with a 4″ strip of fabric for the star backgrounds (and it will take 18″ of that strip for one background set) and a 3 1/2″ strip for the star centers (and you’ll use 11″ of that strip). So you can get two complete star backgrounds from one 4″ by WOF strip and three complete star centers from one 3-1/2″ by WOF strip.
The trick is, though, that you need a variety of prints to make the wonkiness. Since there are 4 pieces to the star center, you’ll need at least 4 strips, each of a different fabric. For the star backgrounds, you’ll need 5 different strips.
ARE YOU THOROUGHLY CONFUSED? Me too, and I already did it. Just download the chart, follow along how many we cut (or count the number in the photo) and get everything cut. Don’t give away your extra fabric, in case you need more, and tuck it all away in a box until April 13th, when we’ll start constructing the appliqué blocks, and I’ll show you how to do the 8-way HST blocks, too. Wonky stars are coming in May.
NOW, here’s Mary Burton’s measurements for her smaller quilt. She writes:
“The blocks finish at 8.5 inches with piano border finishing at 3″ so the quilt will be 40″ square. I love mine. I don’t usually make bed quilts so I reduce lots of patterns.”

I’ve purposely left this photo uncropped so you can use the outlet for a gauge as to how elegant this smaller version of the quilt is. Really fabulous, and I love the way her backgrounds in the star blocks go from medium to light.
She and I corresponded back and forth several times. She mentioned that:
“[Going smaller] isn’t harder when you are an experienced quilter. You just take your time. Take two squares, sew your seam and measure that piece to be sure you have the measurement you are supposed to have. Do that until you get the correct measurement. If you do that you should not have to pin. Also, you will always be able to use that needle position for all future projects.The only part that I had to slow down for were the half square triangles because they are so small. If you use the easy angle ruler, they actually cut and go together fast. I just learned how to use it this year and it’s wonderful. Since I made this quilt last spring I just cut 2-inch squares in half and sewed my triangles together and then squared them down to 1 1/4.” The Easy Angle ruler leaves that step out and you don’t have any fabric waste. You do have to find your correct measurement though. You don’t measure your seam, you measure those 2 squares after you sew them.I did press my seams open because of so many seams. You can use any technique you wish. I always use whatever works for me. If you have never use the Easy Angle ruler, Bonnie Hunter has a tutorial for it on her site. Don’t bother with the tutorial from the manufacturer.”
By the way, I’ve changed some of the schedule stuff below. Just keeping’ things up to date. See you next month!
![]()
Revised Master Schedule:
Step 1 (Preparation): February 2016–buy all the fabrics and find the pattern. Mine was purchased from Common Threads in Waxahachie, TX (www.commonthreadsquilting.com). The quilt measures 90 by 90, which is too large for me, so I’m only doing nine blocks. Each block is 20″ square, and with the outer borders, that should come to roughly 65″ square. I may change my mind, but this looks good from here.
Step 2: March 2016–Cut out the quilt: the tan backgrounds of the squares, the border triangles, the smaller half-square triangles, strips for the wonky stars, but save the piano key border for later.
Step 3: April 2016–Assemble four blocks and add large appliques; use Thelma’s method (of Cupcakes and Daisies) for adding the curlicue stem. Make and add half-square triangeles (HSTs) around these blocks, using the 8-at-a-time method of HSTs, here and here. In the pattern, and in the photo from Thelma, they are mixed up and varied, but also harmonized (some have a mix of orange and black, some have just black, some have just orange.) Make your own rules and go with it.
Step 4: May 2016–Cut and make the wonky star blocks from templates and strips. We’ll be using Thelma’s method. I’m doing five blocks, so will need to make twenty wonky stars and true them up.
Step 5: June 2016–Assemble the rest of the star blocks, adding the large triangles on each corner and their HST borders. In the pattern, and in the photo above from Thelma, they are mixed up and varied, but also harmonized (some have a mix of orange and black, some have just black, some have just orange.) Make your own rules and go with it.
Step6: July 2016–Arrange the blocks on your design wall and stitch together. Cut the pieces for your borders. Make the four corner pinwheels.
Step 7: August 2016–Sew borders together and attach them to the quilt.
Discover more from OccasionalPiece--Quilt!
Subscribe to get the latest posts sent to your email.

Again you have made a terrific tutorial on this next step. I really appreciate all your hard work in doing this as it makes it so much easier for us to do the project.
Oh, Elizabeth.. The wonky stars are amazing. Since I’d already begun this quilt, I already had appliquéd the stars on using machine blanket stitch. Those stars are amazing though. That is such a great tweak.
I just love the pictures of you and Leisa. You look so happy it makes me smile.
I bought this pattern sometime this past year and had done nothing with it. I was so excited to see your quilt a long for this pattern. Thank You for the inspiration. I’m behind but will get my fabrics together and get with you on this BBD charmer. I was thinking about this project today and I’m happy to see your posting.