I recently made two blocks for the Traveling Threads Bee I’m in, and while we don’t show the completed sections as we go, I thought I’d share the blocks I made here. The first one is Woven Star, which finishes at 10 inches (trimmed, it will measure 10.5″).
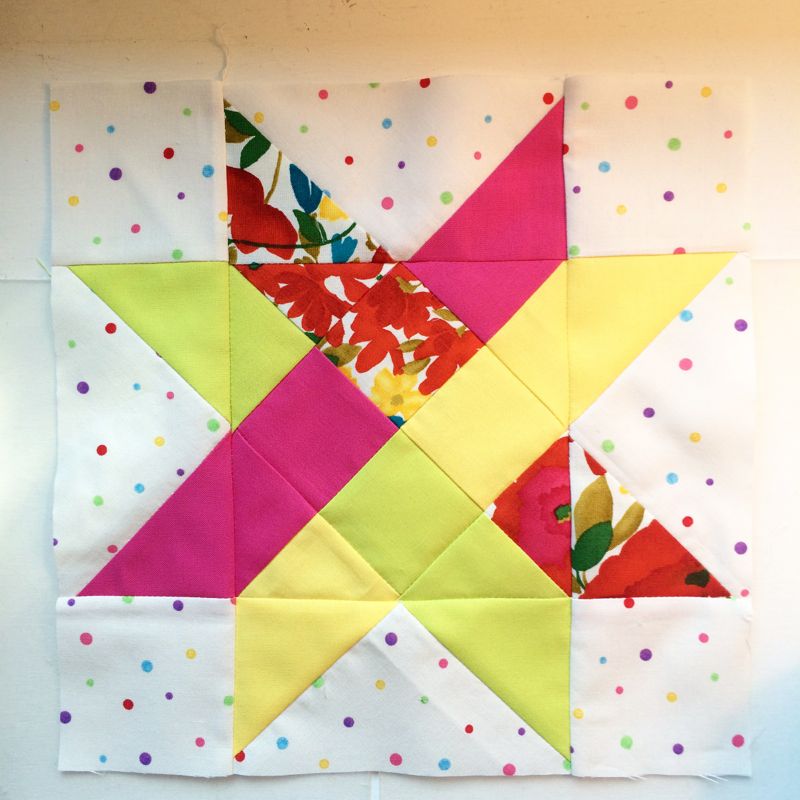
Lisa loves bright colors and sent along that floral as her signature fabric, including some of the solids. I added the polka dot for a punch of light in the set of blocks I was sent to work with.
Here is a PDF of the templates for the block. I am happy to provide them to you as a free downloadable file, but please don’t distribute these blocks to your mother or your friends. Send them here to get their own, please. Thanks. Click to download: Woven Star 10inch
I always like to simplify my cutting, so I tape together the triangles, then measure them, as shown here:
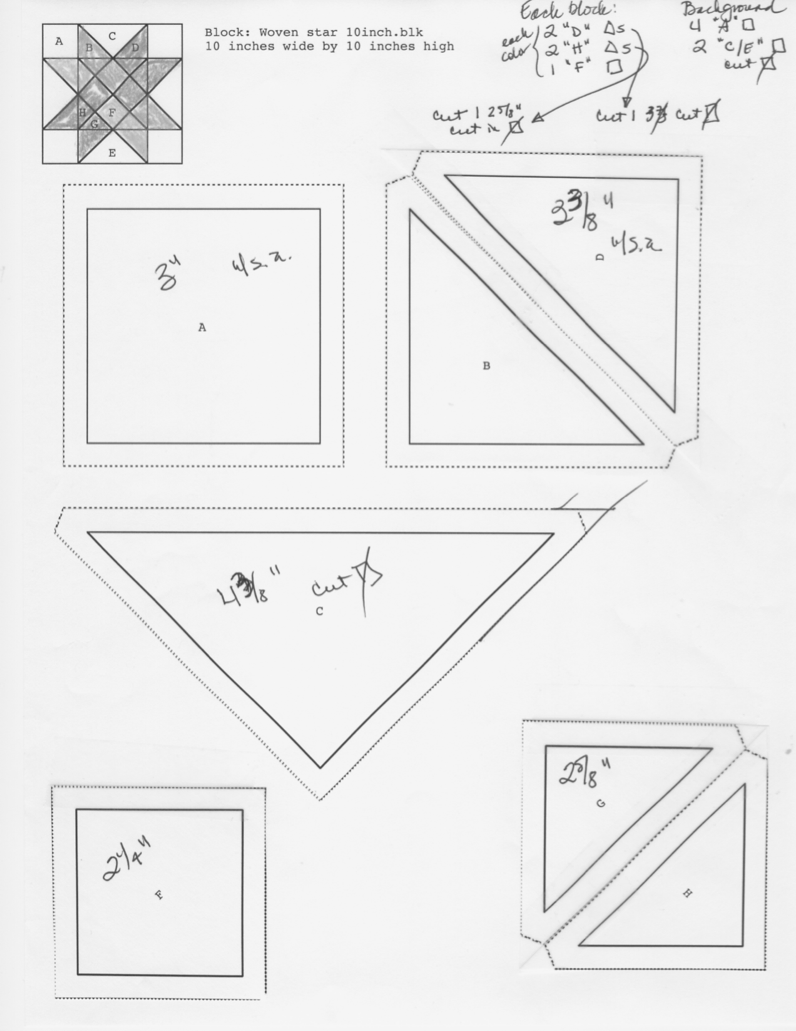
I always then tape them back onto the first sheet, as it shows the diagram. While this is shown in black and white, I also take colored pencils and color in the diagram so I know what goes where. My quilt software is made by QuiltPro. It’s a native application for the Apple (they also have PC versions) so it runs very smoothly.
Track which color of what you need. For me, it was like this:
Cut one 3 3/8″ square of yellow (then cut in half diagonally)
Cut one 3 3/8″ square of bright pink (then cut in half diagonally)
Cut one 3 3/8″ square of floral (then cut in half diagonally)
Cut one 3 3/8″ square of bright green (then cut in half diagonally)
Cut one 2 5/8″ square of yellow (then cut in half diagonally)
Cut one 2 5/8″ square of bright pink (then cut in half diagonally)
Cut one 2 5/8″ square of floral (then cut in half diagonally)
Cut one 2 5/8″ square of bright green (then cut in half diagonally)
Then it was one 2 1/4″ square of each color.
Background:
Cut four 3″ squares of background color, and two large 4 3/8″ squares of background color (cut in half diagonally).
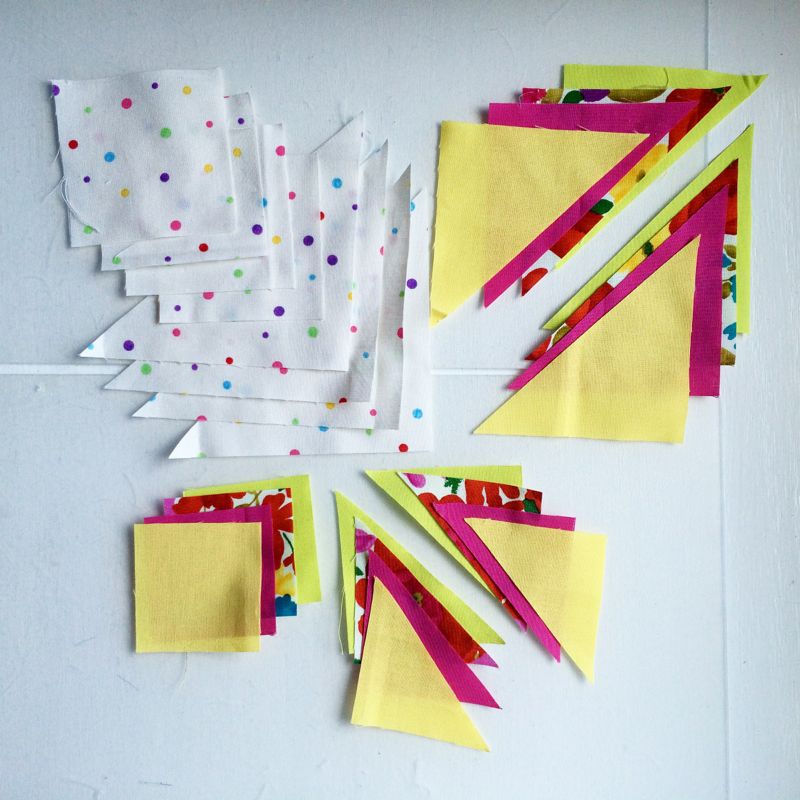
All the parts. Lay them out, as shown below.
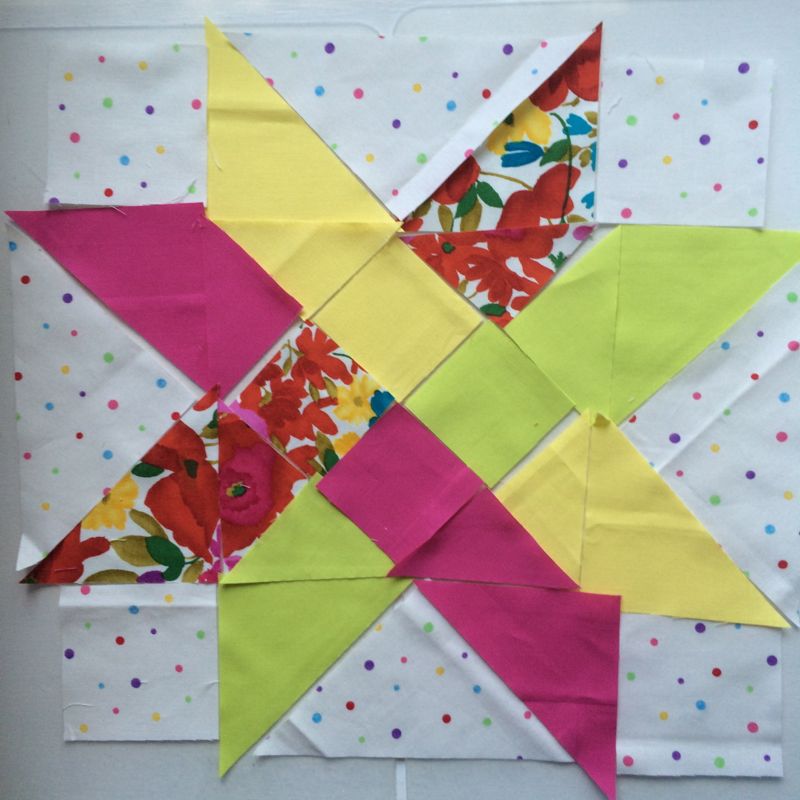
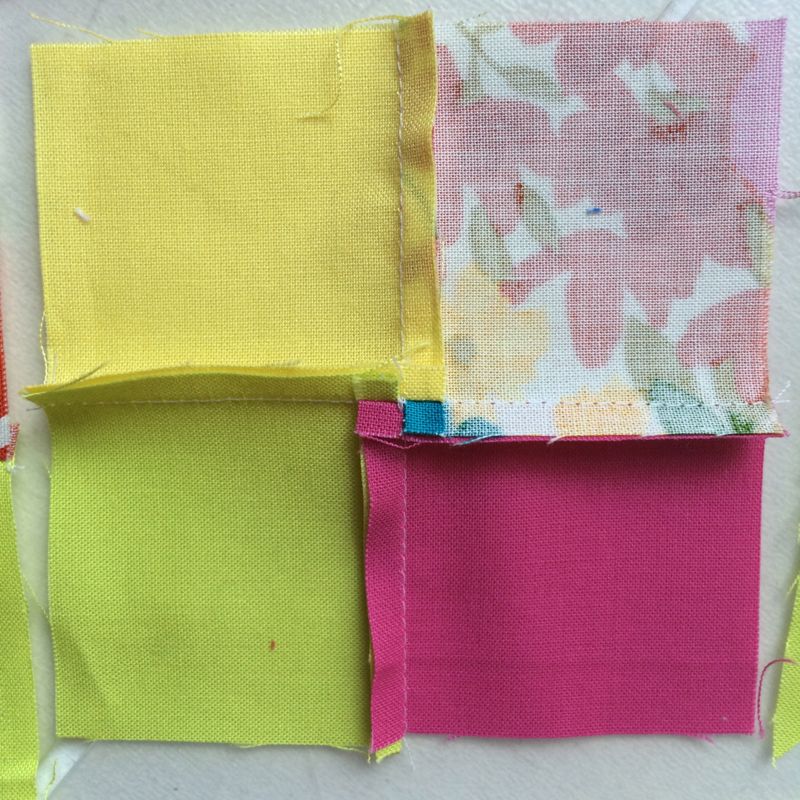
I started by making the four square in the center. Stitch two squares together, pressing the seam allowances to the side, then stitch those two units together, making sure the seam allowances are “opposite”–one falls one way and one falls the other, so they nestle together. To get the nifty little square shown above, pop open the stitching (a little tug will do it), then press those in a swirl around the center, each seam allowance going a different direction. The block center lays pretty flat if you do it that way.
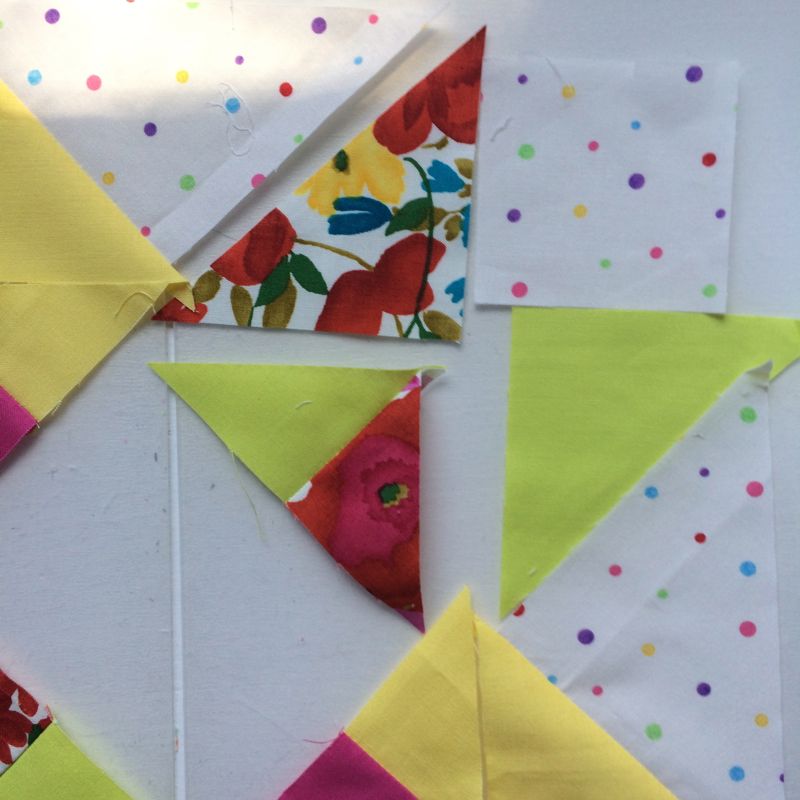
Fail. Make sure when you are stitching those corner triangles together you do it correctly, and don’t flip them. In this duo, needed the yellow-green to be on the right, not the left.
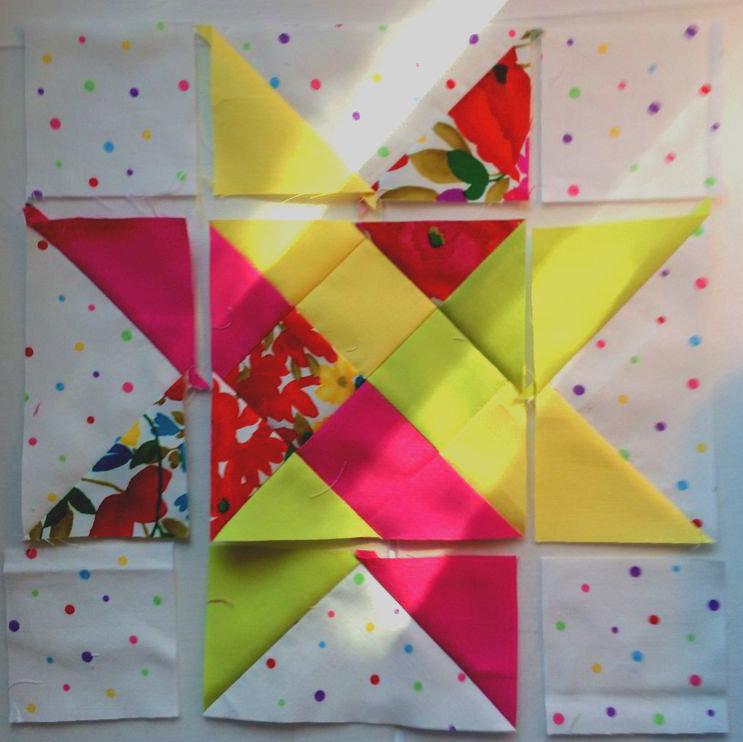
Better now (I restitched it, obviously). Make your flying geese units at the top, bottom and sides. Stitch your corner triangle units onto your center square, matching seams.
Stitch the two side 3″ blocks onto the top and bottom flying geese unit. Stitch the two side flying geese units onto the center block, then stitch the three sections together. Give it a good steamy press on a well-padded ironing board (if you don’t have a well-padded ironing board, press it face down on a towel, unless you are one of those who believes that the flatter a block is, the better. In that case, go ahead and press the life out of this thing.) Let it cool, then true up your block to 10 1/2″ square.
Next post: Peaceful Hours Bee Block
Discover more from OccasionalPiece--Quilt!
Subscribe to get the latest posts sent to your email.

This is a great block! Definitely on my to-do list. Could you possibly do the math for me to increase it to a 12″ block. Ha–just kidding. Sort of. Also I think your logo should be made into an actual quilt.
This is a great block. I also love the one that is the 11″ block, but the computer won’t let me comment on that one. Rene’s log block is awesome!
Ummm… I believe that the flatter the block the better! Am I missing something here! Anyway its a gorgeous block! Thanks for sharing your talent and expertise with us Elizabeth! ( I Cindy has suggested another quilt idea too! LOL!)