Worn out from two back-to-back trips, I spent the day quietly hand-sewing my Circles Block #1, Swirlygig, using the English Paper-Piecing Method. A couple of weeks ago, I had decided I wanted to make a series of circular blocks, but I wanted to do them slowly, with hand-sewing. So I’ve turned to English Paper-Piecing, which involves using paper shapes sewn inside your fabric. For a pretty good how-to video, watch *this one,* which uses hexagon shapes. The only difference between this video and how I do it, is that I sew from the back to the front with my whipstitch. Do whichever one you like.)

The free patterns are now returning (Red, White and Blue is above). I request that you not distribute them, but send people here to this website to get them. Click to download a PDF file:
SHINE Block 1 pattern_opquilt
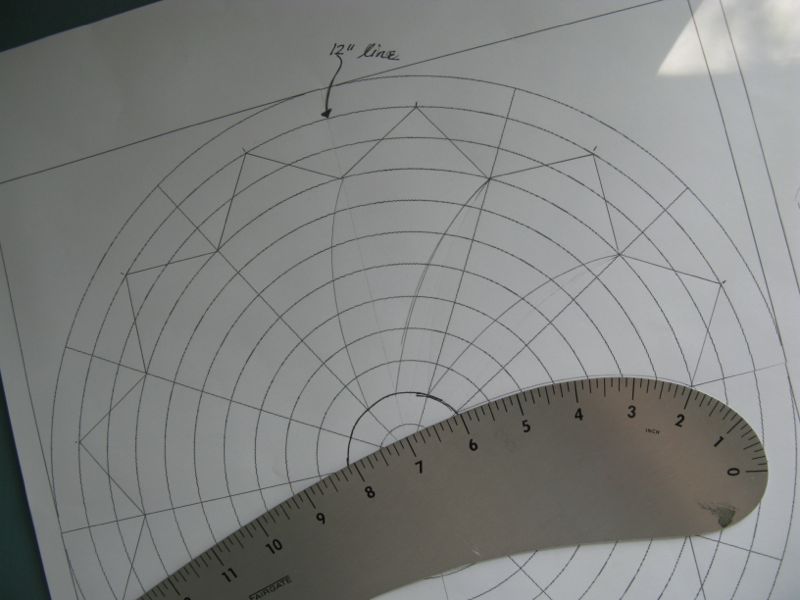
Please remember to set your printer settings to 100% and check the little scale square included on the pattern. It should measure 1″ in size. Illustrations of patterns below will differ from the newer version of the pattern.
 A word about laying out the pieces. The straight grain (threads parallel to the selvage) and the cross grain (threads running across the fabric) have less stretch that does the bias, which is what we call the diagonal line across the fabric. So when you know you have to ease that 1/4″ seam allowance over a curved edge, lay it out so that diagonal bias will align with that edge, as shown above. I didn’t lay out the swirl pieces with regard to grain (paying attention instead to the fabric’s design), but certainly any time you need a little more ease, or want the fabric to fold easily over a pattern piece, put that bias to work for you.
  First, cut out the shapes, then cut out the fabric, leaving 1/4″ seam allowance around most of the pieces. Baste the pieces onto the paper (good time to use up old icky thread that you don’t want to use in your quilts). Some people like to use freezer paper, others like to use glue. If you do a search on English Paper Piecing, everyone has a favorite method. Mine is folding the seam allowances over the paper edges and sewing them to the paper.
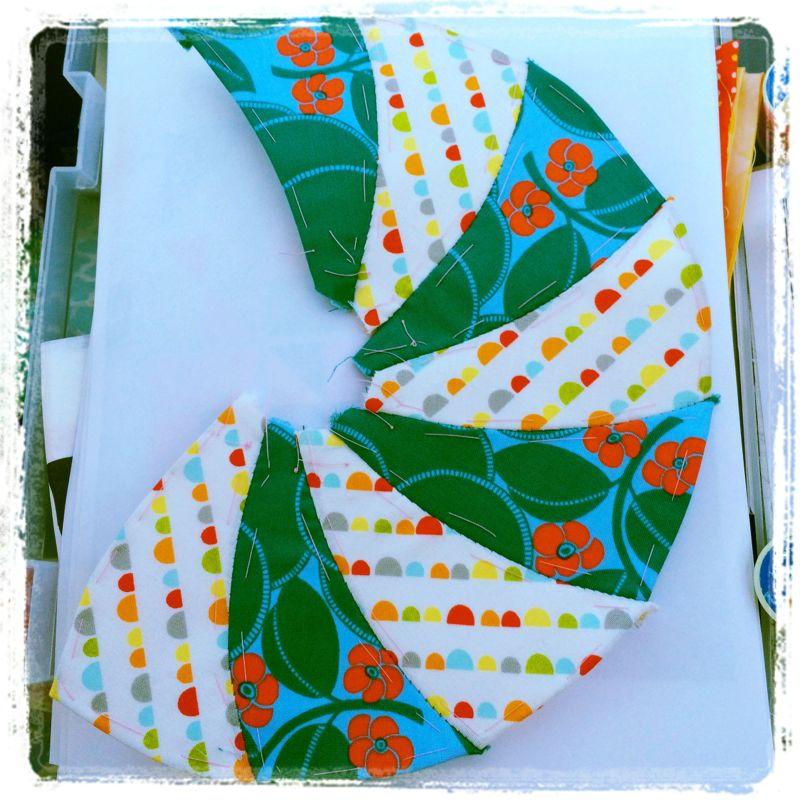
When I started sewing the inner swirling pieces together, it was easier if I placed the piece with the outward (or convex) curve on the top (like Spun Sugar does *here*, but I never clipped any of my seam allowances, nor used glue–just pins). I lined up the outer corner and sewed a couple of stitches to anchor it. Then I moved on down the seam, using an overcast whipstitch. I was happy that it went quickly.  Here’s my Instagram photo of the first few swirls sewn together. I was sewing these as my husband drove us home across the Arizona desert. I have a rigid plastic box that hinges in the middle, folding out like a portable desk, and I keep everything in there.
  After I sewed together most of the inner circle, I went back to joining the last three together independently, then added them to make the circle. Next up were the little triangle points and the outer arcs.
  I tried sewing these on two different ways: first the little triangle points, then the arcs in between them. Fail. Better to sew a few triangle points to their outer arcs, then attach that to the existing circle. Then repeat.
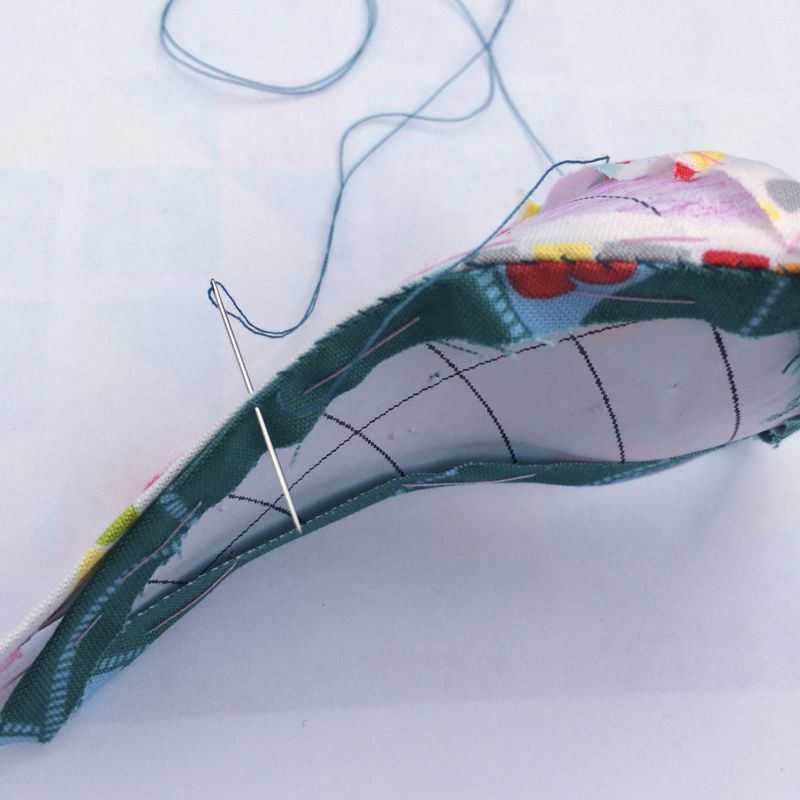
I sewed about five points and arcs, attach it to what I’d sewn on before, attach that new section to the circle, and then start again with a few new arcs and circles. Above you see me finishing off the last of the sewing the arcs/triangles to the circle.  Things can get a little skitty-wampus, but this is the back, showing it sewing with all their papers. I was trying out some designs with my colored pencils, so you see some different colors on the paper.
I’m sure you noticed that the swirls move a different direction in the fabric, than from the drawing. Everything is dependent on how you lay out the printed pieces, text UP or text DOWN. In one of our blocks, we’ll lay them the reverse direction, and have it swirl the other direction. 
Everything is sewn together, and pressed.
 The outside corners have been seamed together, then sewn on. Again, it’s a little wonky-looking because the papers are still inside.
UPDATE: After doing a couple of circle blocks I found I liked it better using a 14 /12″ square and appliquéing on the circle. Your choice.  I used Karen Buckley’s Perfect Circles to make my center circle, sewing a running stitch around the outside edge, then drawing it up around the plastic circle, then pressing it into place. You can iron two pieces of freezer paper together and trace off the circle on the pattern to use as your template, if you don’t have the Perfect Circles. I was having a hard time figuring out how to get that circle on. I took out all the papers, gave it a good steamy press, pinned on the circle and just appliquéd it on. And that’s the first circle block! I am still learning about which colors and shapes and directions will go where with these circle blocks; feel free to experiment as well. I have learned that I can be overly critical with a particular block, but when worked into a quilt, my concerns and criticisms often disappear, so I just keep going. I’ll post one of these about every month, somewhere near the beginning of the month. I hope to get twelve different circle patterns by the time I’m through. I hope you join me on the journey!


 (from *here*)
 (from *here*)
 (from *here*)