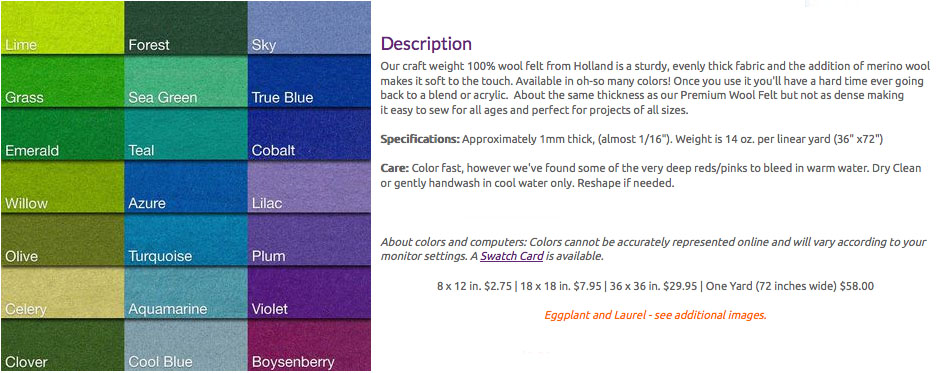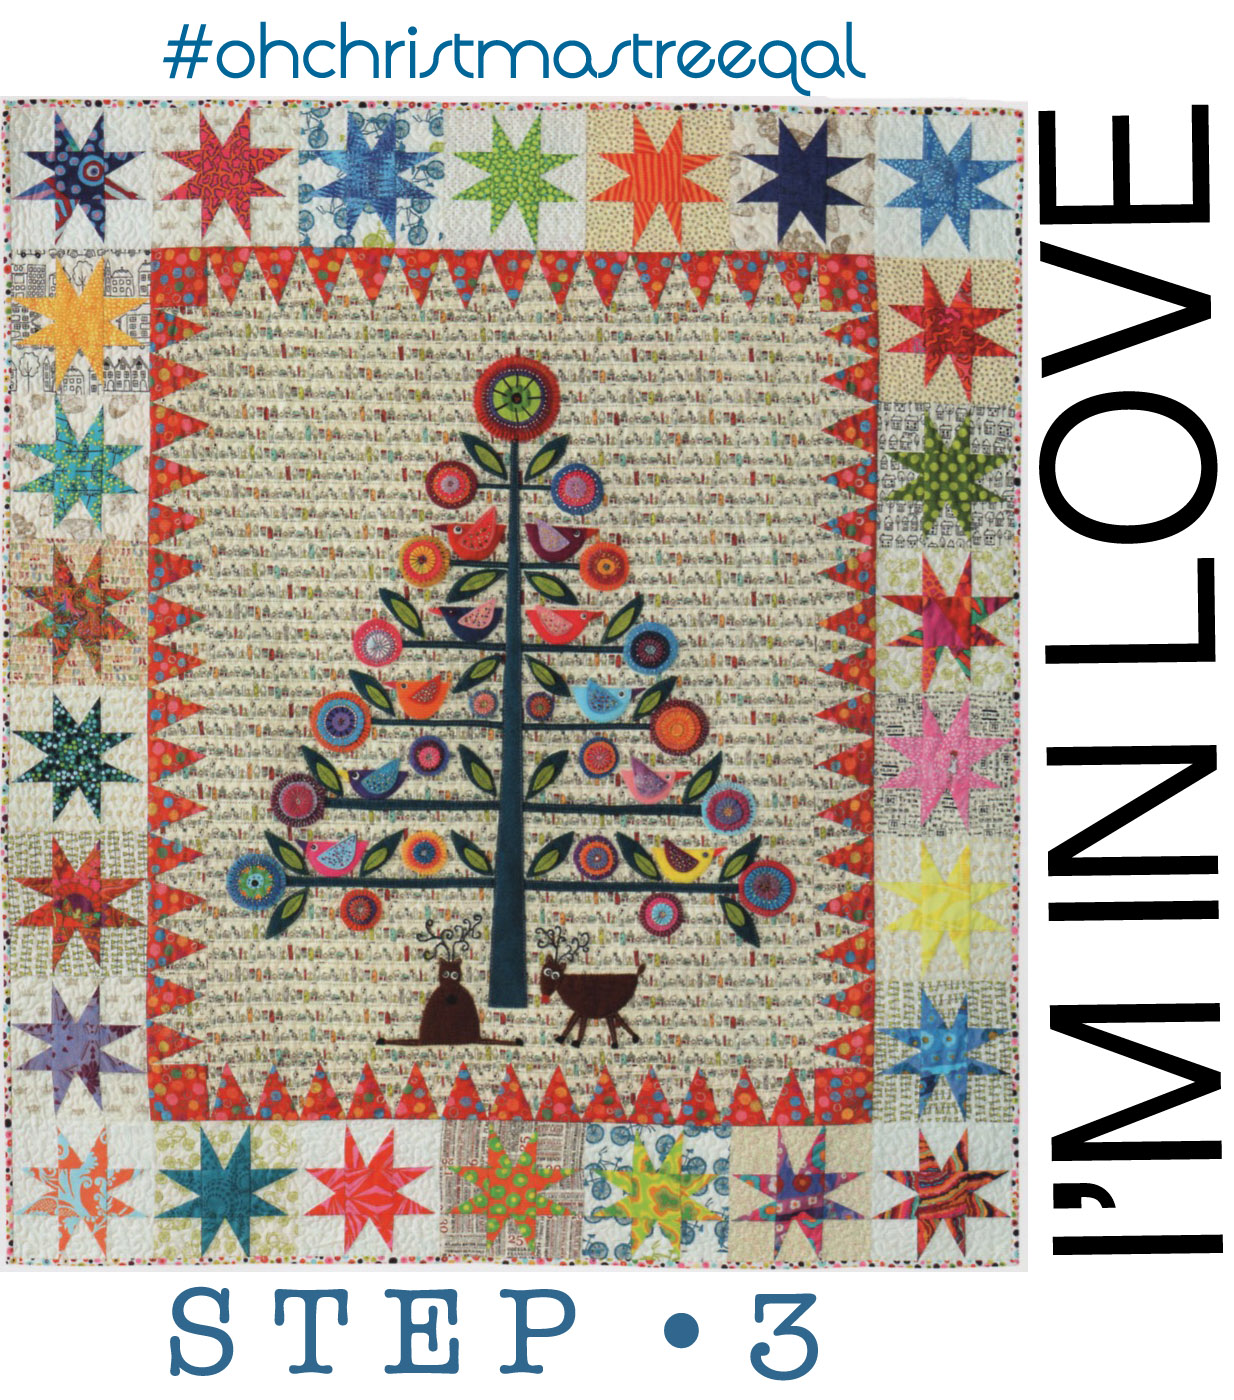
Here we are again, gathering together for the next step of the Oh Christmas Tree Quilt-A-Long (#ohchristmastreeqal), using the pattern found in Quiltmania’s Simply Moderne, issue #3, designed by Wendy Williams of Flying Fish Kits.
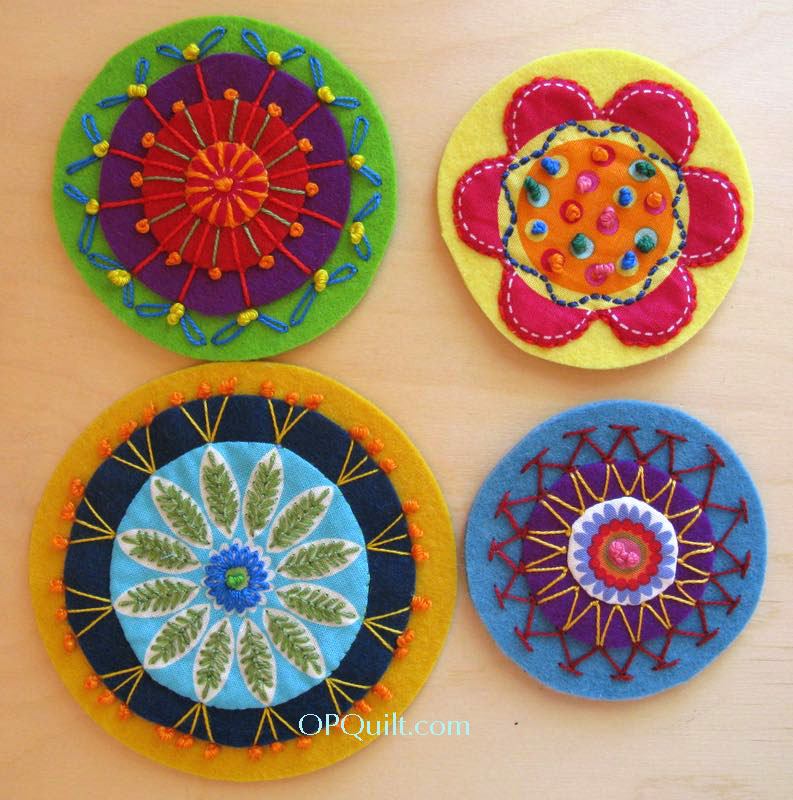
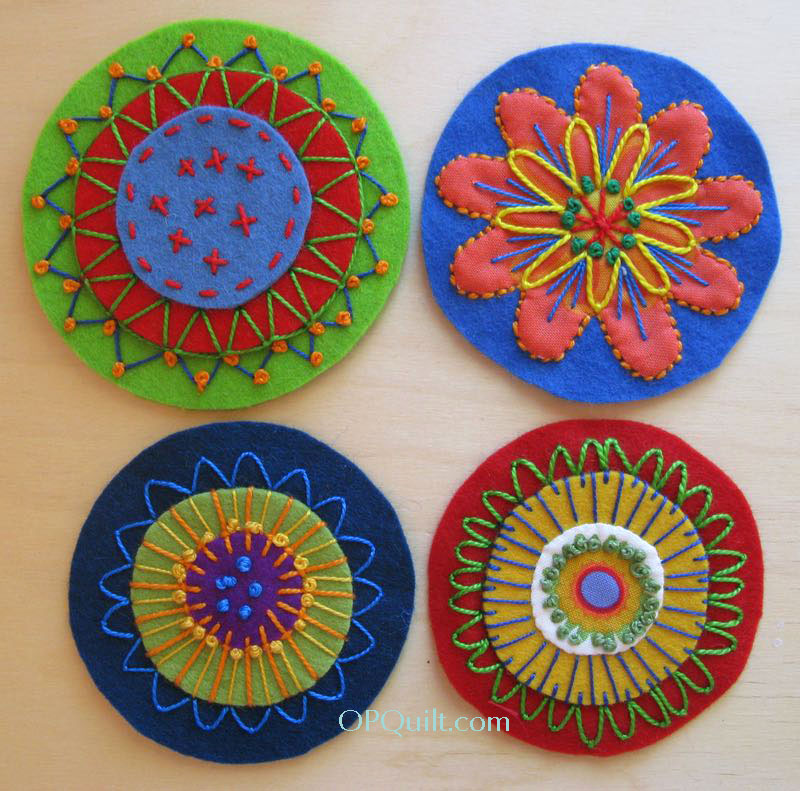
At this point, you’ve been working on your flowers for a month, and if you are like me, that first one was like jumping off a high dive, and thinking the pool was empty and you’d go splat. But you didn’t, and your flower circles are looking wonderful and you are actually having a great time. Keep working on them, you’ll need 21 of them in the various sizes shown on the pattern. I have to admit that all of mine are not the “perfect” size, as some are larger than what is called for. I mocked up the tree the other day (I’ll show you this at the end) and it was okay. So no fretting. Just #startyourneedles and keep creating and stitching.
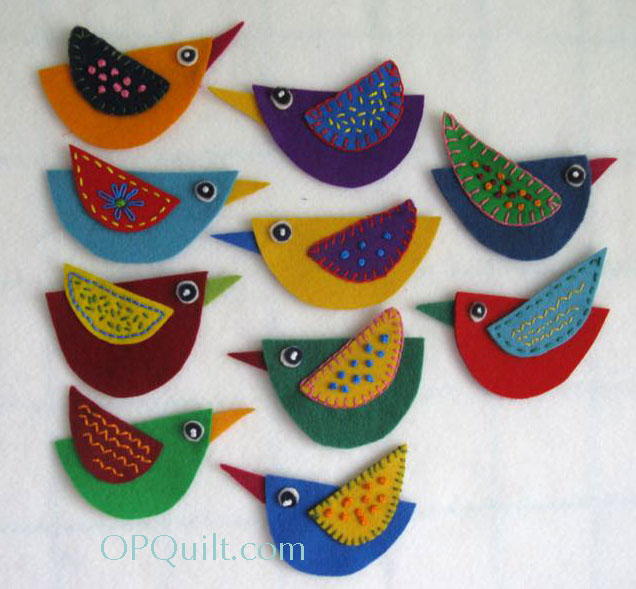
But. . . this month we’re adding two easy tasks: leaves and birds. First up, birds.
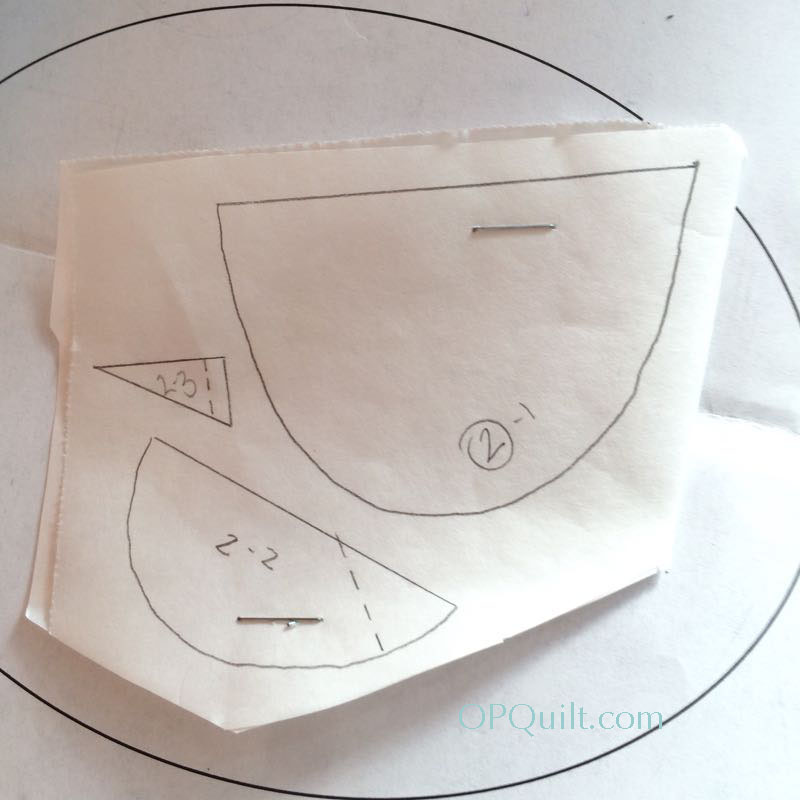
Remember all that tracing you did of the birds, and how you labeled them and marked the dashed overlap lines on a folded piece of freezer paper, so you’d be making two copies of the bird (one regular, and one reversed) and you stapled it together to keep the pieces from shifting? Now’s the time to get them out. Hold them up to the light and transfer the dashed overlap marking on the wing to the wing piece on the other side, then cut them out and start picking your colors.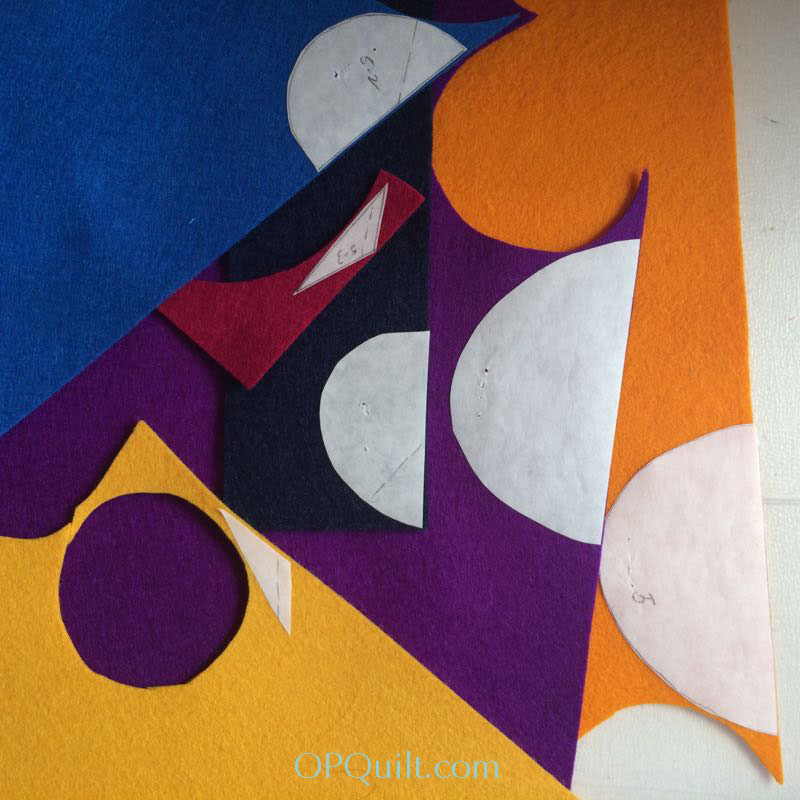
Be bold! Red beaks! purple bodies! wild wings! I ironed down the freezer paper patterns, using a wool setting (NOT your regular cotton setting–or you’ll scorch the wool), and then cut them out. I tucked the beaks under the body, guesstimating where they’d go (hint: NOT even with the top of the body) and pinned them. Then I place the wing on the bird, using the dashed overlap line to place them, then pinned that in place.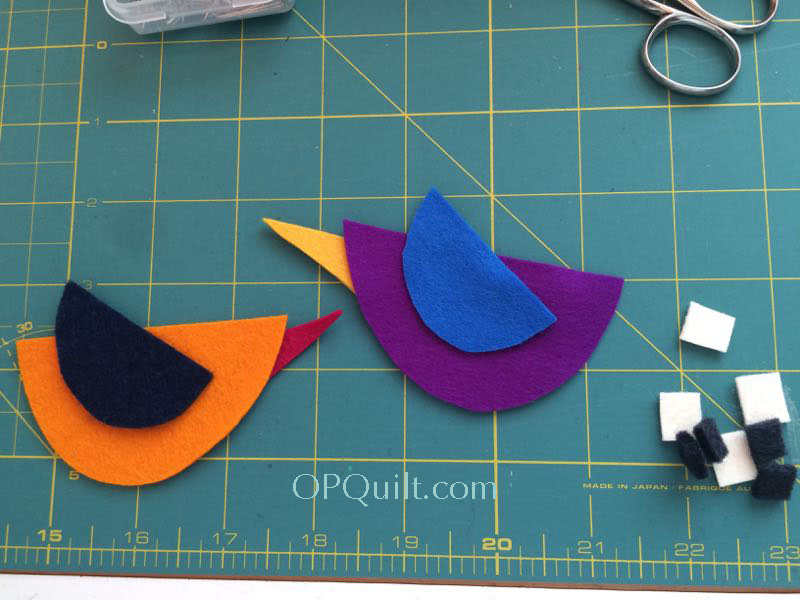
(No worries…I fixed that purple bird’s wing before I pinned it down!)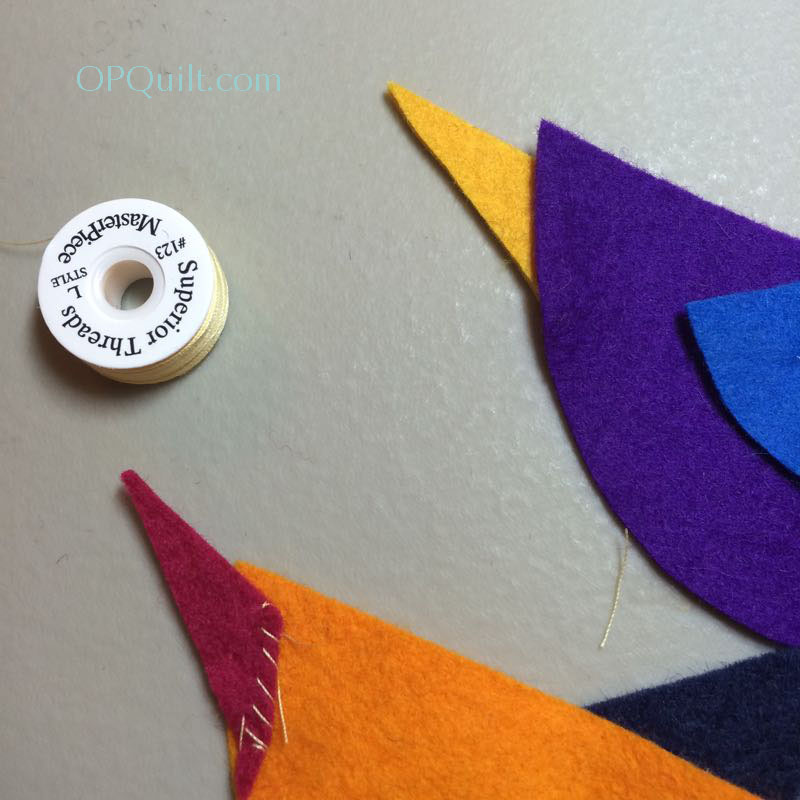
Wendy of Wendy’s Quilts and More gave me a tip to sew on the beak first. I just used a few overcast stitches to get it on securely. I’d never qualify for a bird plastic surgeon, that’s for sure. Then attach the wing by blanket stitches (or overcast stitches, or a back stitch or a running stitch), beginning where it attaches to the body and work your way around the lower edge and back up again.
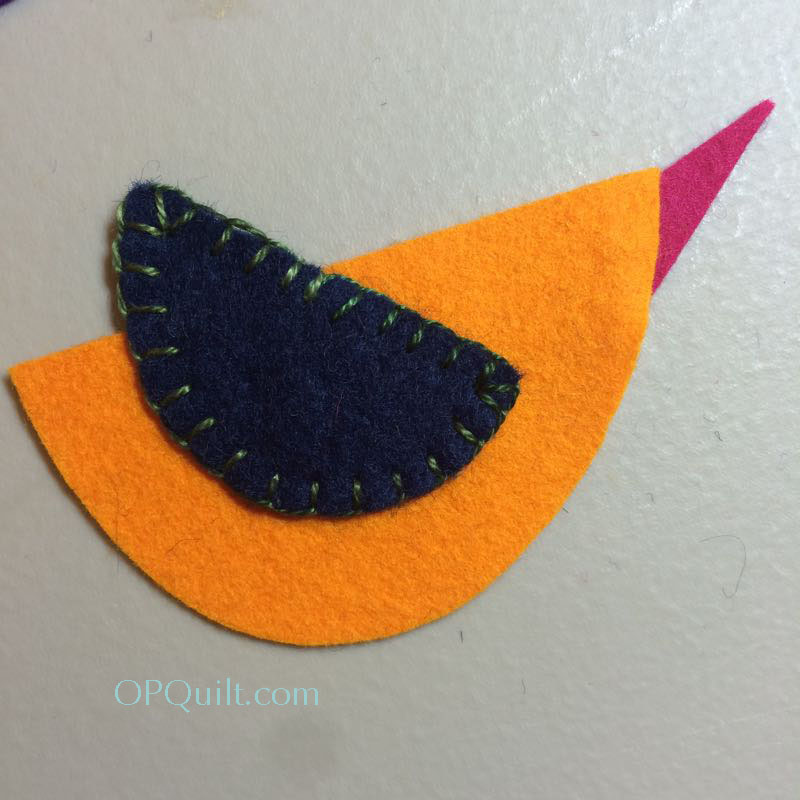
Now do the floaty part of the wing, and tie it off.
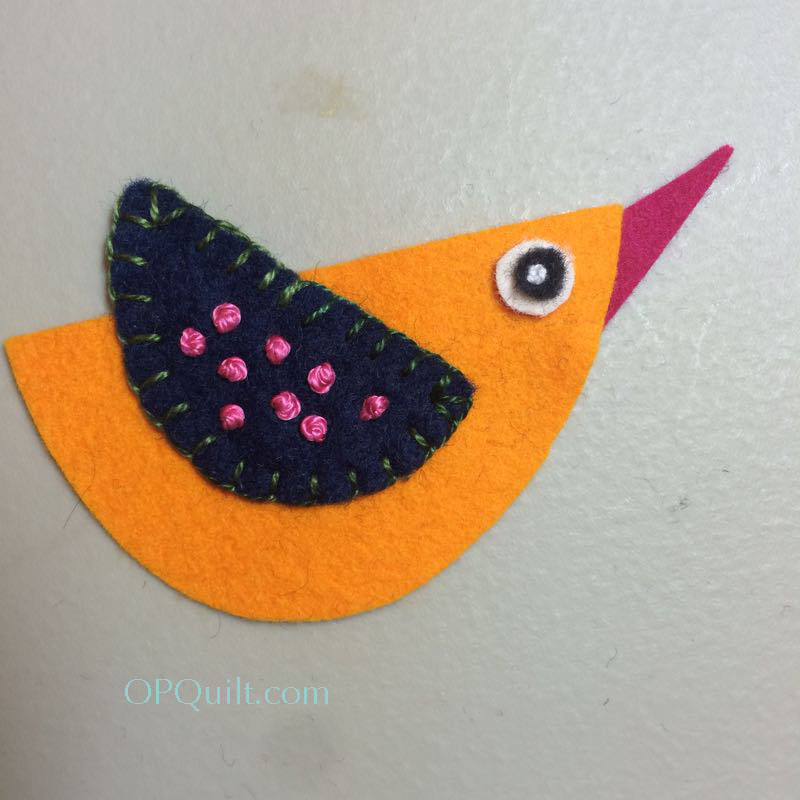
Add a few French knots, or seed stitches, or whatever small decorative stitch. Cut a teensy circle of white, then an even teensier circle of black and secure them both with a French knot, done with white thread. I started by cutting 1/2″ squares of white felt, then rounded them off, and then cut smaller squares of black and just kept going around and around, cutting, until it was the right size. Be prepared to sacrifice a couple of eyeballs until you get the hang of it.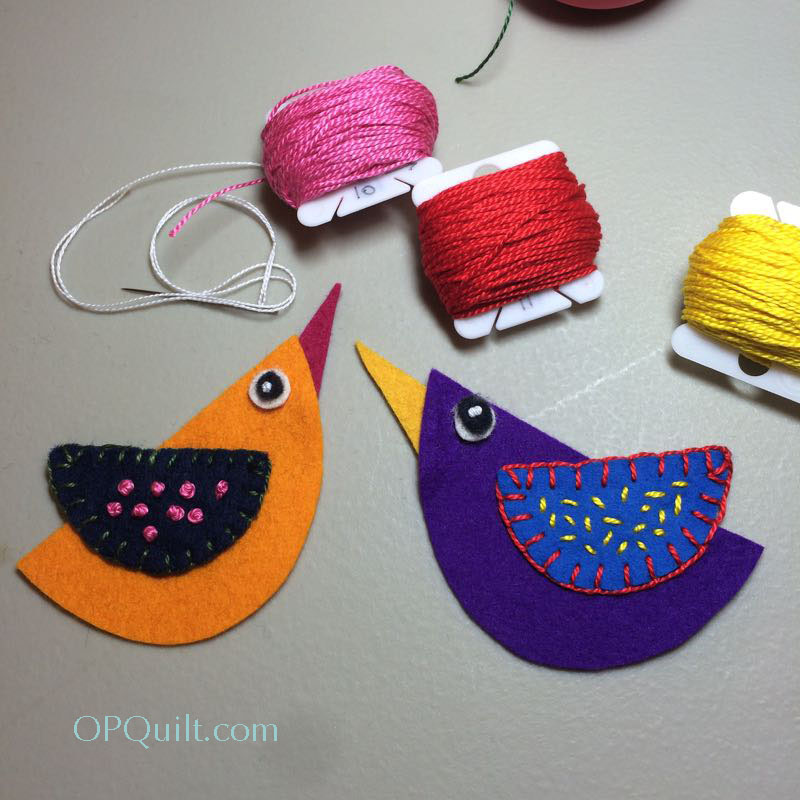
Ta-DONE!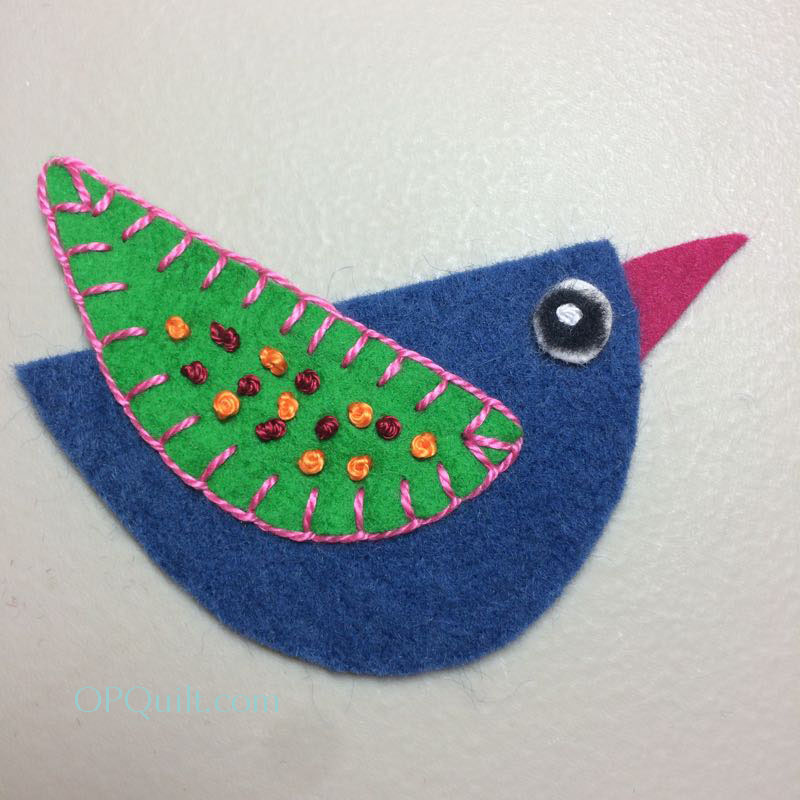

I got fancy with that red bird, attaching the wing with running stitches, and doing a zig-zag stitch across the wing.
 I took them with me on my trip to Portugal and Spain (pictures of that trip are on my Instagram, to the right and on a previous post) and was able to get them sewn without too much trouble on the [long] flight out there. These go MUCH more quickly than do the flowers, so I’m also adding LEAVES to this month’s tasks.
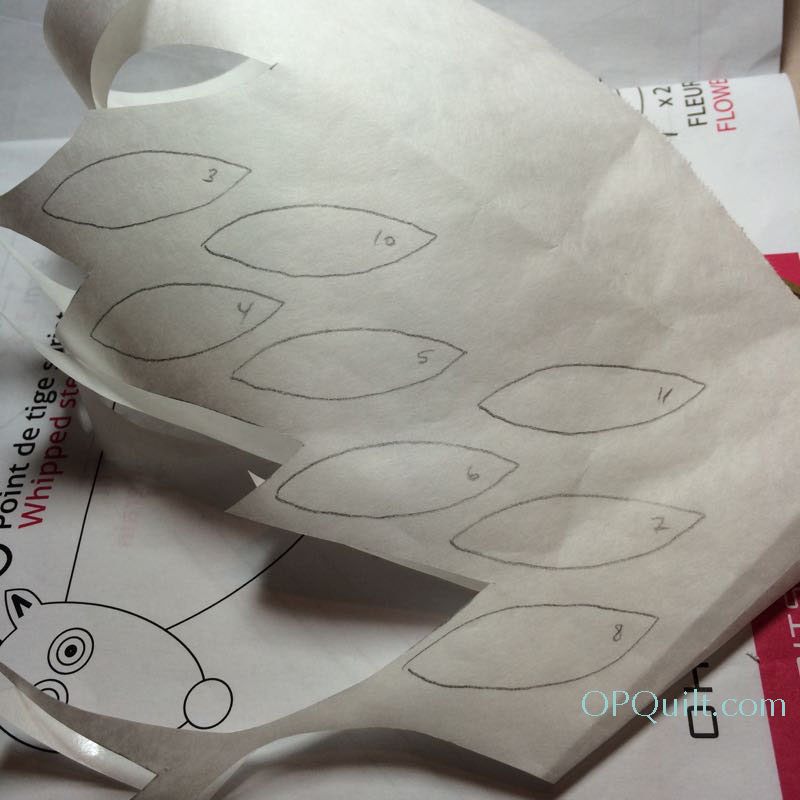
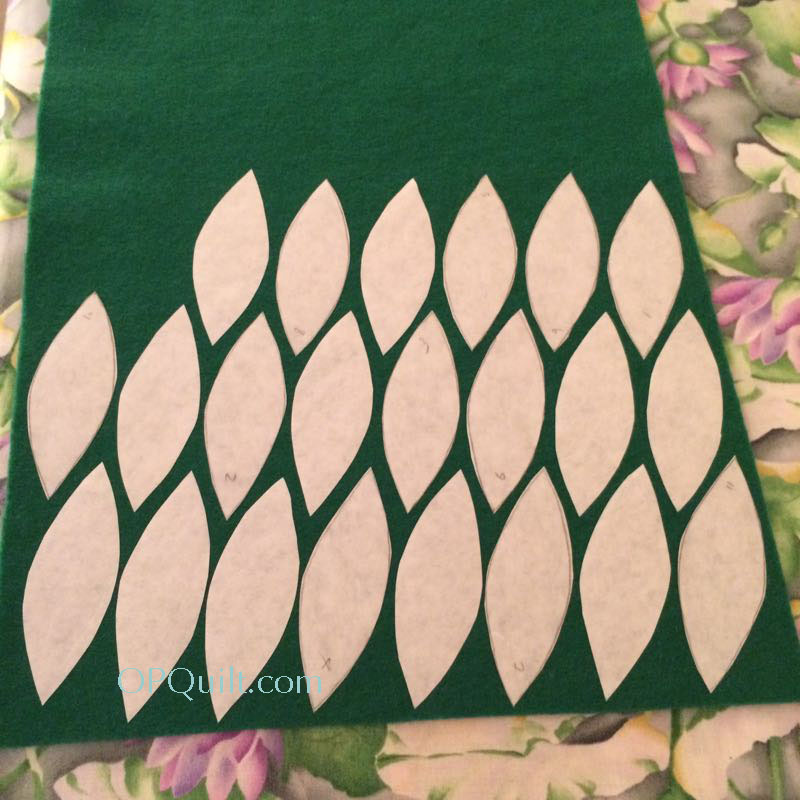
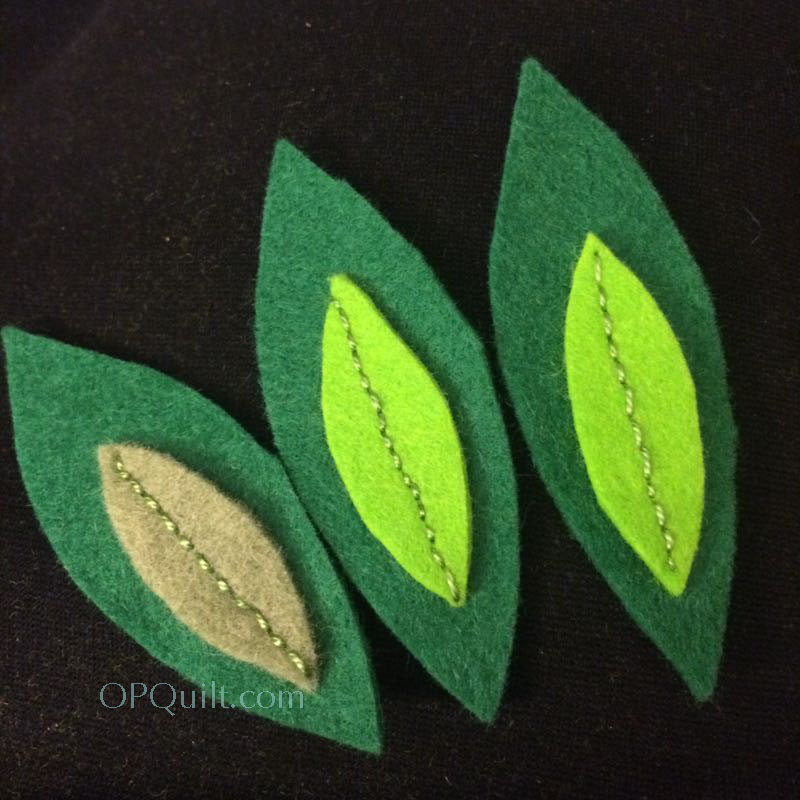
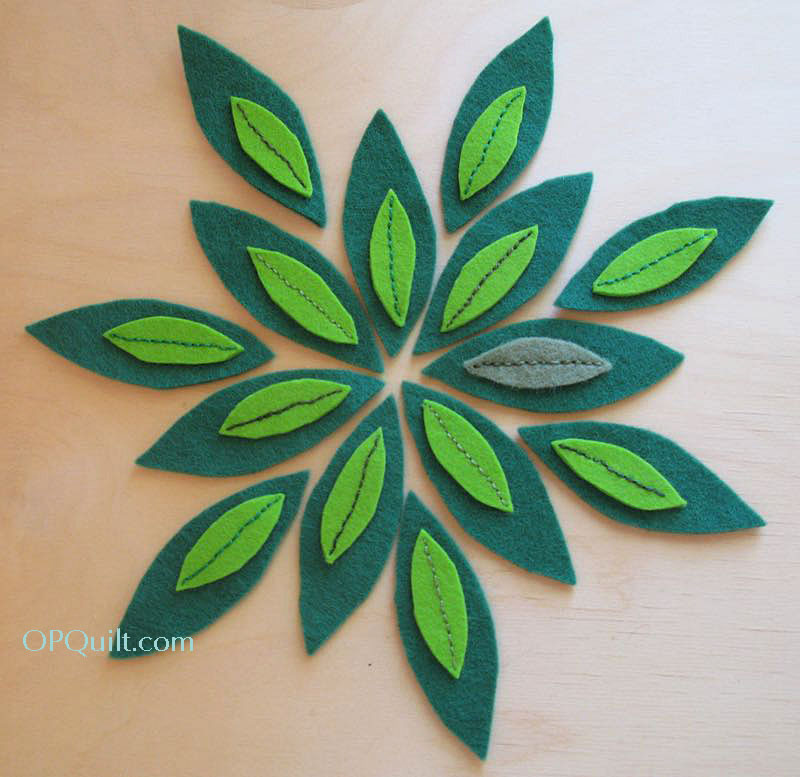
Okay, that wasn’t hard! I traced half of all the leaves I’d need onto freezer paper, doubled it over to get two layers, then cut them out. Iron on to your felt using a wool setting, and cut out. Repeat for the inner, smaller, leaves. I cut a few out of a different green just to give some variety. Place the smaller leaves as shown, setting them closer to one end. Using a backstitch, sew them down. It’s tricky near the tip, but you can see how wobbly mine are and how it really doesn’t matter. (Last time I checked, The Creator didn’t use a ruler to create his leaves either, and our world is the more beautiful for that variation.)
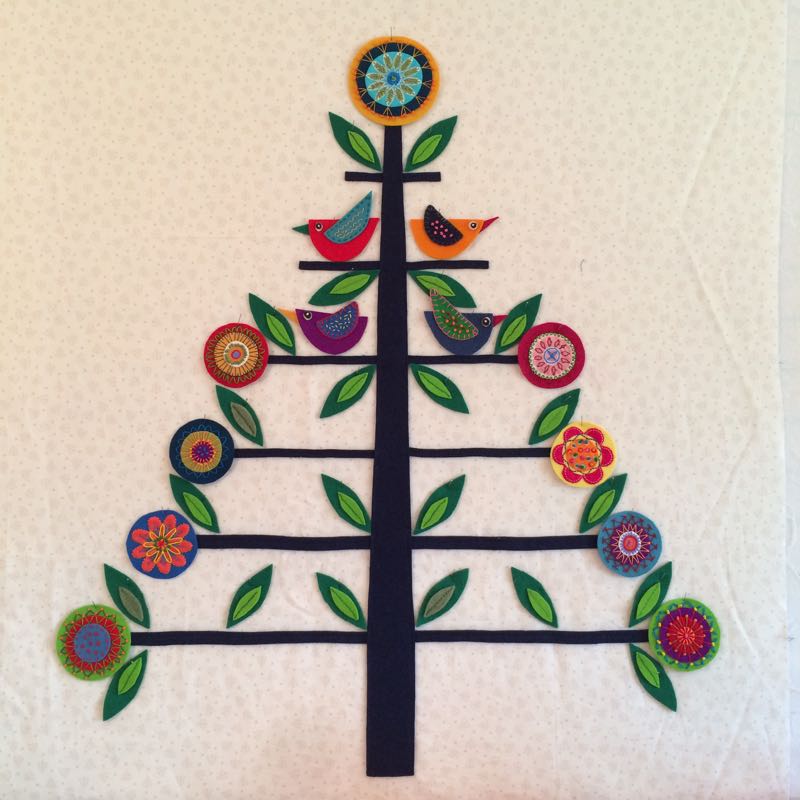
So I was curious as to how I was doing at this point, so I smoothed my tree up on the design wall, and stabbed pins through all the flowers and the four birds I’d finished. Then, ACK! I was stuck. What number flowers were where? What had I sewn and cut and what was I lacking? I got out all the baggies of labeled flowers and set up a little station on my ironing board, right below the tree. I wrote out post-it notes labeling the flowers as in the pattern, and then a master list of where they were supposed to go. I then lined up the circles from the pattern, drawn out on freezer paper below each sticky note, so I could see the relative sizes.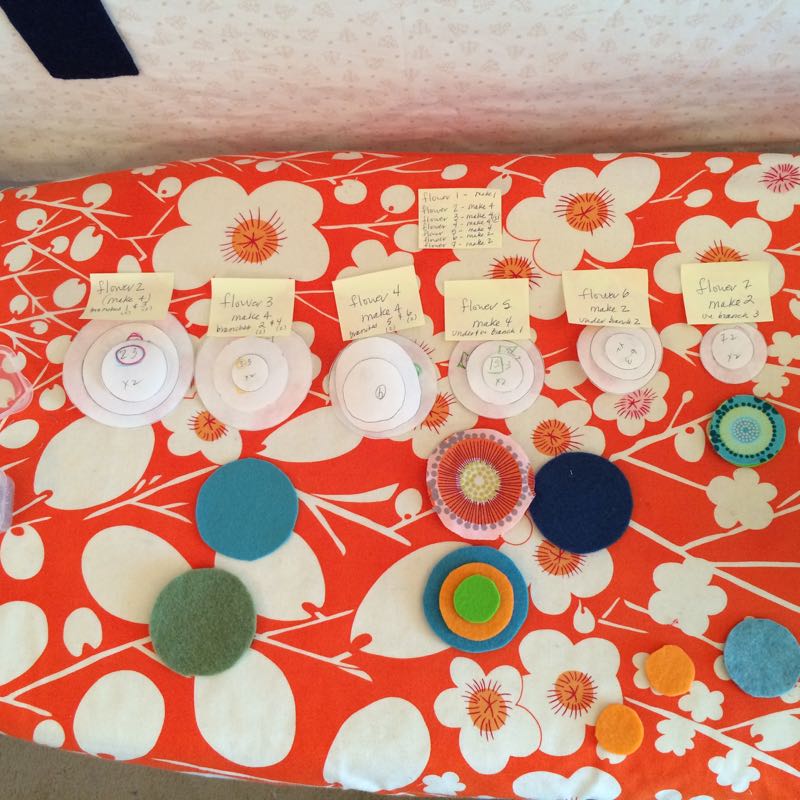
Now that I was organized, I could figure it out. I had enough of certain flowers and needed more of others. Some of the directions in the pattern were wrong, so I corrected for those:
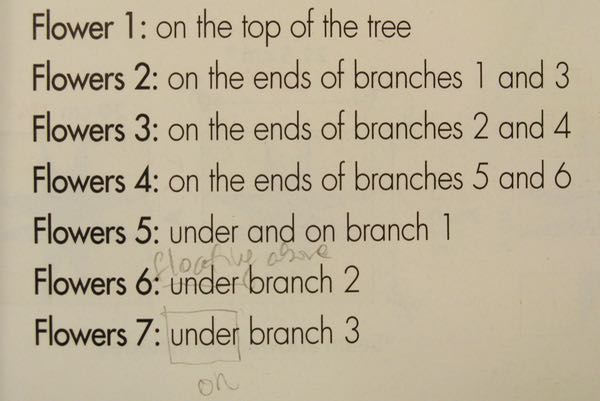 If you want it to look like the one in the magazine, Flowers 6: should read “floating above branch 2” and Flowers 7: should read “on branch 3.” I say, just squinch them all in where they’ll look good. This is just a test run, but later we’ll do it for real.
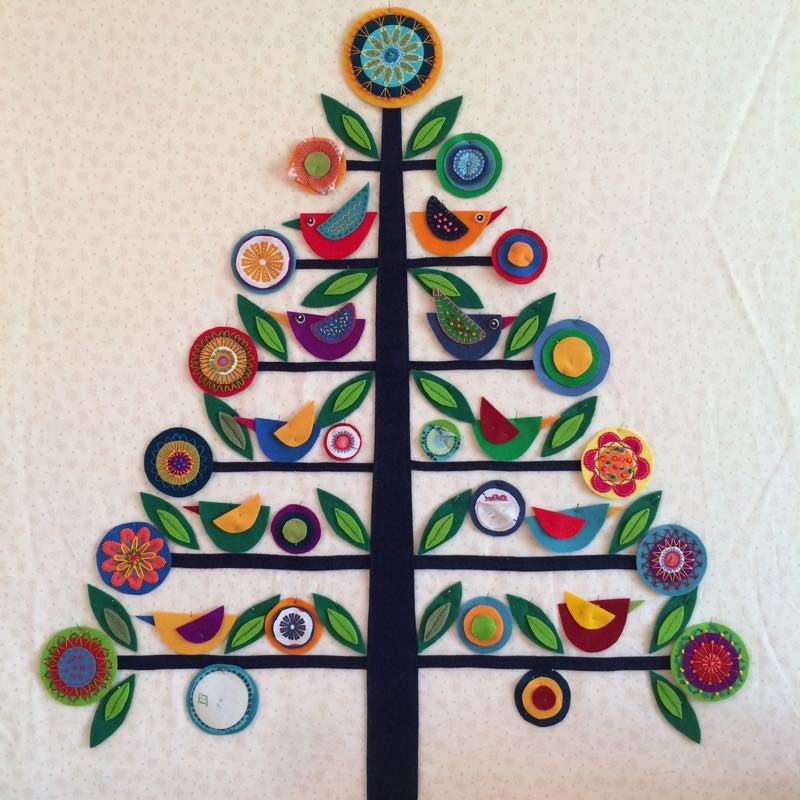
After a while, I could pin up what I’d cut out, fabric medallions, layered felts and all, and was pretty pleased with how it was coming along! I’d encourage you to do this interim step, if only to give yourself a little pat on the back that you’ve come this far. After taking the photo, I put everything away in the proper baggies, and planned to keep stitching flowers and finish up the birds.
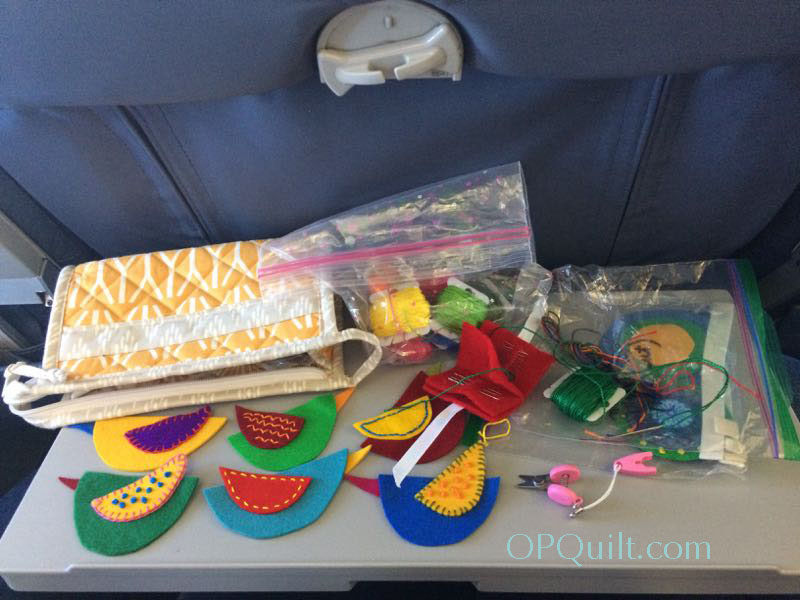 At the last minute, I decided to take a bunch of the flowers with me on our trip, squeezing them into a cute bag made by Sherri of A Quilting Life. I snapped a photo of my stitching on the airplane tray table. I kept stitching until I had nearly all of the flowers done:
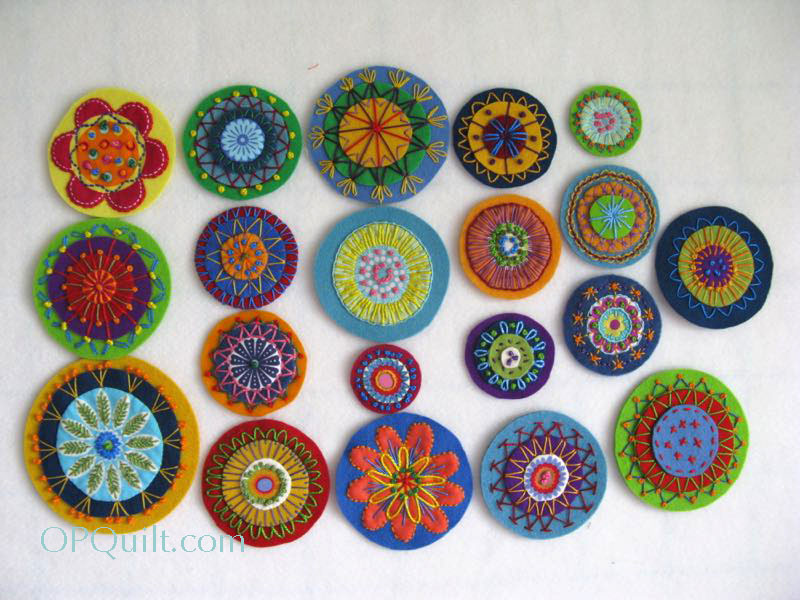
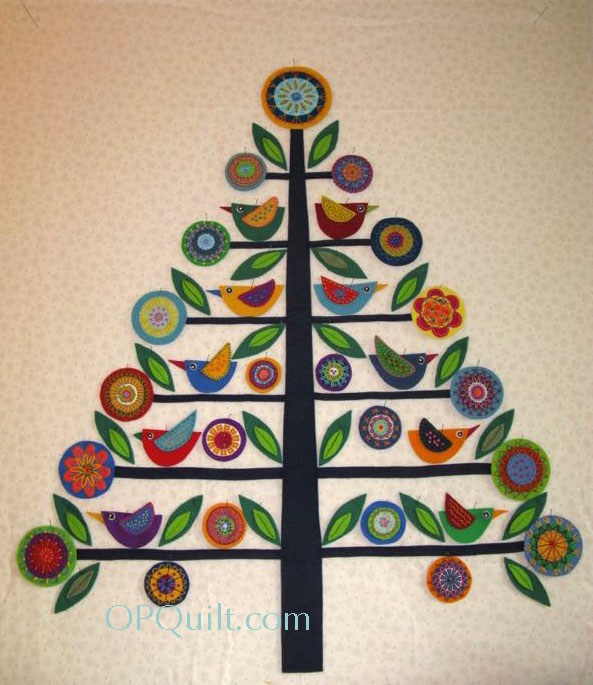
And after getting home, I did another mockup. I didn’t pay too much attention as to what number flower should go where, but instead put my largest one on top, then the next two largest on the lowest limbs, moving on up the tree and thinking more about size and color placement. I’ll let this stay up on the design wall for a few days while I move things around. I did have one dud–a flower I ended up not liking, but that’s pretty good, I think. I only had three flowers left to finish, which I did yesterday, so I’m ready to move on to the next phase.
A recap of where we are:
January, Step “prepare”: buy the magazine, books, gather your fabrics, buy the felt/wool, buy/find the pearl cotton.
February, Step 1: Make the tree on the background and stitch it down.
March, Step 2: Make 21 flowers.Keep stitching, keep stitching!
April, Step 3: Make 10 birds and the leaves. Keep stitching, keep stitching!
May, Step 4: Scene at bottom of tree.
June, Step 5: Appliqué down the flowers. (Wendy gave me some tips for this last week, which I’ll pass along.)
July, Step 6: Appliqué down the birds and the scene.
August, Step 7: Sawtooth border (reds); sew together and attach.
September, Step 8 (finish up Quilt-A-Long): Make wonky star blocks, sew them together and attach border #2.
See you May 2nd for the next step: scene at the bottom of the tree. Wendy’s done one scene, the pattern shows one, and I’m cooking up another. See below for the giveaway.

#startyourneedles for the #ohchristmastreeqal

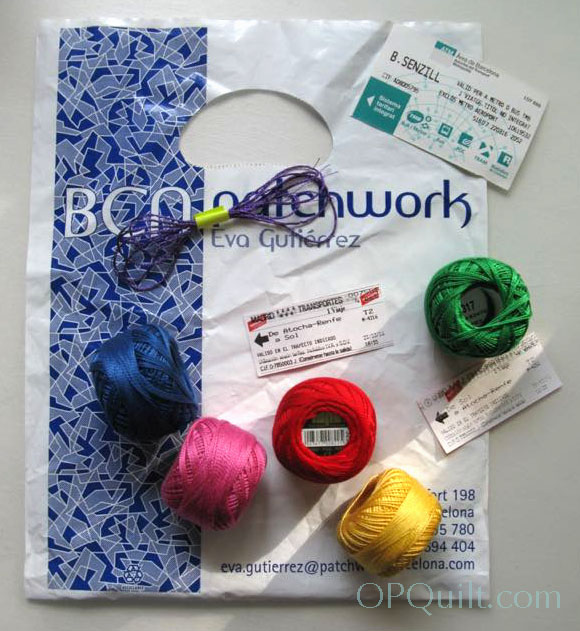
Initially I wasn’t going to do a giveaway, but after visiting with Anna in Barcelona, I thought it would be fun to have a Spanish connection from our trip. In Barcelona, I purchased five balls of size 8 pearl cotton (my favorite size) and will send that to the lucky person who is chosen from comments left below. I’m also including a 1 yard piece of metallic purple embroidery floss that I purchased in Lisbon. Even though it is a little like sewing with tensile steel, it makes fun accents on our flowers (I used mine for some back stitching here and there, and also for some French knots on another flower).
Please leave a comment below, telling me either where you’d like to go a a trip outside the US and why, or the place where you had your favorite trip (outside the US) and why. I love to read about other people’s trips, or their hoped-for travels! I’ll let this run for a few days, then will close it off and chose a winner.
UPDATE: Comments are closed now. Thanks for writing!