Quilts

Quilting. . . and a Sticky Question

Facets Quilting_1

It begins here.  I printed off a picture of my quilt, then took a fine-point sharpie to “quilt” in the designs I thought I would do.

Facets Quilting_2

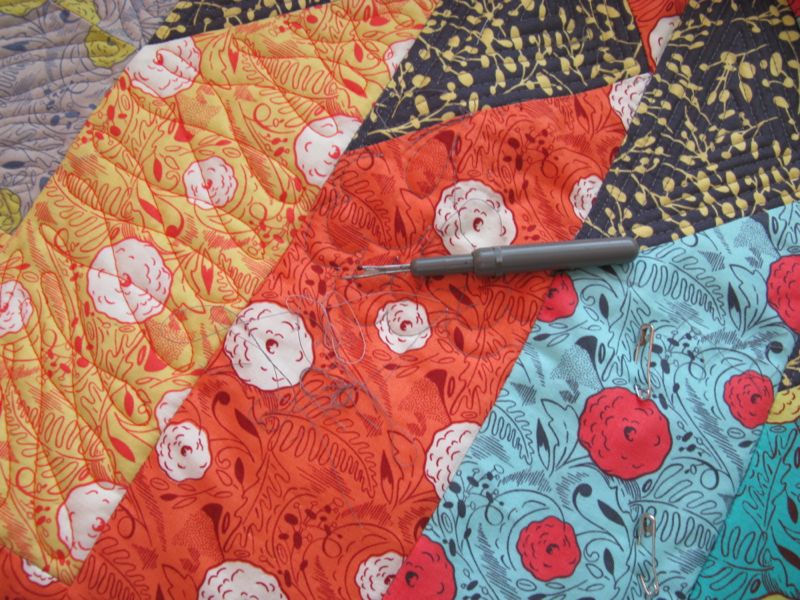
Then this happens.  Over and over, on each row.  For every hour quilting, I spent half an hour unpicking.  Wrong color thread.  Wrong pattern.  Wrong shape.  Wrong style.

Facets Quilting_4

Finally, things start working.

Facets Quilting_3

Facets Quilting_5

I admit it.  The last row got stippled, as I was pretty tired and my shoulders hurt from quilting.

Facets Quilted_1

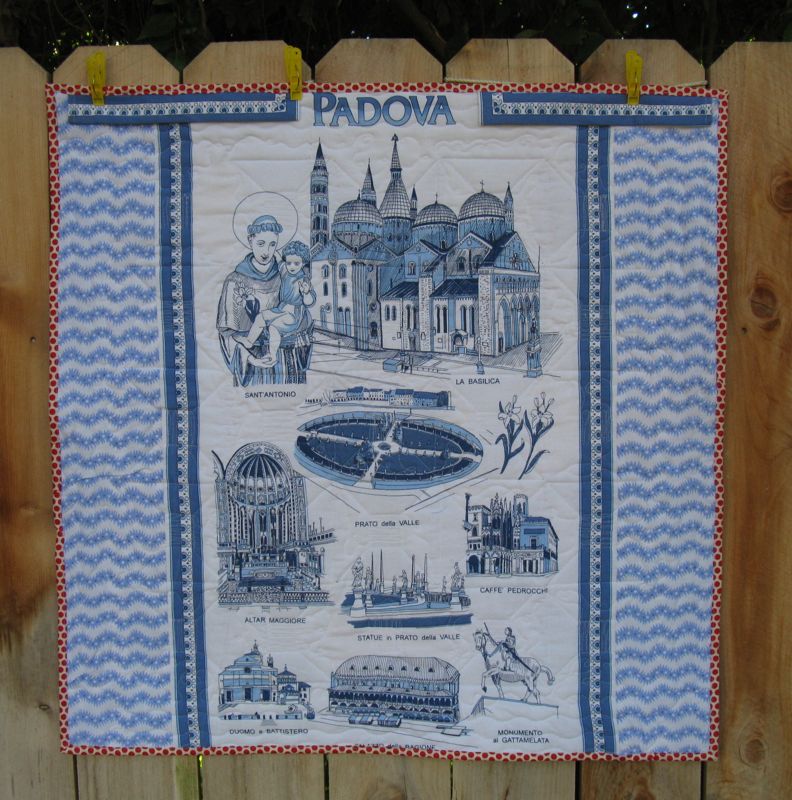
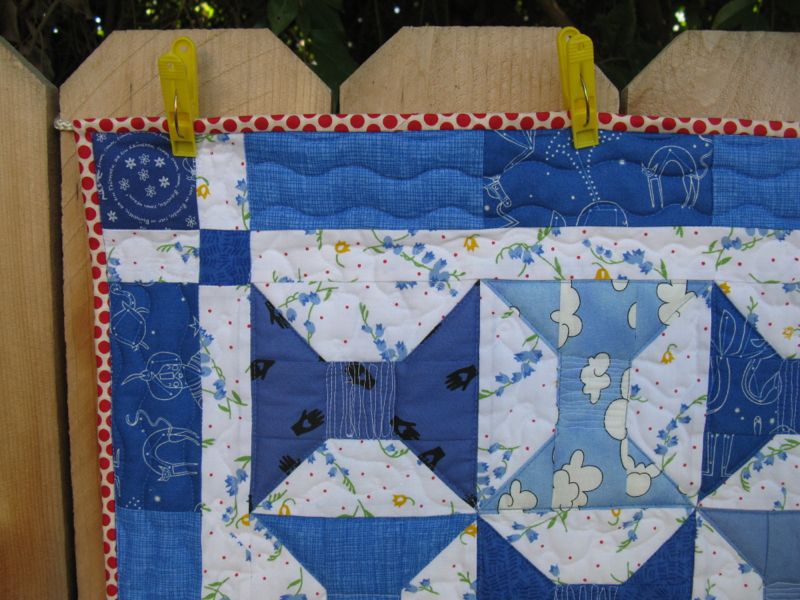
I put it up on the pin wall, but something’s not working.

Three Tries for Facet

I pin up different centers–hard to see on this small picture, but I know it’s the center.  I call in my resident quilt expert.  “Looks nice,” he says, in the same tone of voice as when he answers the question “Does this make me look fat?”  I know now what is wrong, but I am loathe to admit it.  I turn out the light and go to bed.

Facets unpicking_1

In the morning, I pick up my seam ripper.  Unpicking dense quilting gives you a chance to think.  A lot.  Here comes the sticky question, but first the set-up.  I own a good-quality Viking/Husqvarna sewing machine, but it was purchased before we all started quilting so much on our quilts, even though it is called the Quilt Designer.  After three tries, I finally found the foot that works for me, the tension, the everything to allow me to quilt on my machine.  But my quilting doesn’t look like Judi Madsen’s on The Green Fairy, or on other blogs that I haunt.  And I know why: my domestic sewing machine, without a stitch regulator, cannot compare to what a long-arm can do.  Or even a baby long-arm.  It’s just me and the thread, me and the pedal, my hands moving supposedly in sync with the speed of the machine.

But it’s not enough anymore, is it?

Facets unpicking_2

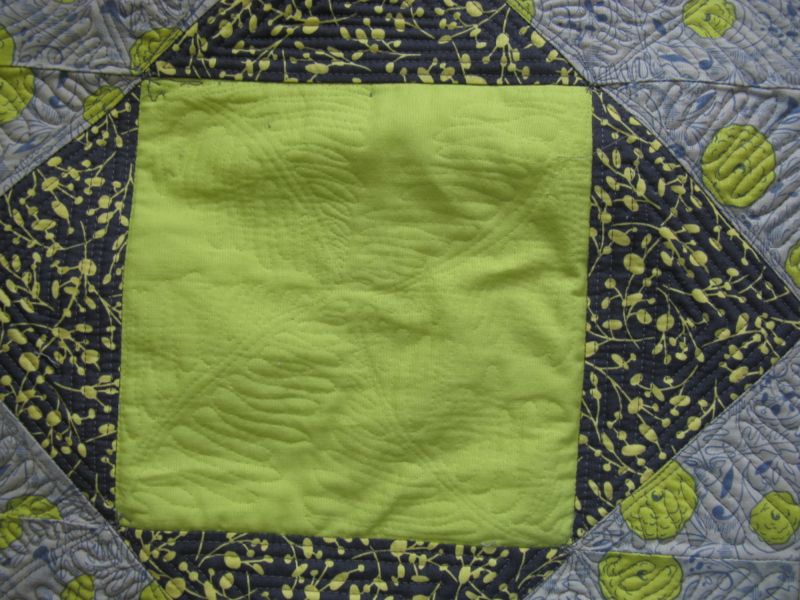
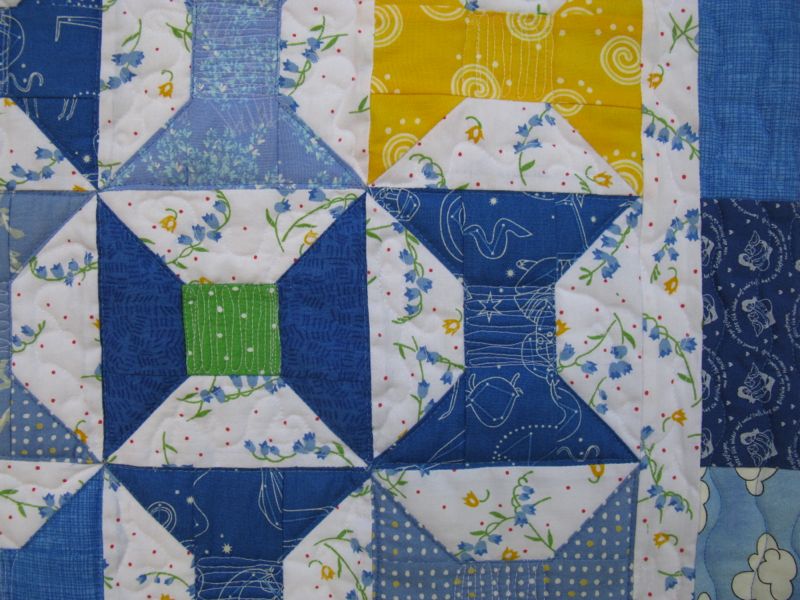
What was wrong with the middle was my quilting.  The shape of the fern, the stitches that hover near even, but occasionally veer into very small or a bit-too-big, the whatever–it was just wrong.  Free-Motion Quilting — the REAL free-motion quilting, has its warts, showing the artisan behind the tool.  But that’s not what we are after anymore, is it?  We want perfection: no bobbles, no wobbles.

So after three hours of unpicking, I am back here.  And the reality of where our industry is heading today is that if I want a quilt that I feel I can enter in a show, or display wherever, I’ll have to step up on the quilting front, because no matter how you look at it, the ones with the bigger, more extensive machines with stitch regulators will always have it over me on my little domestic machine. Because of the limitations of my tools, I don’t know if I can make it right.

But I’ll try.

˚˚˚˚˚˚˚˚˚˚˚˚˚˚˚˚˚˚˚˚˚˚˚˚˚˚˚˚˚˚˚˚˚˚˚˚˚˚˚˚˚˚˚˚˚˚˚˚˚˚˚˚˚˚˚˚˚˚˚˚˚˚˚˚˚

Note: You may occasionally see ads here placed by my blogging software.  They place ads so I can blog for free.  It’s an okay trade-off.

Sewing

Hot Mitts, take two

Just a little something I put together. . .

Kim Hot Mitts

. . .for my daughter-in-law Kim, who, when I posted them on Instagram said she liked them and “hint, hint.”  I was happy she wanted some!  They were for her birthday.

HotMitts

I used Malka Dubrowsky’s fabric again, as it hides cake-mix-on-thumbs really well.

Quilting hot mitts back

I liked how the quilting looked from the back, on the heat-repellant fabric.  Click *here* for a pattern and how-to’s.

Sam Graduation

My husband and I drove in and attended my nephew’s graduation from University of Southern California, known for its well-endowed education in an academic sense.  In other words, lotsa money at this place.  Congratulations on finishing law school!

USC reception

They had a little reception afterwards and it was like a garden wedding–and delicious.

St. Honore Bottega Louie

But we took off and met the rest of the family at Bottega Louie, where this cool-looking St. Honore caught my eye in the dessert case.  Instead of trying to figure out how to get it home in one piece, I bought macarons in five different colors, and shared them all weekend with my husband.

But I have bigger news about this family gathering in the next post.  (No, I am not pregnant.)  Stay tuned.

200 Quilts · Quilts · Schnibbles

Spoolin’ Around

SpoolinAroundTop

This is my latest Schnibbles quilt: Spoolin’ Around.  Sherri, Sinta and I assume, Carrie, pick the Schnibbles pattern we are going to use, but then we all go to town putting it together in our own inimatable way.

GentleArtSchnibbles

I changed up the borders a little, because I wanted mine to all line up a little more, creating a different corner look. Read *here* about my fabrics, including using some sheets from the Porthault design vault.

Spoolin Around1

Spoolin’ Around, au natural

Spoolin Aroundback

I feel like I’m also creating a Tea Towel series, but really I’m not trying to.  It’s just that this towel from Padua, Italy was blue and white and the top just called out for this to be used here.  St. Anthony is a Big Deal in that town, as you can tell by his likeness, his basilica, his . . . We went to Padua to see the  Scrovegni Chapel.  Getting this tea towel was a side benefit.

Spoolin Aroundbackdetail

Spoolin Arounddetail

I quilted this during the last week of class, while listening to Barbara Demick’s novel, Nothing to Envy: Ordinary Lives in North Korea, and I quilted and quilted.  Not perfectly, but that’s also the beauty of making these small quilts–nothing’s so terribly precious about them.  They’re fun, not a chore.  And I aim to keep it that way, just enjoying the process.

Spoolin Arounddetail2

I struggled with the border choices: green soft plaid, or yellow spheres, or red/white dots?  Not sure I’m entirely happy about this, but I did want something that wasn’t so serious.

Spoolin Aroundsleeve

I split the sleeve on the back, because I didn’t want to cover up the words.

Spoolin Around Quilt Label

And I kept their label: Puro Cotone, because I liked it.  I used bits and pieces of the border that was cut off from the top of the towel around my label.  I have to say it’s a bit wild looking, but again–I was having fun, and that’s not a bad thing when you are  quilter.  And that’s my June 1st deadline Schnibble, finished a bit early!

This is #114 on my 200 Quilts list.

Tutorial

FSF–iPad Cover

Okay, this was me this week.  Lost in a fog.  I even forgot to post on WIP Wednesday, which is usually like a religion to me.  Suspected sinus infection.  Exhaustion.  Suffering from What-Day-Is-It-itis.  Verified Foggy Brain condition.  But today, the sun it out, the day is pleasant and I have a mani-pedi scheduled in an hour.  All’s good.

And I finished up my iPad cover.  Somehow.  A blue ikat with a little happy surprise inside.  Front.

Front, with flap open and shy little orange bird looking all coy.  Like an idiot,  I cut it too close (there were some alterations after I had it quilted–double rats!!) and the other birds are peering out from underneath the bias edge binding.  But I love them all anyway.  Velcro sticky dots, which ruined a needle (you’re warned).

And the treasures peeking out: the iPad and a stylus.  Okay, I’m enjoying my iPad, but I love my laptop.  I’m sure it’s like anything–takes a while to figure it out and get it under your techno skin.

Here’s how, in a few easy steps:

Whack off a piece of fabric (I pieced the back for a little “interest” as shown here) about 3″ larger on all sides than your iPad. The piece on the left is row-quilted in varying widths. The piece on the right is trimmed up.

I flipped over the trimmed up piece so you could see that I am lining this with some birdy fabric on the upper edge and using Minky down below.

I thought I should lay them out to show you what my final dimensions were before I sewed them together (yep, I’ve already started with the binding).

The back, which includes the extra for the flap is 13 1/2 ” tall and 8 3/4″ wide.  The stylus case is 6″ by 1 3/4″ and the front is 11″ tall by 8 3/4″ wide.  I think the “body” pieces could be cut to 8 1/2″ wide if you want a bit snugger fit.  The way it is now, there’s some skootch room (the one I made for my husband is skin tight, but he says it’s fine).

Make your binding by cutting a bias piece of fabric 1 1/2″ wide.  I seamed a bunch of strips together to make one long piece  (add up the dimensions if you must have an accurate length–I’m guessing mine was in the 45-50″ length).  Take it to your ironing board and press all seams OPEN, then press it in half along the length.  Now press both raw edges in to the ironed fold, making double-fold bias tape.  I offset the folded edges slightly, so that when I laid it against the raw edge of my quilted piece, the back would be slightly longer.

Bind the upper edge of your shorter body piece.  Bind around the stylus case.  I left those edges square.  That was a nutso thing to do, so on the back body piece, I wised up and placed  a spool of thread to mark a rounded edge.

Sew on the stylus case on the front, centering it.  Stitch around three side, leaving the side open.  I realized I would be slipping this case in and out of my school bag/church bag/whatever purse when I put it into use, so I tried to incorporate the stylus case where it would be out of the way, yet accessible.

Now line up your front, shorter piece on top of the longer, back body piece WRONG SIDES TOGETHER, leaving the extra on top (where my birds are) as the flap.  Stitch down one side, using a 1/4″ seam allowance, then across the bottom, then up the other side, stopping where the front body piece ends.

I know a lot of sewists (sewists?  can you get used to that word–I can’t! I still like “sewers”) make a “lined sack” sort of arrangement for their cases (yes, I Googled “iPad Cover Tutorial” and there are a lot), but I wanted a quilted body and a smooth interior which would be fuzz-less for the iPad.  [Once we had to make a little trip to Apple when the pocket fuzz from my husband’s pockets clogged up the earbud port.  Apparently this happens a lot.]

Begin stitching on the binding about 2″ down from the fold of the flap.  Here I’m going around the flap outer corner, and that sweet yellow bird is keeping an eye on me.  The bias binding really goes smoothly around corners.

After sewing on the bias, turn it over and try not to curse when you notice all the places that didn’t get caught in your sewing.  Re-stitch those, which is another reason why I chose a colorful fabric for my bias binding.  It hides mistakes.

I had not planned to put on Velcro dots, preferring instead to simply fold it over, but row-quilted fabric apparently has a mind of its own, and it’s comparable to a two-year old’s who wants the Skittles from the back of the cupboard.

So on they went, obscuring two of my favorite birds (rats!).  I ended up putting a third dot in the middle, hand-stitching it to the stylus case, but machine stitching it to the flap.

So now I can be cool with my ikat fabric cover.  And not worry so much.  I may yet get a black foldable cover but I looked at the ones in my local store and wasn’t that thrilled with them.  This is fine for now.

And I’m out of the fog!  Happy Quilting this weekend.