Creating · Gridsters · Quilts

July’s Gridster Bee Block

July 2017_Gridster_Carol

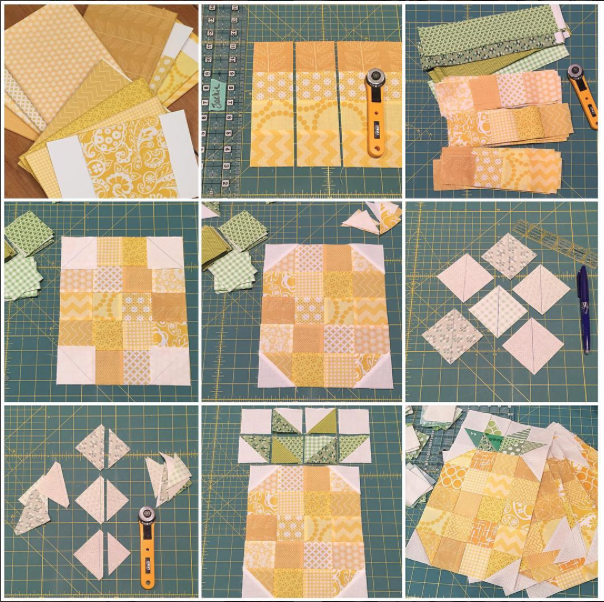
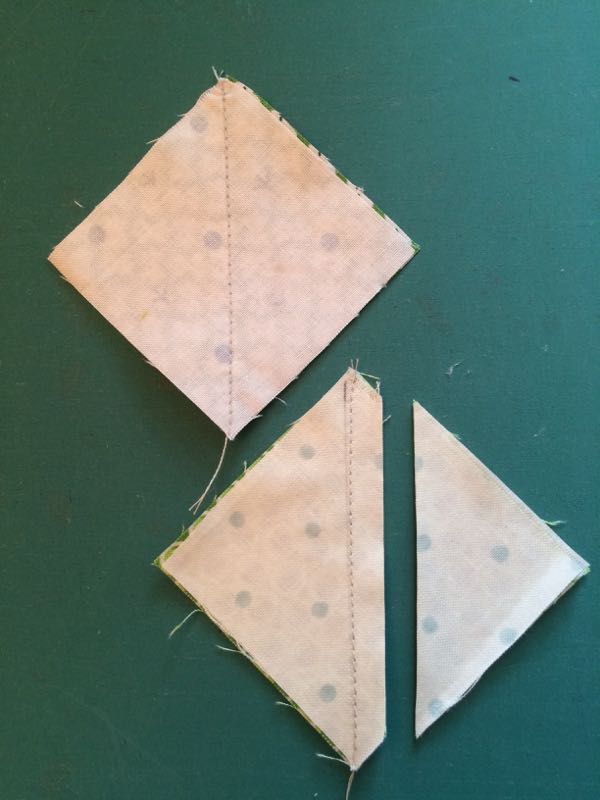
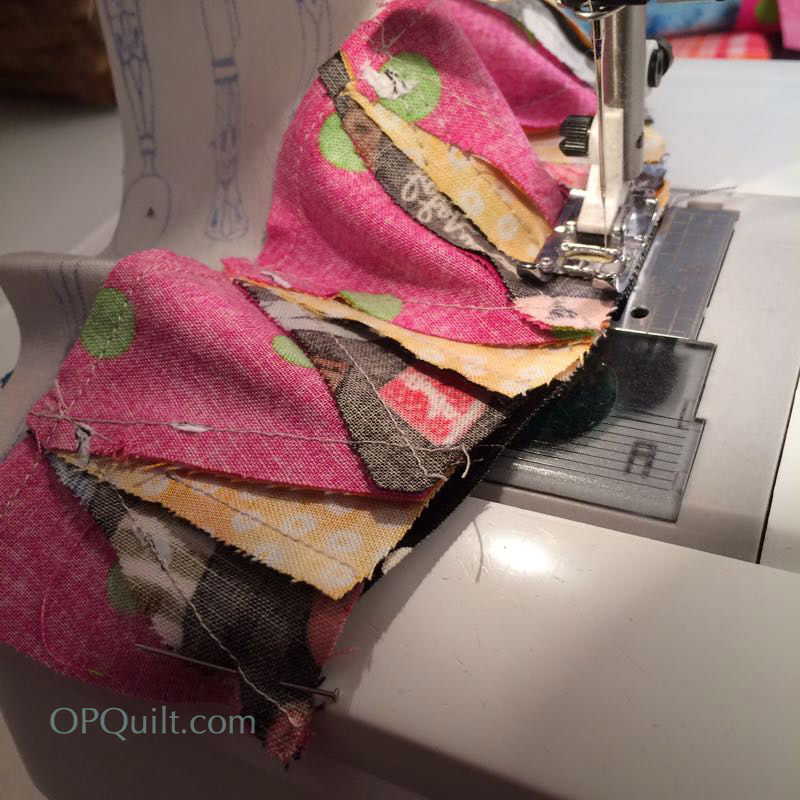
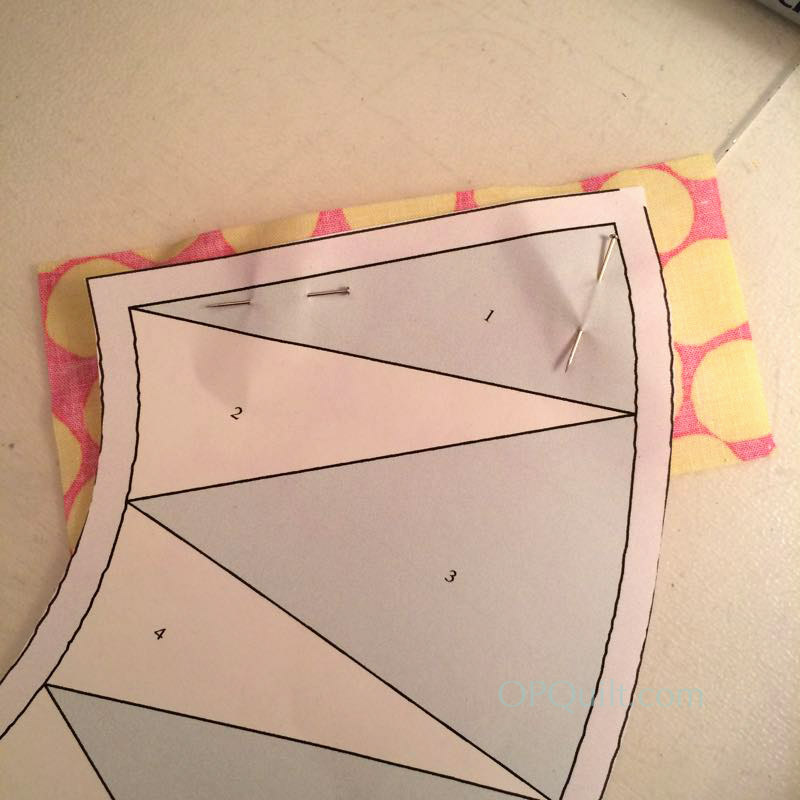
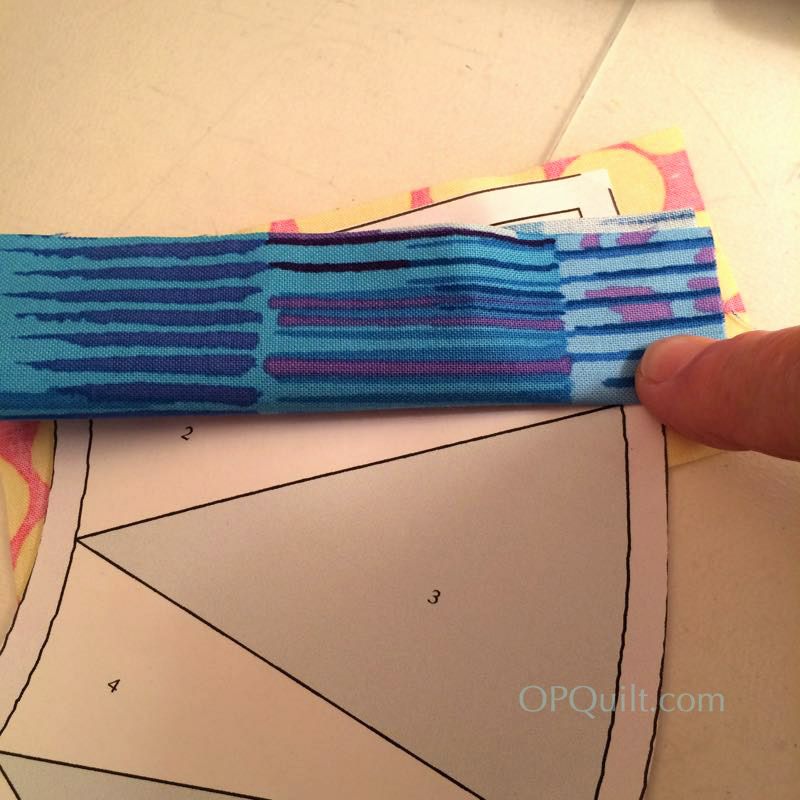
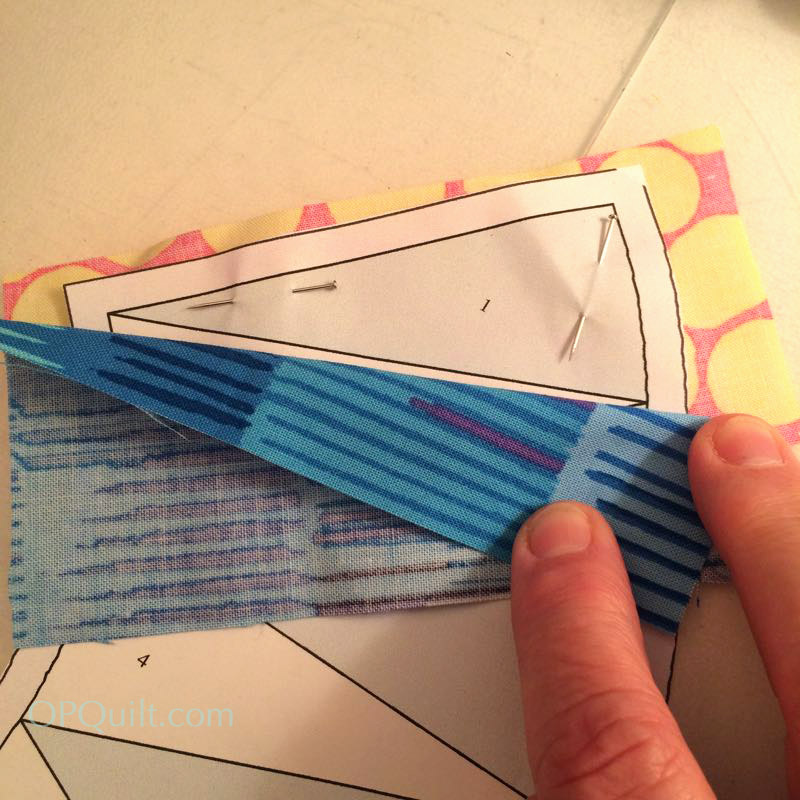
Here’s the block I made for the July Gridster Bee, for Carol.  It was a fun make, made easy by this tutorial from Sara Noda.  (She also has a blog post on her completed flag quilt.)

Rosette 7

I also dragged out my hexagon quilt, and got started again.  Here is Rosette #7, isolated (above), and below as it looks sewn into the quilt.  I took the blocks and quilt rosettes with me on our recent family trip — since we had a lot of driving time — and was able to get the rosettes sewn together and one more completed.Millefiore Rosette #7I’ve totally revamped Rosette #8, because frankly, everyone on the Facebook page was having real troubles with it, so I thought I would have a go at creating my own hexie arrangement.  I’m choosing fabrics for it now.

Road to California 2018 classes

I also picked my classes for Road to California 2018 (above)…

QuiltCon 2018 ESE Classes

…and my classes for QuiltCon 2018, too.  Anyone else going?  Are we in the same classes?

Film Quilt1And in case you think you only need fabric to create quilt patters, Sabrina Gschwandertner acquired a collection of old instructional films on the textile arts and has been creating quilt works of art.  I will spare you the mumbo-jumbo about quilting from the LA Times, but here’s the article if you want to read it.

Film Quilt2
(PS Ignore the random “A” up on the right side)

Film Quilt3

I actually wanted to see the movies, after reading about her and seeing images of her work.  Now it is lost forever.  Will we feel that way about the millions of YouTube videos?  I doubt it.  There is something about the tangible presence of film being cut up, the scarcity of that resource being destroyed to begin again.  But I do like looking at her works.  If you are in LA, the article has info about how to see this in the gallery, but the show closes soon.

And today is six months since my shoulder surgery.  I’ve seen the surgeon for the last time, finished my formal PT.  Now just the challenge of walking, getting back into some semblance of shape after sitting around, and doing the PT exercises on my own.

LASTLY, thanks to all who entered the OPQuilt Summer Book Giveaway (snazzy title, don’t you think?).

 Giveaway Banner

Here’s another:

Intentional Piecing_Book Giveaway

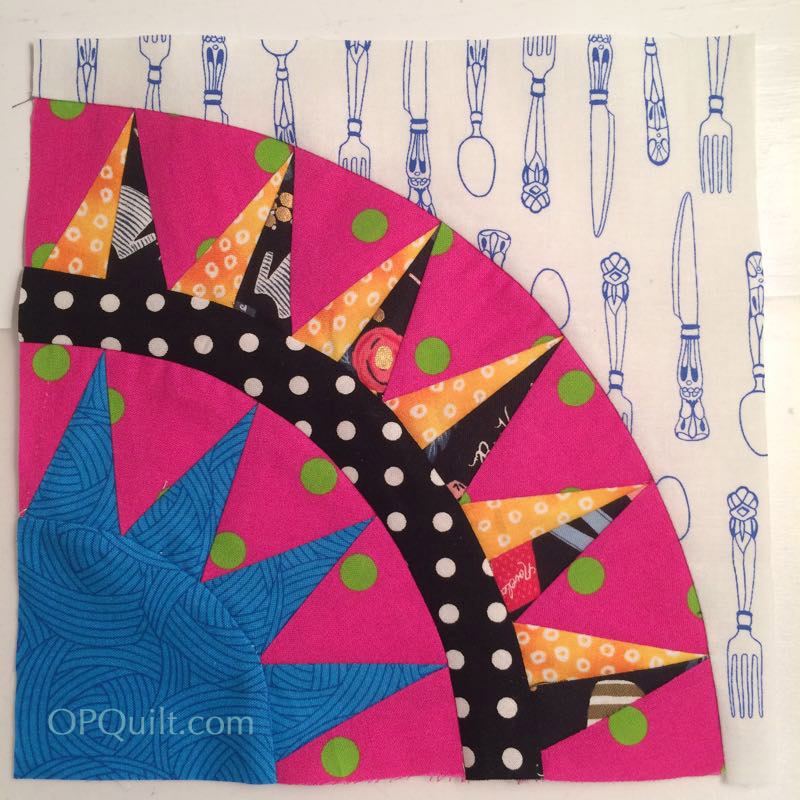
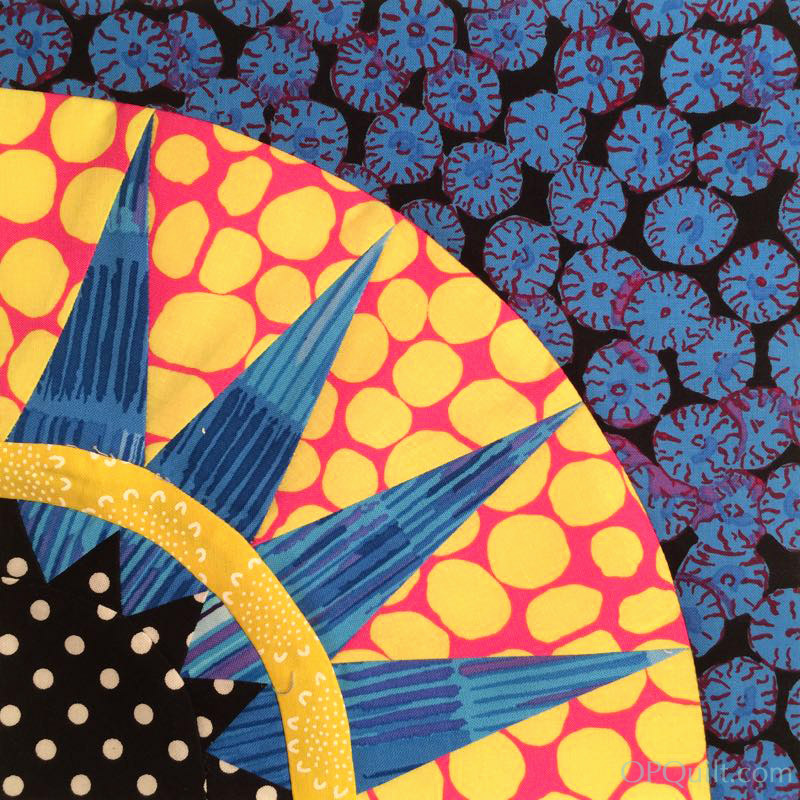
Amy Friend’s Intentional Piecing, a look at using fussy-cutting to make spectacular quilts.  She has a range of stellar projects, plus some fun paper-piecing designs to sew into various quilts and hand-mades.  It’s signed by the author.

Again–leave a comment letting me know if you are interested in receiving this book in the giveaway.  I’ll notify the winner by email.

Update: Roxanne was our winner from the last giveaway. Thanks again for all who entered!

SaveSave

Gridsters · Quilt Bee

February Bee Block for Gridsters Bee: Pineapple!

gridsters-250-buttonx

IG: #gridsterbee

gridster-feb_4final

Pineapple Block for Sherri for February 2017

This month, Sherri, of A Quilting Life, is our Queen Bee and she’s asked us to make her pineapple blocks.

green-fabrics_2017

First step: make a mess of the sewing room pulling out greens to get the best ones.  (It also helps with re-organizing my messy shelves.)

I downloaded the free pattern, and also pulled up the post from Sherri where she makes her block, so I could glean any tips she had when she made it.

padesky-pineapple-tut-from-ig

She suggested we scroll through Jackie’s IG feed until we found the tutorial, which really helped me understand how we put these together (that’s a screen shot of her image above), as the pattern is a bit sketchy on details. It can be a bit confusing, but basically she is making enough for 18 pineapple blocks. 

As promised, here’s a brief tutorial on how I like to make my #pineapplequilt blocks! The great part about these blocks is there is no wrong way to do them, and lots of right ways!
1️⃣ I like to pull yellows in sets of four so that I can strip piece my units to form the yellow body. You need 24 2-1/2″strips sewn into 6 groups of 4 to produce 18 pineapples. 2️⃣ After sewing my 6 strips of 4, I like to press them all one direction and then I subcut them at 2-1/2″. This helps to nest my seams when I construct the body of the pineapple. 3️⃣ I choose a variety of greens, along with my white background fabric, and subcut the number of 2-1/2″ blocks needed to make the corners and stem units. 4️⃣ Then, I draw a line corner to corner and I sew on the line on the white squares to create the white background pieces. (Kind of like making a snowball block) 5️⃣ Next, I trim 1/4″ from my seam and press my corners out. 6️⃣ To make your stem units you’ll want to make HST’s in whichever method you prefer to equal 2-1/2″ unfinished HST’s. 7️⃣ This quilt is great for using up scraps, and I generally have a lot of 2-1/2″ strips, so I make my HST’s from that size and sew corner to corner and then trim 1/4″ from my seam down the middle. There is more waste this way, but if it’s just scraps anyway, I’m ok with it! 8️⃣ Arrange your background squares and HST’s to form the stem shape, and sew those units to your pineapple body. 9️⃣ Ta-da! You’ve made a pineapple block!!! 🙌🏻🍍

Better to click on the Tutorial (above) and use that.

gridster-feb_1

What confused me was that the pattern calls for cutting all the blocks the same size, different than what I would do if making half-square trianges (HST).  After reading the IG tutorial, I see that Jackie sort of “snowballs” on the white corners, instead of making HSTs.  She marks the line, and sews just to the side of it–to the seam allowance side.  She then cuts off the excess.  One advantage of this method: there are no dog ears to trim!

gridster-feb_2

Yellows sewn: check.  Green pineapple crown sewn: check.

gridster-feb_3

One other difference in the construction of this block is that the low-volume white is added to the corners of the yellow block after it’s all sewn together, then sliced off and pressed.

gridster-feb_4final

Ta-Done!

gridster-feb_4finalsig

And here it is with its signature block–with yellow on one corner and green on the other–albeit a bit blurry.

elaine-pineapple-exhange

Elaine’s Quilt Block Quilt Shop in Salt Lake City had a swap of pineapple blocks–both in the yellow and in a range of colors.  Unfortunately, they have now closed. I wish I’d grabbed more screen shots of all the pretty blocks!

Next month I am the Queen Bee–can’t wait!

Gridsters · Quilt Bee

Gridsters Bee • January 2017

gridsters-250-buttonx

IG: #gridsterbee

gridsters-january-2017_2

Susan of PatchworknPlay starts off our new year of our Gridsters Bee with having us make her some New York Beauty blocks.

gridsters-january-2017_2b

She sent us to a webpage (Ulas Quiltseite–it’s German, but no longer live) that had ten different New York Beauty blocks on it, and we could pick two different ones (if we were making two).

gridsterbee-january-blocks

There was even a block for beginners.  I chose Block #1 and Block #6.

gridsters-ny-beauty-instructions

Helpful tip: These words mean that she split them to get them printed.  You may want to join the outer pieces together so there is no seam.  You’ll see what I mean.

gridsters-january-2017_2a

gridsters-january-2017_3

I always remember Leann’s tips for sewing curved edges together (her quick video *here*): it’s best to put the concave piece on top, and the convex piece on the bottom.  But since I had a curved shape with gazillions of pieces, I reversed it.  Don’t know if that made it harder or easier.

gridsters-january-2017_4

The second block had another challenge.  If you go and look at it, you can see I was using striped material, and I didn’t want that stripe to tilt.  First piece on (above), and I don’t glue my foundation paper piecing, I pin.

gridsters-january-2017_4a

I marked the center of the lower edge of the piece (opposite its point).  I folded my fabric scrap in half lengthwise and line it up with both centers.

gridsters-january-2017_4c

Keeping it in place, I fold back one side, mimicking the slanted edge that needs to be sewn.  I finger-press it.

Then using all my skills, I move this carefully to the other side of the unit, holding it up to the light to line up that folded edge where it needs to go.  Sometimes it’s easiest to note where the edges are and adjust from there.

gridsters-january-2017_4d

Unfold it, being careful not to move it.  

gridsters-january-2017_6a

Stitch on that line, trim seam allowances and continue on.  They all line up nice and vertical.

We make each other signature blocks, using a white 3 1/2″ square and snowball on two 2-1/2″ squares on either corner, using fabric from the blocks we made. (Click on the link to see a how-to, as well as how we’ve used our signature blocks: sometimes on the back and sometimes on the front of the quilt!)

The key to success:  IRON ON A SCRAP OF FREEZER PAPER to the back before writing, as it stabilizes the fabric.  I use a Pigma 08 to write.

gridsters-january-2017_6b

We always write our name, but other things to write could be:

  • IG/blog name
  • month/year
  • hometown
  • name of the bee or why you made the quilt

Looking forward to the rest of year with my Gridster Beemates!