Quilts

Don’t Let the Process Overtake the Purpose

Narrow Mountain cliffside road

So here’s a dream story. I was driving someone home on a cliffside road, maybe it was the side of a dormant volcano or something–things are awfully hard to pin down in dreams.  The road was carved into the side of a mountain and kept getting more and more narrow until I felt I had only about two wheels on the road, but somehow didn’t fall down the mountain.  I could see the village in the valley below, and the person in the front seat kept yakking on and on like there was nothing unusual, and I’m like, “Hey! There’s no road here!”

Leap of Faith Indiana Jones

And as only dreams can do, it suddenly got worse when a car was coming the other way and I’m like “Are you nuts?  I’m not pulling over. . . I’ll grind right into the mountain.” And the oncoming car got closer and closer and I was sure I was going to be killed–because it was a dream, and that’s how dream things go.

crusades1

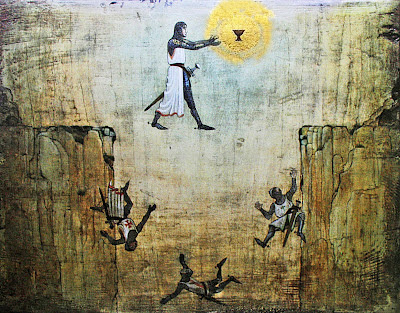
I woke into that lucid dreaming sleep place, where you are half in and half out, and thought of that scene from Indiana Jones, where he had to take a step of faith, and then discovers that the land bridge is there, only he couldn’t see it.  I focused on that, trying to stop being so frightened about there being no road, when it suddenly dawned on me that this was all about The Quilt.  The one that has been done since MAY and the one that’s been hanging in the closet, as I was too frightened to start quilting it.  I just didn’t know how, didn’t know if I was up to it.  I had already purchased all the thread in two separate trips up to Utah’s Superior Threads, so it wasn’t like I didn’t have my supplies.

Colorwheel Blossom Quilt Top

I did this-and-that all morning, still avoiding The Quilt.  And at lunch I was reading the New York Times and found an interview with Janet Elkin, with the words from this post’s title: “Don’t let the process overtake the purpose.”  She went on to say that when she motivates her employees, instead of focusing on the negative, she says “Let’s talk about how we’re going to get better.  Let’s get started.”  I ripped out that article and went right upstairs and pinned it to my design wall where I could see it.  It was time to get started.

Quilting Ideas

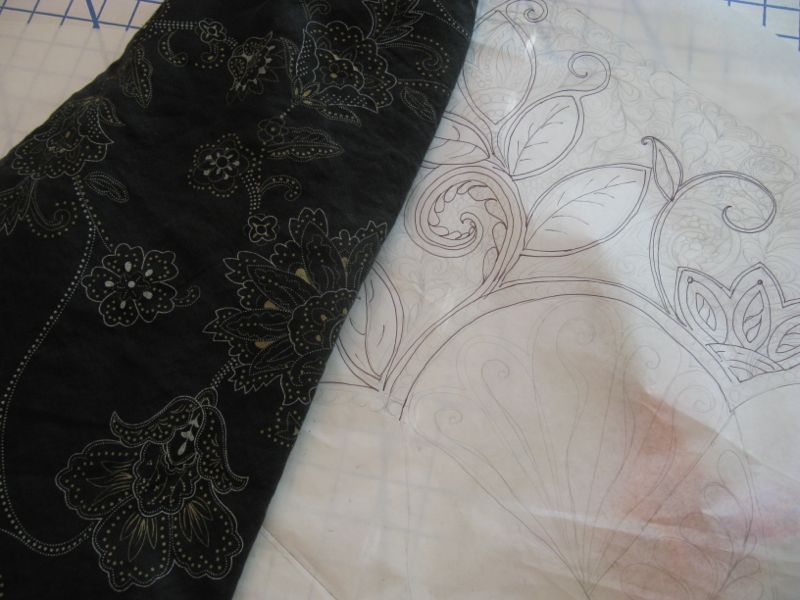
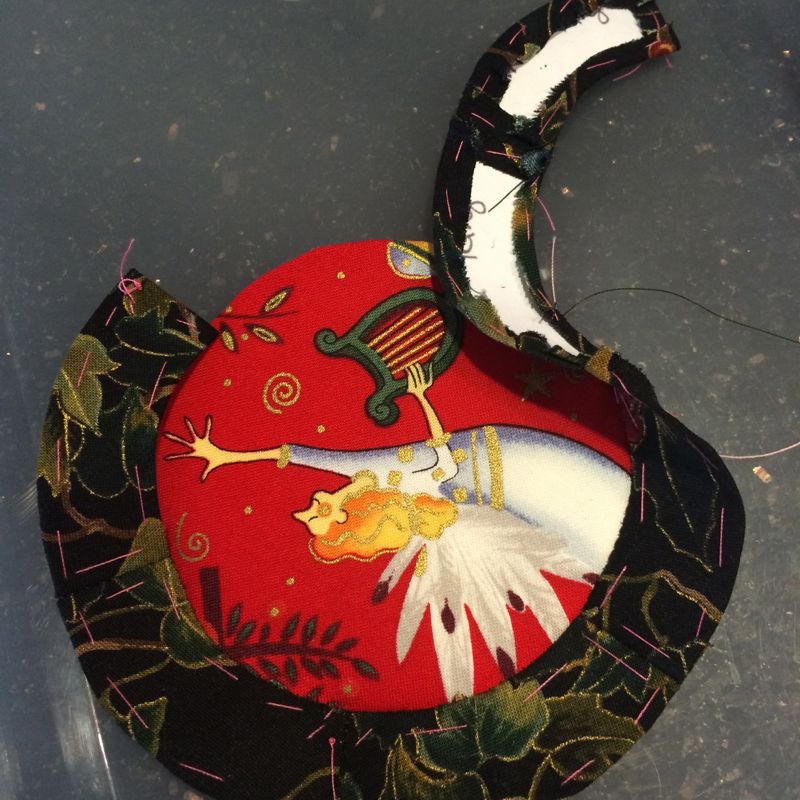
When I’d taken my class this summer at San Diego, Sue Rasmussen, the teacher, recommended finding ideas even in clothing.  I had drawn up a small sketch of an idea some time ago, and in another “ah, ha” moment, recognized it as being from the skirt I was wearing that day.  So I pulled out that skirt, traced a quarter of my quilt onto tracing paper and started sketching some ideas in pencil, going over them in ink when I liked them.

Colorwheel Quilt_sketch

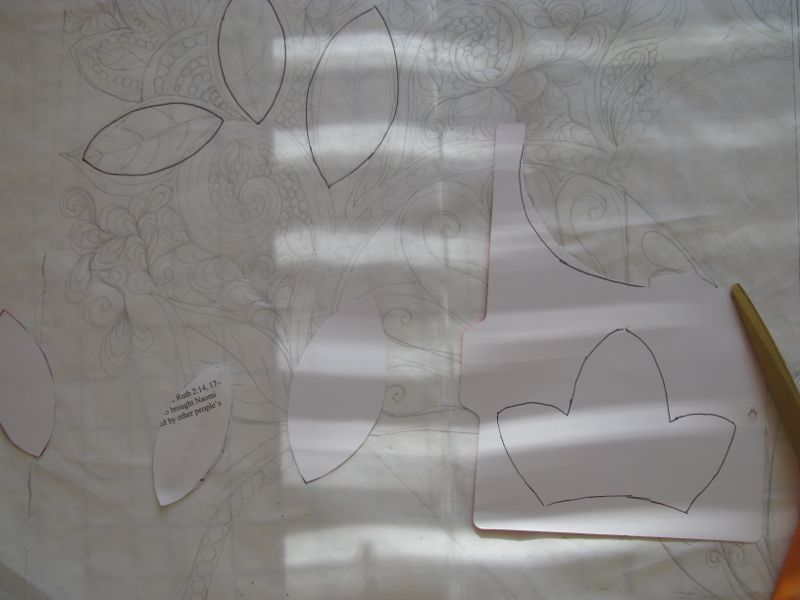
Although it took me a while to realize this, a lot of free-motion quilters use drawn shapes to help them get the quilting done, so I made some templates of repeated shapes and laid them out on my quilt.  I used a blue wash-out marker to trace them, as I wanted them to stay on the quilt for while, giving myself a road map. I kept saying to myself that I had let the idea of quilting this quilt — the process — get in the way of my vision of a finished quilt — the product.  The universe had delivered two strong messages to me, so finally it was time to get going.

Colorwheel Quilt_petals1

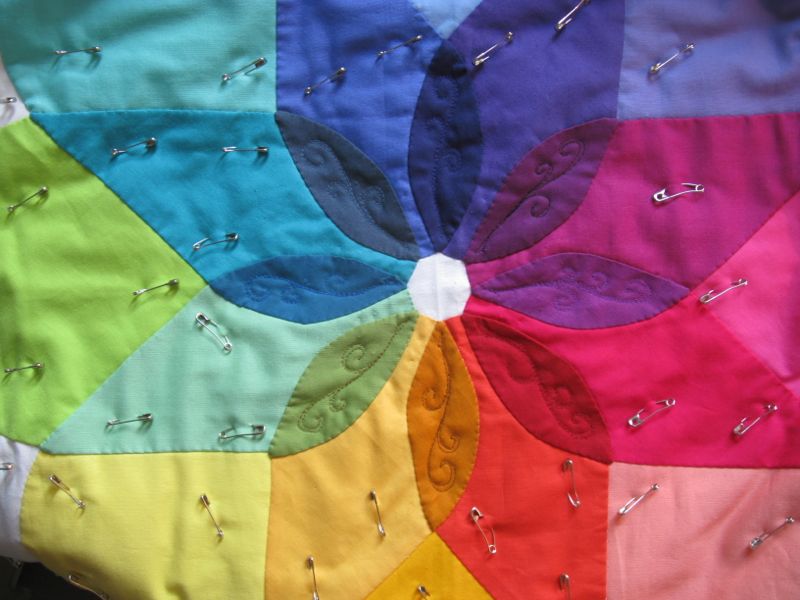
I drew on the design with a purple disappearing marker for the inner petals, found the threads, and stitched those.  Big breath. Keep going.

Colorwheel Quilt_petals1a

I have NO confidence whatsoever in my ability to free motion quilt feathers, even though I have drawn them out about a billion times.  So I drew on that next set of petals, found the threads and quilted those and before quitting for the day, I buried all my threads, using the new method taught to me by Sue Rasmussen.

Colorwheel Quilt_petals2

I matched up the colors for the outer petals this afternoon, but even though I’d made a sketch of what I wanted, I needed another road map.

Colorwheel Quilt_petals template

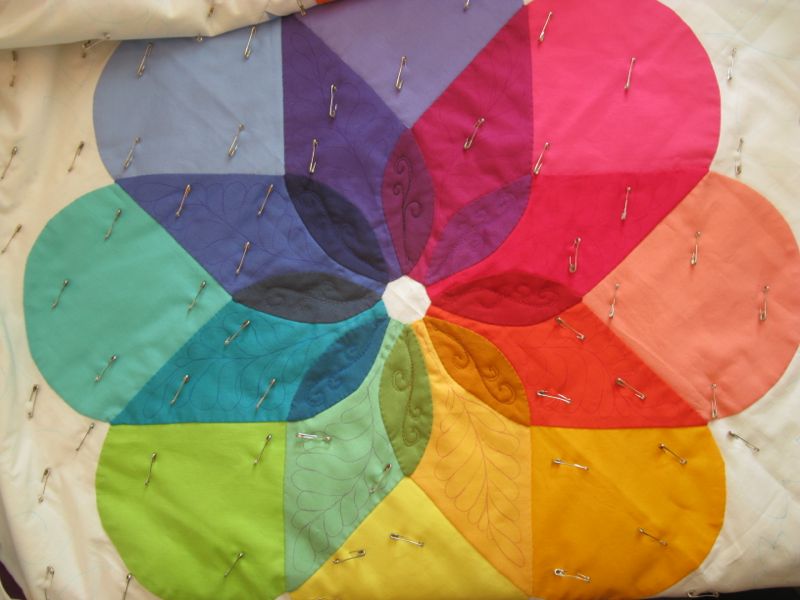
So I made  another template, and drew that on.

Colorwheel Quilt_petals3

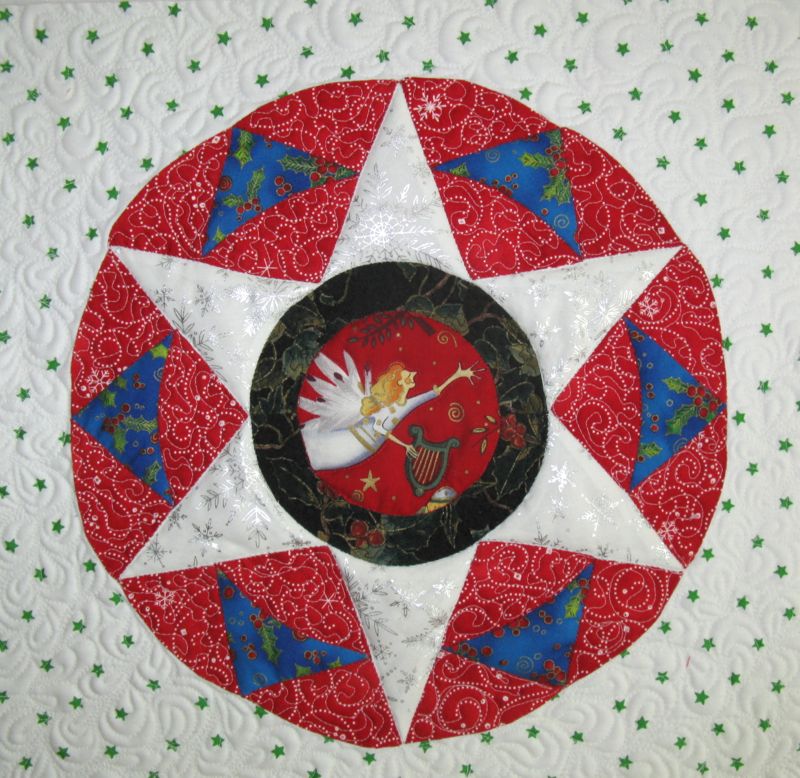
Tonight before I stopped, I had finished up all the colorful petals of my Colorwheel Blossom.  Of course, I’m not out of the woods yet, because I feel like another cliffside road is coming up for the quilting of the white part, but I will go forward in faith, trusting that I’ll figure it out as I quilt.  I appreciate all the encouragement I’ve received from the IG crowd; their enthusiastic comments help to propel me forward.  Lastly, I don’t know if any of my quilts  will ever be “show-quilt” worthy, but I will have tried something hard for me, and traveled down a new road.

driving into the sunset

Sometimes that’s enough.

Quilts

Moments of Friendship

collage

I had some enjoyable moments last week with friends and family, and a funny little moment in a fabric shop watching these two little future quilters in the lower right corner climb up the shelves of fabric.  I was also able to attend Andrew’s baptism at the age of eight, and I got all teary listening to the talks, the messages from the bishop of that congregation, and enjoying seeing my son interact with his sons (he has four boys).

Screen Shot 2014-11-11 at 8.35.54 PM

Another friend and I traveled to Roger’s Gardens in Costa Mesa (Orange County) to see their holiday decorations, newly revealed and loved all their arrangements.  But since we didn’t rob a bank before going, we took snapshots of a lot of them for you to enjoy (although I would have like to have sent you all that beautiful wreath in the upper right).

Signature Quilt Top

And to honor another friend, we finally gathered up all the signature blocks we needed in order to make a quilt for Lora.

Signature Quilt top2

Another reminder of how the weekend went was the chance I had to listen to still another friend who had just lost her father, and all the attendant issues that come with the dismantling of a childhood home, of caring for the remaining aging parent, of dealing with grief and loss.

listeningSome of us have known each other for 25 years or more, and like all friendships, our ties to each other have come about layer by layer and shared experiences and I have had a chance to reflect on why they had impacted my life so deeply. The salient characteristic was as Emerson described: they listened to listen.  They listened to learn.  They listened and then asked questions and our answers and questions to each other would ping-pong back and forth.

Bizarro About me and my stuff

They never listened to me in anticipation of getting the conversation centered back on themselves, a commonplace experience nowadays.  Slowly over time, like the process of building a quilt,  we learned about each other, the years sifting over us until we found ourselves at a dinning room table talking about seam allowances, a flood in a kitchen, how a child is doing in college, a child’s wedding.  Not all friendships can go the distance, and perhaps Emerson’s words are a golden nugget for me to think about again and again.  All I know is that time with a good friend is a treasure, and this past week I had more than my share.

Quilts

Sewing Sewing Sewing Along

Peter's Pumpkin 2014

To get you back in the mood for this post, here’s my son’s pumpkin.  Did I tell you he has a great sense of humor and can write computer code that drives websites?

KeaganEgyptian_1

First up is Keagan, the Egyptian Princess.  I visited my daughter’s home in October and went right to work.  We had to double-line that white sheath because, well, it was white.  Keagan and I talked over costumes, looking some up on Pinterest before she went to school and then I headed to JoAnn’s.  I hate paying a billion dollars for patterns, so picked up one of the $2.99 Quick and Easy patterns that looked like it might work, and added on enough at the bottom to be long enough.  I used the bodice of the dress to fashion a collar out of paper and tried it on her.  Keagan had a few suggestions and I trimmed it to her specifications.

KeaganEgyptian_2

The drapey thing was pinned on in the back with a safety pin, then wrapped around some rubber bands.  Her mother and dad fashioned some gold bands for her (one solution is to cut a Pringle’s can into sections, then spray-paint gold) which she slipped over to hide the hair bands.  She also had some on her upper arms to complete the look.

MaddyasElsa_1

Maddy wanted to be Elsa.  She had VERY detailed instructions, and since she was recovering from a tonsillectomy I had her at my disposal for measuring.  The dress had to had see-through sleeves and silver at the top of the bodice, and Maddy was very specific about the drapey overcoat thing, wanting it to flow from her shoulders, but since I only had one day to get both costumes done, I went with a “coat-type” construction, made out of organza so it would have some body.

MaddyasElsa_2

We cut out a giant silver snowflake by tracing it onto the paper side of fusible web, adhering it to the silver lame.  We cut out the lame, peeled off the paper and fused it on.  Because the lame and the organza are kind of “open” this process left a residue of stickiness.  I told my daughter she’d better wash her ironing board cover so it wouldn’t stick to anything she ironed after that.

MaddyasElsa_3

I’m told both costumes were a hit.

Halloween 2014

Here they are with their brother who was a Mad Scientist-Zombie Guy.  Maddy is not wearing a crown (it’s a bush behind her).  Sure looks like a crown, though.

BarbarasTote_1

I was also able to get ahold of the pouch I made for Barbara and check it out, fully loaded.

BarbarasTote_2

BarbarasTote_3She says it works great.  I’m so glad I can sew! Thanks, Mom!

EPP · Shine: The Circles Quilt

Circles Block #6–another view, EPP Sew-A-Long

Circles EPP Button

I told you in the last post that I’d made up another version of Circles #6, and today I’ll show you what I came up with.

Circles Block #6 duo

When I was sewing this up, I kept thinking what a great Christmas pillow it would make.

Christmas Star Pillow_front

So I made one!

EPP #6_auditioning fabrics

As usual, I audition fabrics to see what I like.  You can see which won.

EPP #6_1sewing together arcs

I lined up the Star Point with the lower inner arc and put a pin through the centers.

EPP #6_2sewing together arcs

It’s easier to stitch when you do it three-dimensionally.

EPP #6_3sewing together arcs

Cute little thing, isn’t it?

EPP #6_4sewing together arcs

EPP #6_ring to center

I made this  circle differently.  I think the method I showed you on the first post is much better, but here’s this one:  Stitch the inner ring pieces together, then stitch to the center circle.  There’s no need to ease; it should fit together neatly by taking a stitch or two at a time, then moving along.  Sew the final inner ring seam together.

EPP #6_stitching center to outer ring

Now stitch together the inner arc (red) and the small star point (blue) and add the left star points (more red, on either side of the blue).  After you’ve made six of those little units, start making the larger outer ring by attaching the large star points (white).  Like the first ring onto the center circle, it should “match” easily onto the sign.  You can see how I began here, by dropping the ring down and starting the stitching.  I did take time to figure out how I wanted the white star points to be aligned on the final block.

Circles Block #6 duo

See the two circles side-by-side, above, to see the different alignments.  The Christmas Star has a star point centered, pointing North, but the other circle has it differently.

Like I said, I think the other method is much easier.

EPP #6_center circle

Done!

EPP #6_back with papers

Ah, you know I love this view!

Circles Block Christmas Backgrounds

I had several backgrounds to choose from, but my granddaughter Emilee helped me choose the white one with the stars.

Christmas Star Pillow_front1

Papers out, and here we go a-quilting!

Christmas Star Pillow Back_quilting

One thing I learned from Sandra Eichner’s blog is how to let the batting poof up under a design element by stitching towards it.  First I did the red pieces in between the star points in a meander, trying to quilt toward the star points large and small.  Then I went for the outer margins, having fun and letting the machine roll.  Black thread and a tiny stipple for the inner ring, dodging the berries, and then outline the angel in the center in order to control the fullness of the batting.  Lastly, I outlined everything, using my even-feed straight-stitch foot.

Christmas Star Pillow_detail front

Christmas Star Pillow_front

Yay!  A new piece of Christmas fun.  Hope you’ve enjoyed seeing both of these Circle Blocks.  I’m taking a break during December and will be back in January for the last six circles in this project.  Yes, I’ve decided I’m stopping after twelve EPP circles.  That ought to give you enough to play with!  If you are making these blocks, please shoot me a photo, and I’ll post it up on the blog.