It’s the WONKY STARS step!
If you are appliquéing your stars onto your smaller background blocks, go for it and we’ll see you next month. For the rest of you, even those not making this quilt, I’ll walk you through a stack and slash version of a star, pioneered by Thelma of Cupcakes and Daisies.
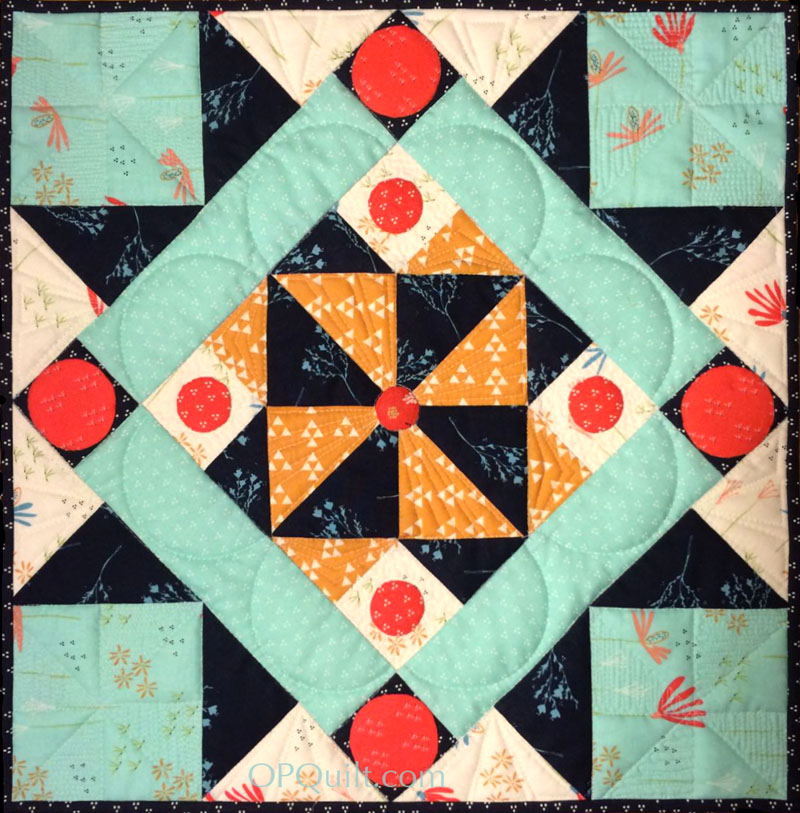
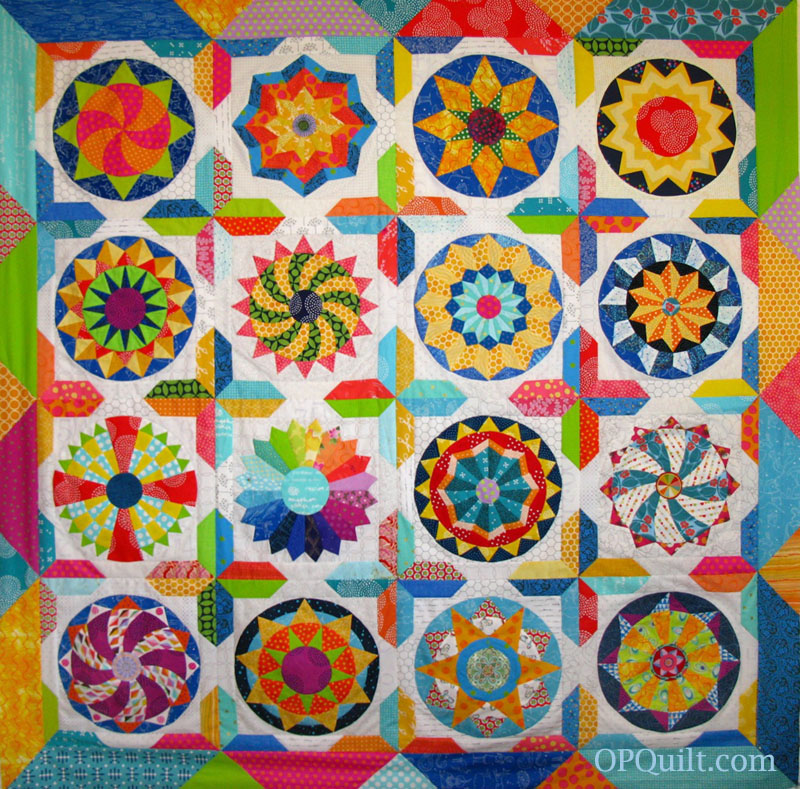
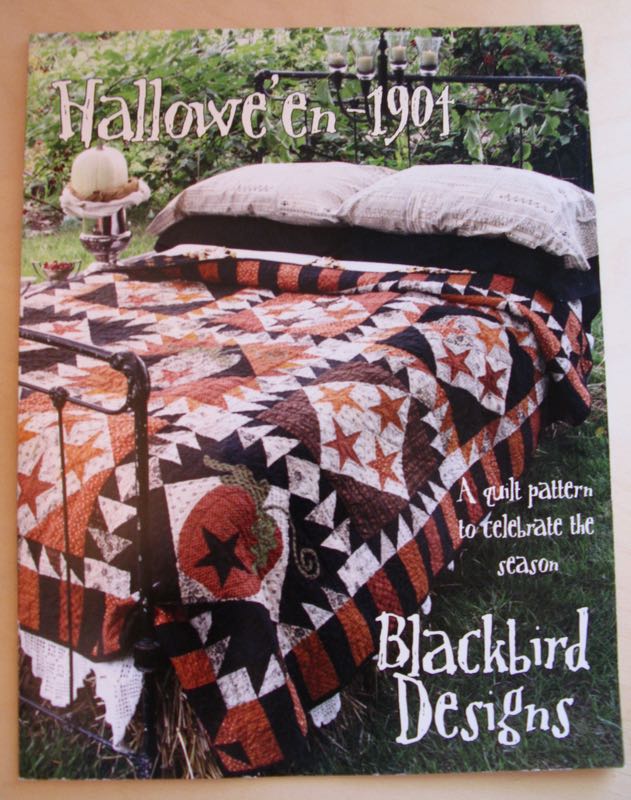
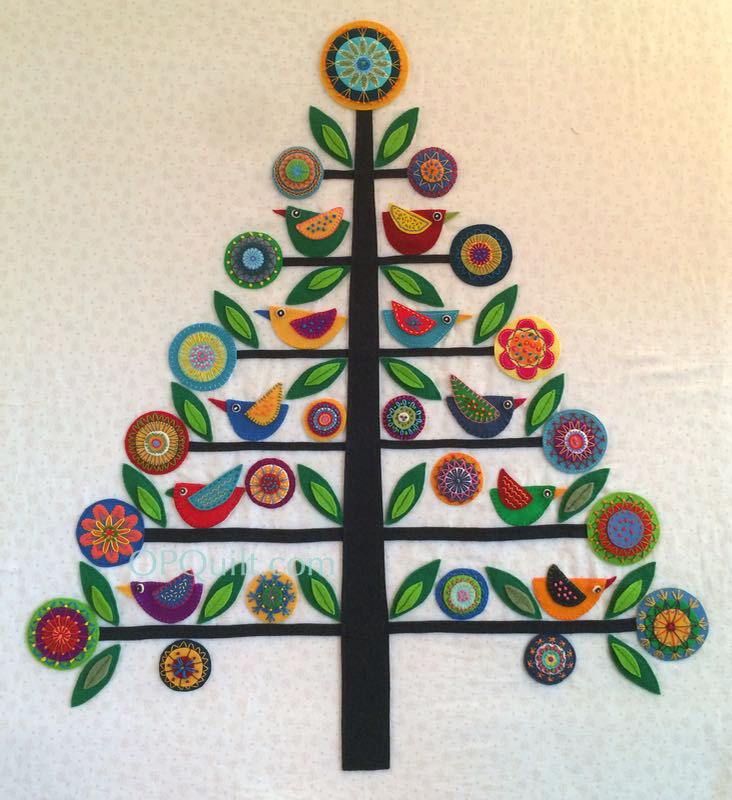
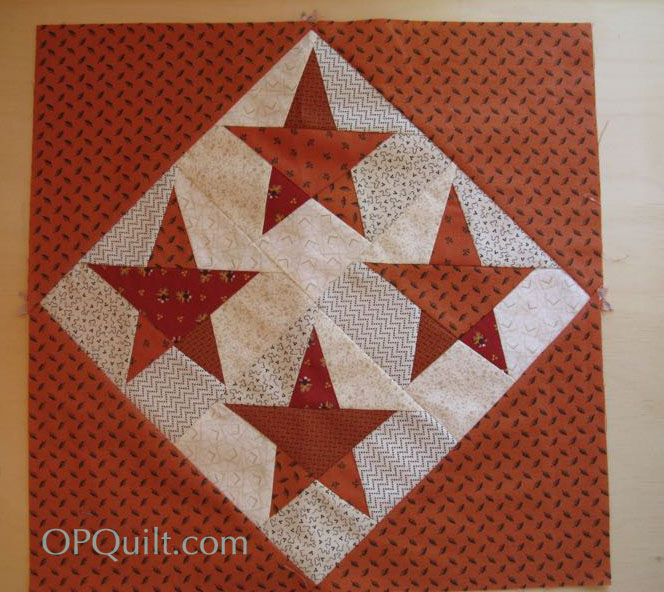
You’ve seen this before; this is an image I found on the web some time ago of the quilt we are making, Hallowe’en 1904 by Blackbird Designs. Yes, we are again hard at it for the Hallowe’en 1904 Quilt-A-Long. All of four of us will have quilts ready for Halloween, so I’m excited about that prospect. Well, maybe it’s more than four of you out there in the Internets, but at least two of us — Leisa and I — will be among those finished in time for that fall celebration.
Again, Leisa and I are making NINE blocks, down from the original twelve in the pattern. I posted a version of smaller quilt *here,* using all twelve blocks and formulated by Mary Burton. But we’re doing nine, with four appliqué and five star blocks.
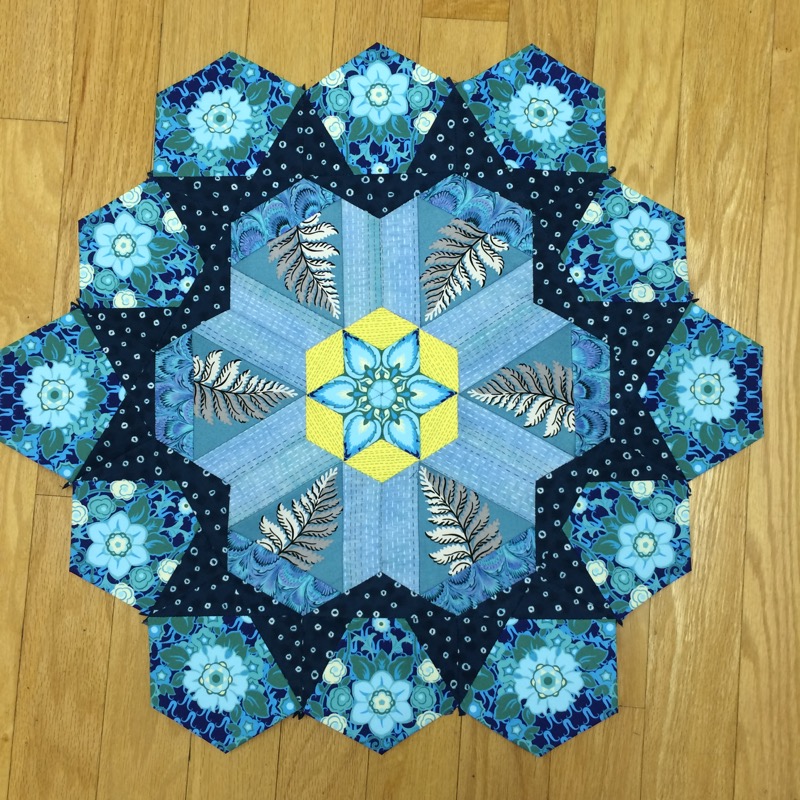
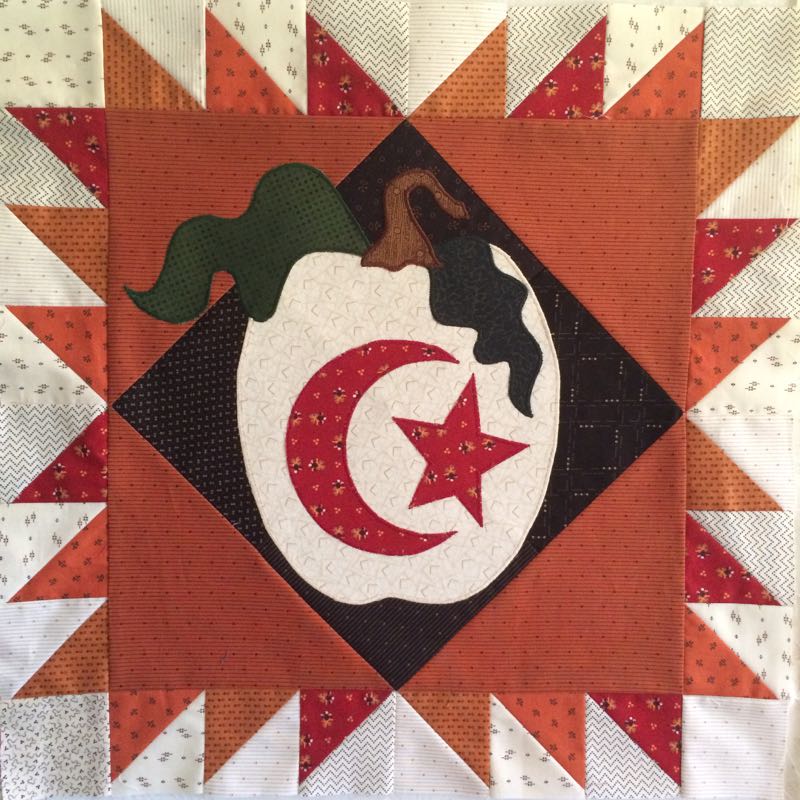
A recap of last month’s sewing:
Yes, all four are done, even the one with the weird-o leaf. It’s staying put for now.
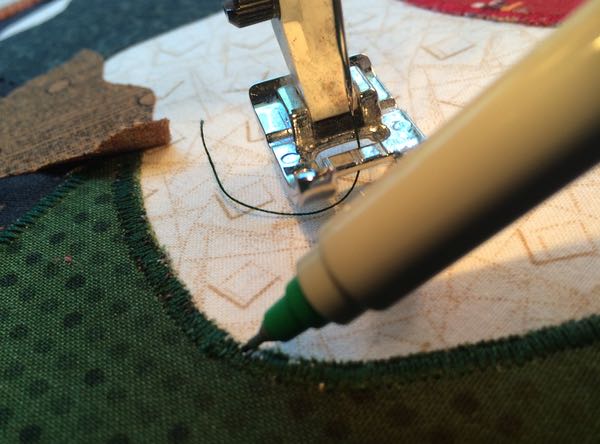
Here’s my tip for touching up those stray bobbin threads that work their way up if you are doing satin stitch: get out a Sharpie marker in the color of your thread and color it in. I also use it for errant free-motion-quilting oopsies.
And this time, we’re heading right into How to Make A Wonky Star. If you want to go the traditional route, of cutting and appliquéing your stars down to your background, go ahead and get going, and we’ll see you next time, on June 13th. Anyone else who wants to learn this technique, stick around.
(from here)
It’s not a new technique as we used to use it to make things like nine-patch blocks: stack up a bunch of fabrics, cut, swap out the fabrics and sew. I also found a version of this stack-and-slash used in a star block, and the copyright on the page says it’s from 2000-2005. And Bethany Reynolds is credited with the first national use of the technique known as Stack-N-Whack. I tell you all of this to say there is nothing new under the sun, especially in quilting, but only new turns at an old technique or form or idea.
We’ll get this far this month, but will do five of these blocks, saving the points around the outside for next month (although you are free to move forward if you want).
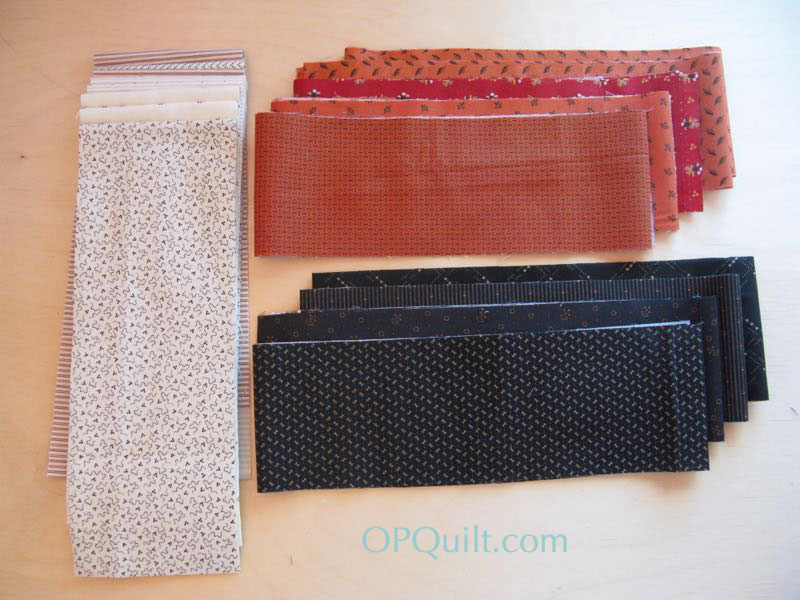
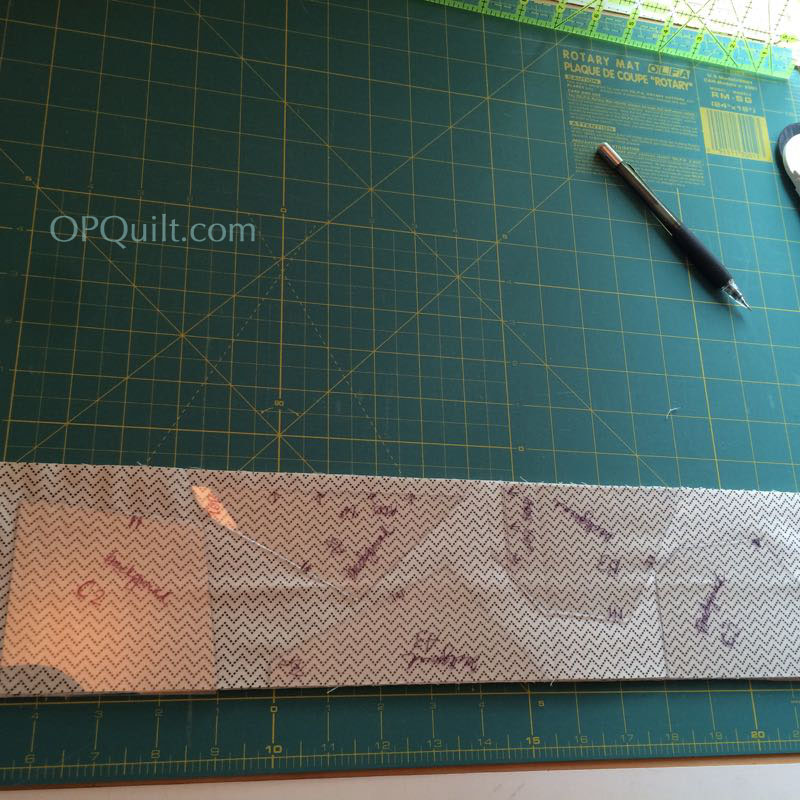
Get out your strips of fabrics, cut according to the chart.
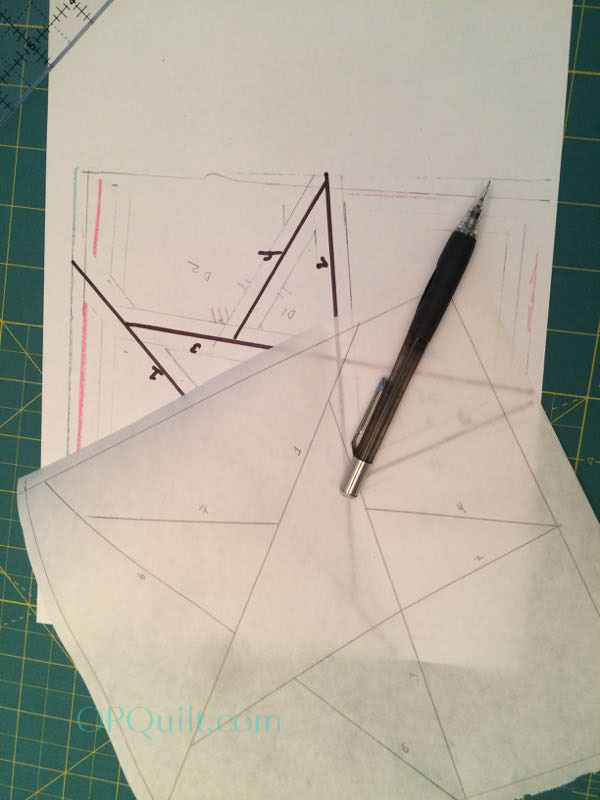
Different versions of the Stack & Slash Star pattern. I drafted and revised this star block multiple times, trying to get the proportions of the Stack & Slash pattern correct. For this reason, please print off only enough for your own use. Please don’t print off enough for your mother or your girlfriend; send them here to get their own.
Print off two: one to use for a template for your star patterns, and one to use as a map for when you are piecing.
You’ll notice on the pattern that there are lots of little diamonds and slashes. (These are your notches to help you get the thing back together. It doesn’t matter if you use mine, or make up some marking system of your own, but please do this!) Lay some clear template plastic over the pattern and trace. Looks like mine got reversed somehow, but really it just doesn’t matter one way or the other. Now pay attention to what is the center of the star (A1, B1, B2 and C1) and what is the background (all the rest).
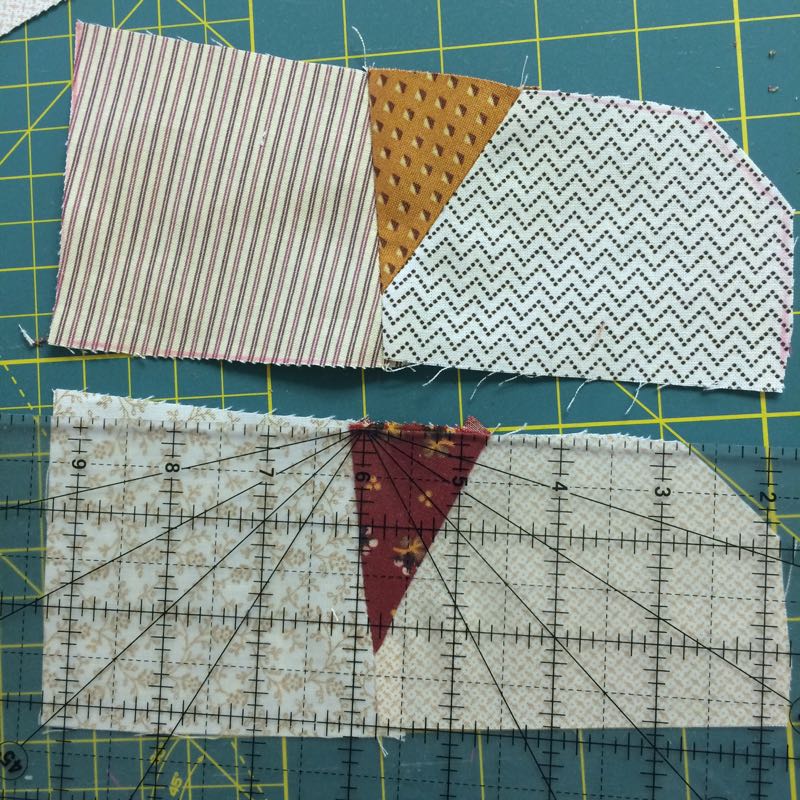
Working with a single layer of fabric (yes, you can stack them up, but don’t put the fabrics back-to-back unless you want to have some “regular” stars and some “reversed” stars. It will drive you a bit crazy, but it’s do-able, in case you forgot), lay out the background templates. (See example below)
If you do the usual cut of WOF, you’ll have part of the fabric facing you and part of it will be facing down to the cutting table, because of that fold. Unfold it before cutting and you’ll avoid this problem. I just had to go back in and cut some parts “backwards” and I made enough for a star or two. So you’ll notice that some of my stars are wonky to the left, and some are wonky to the right. It just doesn’t matter. Really.
Cut around them.
Start stacking up your pieces underneath the templates as you cut them
VERY IMPORTANT: To get the appropriate amount of wonkiness, you’ll need at least FIVE different background fabrics, because there are 5 different pieces to the background. If you want to have the star pieces all different, you’ll need FOUR different star fabrics, because there are 4 different pieces to the star. But so you don’t lose your marbles in construction, cut FIVE different background fabrics and FIVE different star fabrics.
You’ll need to do some shuffling as you sew.
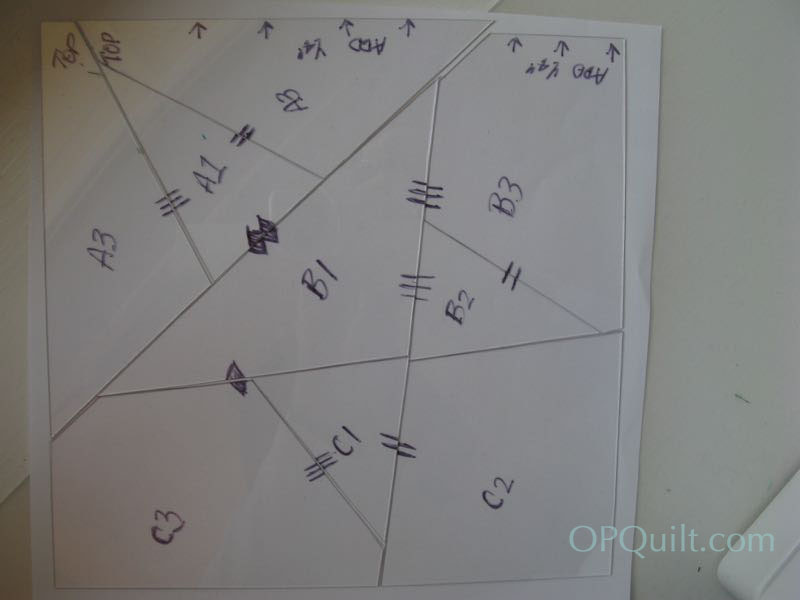
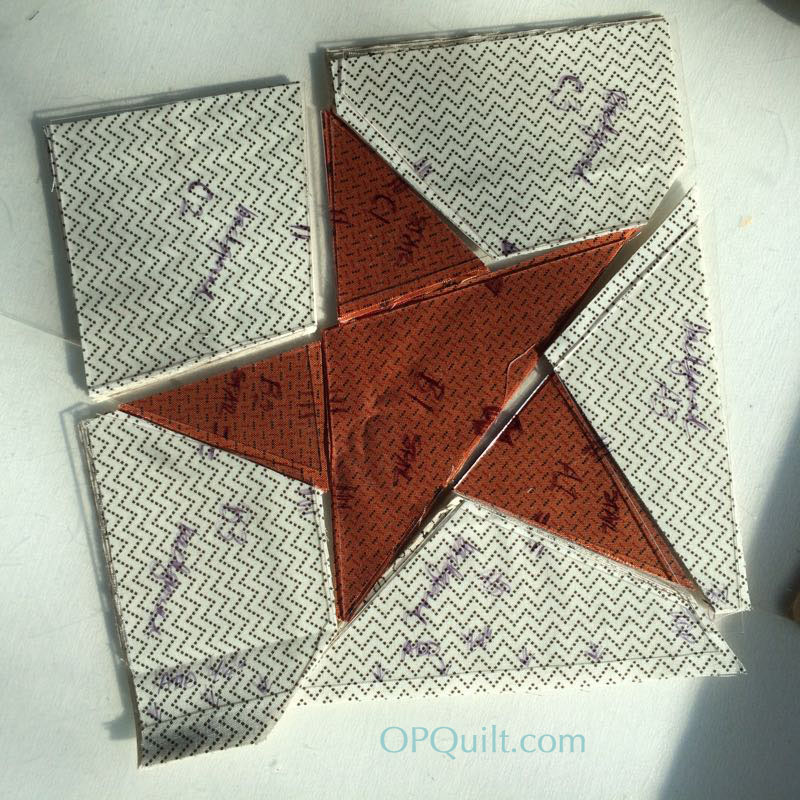
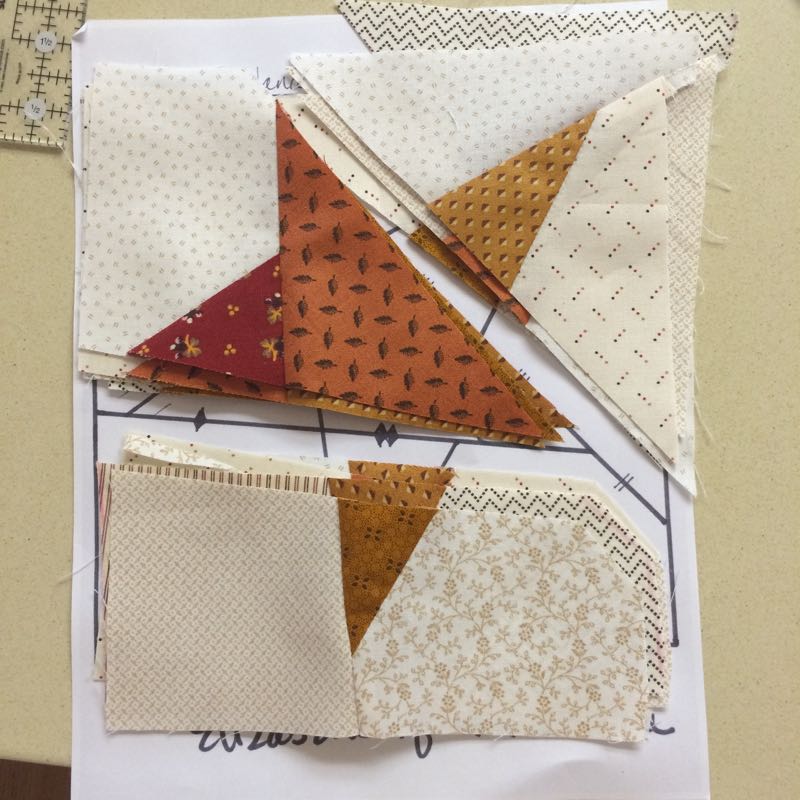
This is the “map” of the Stack-and-Slash Star (another printed copy) so I could use it as a way to keep all the pieces straight. Here you see five different star fabrics.
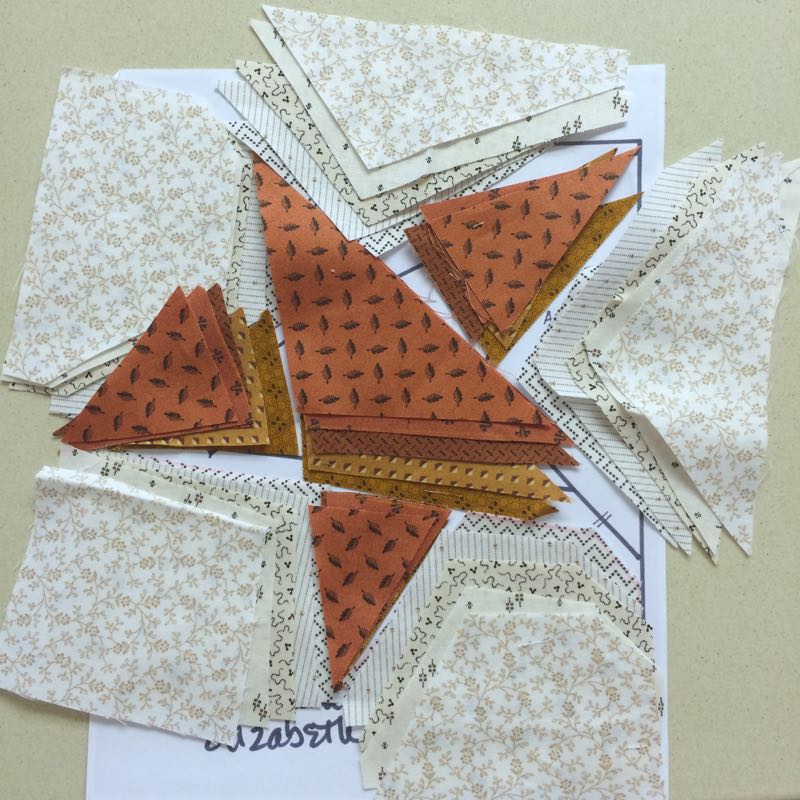
I cut, then laid out the five different background fabrics, too.
First we’ll do the BACKGROUND fabrics. Leave the star fabrics along.
1–Leave background stack A3 (upper left in this photo) alone. Starting with stack A2 (upper right), take the top fabric and move it to the bottom of the stack. Now move around the star in a clockwise fashion (or refer to the photo to the left which has the pieces listed).
2–Take C2: Take the top TWO fabrics and move them to the bottom.
3–C3: Take the top THREE fabrics and move them to the bottom.
4–B3: Take the top FOUR fabrics and move them to the bottom.
All the backgrounds have been switched, but the star’s pieces are still in the same order. Now we’ll do the STAR fabrics:
1–Referring the map above, start with A1 (leave it untouched).
2–B1: Take the top fabric and move it to the bottom.
3–C1: Take the top TWO fabrics and move them to the bottom of that stack. Now keep reading.
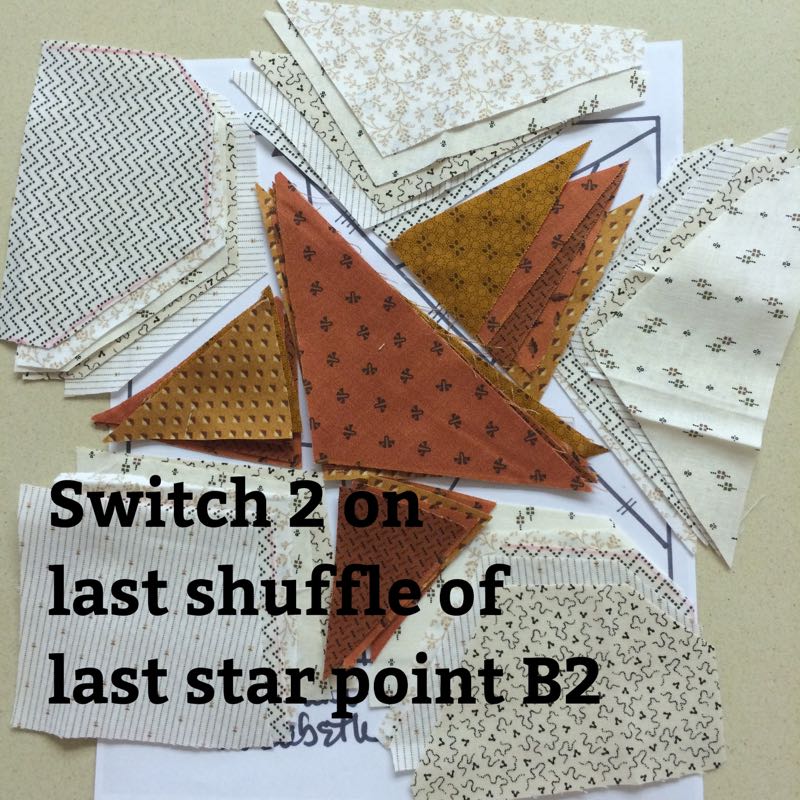
4–Since you have FOUR star pieces, you’ll need to do some switch the the top FOUR fabrics on the piece B2, and move them to the bottom of the stack. I don’t know why, and no, this isn’t the Gospel Truth, and yes, I could have said it wrong, but that’s what I did to get them all different. This way, when you sew that last star (star #5), you won’t have two the same on the last one. If you do it differently, please let us know in the comments.
If this is all too confusing, on YouTube there are multiple videos — just type “stack and slash,” or “stack and whack.” If you have a lot of time, *this* one is in four parts, but it’s very thorough.
Now we start sewing them together. Sew the A parts together.
Sew B2 and B3 together, then sew them to B1
Sew the C parts together.
Above I show how I’m sewing them in parts, always replacing them back on my “map.”
Some sections need straightening up before I sew the next seam. If they are too out of whack, just even them out.
Now all the B-pieces are sewn together.
Sew them to the C-pieces.
I evened out that edge. Notice that monster dog ear at the top right. Don’t even worry about it–just slice it off.
Join the sections together, pressing the seams to one side. All the outside edges are skitty-wampus, but it’s all sewn!
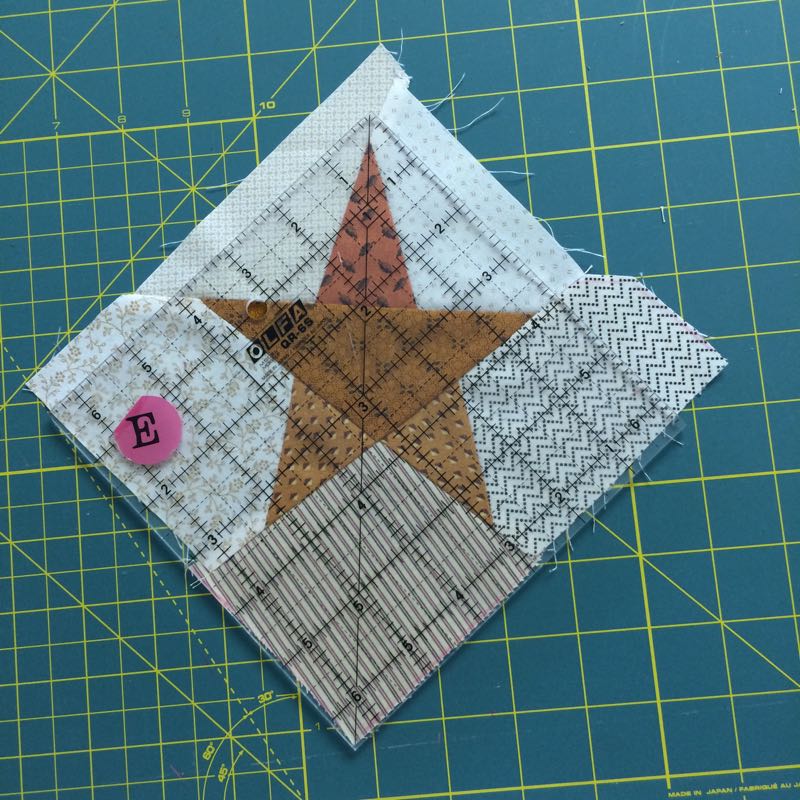
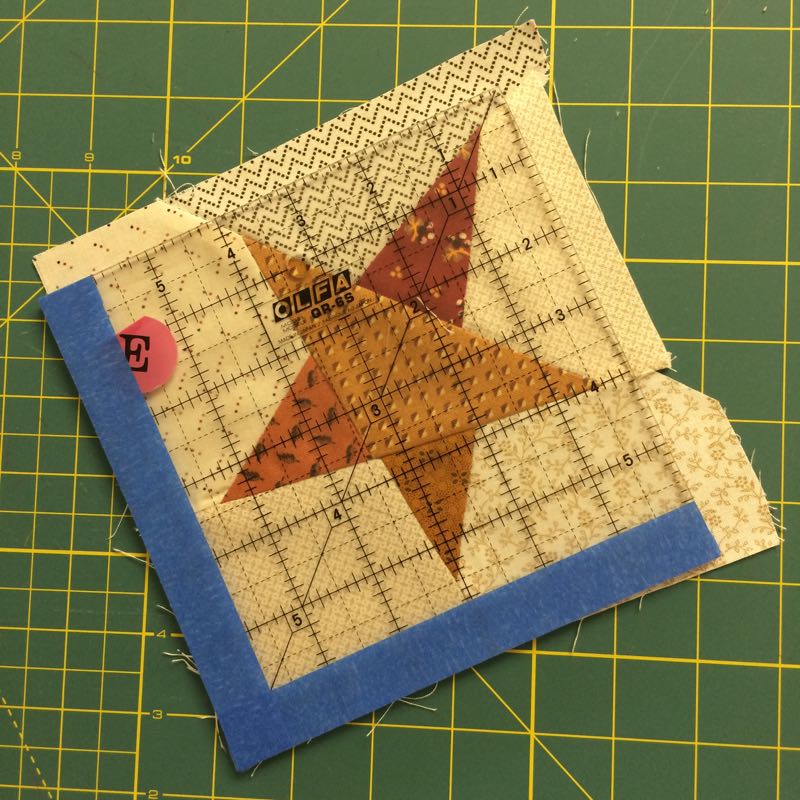
Now it’s time to even them up to our Gold Standard Measurement of 5 1/2″. Find the A1 piece and put that in the upper angle corner and then monkey your ruler around until you have a nice mostly-even space around all the start points.
I put tape on the 5 1/2″ mark so I could frame it up better. Now you see better how I laid it on the wonky star. Repeat this over and over. You can cut and sew a bunch and it goes much faster, but have chocolate at the ready.
Add on your outside large triangles, varying them from orange to black, as are your star points. We’ll save the outside HSTs for next month. So, get busy making wonky stars and we’ll see you on June 13th!
Here’s our schedule:
Step 1 (Preparation): February 13, 2016–buy all the fabrics and find the pattern. Buy your pattern from The Primitive Gatherings Online. Link is *here.* The quilt measures 90 by 90, which is too large for me, so I’m only doing nine blocks. Each block is 20″ square, and with the outer borders, that should come to roughly 65″ square. I may change my mind, but this looks good from here.
Step 2: March 13, 2016–Cut out the quilt: the tan backgrounds of the squares, the border triangles, the smaller half-square triangles, strips for the wonky stars, but save the piano key border for later.
Step 3: April 13, 2016–Assemble four blocks and add large appliques; use Thelma’s method (of Cupcakes and Daisies) for adding the curlicue stem. Make and add half-square triangeles (HSTs) around these blocks, using the 8-at-a-time method of HSTs.
Step 4: May 13, 2016–Cut and make the wonky star blocks from templates and strips. I’m doing five blocks, so will need to make twenty wonky stars and true them up. Add on the large outside triangles.
Step 5: June 13, 2016–Assemble the rest of the star blocks, by adding their HST borders. In the pattern, they are mixed up and varied, but also harmonized (some have a mix of orange and black, some have just black, some have just orange.) Make your own rules and go with it.
Step6: July 13, 2016–Arrange the blocks on your design wall and stitch together. Cut the pieces for your borders. Make the four corner pinwheels.
Step 7: August 13, 2016–Sew borders together and attach them to the quilt.