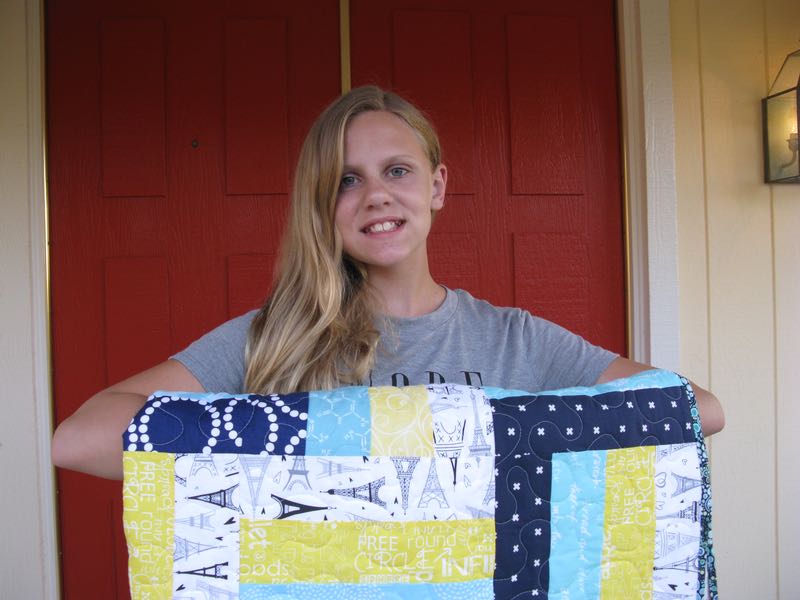
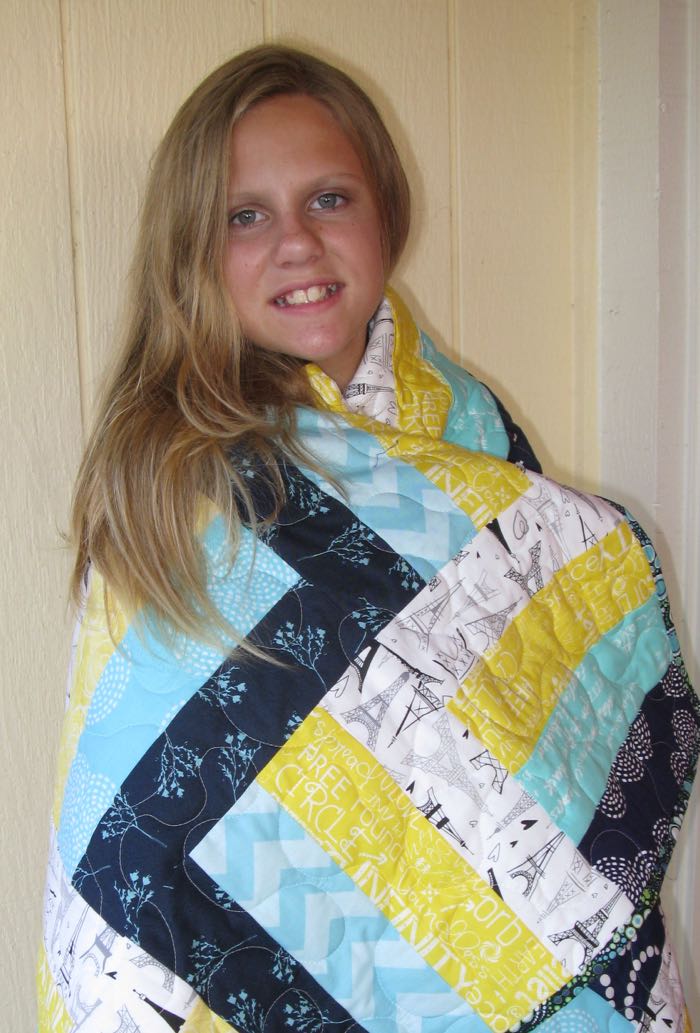
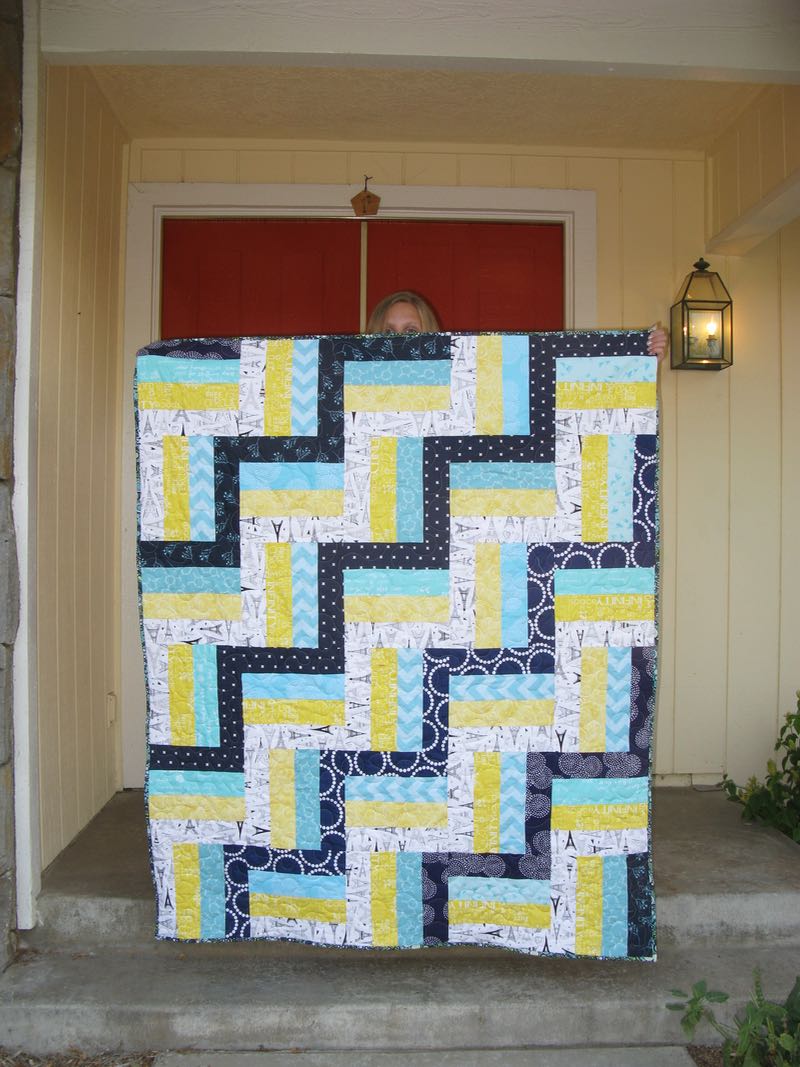
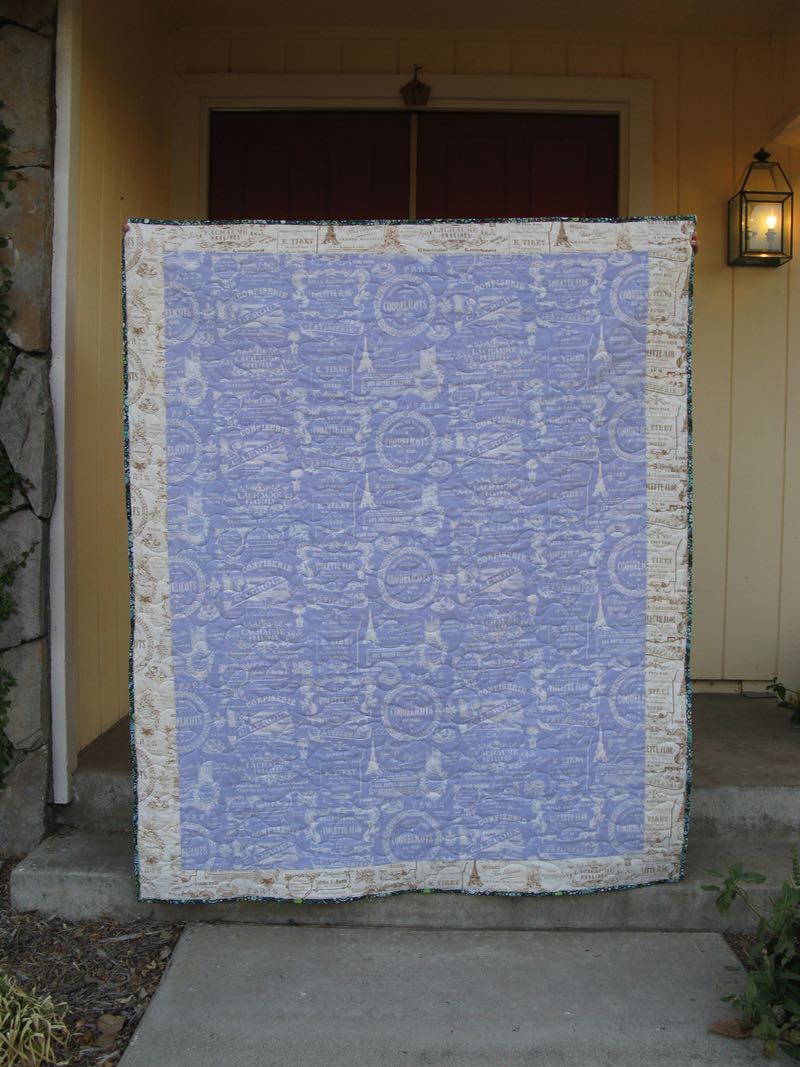
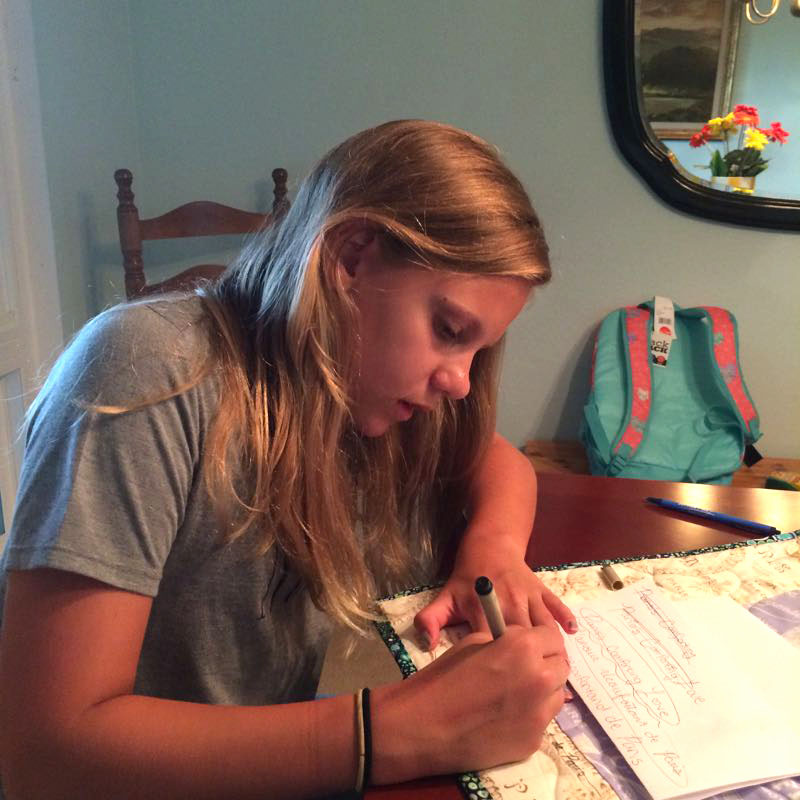
Keagan, my first grandchild, came to visit me last month (along with her Mom–our daughter– and family. She’s crazy about Paris and France and all things French, so I collected a few fabrics before she got there and surprised her with them.
And you just can’t leave it at that in a quilter’s house.
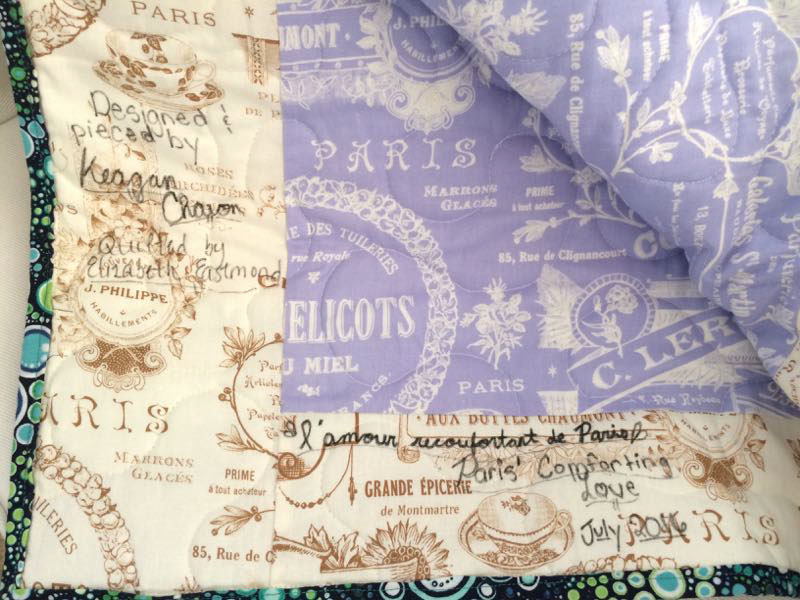
L’Amour recoufortand de Paris, quilt #167
Pieced and quilted by Keagan Charon and Elizabeth Eastmond
July 2016
L’Amour recoufortand de Paris, the title, means Paris’ Comforting Love, because she considered how quilts give comfort and since it had all things Paris in it, she thought it up and had my husband translate it for her.
We got all the pieces cut out, then I had to go and Take Care of Things, and when I came back, this was the design she’d carefully put together on the design wall. We sewed the pieces together–me on my regular machine, and she beside me on the Featherweight– and we put the top together. Her brother Riley helped iron the blocks; it was a team working together.
I stitched most of it on the Sweet Sixteen machine, but had her take a turn at the quilting, so she could say she’d help quilt it, too.
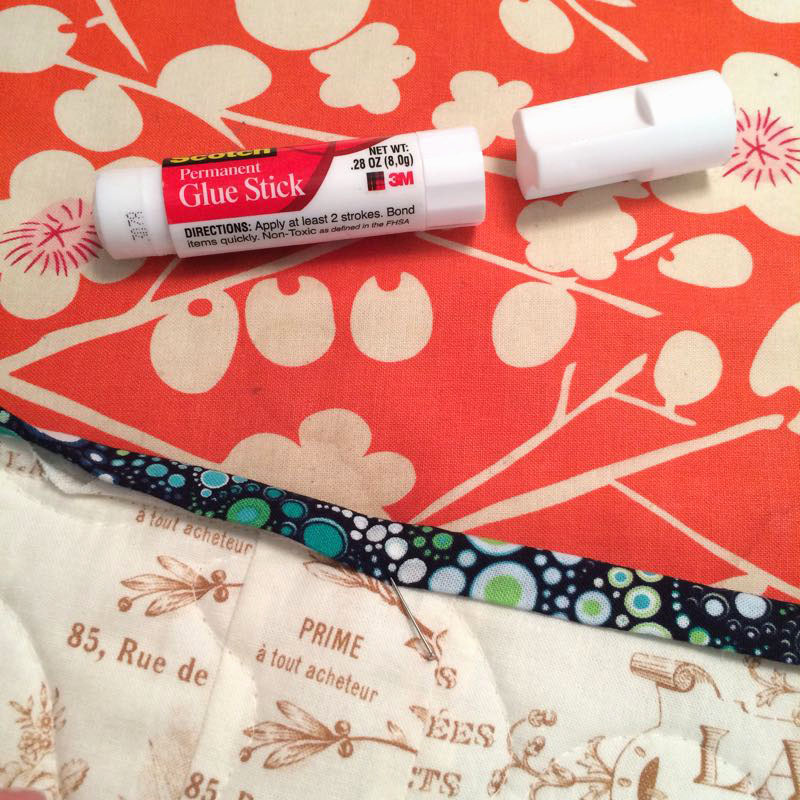
Since we were working against a deadline, we used a glue stick to tack down the binding, and then I top-stitched it into place.
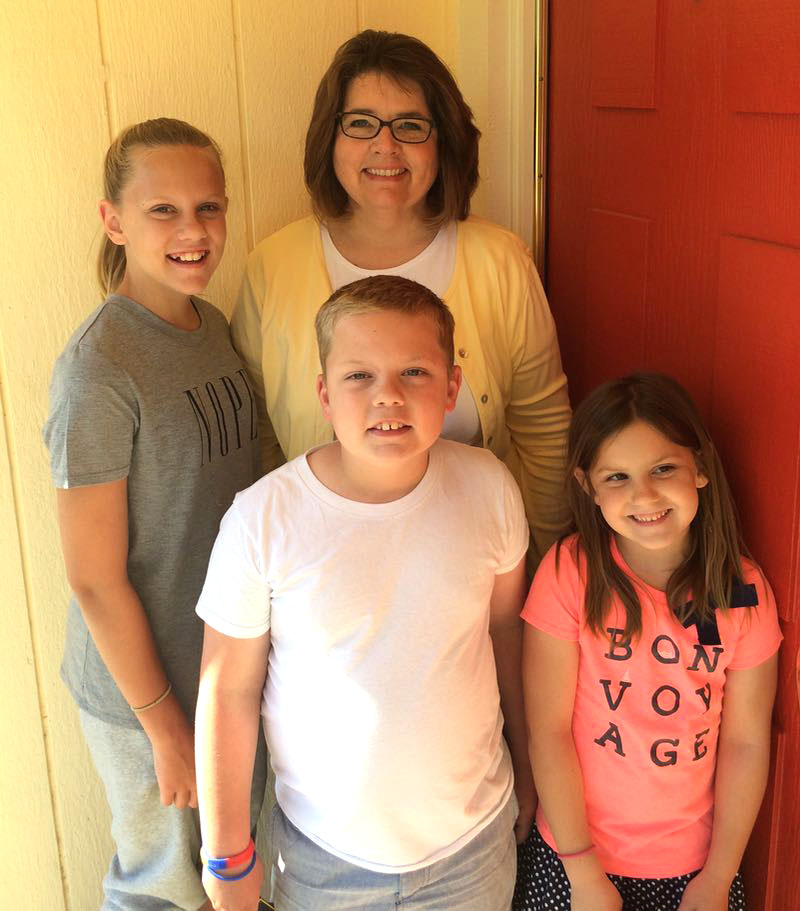
And then, just like that! it was time to head on home. Here they are Sunday morning, all the kids (Keagan and Riley and Maddy) lined up for a picture before they piled in their van to drive home.
Since we are doing a yearly theme of color, the next challenge also has to do with a particular hue. Rachel just announced our theme of “I’ve got the blues” for our November 2016 challenge. As you all know, our art quilts are smallish (no exact size anymore) which allows us to complete them quickly, and to follow our hearts in constructing them.
I immediately thought of some blue quilts when I read the new challenge. Enjoy the show.
Rosette #1 from a quilt in progress
But “got the blues” can also mean sadness, as in this quilt, depicting a mother saying good-bye to her newly deceased newborn child:
Most of these quilts are from past Road to California quilt shows; here’s what I wrote at that time:
Surrender was a quiet quilt, tucked in among some showier ones, but took my breath away for the depiction of a mother saying good-bye to her newly deceased newborn. Maria Elkins of Ohio, paid homage to all those moms who have had to say farewell at birth. She dedicated it to her grandchild, “who was given into the loving hands of her daughter and son-in-law.”
And finally, another inference, as shown by this quilt:
Kathryn Nolte, from La Habra Heights, California created this visual feast, titled Take in the Night Blooming Jazz, Man. Sinewy, fluid shapes echo the subject of her quilt, with a real live “piano key” border. This, too, could be a rendition of “I’ve got the blues.”
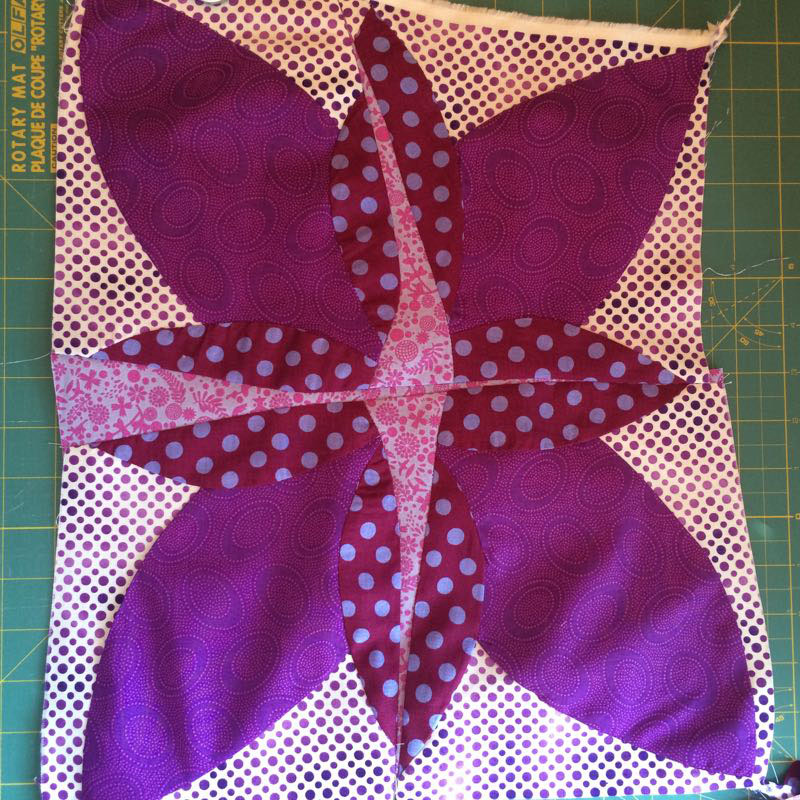
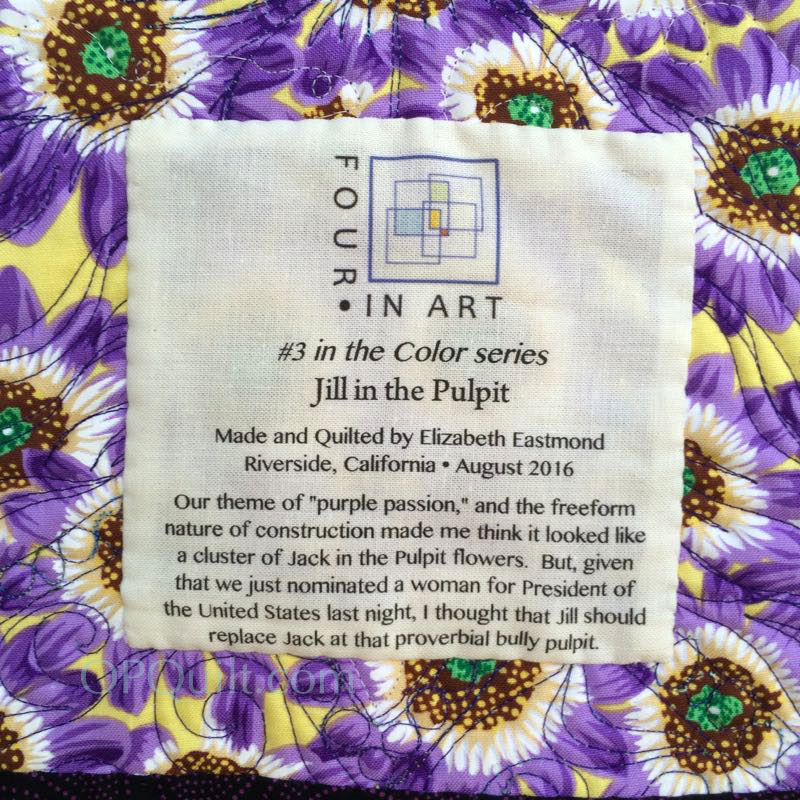
Jill in the Pulpit
Quilt No. 166, August 2016
#3 in the Color Series: Purple Passion
I have no serious thoughts about the color purple even though there’s a novel with that title, and even though it has so many interesting connections (which were explored in my last post and which seems like it was written about a year ago, but really it’s only been several days). Where do summer days go to? To family picnics, visiting relatives, long interstate drives, trips, lounging around in hot weather cleaning house. . . the usual. And then I had to ponder what I’m passionate about? Quilting, for sure, so in the end, the reality is to Get The Thing Done, diving into my passion of quilting, but hampered by. . .
. . . my shoulder going rogue, rendering me only a bit less helpless than the Black Knight in Monty Python, which is the standard by which we judged all injuries when raising the children. Yes, “tis only a flesh wound,” became our rallying cry for getting up and going, and so I did, and got the quilt done. Cause? Pretty sure it was the cheap-o yoga class I signed up for early this spring, and couldn’t finish because of the pain. I’m sticking to walking. Or sword-fighting.
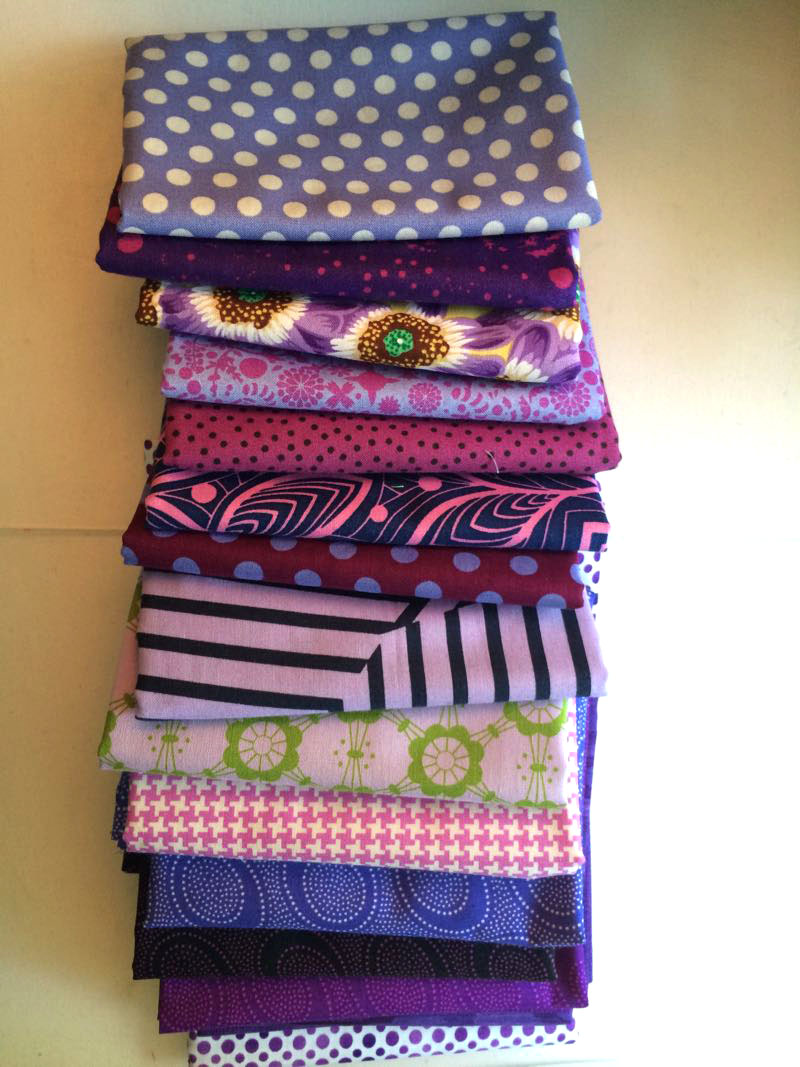
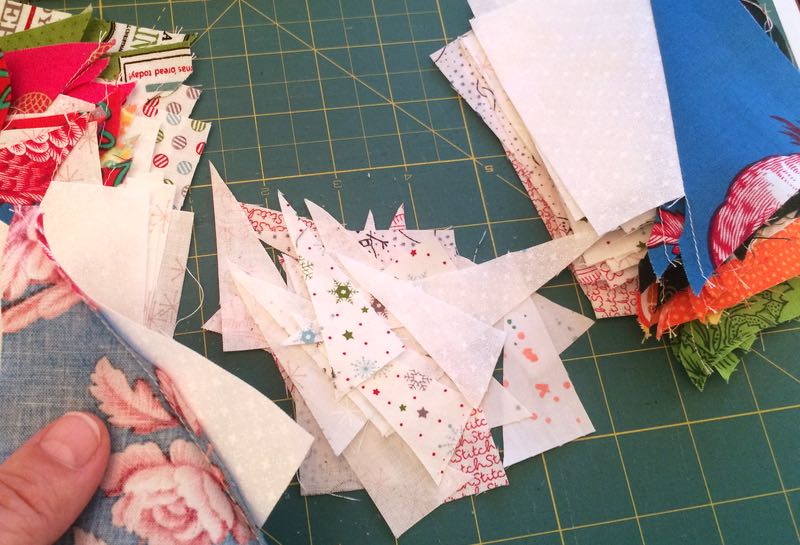
All the purples in my stash (with the exception of the Kaffes) were purchased about the time of the Knights of the Round Table — all plummy and grayish and dated — so while in Utah, I visited *this* shop and *this* shop, acquiring a few new fat quarters.
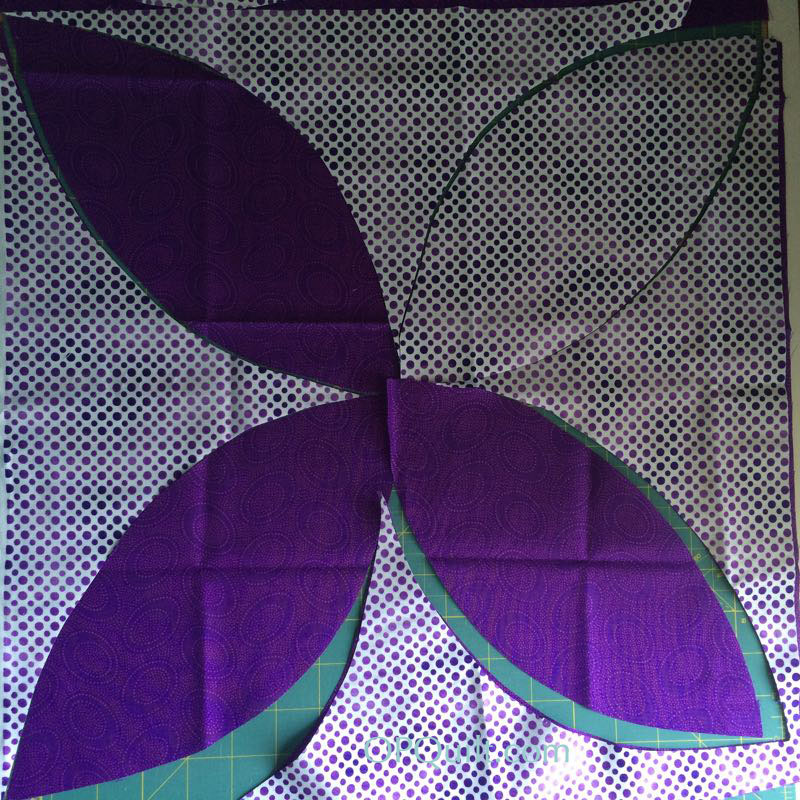
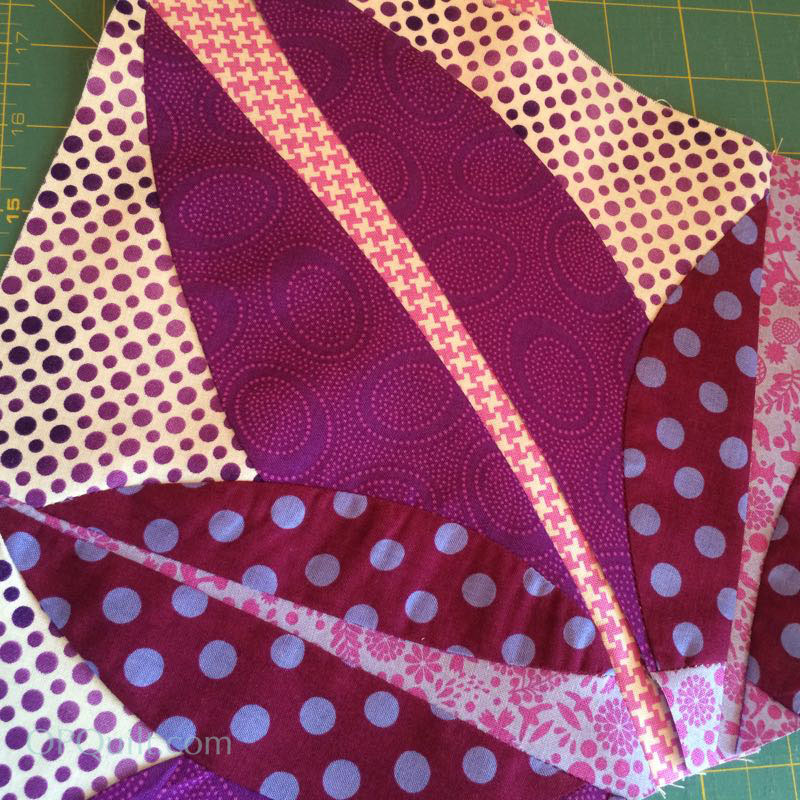
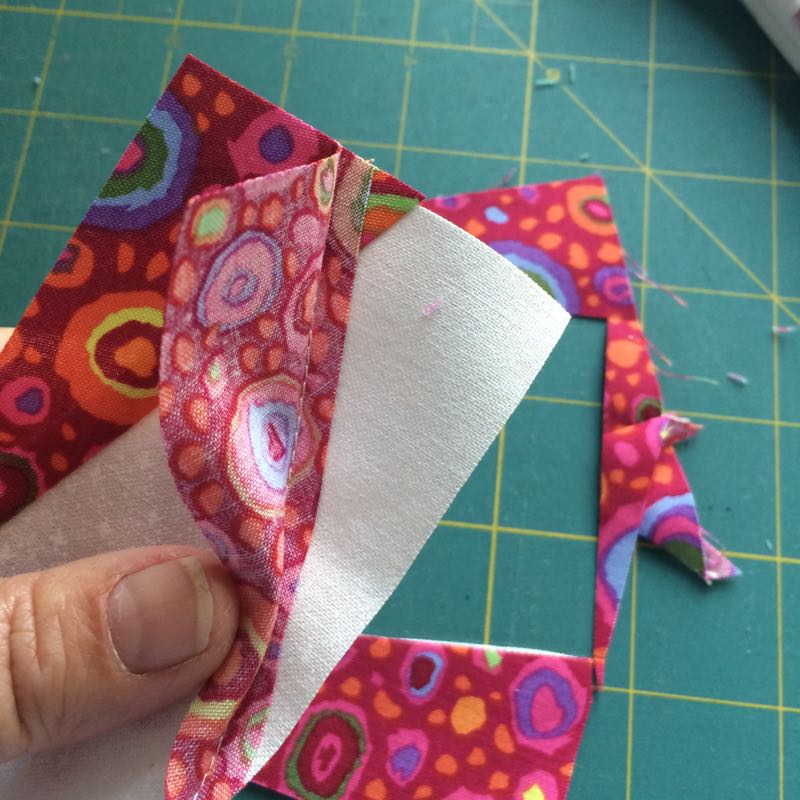
Just before sleep one night, I sketched out an idea (top). The next day I proceeded to massacre my idea (the rest of the photos). Finally I decided that I should just slash it where it had problems and insert other fabrics, so I did, using *this video* for help in sewing curves.
I line up fabric underneath the slash, position it, then move it about 1/4″ back from my imaginary positioning line, then rotary cut along the shape. Stitch a 1/4″ seam. Press.
Repeat with other side.
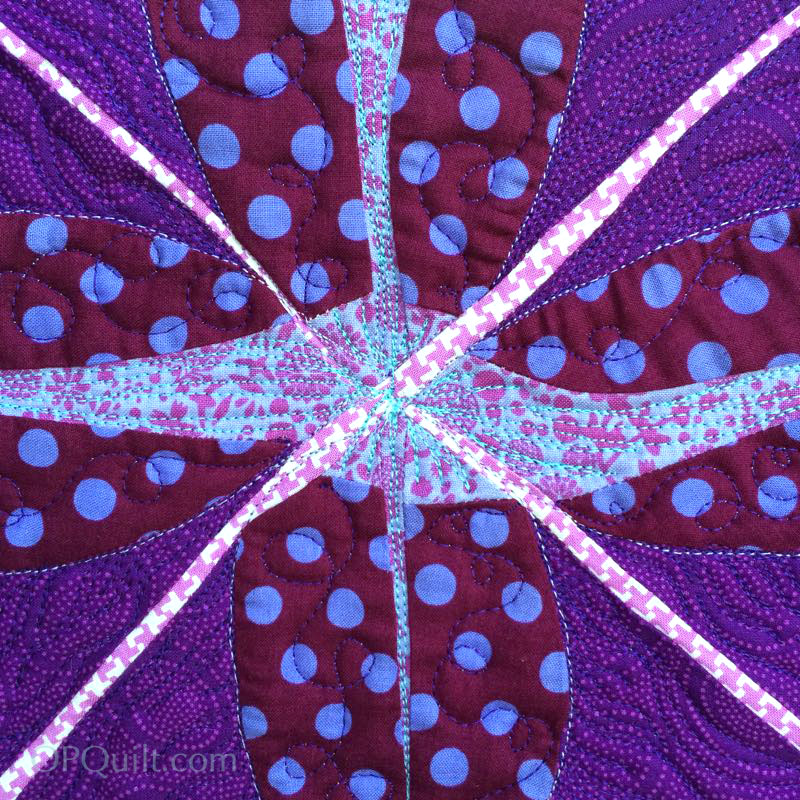
Keeping the bag of frozen peas balanced on my “flesh wound,” I quilted this, stopping often to rest and ponder the state of the universe. . . or what I was doing. I hate that I have a new quilting machine, and haven’t really been able to use it much. “Soon,” my husband says, as he rubs my shoulder nightly and soothes my worries. “Soon.”
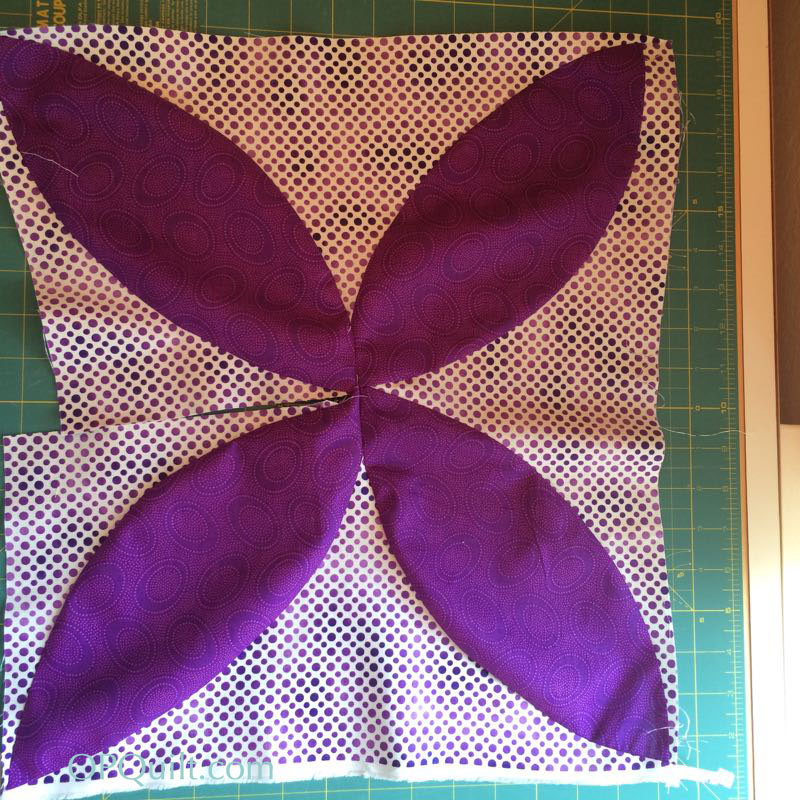
I whacked it here a little, there a little, turned it and whacked it again, until I got this ungainly flower-like thing quilt in a sort-of balance.
Now you know why I named it Jill in the Pulpit. It’s irrelevant whether you like the candidate or not, as the Big Deal is that we have come far enough to nominate a woman, and I thought that deserved some recognition.
So there you go–my Purple Passion Challenge.
Please visit the rest of our group, to see how they interpreted Color: Purple Passion. We also have a blog, Four-in-Art Quilts, where you can find us all.
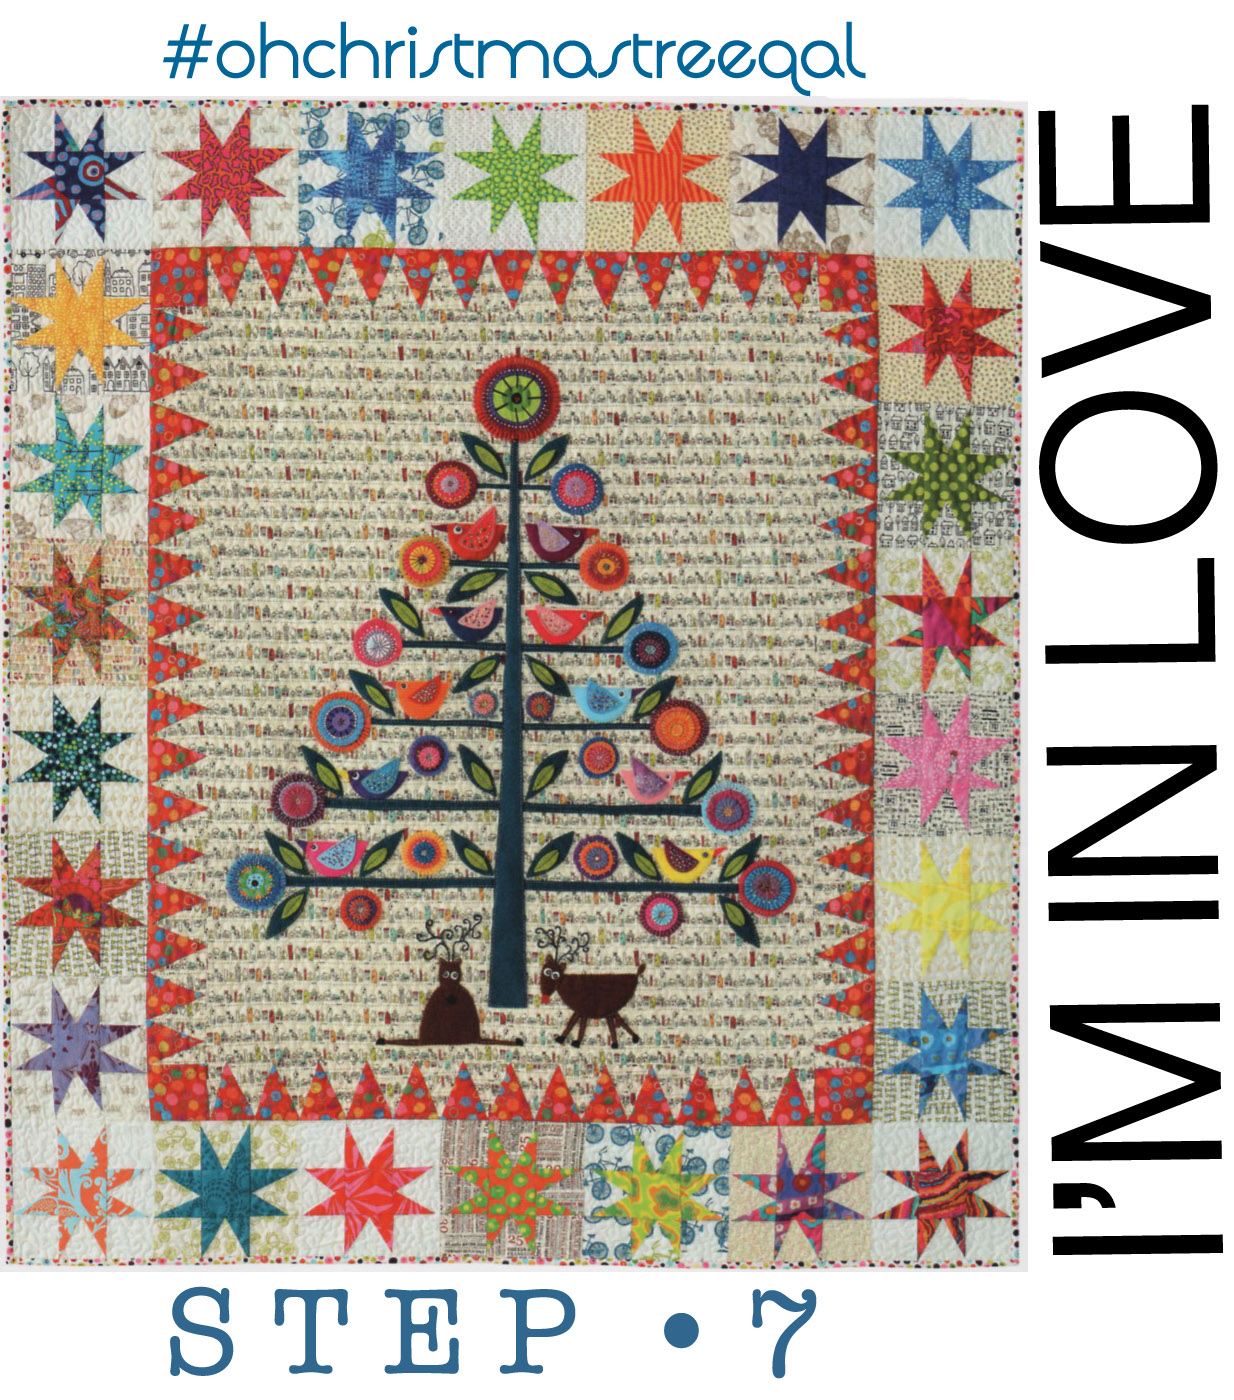
I’ve been keeping a log of the steps in the tab above, Oh Christmas Tree Quilt-A-Long, so consult that page when you need to find a post.
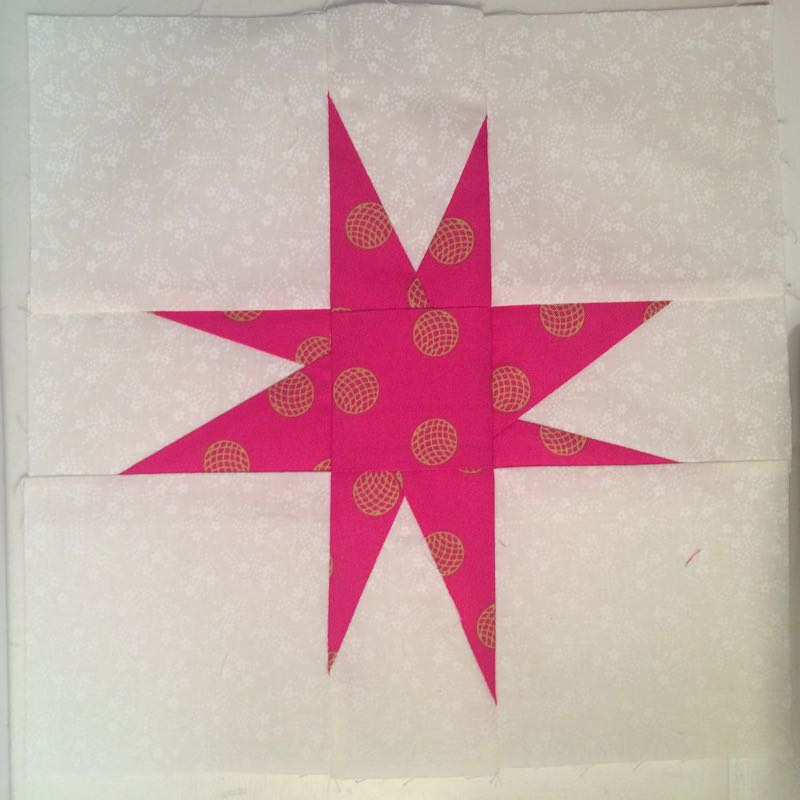
Yes, today we are wishing upon a star, the final part of this quilt. We started this journey 7 months ago in January 2016, right after the magazine came out, and today we’ll finish it up.
Your tree should have the red triangle borders on. See earlier post for how to get them on.
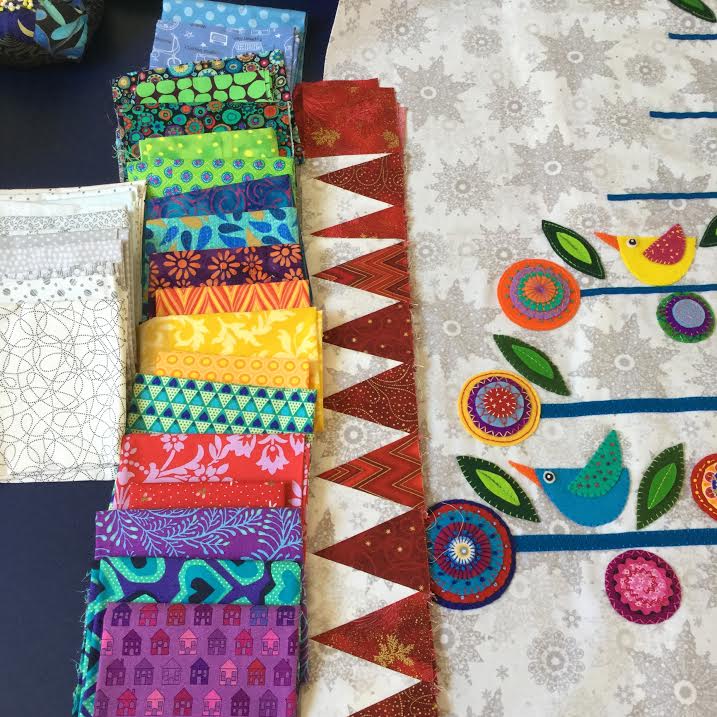
Wendy has laid out several fabrics for her stars, above. I thought I wanted to go with traditional Christmas colors of red and green, but realized quickly that I should go with colors that coordinated with the flowers and birds. In other words, be bold in your star colors.
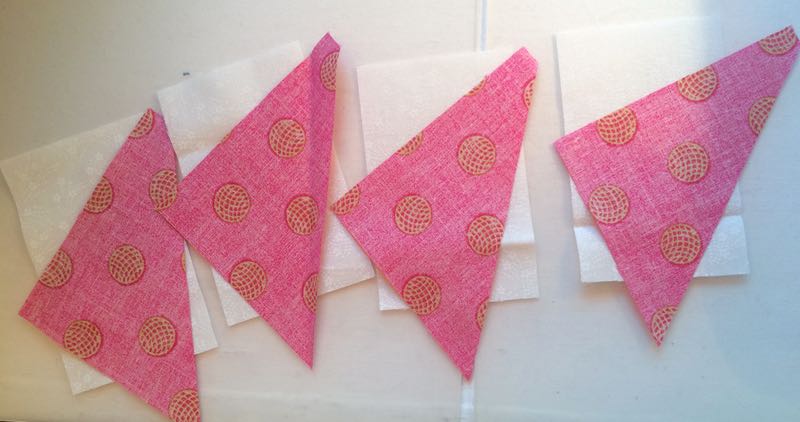
With your fabrics chosen, now it’s time to make the stars, but before you start, one issue with wonky stars is getting the star points too close to the edge.As Wendy writes: “Yellow star is what NOT to do. Points are at the edge and will be cut off during trimming, or lost in seam allowance. Star points need to finish further down the sides.” I’ve circled them in red, so you’ll recognize this when it happens. It happened to Wendy (that’s her block), it happened to me. Consider that your Training Wheels Block. Now one way to be aware of this is to cut all your blocks a bit larger than they ask for, and to slice the diagonal a bit differently as well.
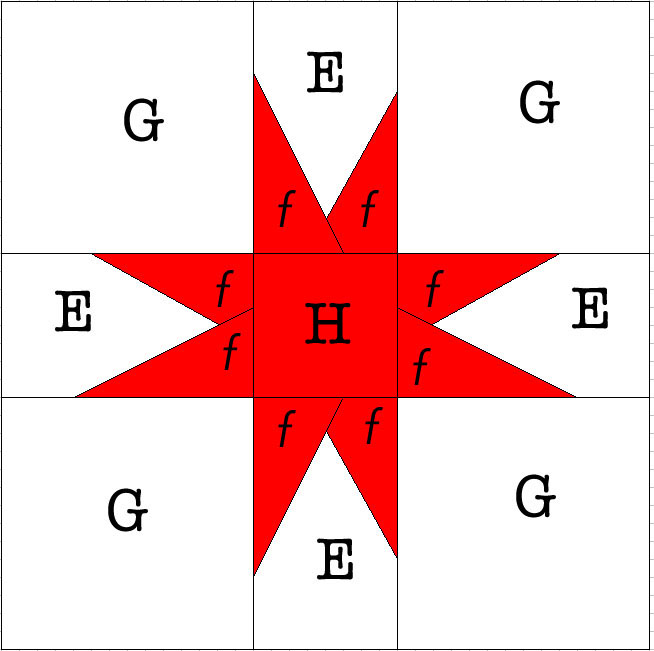
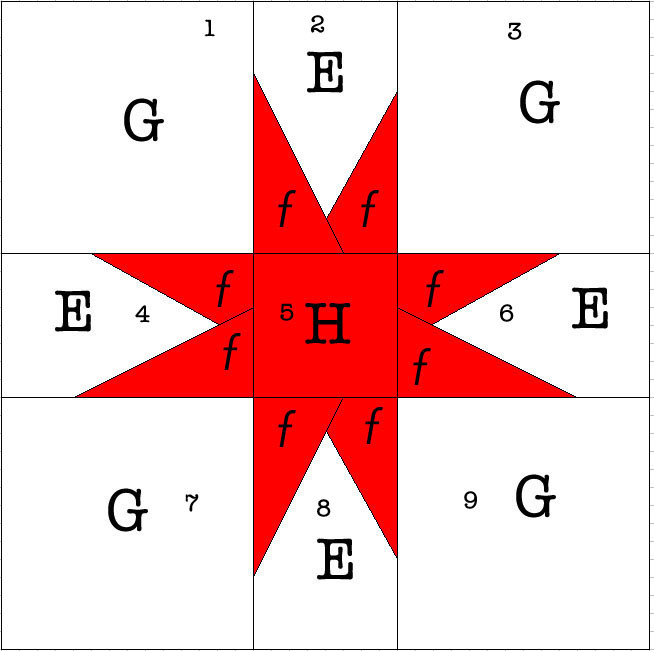
And here’s your roadmap/key to the letters. I put the “f” in lowercase and italicized it, as everything was getting a bit overwhelming with that alphabet floating around.
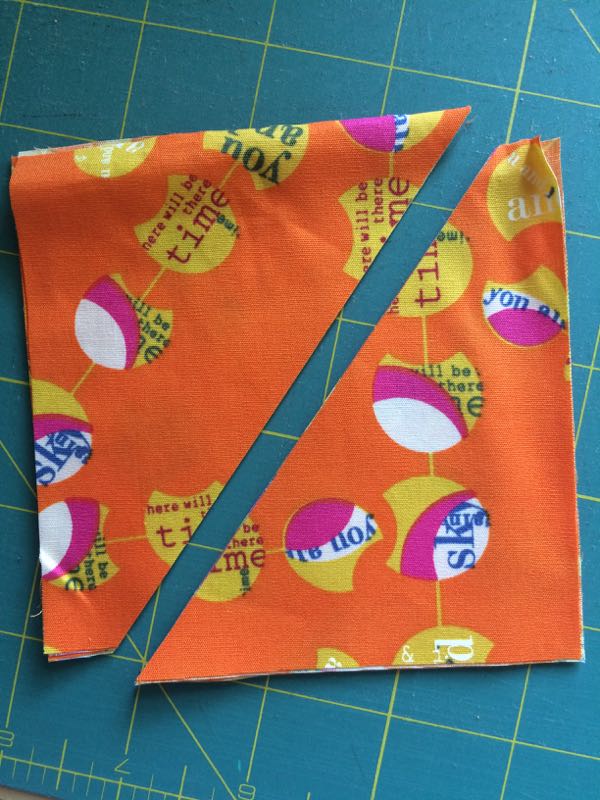
You’ll notice on the chart I mention to cut the f-triangles “skewed.” Cut them like the above shows, so there is a chunky bit on one end. If you haven’t made wonky stars before, you can try it first by cutting it on a strict diagonal, and after some construction, see which one you like. I like this way because I feel like it gives me a good angle and I’m less inclined to get the star points too close to the edge.
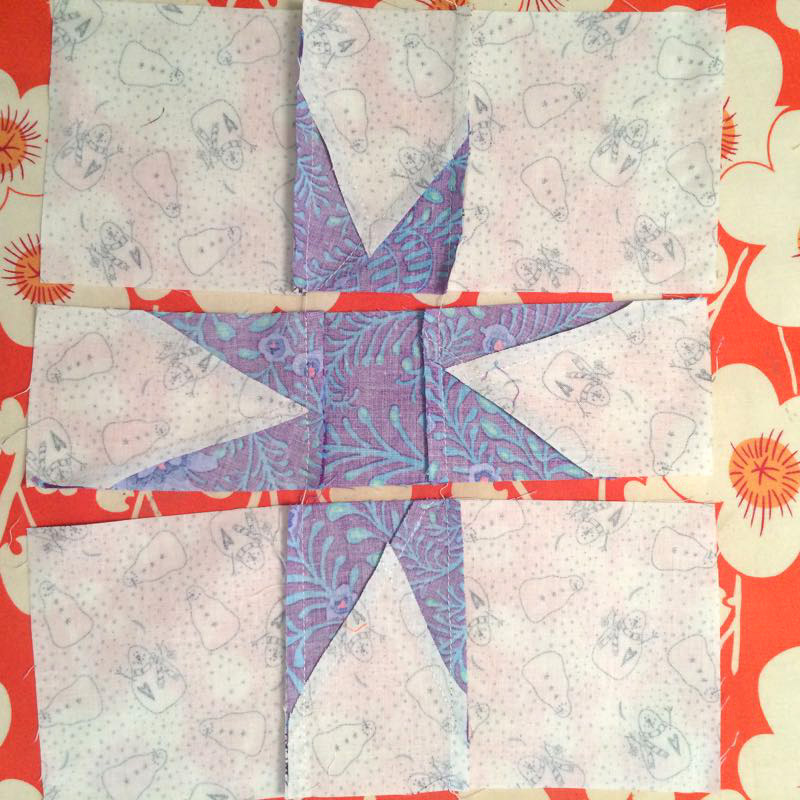
Find the narrower center piece, “E” and lay them out. Layer four f-triangles on top, with the chunky top down from the top edge, as shown. Try to have the lower pointy edge near the middle of the lower bottom edge of the E piece. I often finger-crease a little mark in that bottom edge of the E-rectangle so I know what I’m aiming for. See the next photo.On this piece, I’ve got a pretty good start. What counts is the seam line. So at the top right, it’s down about 1″ to 1-1/2″ and the seamline is about midline, or just a bit to the side of it. As long as you are in the ballpark of the red X at the bottom, you’re fine.
Fold it back to check. Press. Trim off that wedge underneath the star point fabric, as shown below (I’m doing a stack here.)
Now line up the next set. Yes, they are all upside down, as that’s how I’m going to sew them. Again, the chunky tip is near the top edge, and the pointy edge overlaps the first wonky start point.
Stitch, press and turn. If you are worried, check it before you stitch it by folding it back to make sure your star point fabric covers the background E piece all the way on those two lower corners.
Now trim it up to 2 -1/2″ by 4.” In the photo above, I laid my ruler on the outline of the E piece for placement.
Now trim off that underneath piece.
Done with one! Repeat three more times for one star block. Don’t try to get all the points the same–let them be different lengths and placement, as your block will be more interesting. DO make sure you are not too close to the outer edge–you’ll need that extra space for trimming.
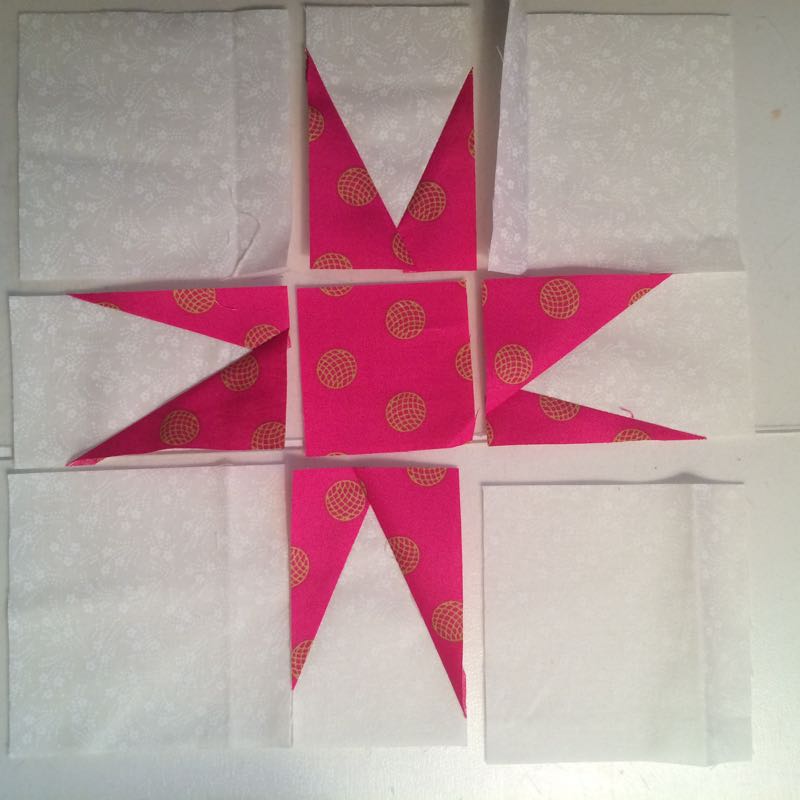
Now line them up as shown, with the H-piece in the center and the four corner G-pieces in their place.
Now you are going to make a “web” of thread, as you sew the pieces into rows. Keep reading.
Unit #1: I stitched G-1 to E-2. Without cutting the thread, I slipped the next pair under the needle and kept stitching:
Unit #2: I stitched E-4 to H-5. Without cutting the thread, I slipped the next pair under the needle and kept stitching:
Unit #3: I stitched G-7 to E-8.
Sew onto a leader/ender piece (mine are just scrap, even though I always think I should be piecing another quilt or something.)
Now to Unit #1 above, stitch on G-3. Without cutting the thread, I kept stitching:
Stitch Unit #2 to E-6. Without cutting the thread, I kept stitching:
Stitch Unit #3 to G-9.
If you can get the hang of this, you can keep all your star points together and really crank through them.
Here, I’ve circled the bit of connecting “web” threads. Press as shown: the center row has the seams pressed to the center, and the top/bottom rows have the seams pressed towards the G-piece (outer corner block).
I’ve sewn them, pressed them, and now I can stack them, ready to sew the rows together. Because of the thread-web, I won’t get a piece turned around, or upside down.
There’s no magic, just press them how you like them, but I do always believe a seam will generally indicate which is the easiest way for it to fall. In this case, it was away from the center.
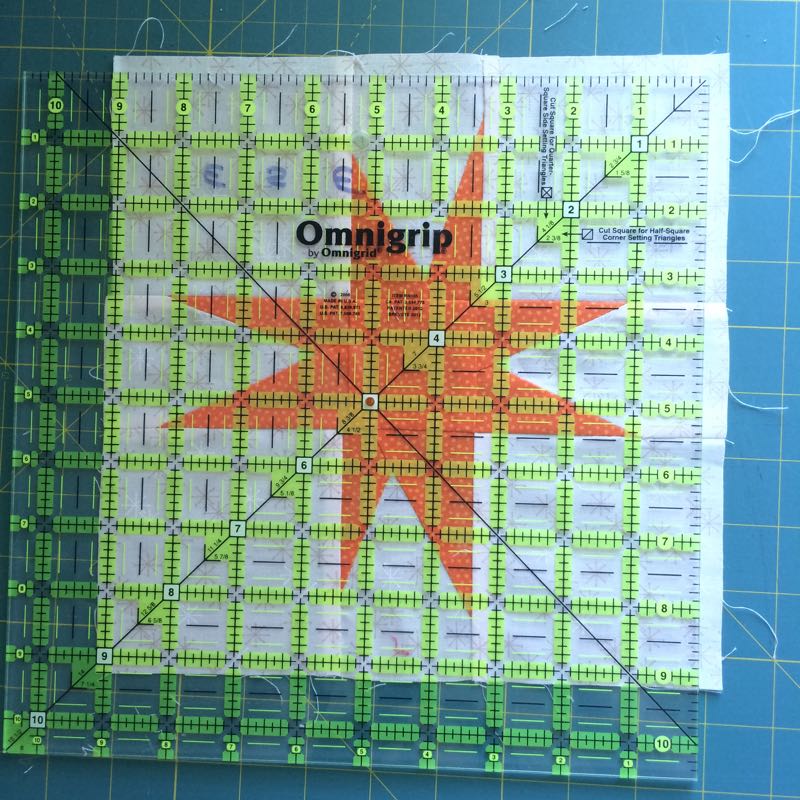
Arrange your stars around the tree how you think you’ll like them. Take a photo, re-arrange if you want. In my case, I ended up making some brighter, bolder stars, and shuffling several times. It also helps if you go get some lunch, or fold a batch of laundry, or maybe snack on some chocolate. Anything to take a break so you can bring some fresh eyes to the process. Do this until you are happy with how they look.Now for some measuring fun. You know that each corner of this quilt will have a star. And generally, the finished measurement is 8″, or trimmed to 8-1/2.” Both Wendy and I caution that you need to make VERY SURE that your H-block is centered in your trimming. Pay attention to the diagonal line and make sure it’s running through the center of the H-piece.
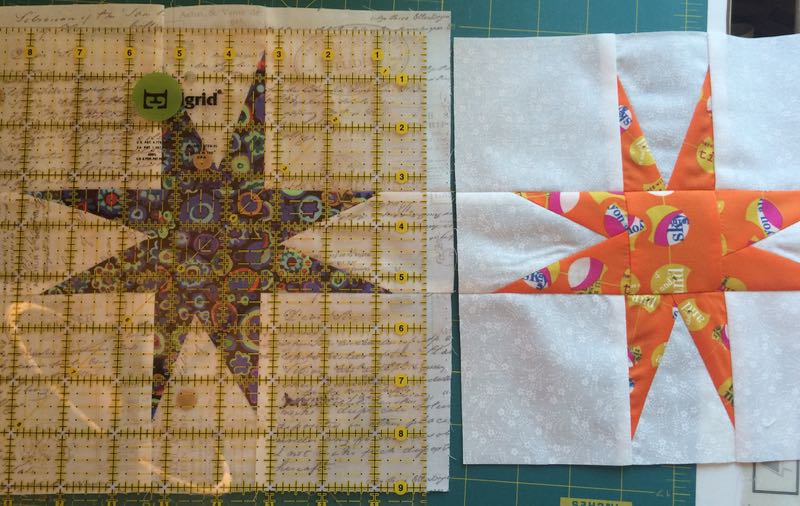
Trim FOUR blocks only, and set aside. What you see above is me making sure that the middle row of my stars would line up when they were placed next to each other. I took my time trimming. If you don’t have the middle of the star lined up, you can fudge it a bit, but not by much.
Diagram of how to get the Wonky Star borders attached
Now comes the hard part.
Take a measurement across the top of Border #1 (triangle-border). Mine was just over 39.” I called it close enough to 40″ as that would fit five star blocks nicely (8″ blocks x 5= 40″); I can also sew a seam or two with a bit bigger seam allowance to get it closer to my measurement (yes, there are all sorts of ways to make our Zen Quilt behave). In my case, I trimmed them to 8 1/2″ so they finish at 8″ when they are sewn in.
Once you get that figured it, trim up TEN blocks. Use the trimming trick above to make sure the star blocks will line up.
See how that trimmed edge is away from those star points? (And yes, I’ve re-done a couple of blocks in my lifetime of wonky star blocks when I trimmed them off.) Sew the FIVE top star blocks together in a row. DO NOT SEW THE CORNER BLOCKS ON YET.
Press the seams to one side, and stitch that row of Border #2 (wonky star) on to your Border #1 (red triangles). Repeat with the bottom row of star blocks. Press seam toward the red triangles border. Your quilt should now look like this.
Before you start on the sides, get more chocolate.
Here comes the part where Wendy says it is kind of like childbirth: you’ll forget about it once it’s over with. I measured the side border, counted up how many blocks were shown in the pattern, and divided that into the border measurement. That was a scary number, so I subtracted one block, and did the dividing again. I ended up needing SIX blocks of just about 7 3/4.” This is the same as the pattern.
Because the measurements were kind of weird, I decided to cheat.
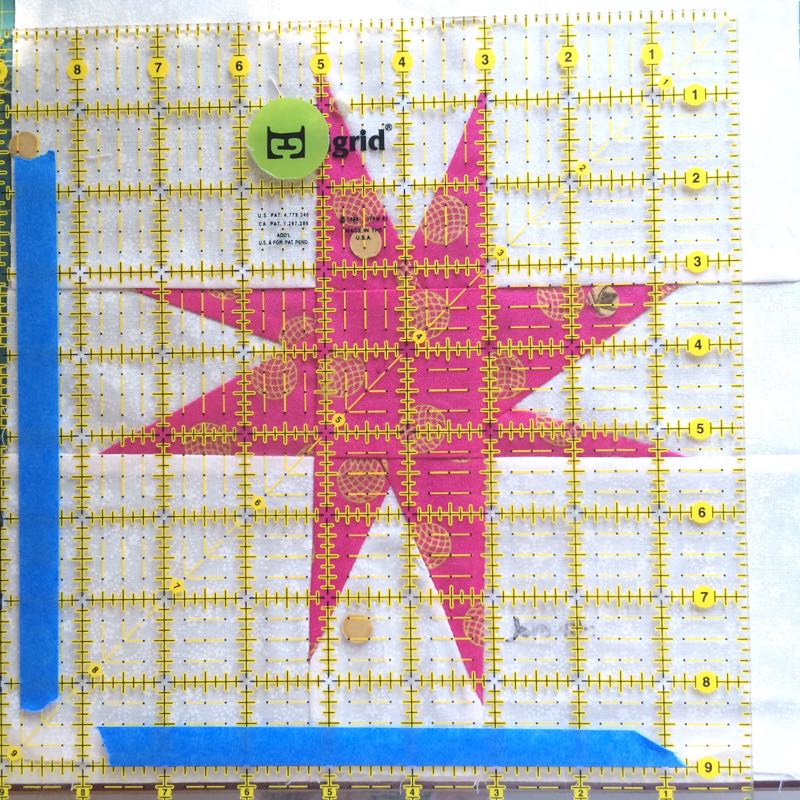
I kept my blocks at 8-inches finished “north-to-south” but cut them to be 7-3/4 inches finished “east-to-west.” Which means I was trimming them to 8-1/2″ and 8-1/4″ as shown above by the blue tape. The “West Side” tape is at 8 1/4″ whereas the “South Side” tape is at 8 1/2.”
I just wanted to make sure that I had at least 3/8″ to 1/2″ away from the pointy edges (blue ovals). Most of the time I succeeded.
Trim up your blocks. Now rotate them so the 7-3/4″ finished dimension is running north-south, and the 8″ finished dimension is running East-West.(This is an update from the original post.)Then sew them together. Press and hold them up against the border. Chances are they won’t fit–they’ll be too big. So. . . cheat again.
Take a bit bigger seams between all the blocks: from 1/4″ inch to 5/16ths of an inch. Check your sewn row again. If they are still too large (and can’t be eased in), choose the two stars that have the most room between the tips of their star points and the seam, and make another teeny bit bigger seam. Now you should be fine.
Breathe Deeply. Go Zen.
NOW sew the star corner blocks to each side border strip–two to each side strip of stars–one on the top and one on the bottom. Press all seams on the strip towards one side. Stitch these borders to the existing quilt.
I then pressed all seams toward that red triangle seam, even if it didn’t want to go there. Now, in looking at it, can you tell that the side blocks are sized a tiny bit differently than the top/bottom blocks? Didn’t think so, and no one else will be able to tell either. I think the solution to the challenging measurements was a success.
As Gwen Marston said, “Nobody ever said, ‘I need a little more stress in my life–think I’ll make a quilt.’ ” Quilting should be fun, even if it’s challenging (and this was definitely a challenging quilt).
Here’s Wendy’s…
…and Betty’s.
Now let’s see yours. Shoot me an email when you get yours done, with a photo of your quilt, and if (I mean, when–I’m thinking positively) I get a few, I’ll put up a post showing off your hard work.
Try not to dance, but you are done! It’s over! You made your quilt!! (Click *here* for a fun dance scene from On the Town, a favorite movie of mine.)
Thanks for joining us on this journey, from January to July, of making the Oh Christmas Tree quilt. I’ve appreciated all your enthusiasm, your comments, and seeing photos on Instagram.
Here’s one of Wendy’s new patterns, My Place or Yours, if you want to feast your eyes on something new. Pattern can be purchased *here.*
Another one of hers is Pieces O My Heart, which just won a blue ribbon at the Sydney Quilt Show. Visit her Instagram feed for more inspiration.
Lastly, if you are not a follower of my blog and you’ve enjoyed this quilt-a-long, I’d like to invite you to become an email follower. Just enter your email in the box above. I generally post about twice a week, with occasional longer gaps. I try to post worthy and interesting content with an occasional “friends and me doing quilty stuff.” I think by building communities and sharing discussions about issues and happenings in our world, we shorten the distance between us, forming strong links of like-minded quilters.
 L’Amour recoufortand de Paris, the title, means Paris’ Comforting Love, because she considered how quilts give comfort and since it had all things Paris in it, she thought it up and had my husband translate it for her.
 We got all the pieces cut out, then I had to go and Take Care of Things, and when I came back, this was the design she’d carefully put together on the design wall. We sewed the pieces together–me on my regular machine, and she beside me on the Featherweight– and we put the top together. Her brother Riley helped iron the blocks; it was a team working together.
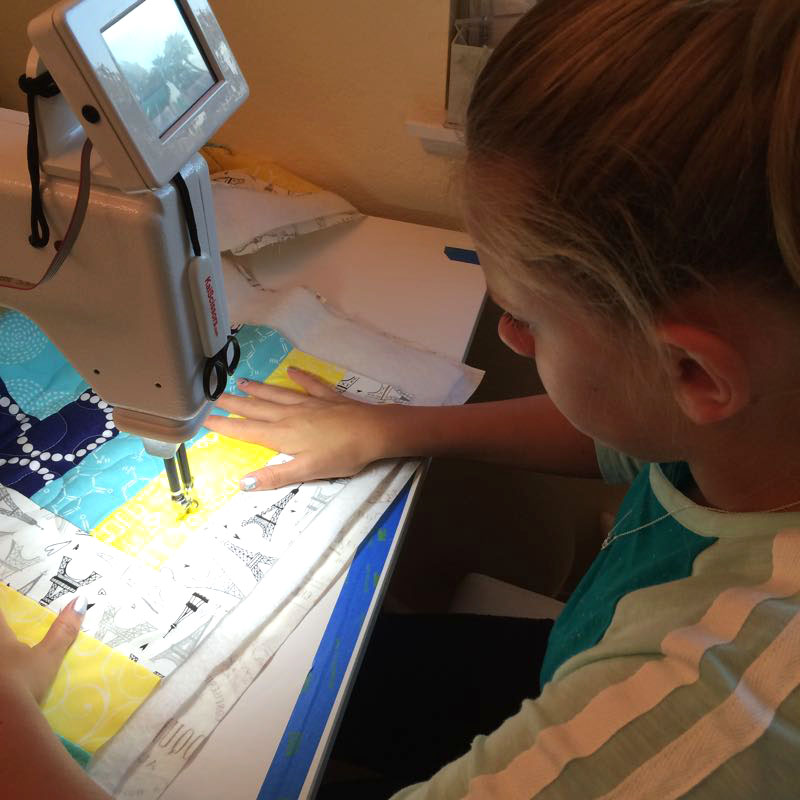


 On this piece, I’ve got a pretty good start. What counts is the seam line. So at the top right, it’s down about 1″ to 1-1/2″ and the seamline is about midline, or just a bit to the side of it. As long as you are in the ballpark of the red X at the bottom, you’re fine.


 Trim up your blocks.
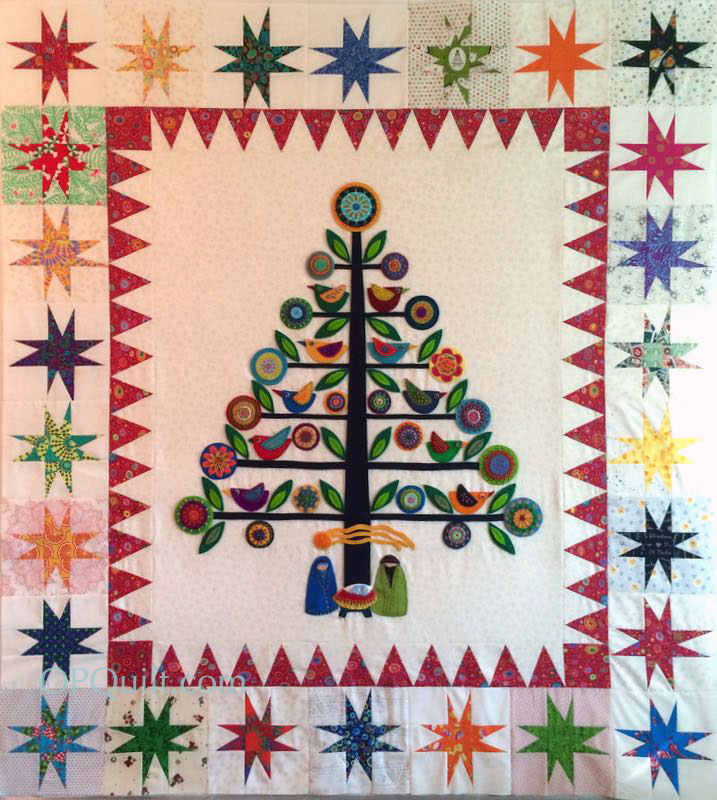


