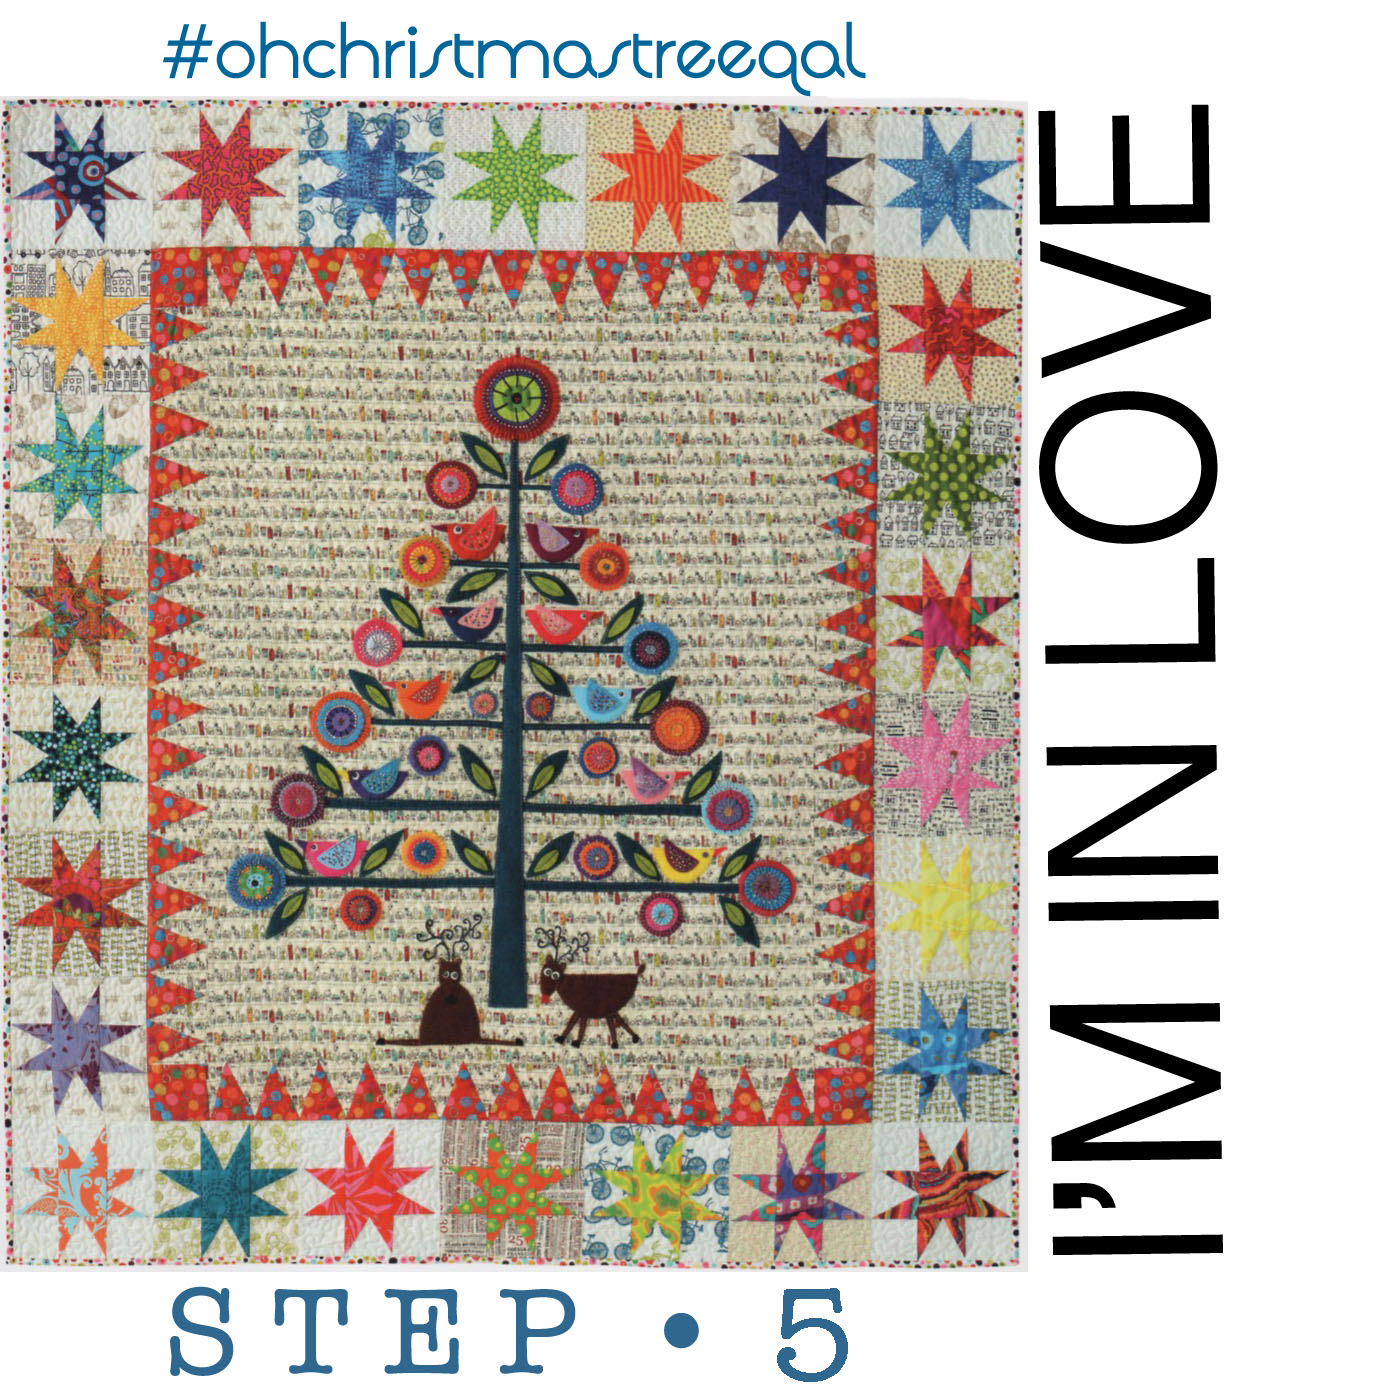
Today is Step 5 of our Oh Christmas Tree Quilt-a-Long (#ohchristmastreeqal), following a pattern by Wendy of FlyingFishKits and which was published in Simply Moderne issue #3, by QuiltMania. As always, we have an assist from Wendy of Wendy’s Quilts and More (blog) and wendyquiltsandmore (IG), as she is slightly ahead of us in her creating.

And because of the nice people at National Non-Wovens, we also have a giveaway of 100% wool felt, and their new colors of their rayon/wool felt. Read through all the way to the end to find the giveaway. Giveaway is now closed.
This month we’ll look at possible under-the-tree scenes; there are four:
 (1) the reindeer cavorting, as shown in the original pattern,
(2) Wendy’s packages,
(3) nothing, or

(4) a nativity scene.
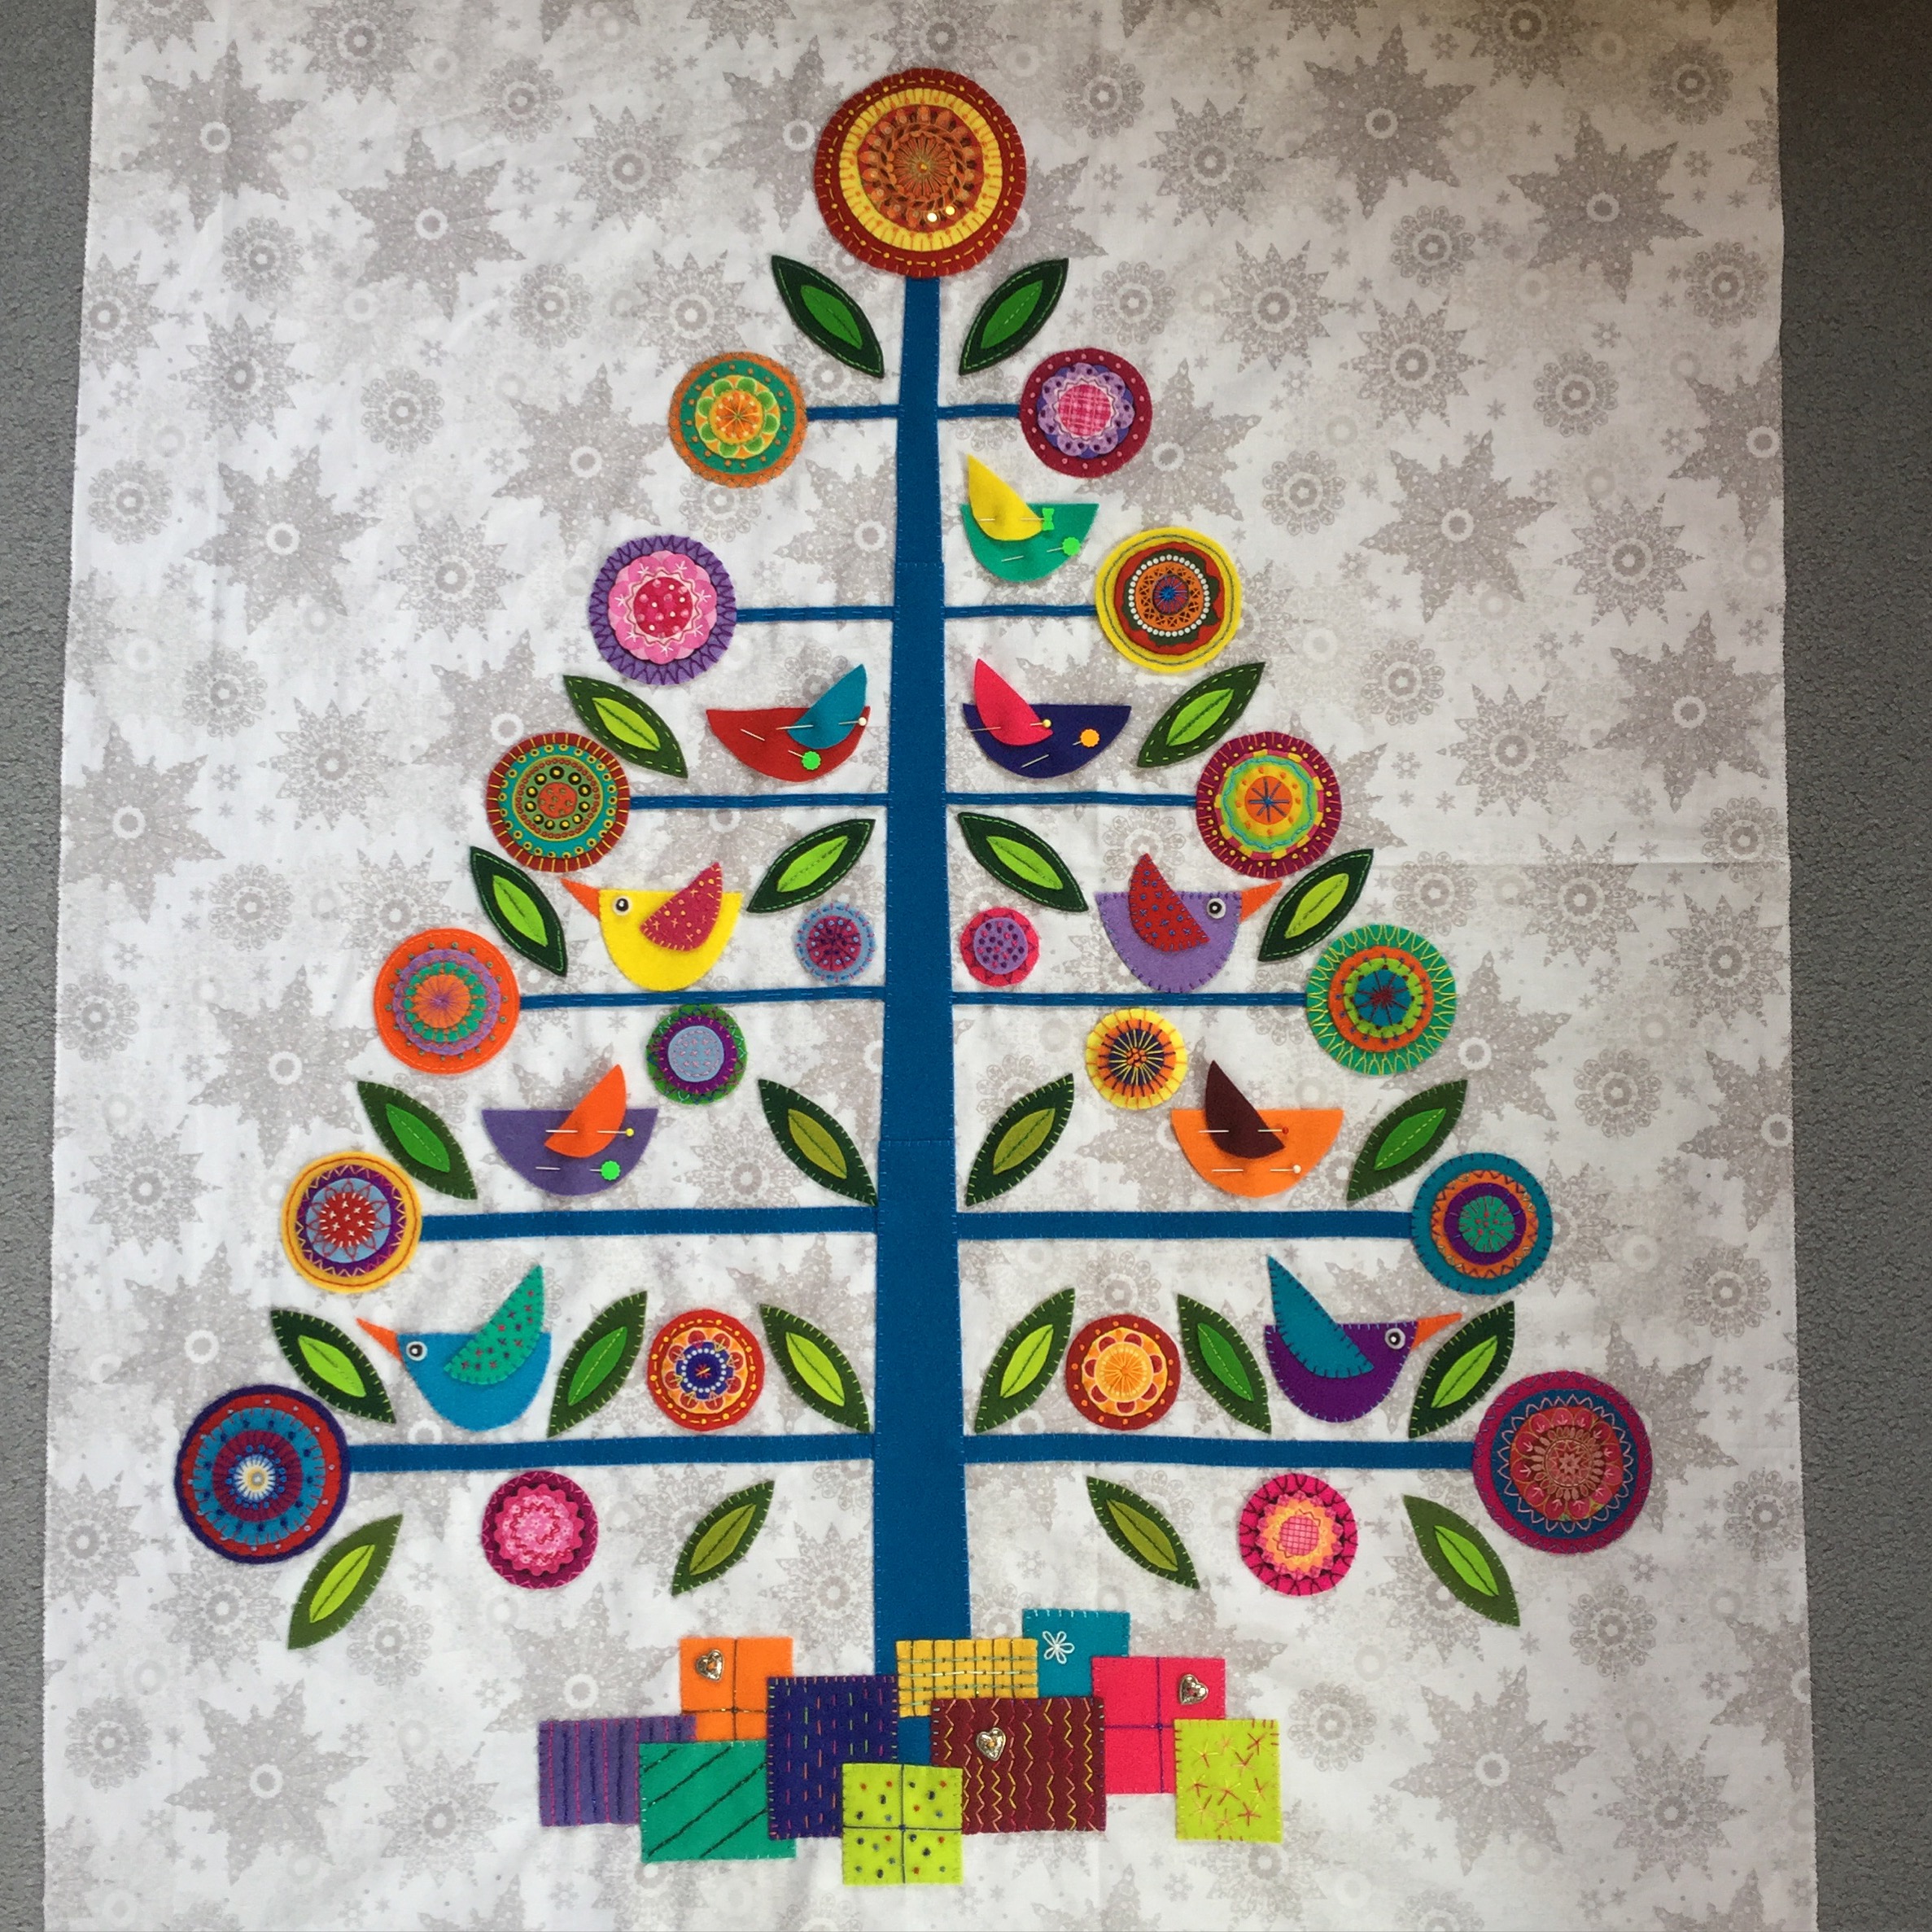
First, Wendy’s packages.
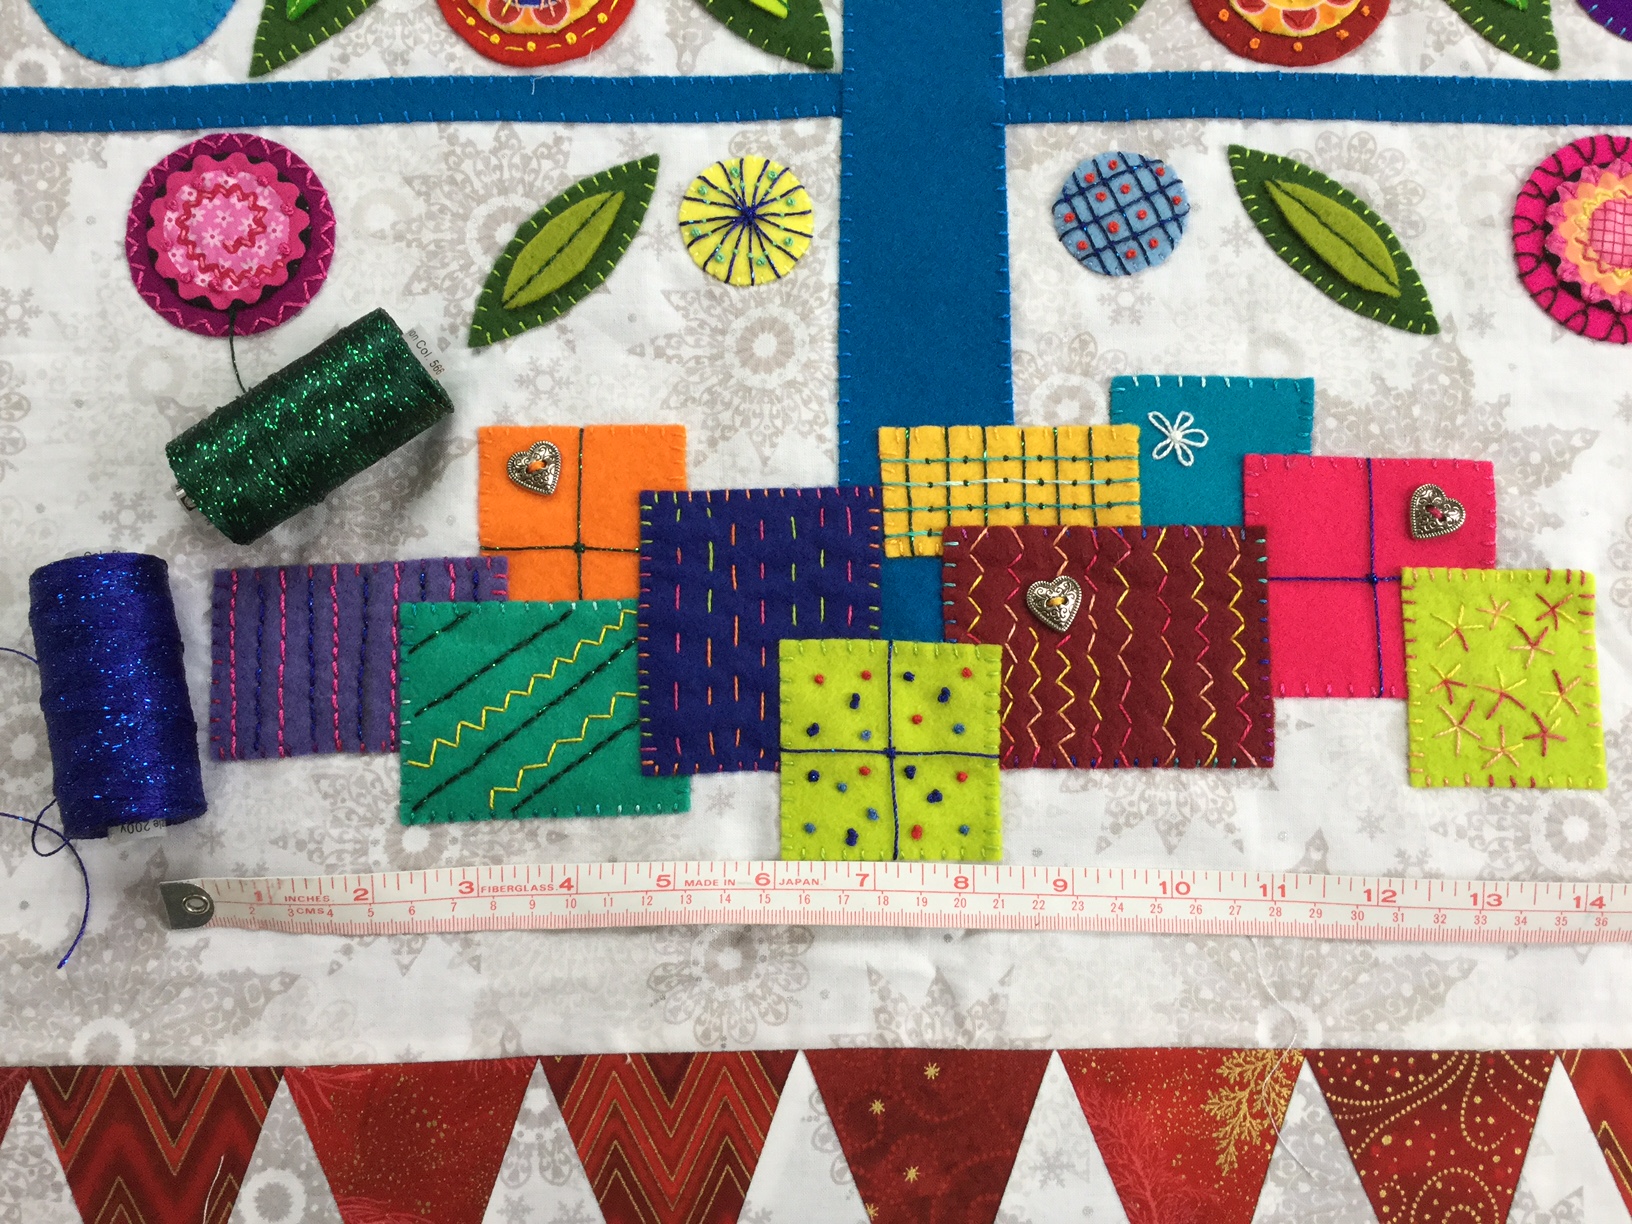
She has included photos, with a tape measure so you can see the overall length. Remember, also, that she added a few extra flowers and leaves on her tree, as described in our last post. 
When I asked her about the packages, she wrote:
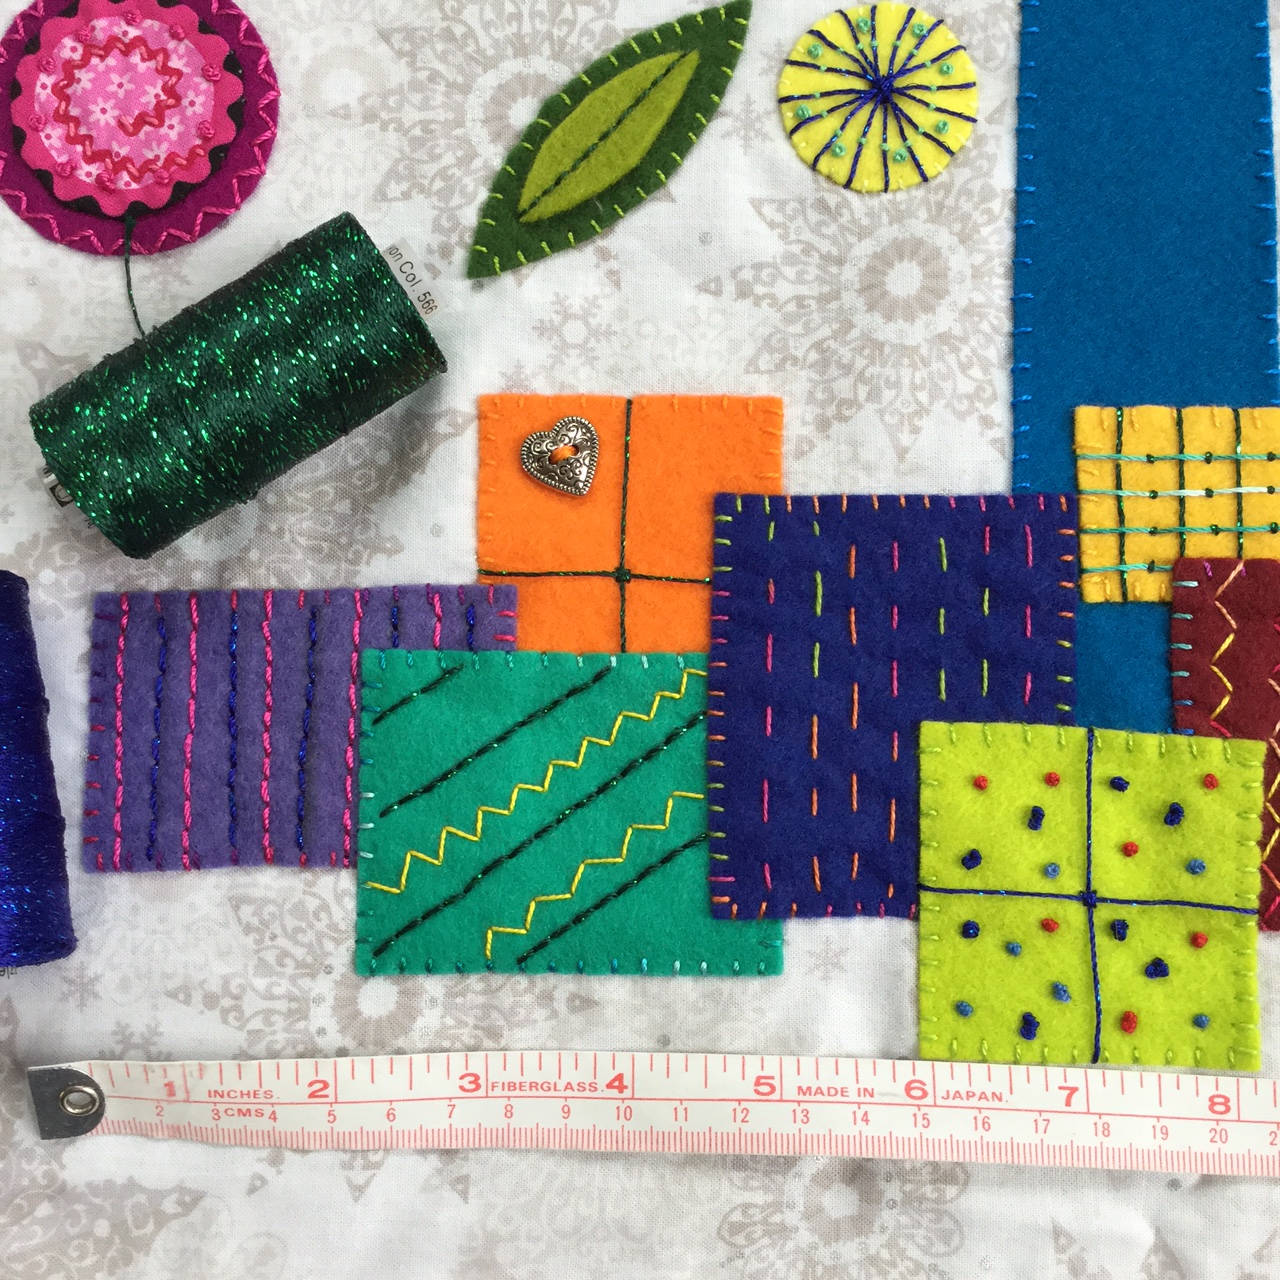
“You’ll see the boxes range from 2” to 3” and were really just cut from scraps of felt. So whatever is left over. I used threads to make them look like presents (including my Wonderfil Dazzle – which has bult in sparkle). And added a few novelty buttons from my button box. I’m even going to add bows from ribbons once it’s quilted.”
“So total length of presents = about 14”. I just fiddled around until I was happy with the layout. Sort the layout before stitching, because then you don’t need to stitch on the bits that will be covered up by another present. I went for a range of colours and stitched a variety of patterns on them, just like real presents would appear under a tree. I didn’t attempt balls or bikes, just kept it very simple. You can imagine what might be in them.”
I also asked her if she had embroidered them before, or after, she’d attached them to the backing:
“I had to check if I embroidered before or after I attached them. The back view shows it was after. I tend to take things cautiously and add more if I think it needs more. Feel free to include that back view photo – sometimes it’s easier to remember if you’ve seen a photo.”
Thanks, Wendy–this is a great alternative!
Secondly, if you are going to do the reindeer, just follow the directions on the pattern, embroidering them before you put them on, then attaching them as we did the flowers and birds.
Third, do nothing. I’ve heard from some of you, and there seems to be an ambivalence about whether or not to put anything. You may want to hold off until you get your borders on, then decide.

Fourth, the nativity scene. I looked and looked for something that might work, finally adapting a folk-style couple with Baby Jesus between them, found on an Eastern-European art site. I had thought about a silhouette of Mary and Joseph, but it just didn’t look right with our folk art flowers and birds. I tried making them larger, as I realize it looks now as if the birds could put Baby Jesus into their nests, but I would have had to adjust the background placement about 3 months ago, and there was no way I was going unpick everything and re-do that. So I decided that they would just look like one of those Nativity Scenes we put up around our house: smaller, a replica of the Holy Family. In the end, I am happy with how they turned out, but I always try to give you an idea of what I was thinking. If you are doing options 1, 2, or 3, we’ll see you next month when we’ll do the sawtooth border (border #1). But keep reading for the Nativity Scene how-tos.
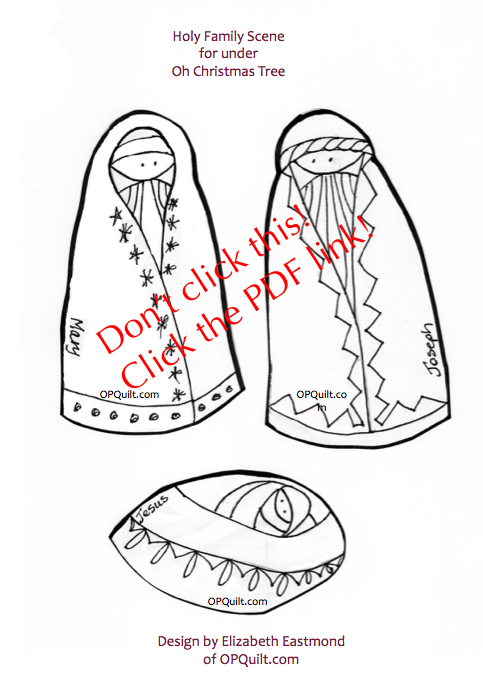
First up, the pattern, free of charge, no cost, no frills, and yes, you’ll have to improvise the manger and Joseph’s beard. But the price is right. Click this link in blue to download a PDF file of the pattern: Holy Family_OPQuilt (Don’t click on the illustration.) Print this out at 100% or larger (I used 100%).
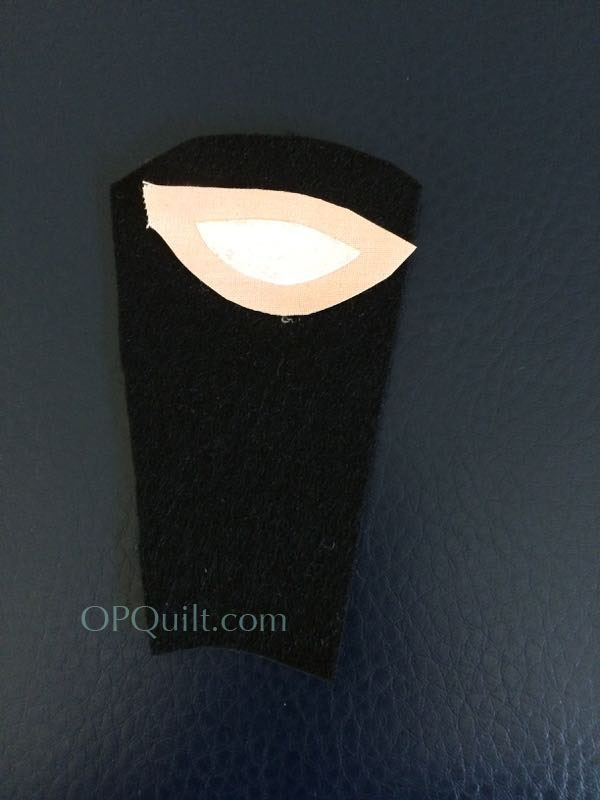
JOSEPH

Here is Joseph’s pattern, all cut out.
Basic steps:
1. Cut paper pattern pieces out; I cut a slit up Joseph’s robe pattern to get at the face and the under-robe. I left the headscarf section on top in place for now.
2. Cut out the robe out of felt (don’t cut a slit up the center of the felt), then snip a slash in the middle to cut out triangle-shaped center, following the cut out of the paper pattern. After doing that, cut pattern, freeing up the head scarf piece. (I show it above all together, but really the paper pattern is in three parts.)
3. Cut face out of interfacing, and bond to face fabric–don’t make the face fabric too pink. Joseph lived in the Mediterranean.
4. Cut under-robe, by tracing around the triangle-shape with a marking pencil, then cutting 1/4″ away from that tracing. I tried to use stripes for both Mary and Joseph’s under-robes.
5. Cut out head scarf, by the same tracing method described above.
6. Cut out deep background out of black felt. SEE BELOW.

I realized, after doing Mary, that the under-robe needed much more support than just cloth. So I laid the pieces as shown above onto some black felt, and cut 1/4″ around everything. That larger black felt piece (deep background) will be largely invisible, but is needed so the center section doesn’t become too floppy.
7. Trim the face to 1/4″ around the interfacing.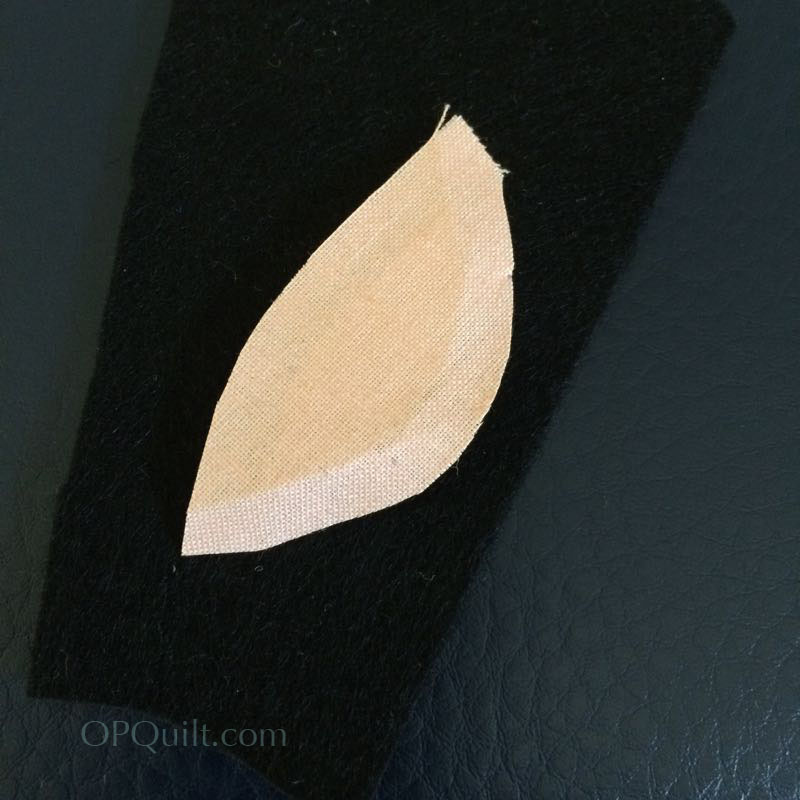
8. Pinch around the lower edge to establish a fold line for appliqué. No need to do the top as it will be hidden by the head scarf.
9. Find the center, fold up the “chin” and pin in place. 
9 (cont’d.) Appliqué down the face lower edge (see above photo for details) to the black (deep background). Fold under the top edge of the under-robe and appliqué that just under the face. They need to touch. Place head scarf onto felt robe piece. Fold under lower edge and attach to face opening in the felt with tiny stitches. Then fold to the back and tack down everywhere.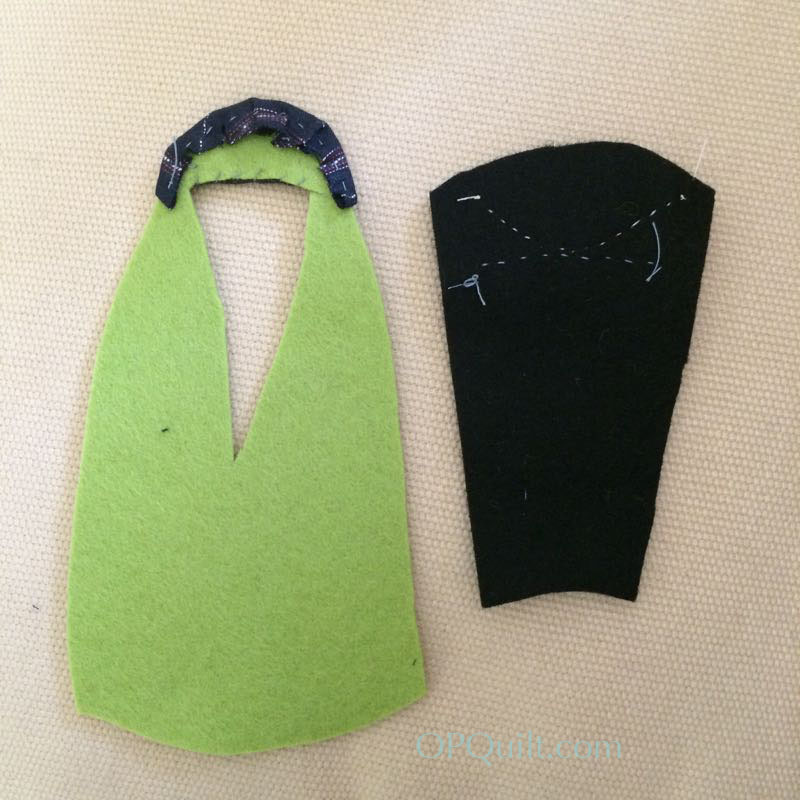
This is how things looked from the back.
10. Center the under-robe/face piece behind the robe/head-scarf piece; pin.
Lifting up the edge, trim away the excess.

Tack into place from behind. It will really be anchored by the embroidery stitches you do, but you don’t want it slipping around while you handle it. All of the above steps took about 30 minutes; it looks longer because I’m describing them to you, but since this is smaller, the stitching goes quickly.
MARY

Repeat basic steps with Mary, but there is no separate step for the head scarf. Make a (deep background) piece out of black felt for Mary as you did for Joseph. (I didn’t, and I wish I had, so ignore that tiny deep background piece above (and below) and create one as large as Joseph’s.)
In addition, DON’T trim the upper edge of Mary’s face piece until nearly the last step, as you need all that extra. DO trim the “chin” area to 1/4″ seam allowance, then pinch along the fold line, as you did for Joseph’s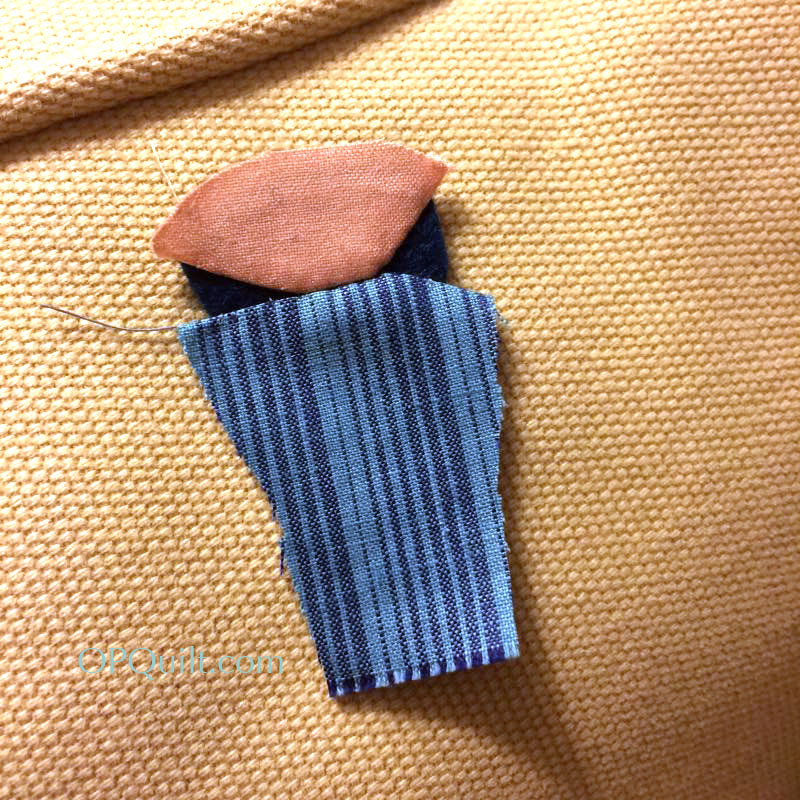
Pretend this is all on a (deep background) black felt piece, as is Joseph’s. It should be. Construct in the same fashion, turning up lower edge of face and appliqué onto black felt piece, then do the under-robe the same as Joseph’s. 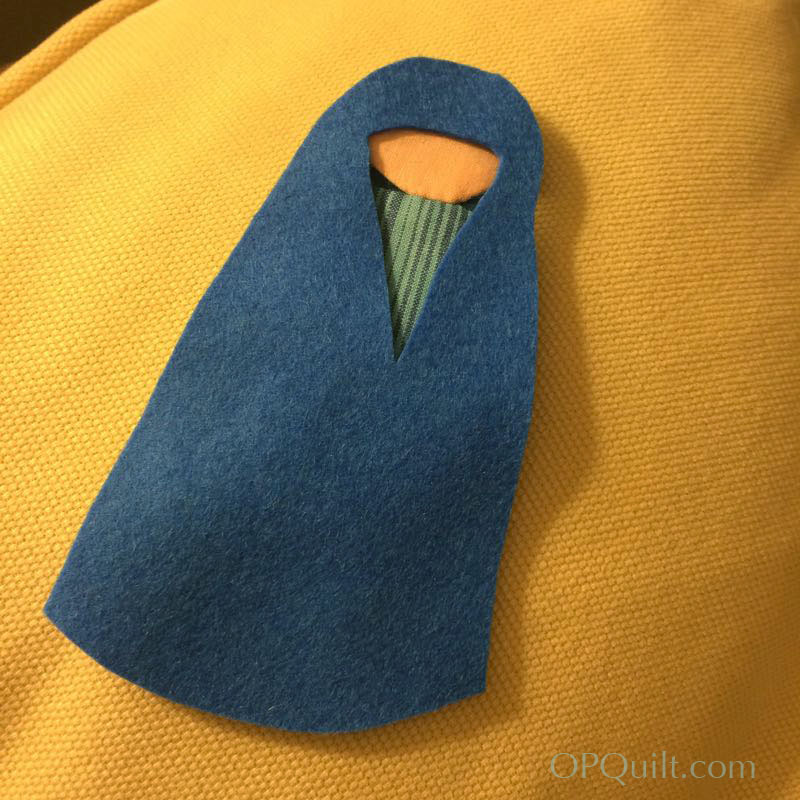
Mary doesn’t have a head scarf that is a different piece of fabric. Women in her day and religion didn’t show their hair, so I purposely didn’t make hair for her; you be the judge of what you want.
Pin the under-robe/face piece in place and tack down from the back, as you did for Joseph. Sorry for the nighttime-on-the-sofa-cushions photo.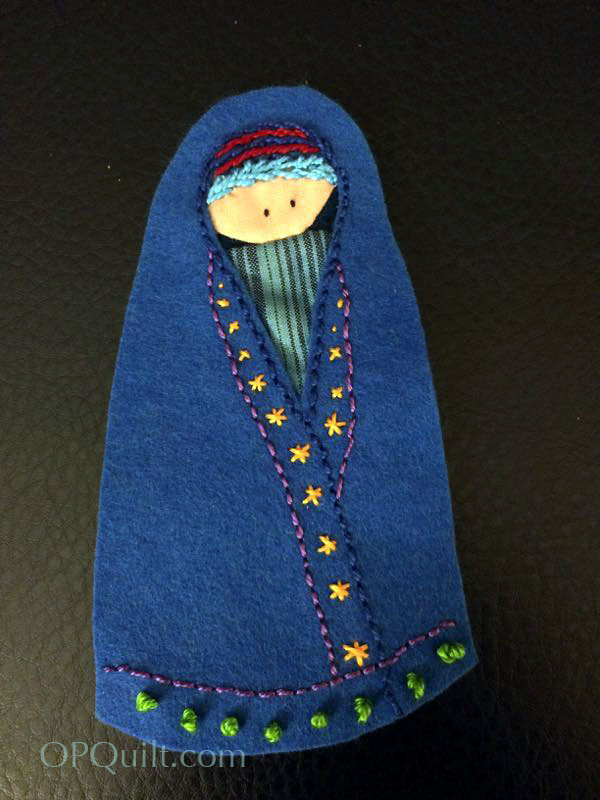
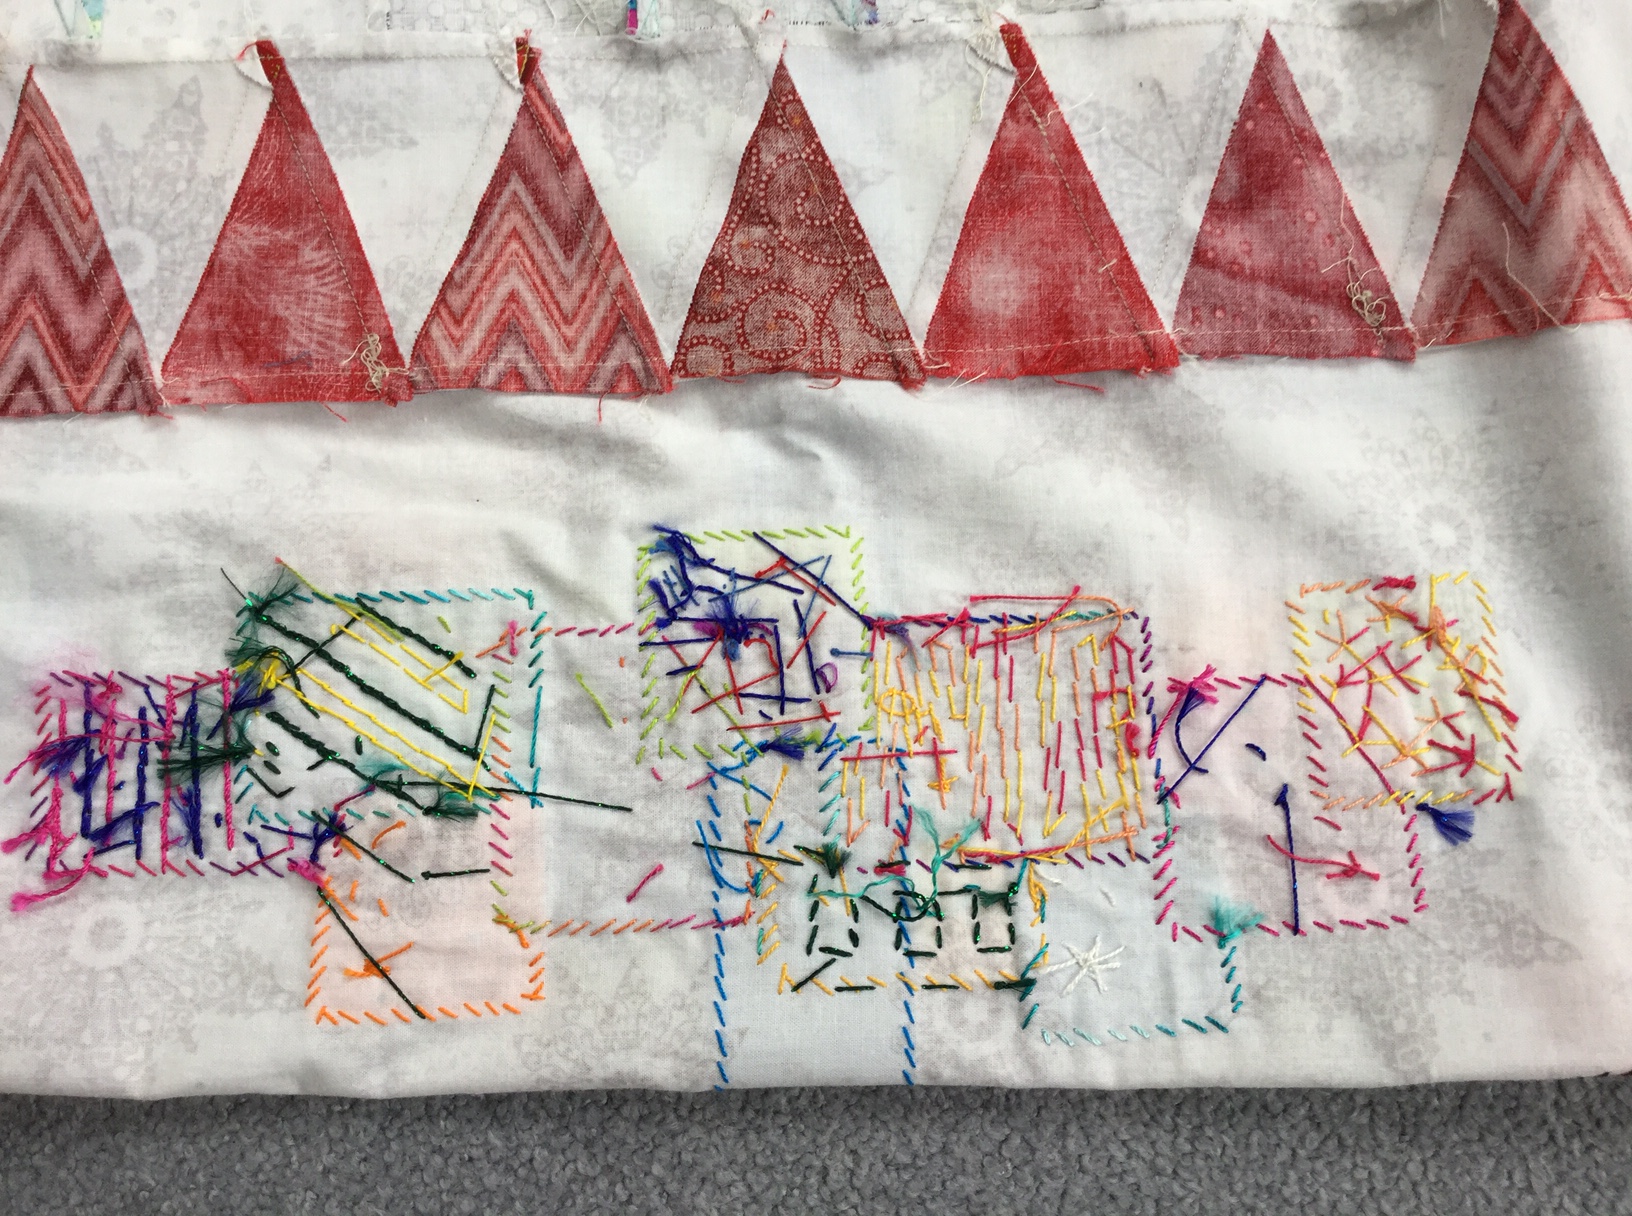
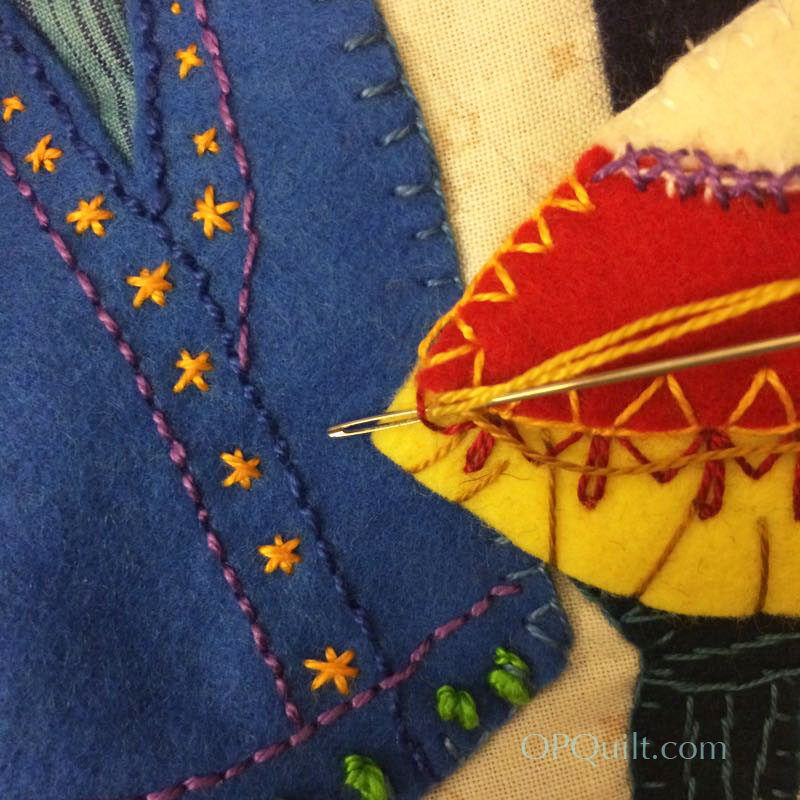
Now add the embroidery. I put several lines of “scarf” on her, alternating navy and red threads, then another line of “braid,” closer to her face, to lower her forehead (foreheads shouldn’t be too large otherwise they’ll look funny). I used blue slightly slanted stem stitches, to give texture. I did a back stitch to outline the fold of her robe, then up around her head, mostly to anchor the robe/face/deep background piece in place. I did a backstitch about 1/3″ away at the hem, narrowing as it came near her face, then around the lower edge. I added small flowers and decorative French knots.

Time to add some embroidery to Joseph.

I did two lines of stem stitch on the scarf, acting as a braid holding it on. Then I figured out his beard by tracing a shape off the pattern about 1/2″ long, as wide as the opening, and in a wide arc at the top on his face. I used felted wool to get the right texture. Tack that on. Then start adding embroidery to the robe: back stitch, seed stitch, building up layers of design.
I actually gave some thought to the colors I used. Knowing that red is for the Savior’s robes after He’s resurrected, I tried to incorporate that in. Purple in my mind is for royalty, so Mary got some of that. Of course, Mary has to be in blue–she just does. I always think green is about life and living things, so Joseph got that color. You decide what colors matter to you, and where to put them. I stitched Joseph’s decorative lines in a variegated thread, so they have some depth to them.

In stitching the vertical lines, be sure to get narrower near his face, and farther apart nearing the hem of his robe. Add eyes. They are not French knots, but merely a tiny stitch. Set Mary and Joseph aside.
BABY JESUS

Here are the pieces cut apart, with wool felt. DON’T CUT THE YELLOW LIKE THIS. I learned my lesson from Mary and Joseph and re-cut the lower yellow to be sort of a large oval; see below.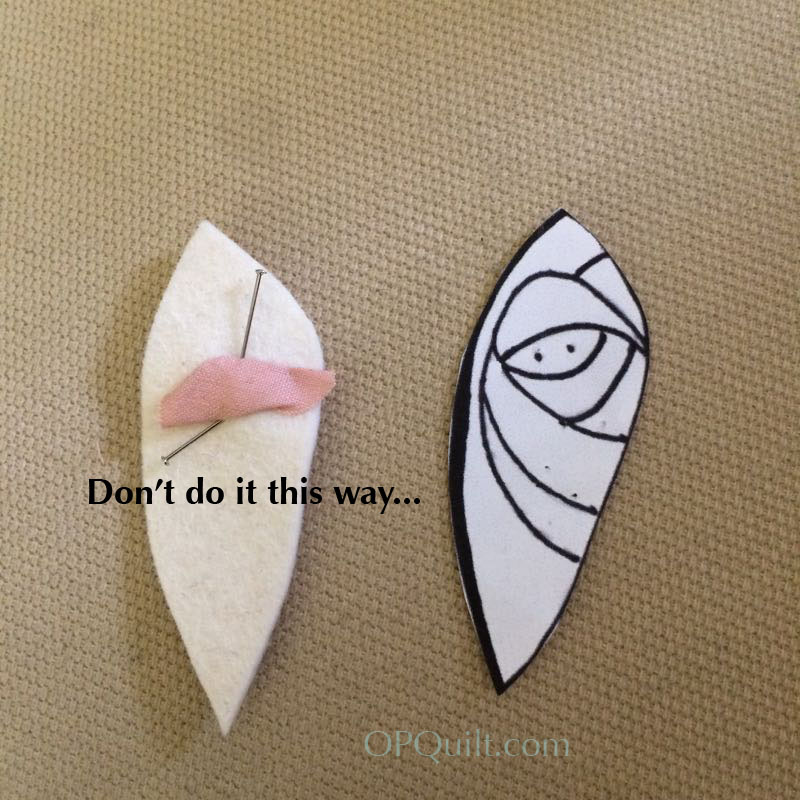
And here’s another DON’T DO. Don’t appliqué the face ON the white. I’ll show you a better way in a minute.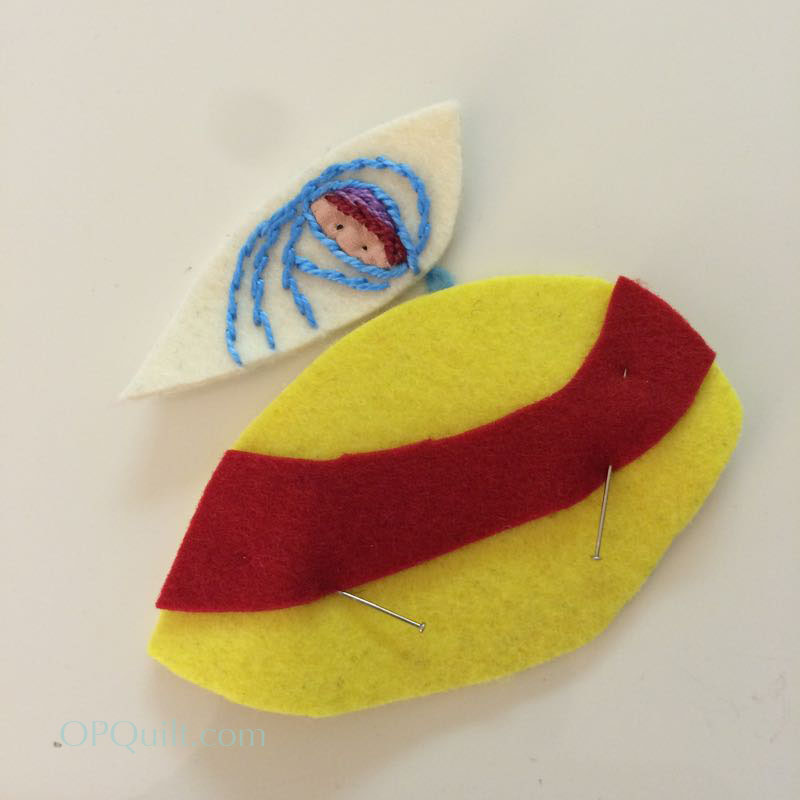
Here’s the face appliquéd on like his parents.
Yes, he does resemble a Cabbage Patch Doll. 
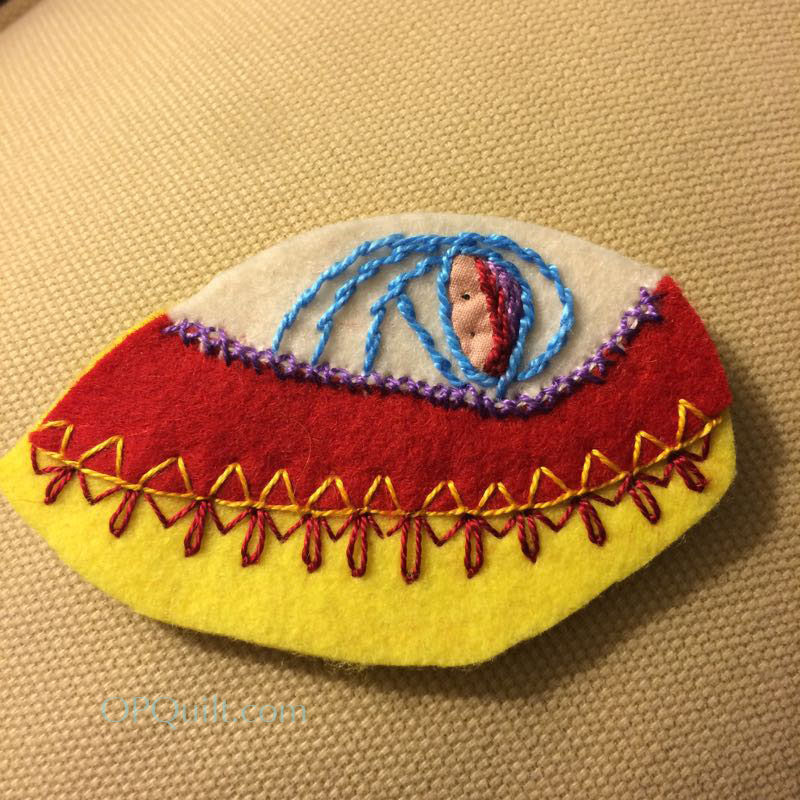
So, instead, CUT OUT that oval-ish slit. Tack the baby’s face in BEHIND the slit (easier to do at the beginning). Stitch the swaddling cloth lines in blue around the face. Then layer him on the yellow felt, with the red felt nestling in just below the white (see above, for the colors I chose). Start anchoring everything down with stitches. You can’t really see, but behind those purple cross-stitches is a small overcast stitch anchoring the white to the red to the yellow.
Now, doesn’t Baby Jesus’ face look better peeking out from behind the swaddling cloths?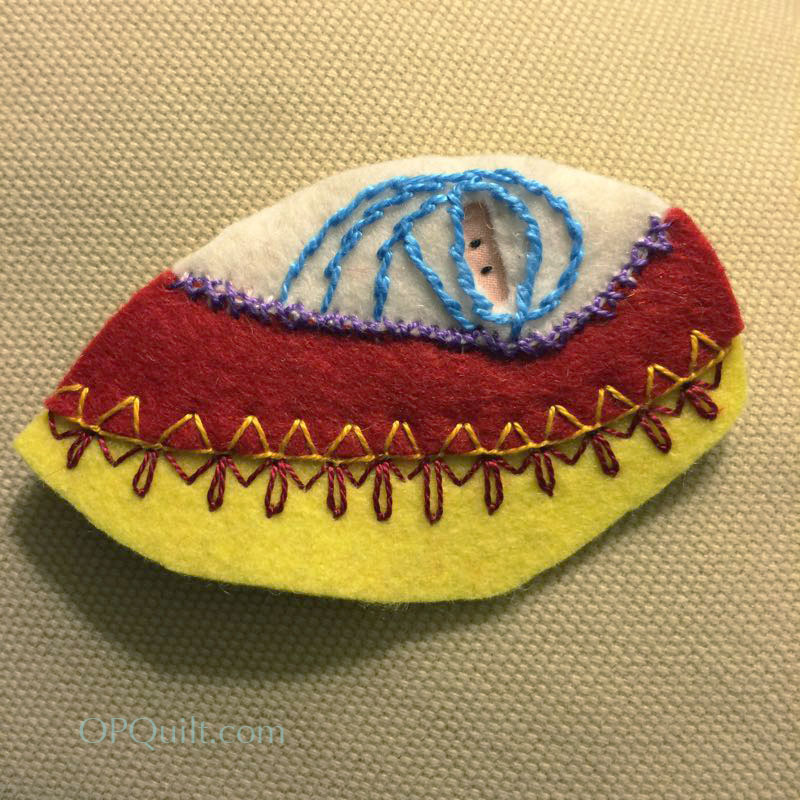
I did the angled buttonhole stitch on his blanket, using yellow thread on the red, then tried to make a red fringe-looking stitch, as if there were fringe dangling down over the yellow (which becomes hay). I did the hay stitches at the end.
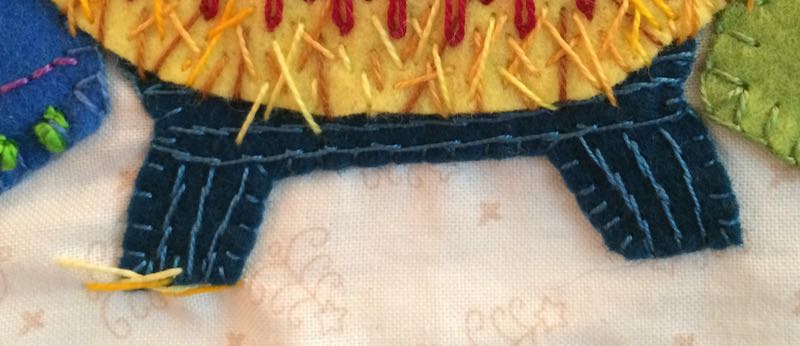
The manger was a half circle of blue, into which I cut legs then straightened out the bottom edge, so it looks sort of like a pot with legs. Or a step stool with a thick seat. It’s slightly less than the width of the baby’s assembly.
All of the decorative wood-grain stitching was done as before I tacked it onto the background. That is simply a stem stitch, done loosely and jaggedly, in a thinner thread (size 16 pearl cotton, but 12 would be fine), trying to imitate wood. The small buttonhole stitch is how I sewed it to the background, and that happens when attaching all of the Baby Jesus’ unit.
Star and Star Trails
 Cut a 1 -1/2″ circle of yellow felt, and a 1 -1/4″ circle of light orange felt. Embroider them as shown (omitting the outside small yellow stitches–that’s added when you tack it onto your background).
The star trails are about 7 ” long, about a fat quarter-inch wide, and are slightly wavy lines. Sometimes they are a bit thicker. Don’t be too precise with them, as you are making folk art. In addition, make gradual waves — not sharp curves. You can shape them into the slight curving shape when you attach them, largely because of their gradual waves. I used a backstitch to put them on. I did not attach them to the star, but stitched them on, making sure they all ended in one place, then stitched down the star over that.

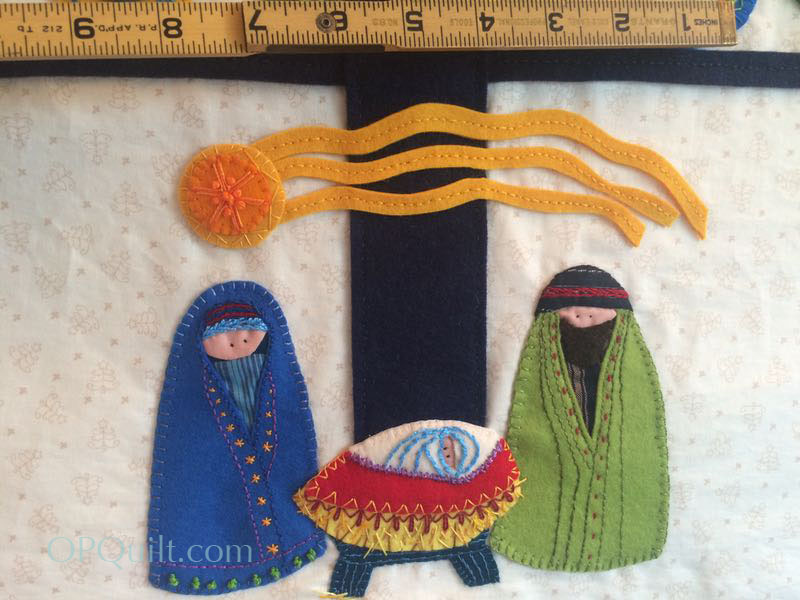
Here’s a ruler showing the approximate placement of things. The end of the tree is about even with the top of the blue manger. I pinned and checked several times, moving things by quarter-inches until I got them the way I wanted them. Notice that Joseph is closer to the tree, and Jesus overlaps both their robes. It just looked better that way to me: you decide what you like.
I used a buttonhole stitch to attach Mary all the way around, but only did Joseph’s robe. I switched to sewing thread and simply tacked down Joseph’s head scarf, without decorative stitches around it.

Now I’m starting on the hay for Baby Jesus. Notice that I completed the zig-zagging buttonhole stitch along the sides of his red blanket. If you have yellow felt peeking out, trim it slightly smaller than the red and finish the stitching down. In the photo above, Mary, Joseph, the manger and the upper half of Baby Jesus are all stitched to the background. For the hay, I used a variegated light brown–golden yellow–med. yellow thread.

I started by making “hay” stitches all over, crossing each other, going over the edge like real hay would.
I turned the needle around and “threaded” it through the fringe on his blanket, when I needed to stitch hay behind the fringes. The thread colors in variegated run in long sections. Above you can see that I went quite wide with the med. brown section, then when the golden yellow section came up, I went over that section again. Some stitches are long, some are short. Some are perpendicular to the lower edge (I did that at the beginning, to anchor it to the background). Some stitches are at a 45-degree angle.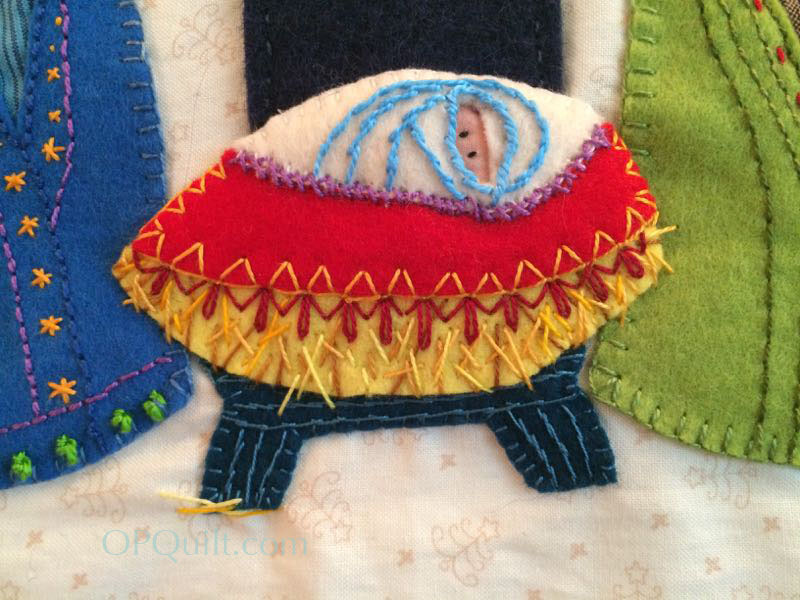
I even put a few strands of hay on the ground, and had them fall over the yellow onto the manger and onto Joseph’s and Mary’s robes. It has to look slightly dis-organized, like, well. . . hay.
Here are some more pictures of the Nativity, showing detail.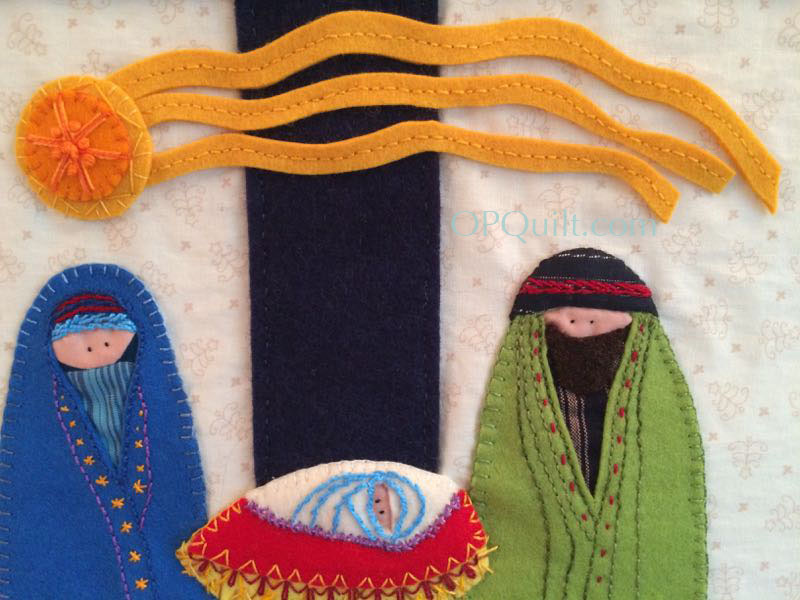

Mary was stitched down with a variegated blue thread; I like how it went lighter around her head. Totally random.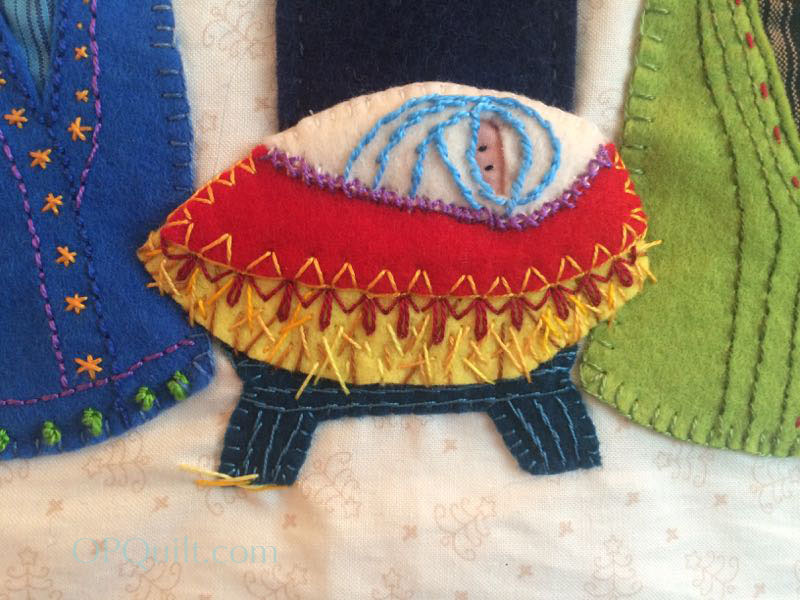
Whatever you choose to do, please keep tagging your photos on Instagram with #ohchristmastreeqal, so we can all share in your progress.
As I was wandering the aisles of Quilt Market, I found the National Nonwovens Company, who deals online with retail at Commonwealth Felt. After seeing my enthusiasm for wool felt — I don’t think they’d had that much excitement in the whole time they manned their booth — they happily donated some samples both of their 100% wool felt as well as their wool/rayon felt blend in their new colors.
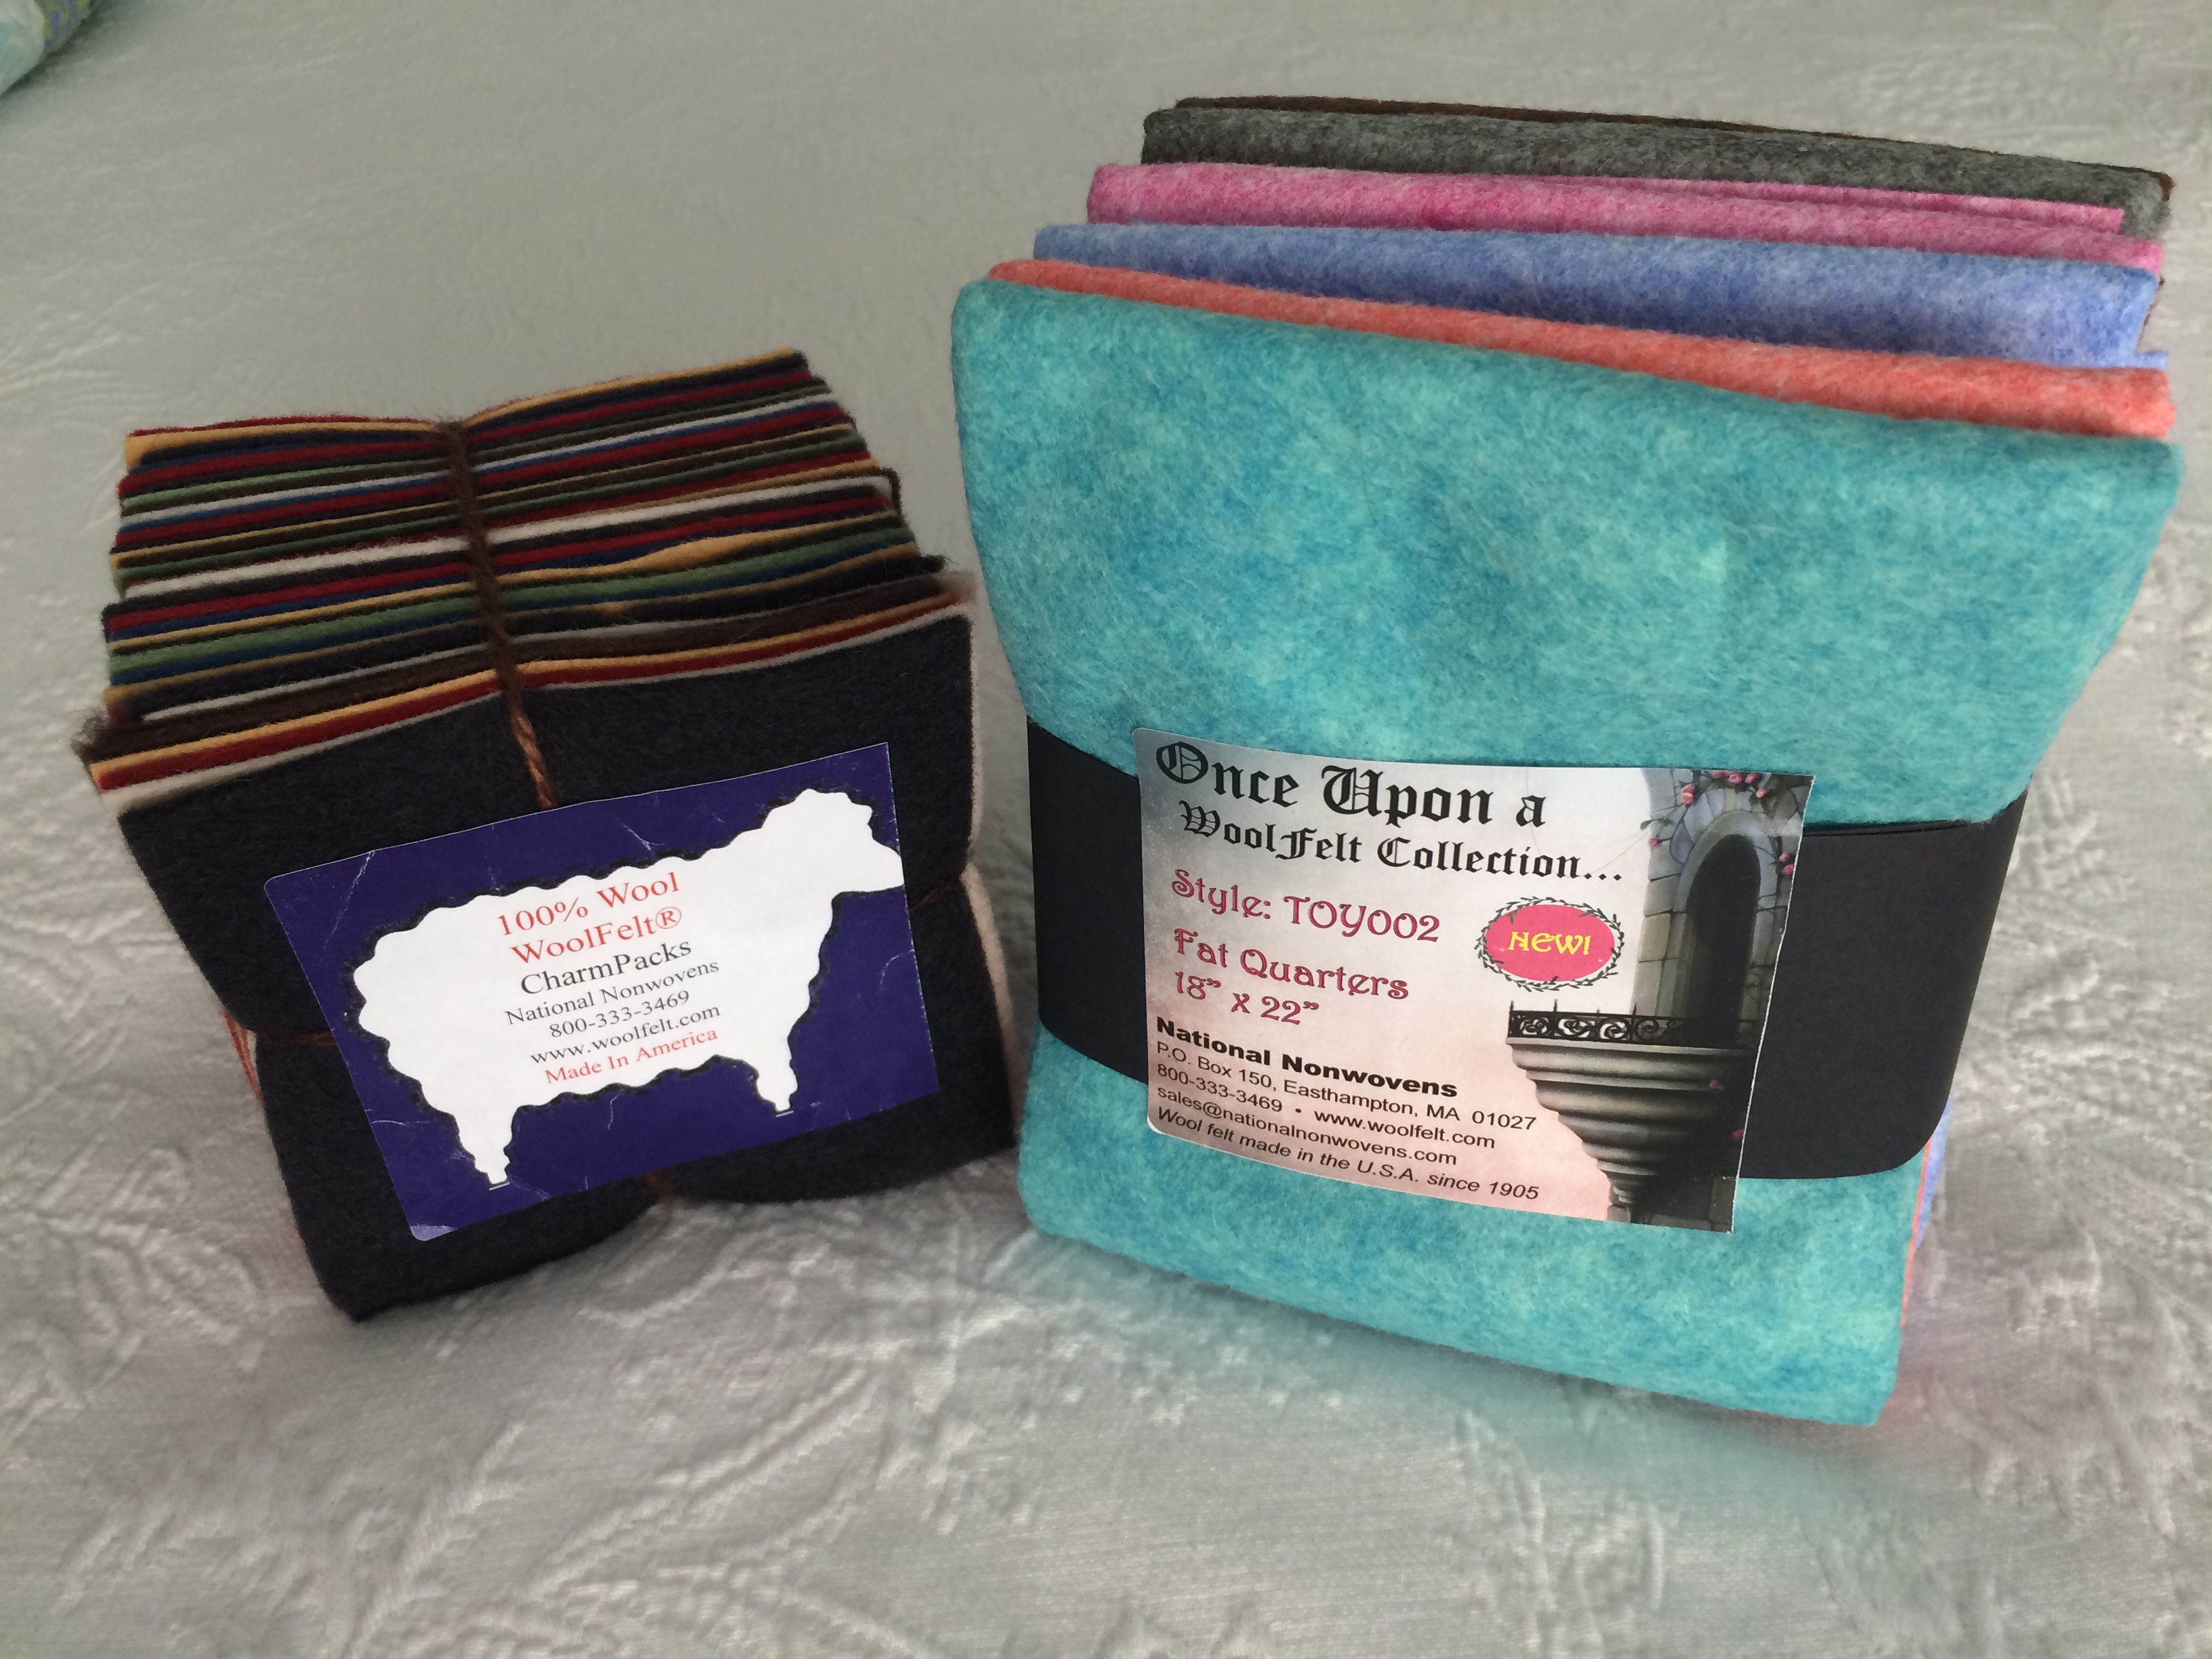
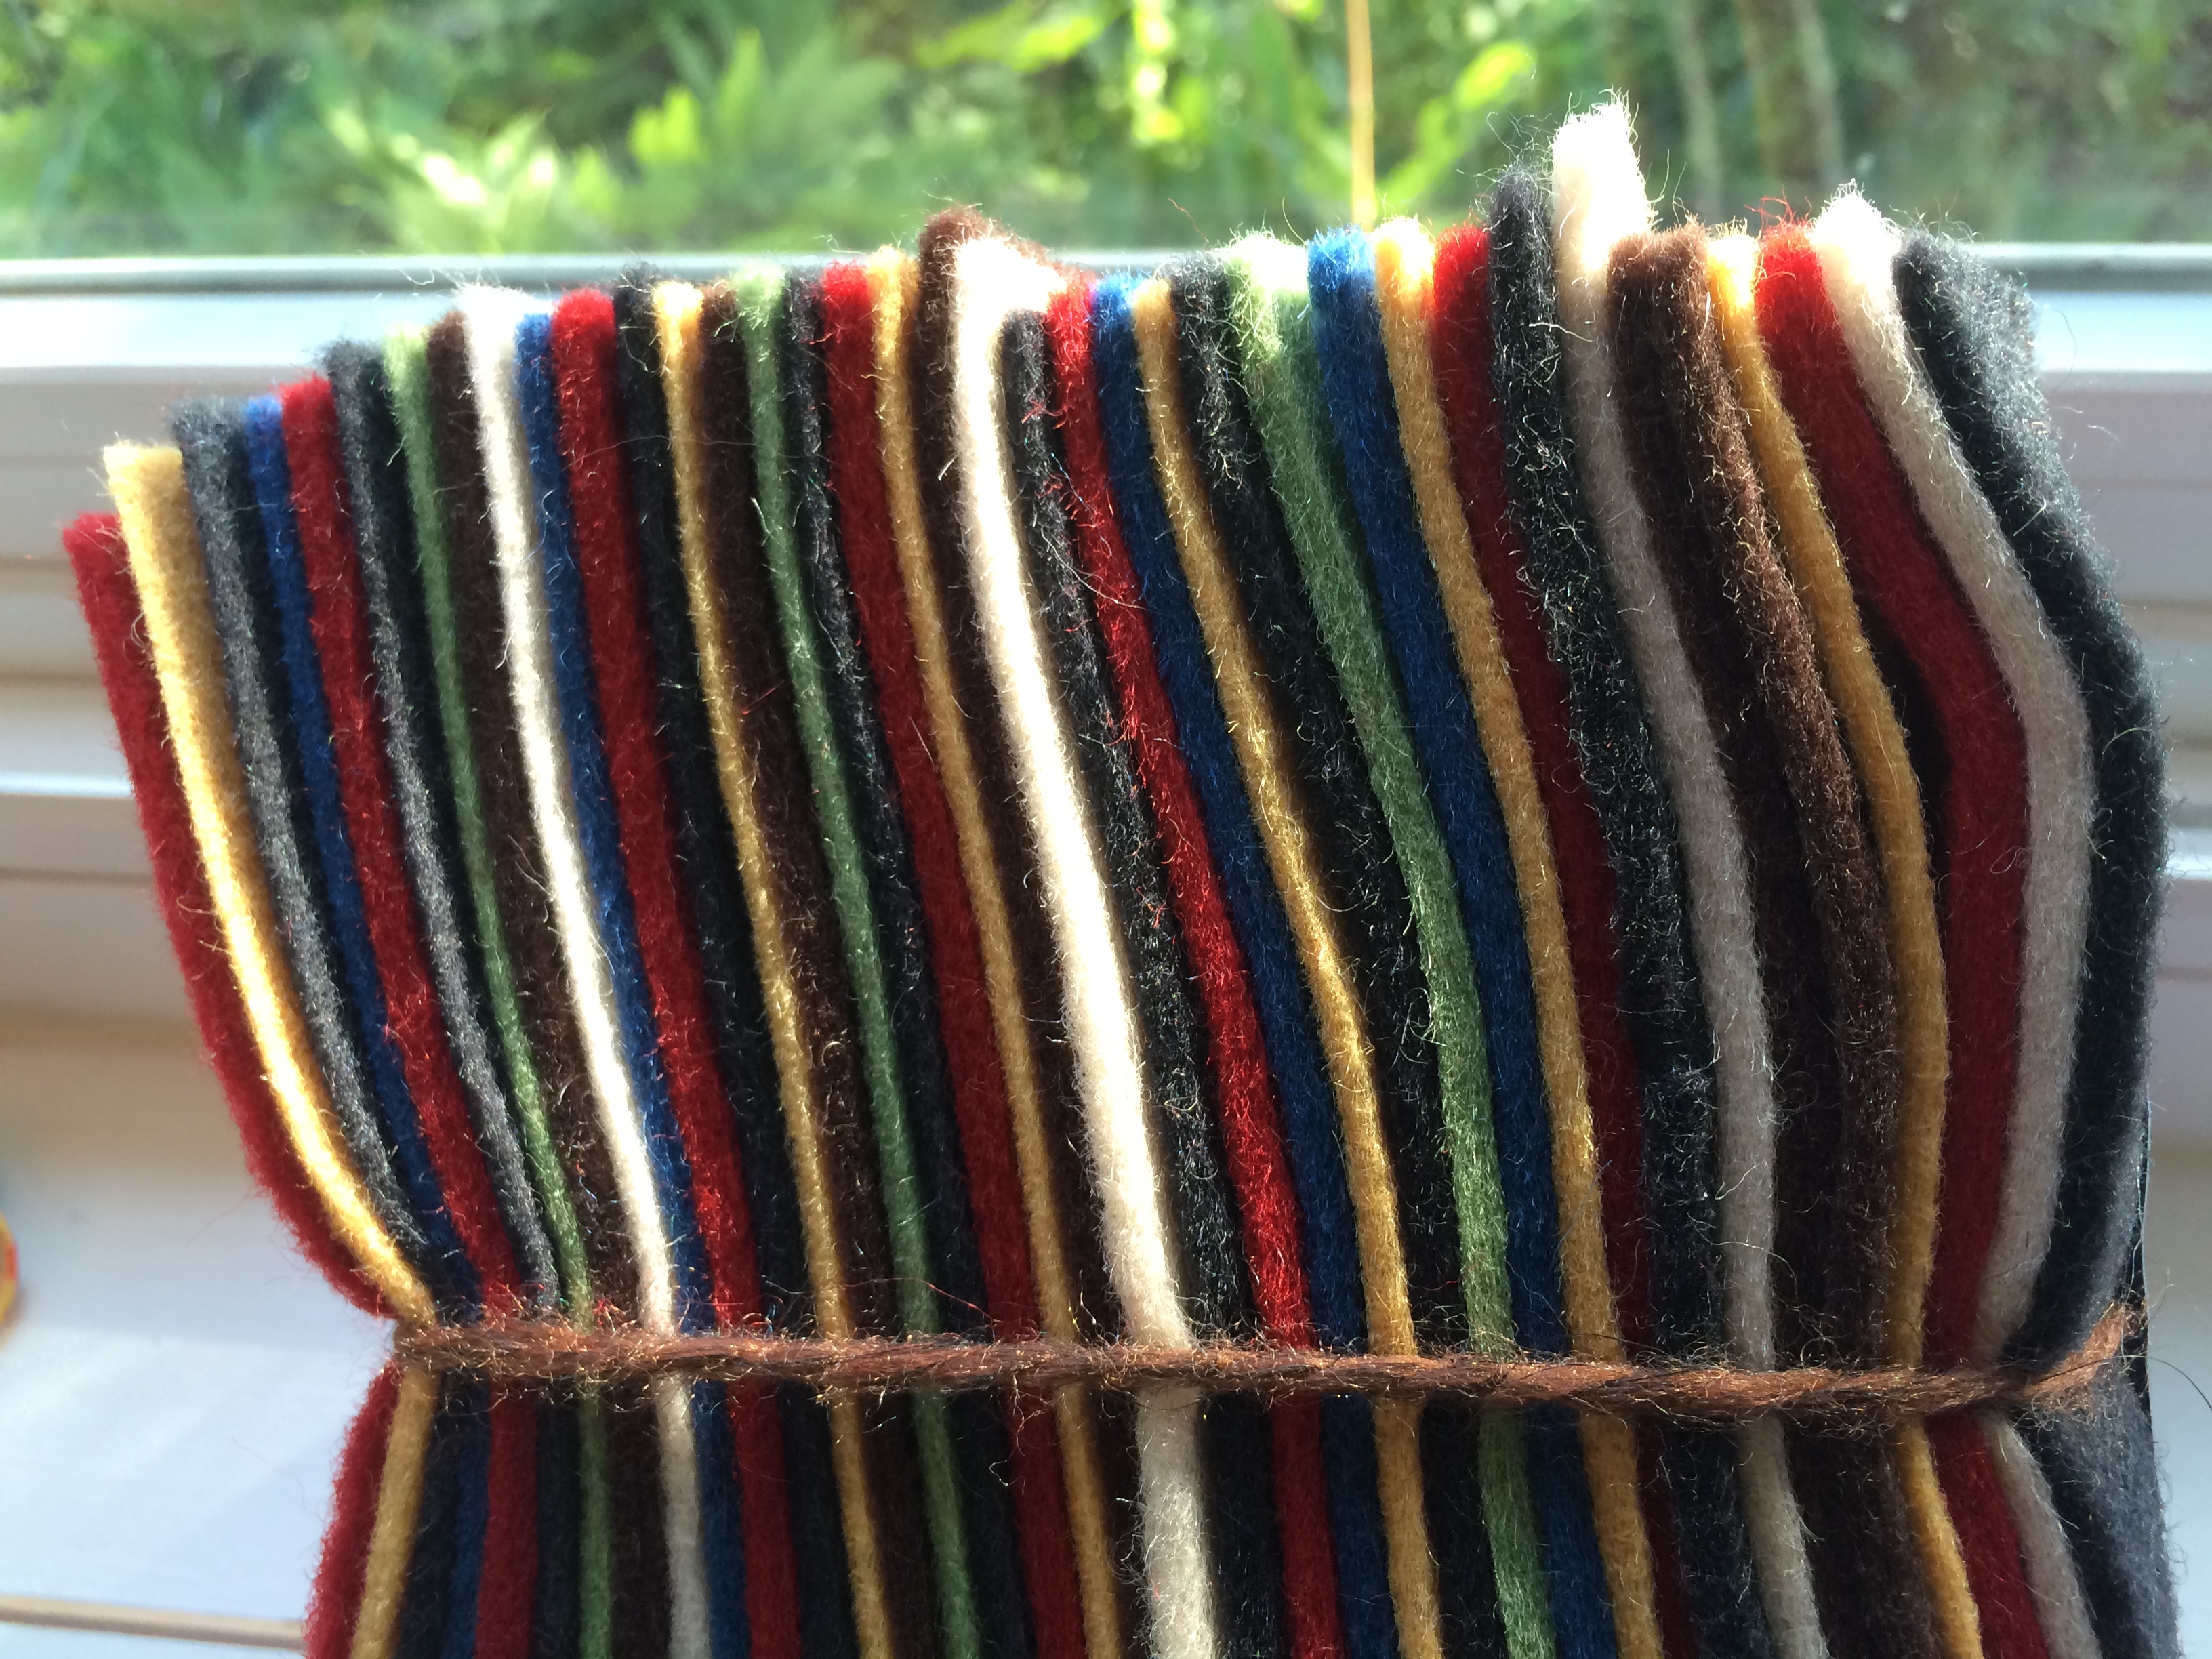
The packet on the left is a mix of fall/summer colors, including medium blue, yellow, red, white, green and black:
To win, leave a comment below telling me why you don’t think it’s crazy that we’re making Christmas things in JUNE (sometimes I think I’m crazy!). I’ll activate the Husband Random Name Generator and pick a winner. Good luck!
 Here’s a recap of our schedule:
January, Step “prepare”: buy the magazine, books, gather your fabrics, buy the felt/wool, buy/find the pearl cotton.
February, Step 1: Make the tree on the background and stitch it down.
March, Step 2: Make 21 flowers.
April, Step 3: Make 10 birds and all the leaves.
May, Step 4: Appliqué down the flowers and birds.
June, Step 5: Scene at bottom of tree–make, then appliqué onto background.
July, Step 6: Sawtooth border (reds); sew together and attach. I’ll have another idea for you to try, as well.
August, Step 7: (finish up Quilt-A-Long): Make wonky star blocks, sew them together and attach border #2.
September, Step 8 Show and Tell, just in time for school starting again. Please send pictures of whatever state your Christmas Tree is in–whether it’s just the bones of the tree, of a completed top–we want to see it!
Happy Stitching and we’ll see you in July!
Discover more from OccasionalPiece--Quilt!
Subscribe to get the latest posts sent to your email.

I had to stop reading when I got to your observation that your original baby Jesus resembled a cabbage patch doll……..I am still laughing out loud! And yes, you are crazy! Not for making Christmas stuff in June (it is winter here, after all!) but for the detail you have gone into in explaining making this sweet little family! They are totally adorable….
What better time to make things for Christmas-at least there’s a chance of finishing!
What great detail and I love the early “cabbage patch Jesus” (real close resemblance there!). And I can just hear you at the National Wovens booth – the highlight of their day I’m guessing. Sewing this “work of art” in the heat of summer (more like late winter, all spring and summer and a good part of fall) is the only way it stands a chance of getting finished. Besides, it’s giving me serious motivation to continue this kind of composition well into the future! You’re the best!
Creating a Christmas project in June or July almost gives me enough time to finish before the holidays start in my house the day after Thanksgiving. Thank you for sharing this great project and the terrific tutorials!
Working on a Christmas project in June means that you might have it finished by Christmas. Love the folk art nativity.
Thanks for all of the choices for under the tree! I think for a project like this, complete with carefully thought out embroidery, it makes sense to start early. It allows for time to thoughtfully sew the quilt and I appreciate the “head start!”
I know that if I waited until Christmas to work on those projects they would never get done. Life is too crazy at that time of the year.
I LOVE your sweet little nativity set. I’d like to make those and put them in a little frame to stand alone. Thank you so much for all the detailed instructions, Elizabeth. It will make a great takealong project.
Working on Christmas projects in June? Well Christmas is only two hundred and six days away! I’m a beginner when it comes to using wool in Applique is I do not have more than a few little pieces, not enough to make a project but am slowly purchasing the colours I’m attracted to and also have enrolled in a wool applique class. I really enjoy the look of all the stitches, most of which I learnt as a young girl…now I need to relearn them! Thank you for such clear instructions.
Seeing as I am still on step 3, it is not crazy at all! I hope to finish in time for Christmas! I don’t know what feature I will choose for this step. I do love your stitching on the nativity figures Elizabeth!
What a better time to work on a winter holiday project —– when the sun is shining off the lake and the temp is over 70!!!
Some wonderful inspiration from both you and Wendy, thanks so much. I know mine won’t be made for Christmas butt loving your enrhusiasm and inspiration. Having fun watching your progress.
Choices, choices, choices… You’ve done a wonderful job of showing how to create your nativity scene. It is adorable, even if baby Jesus is Cabbage Patch doll-faced. He’s is so sweet. I love Joseph’s beard. Your star is lovely… I can imagine it streaking across the night sky. Wendy’s gifts are a great touch too. You’re offering a great give away. The wool charm pack has so much potential. And, no you’re not crazy for working on a Christmas project in June. At the rate I’m going it will be finished just in time for Christmas.
Ahhh this reminds me to AVOID the last minute scramble! Lol. Xmas always turns up soo fast and everyone loves handmade gifts. Sitting until 2 am trying to finish a gift is no fun. That’s why we do this NOW. Lol. Giselle
I’ve just checked out the website for Commonwealth felt. I do like the charm packs they are a nice easy size. The bamboo is curious I would like to try that at some point. The only problem now is to choose colours. You certainly are expanding my horizons on shops. Lol Giselle
Doing this in June is so smart! Getting things done ahead of time gives me a feeling of accomplishment. I can sleep at night knowing everything is ready to give!!
I’m always far too busy making gifts for everyone in the run up to Christmas so if I want to make anything for myself I have to start in June! X
E, we are doing this in June because you started it back last winter, a while after the magazine came out with the pattern and you organized this sew along. We’re really pokey if you think about it — we should have done this in December LAST year, but we cling stubbornly to the myth that we are doing it early, instead of [at this point] six or seven months after most of us got the pattern!!! I mean, think about it. Do the magazines come out with their December/Christmas issues in July? Nope, they arrive in November (or October?). It’s all part of the illusion of control. So what if we’re making last year’s pattern? It’s this year’s if we say it is and that makes us early, and that’s what counts. And by not rushing to sew it last December, then throwing it into a corner with other projects we didn’t get done in time for Christmas, we actually have a shot at getting it done for next Christmas. That is, if we move beyond the fondling the fabric stage and get started actually sewing (I speak only for myself). In all honesty, probably the only person who gets the pattern in December and finishes it the same month, along with eleven other projects, is Wendy in New Zealand. Must be all that blood rushing to her head from being upside down on the bottom of the world. Or that she had summer weather last winter and we’re only getting it now. Right, Wendy?
None of us are crazy because we are doing this Christmas project now. We all know ourselves so well…we’ll be way to busy in November and December and it will become a ‘maybe next year’ project. Love CP Jesus too. The folksy nativity is just perfect for this folksy tree! Thanks for the extra thought you put into this project.
This is all so cute and detailed with admirable stitching detail! Seems highly organised to be doing in June (until I read the comment above which suggests that actually you’re six months late- who cares it looks like a great project to be doing!)
Crazy? No way! We crafters know it’s always time to create for Christmas!
BTW, I am constantly amazed by your endless creativity!