
Yes, I’m going to talk about making curves, but it’s part of a path that began after I finished the Bee Happy Quilt. You know what comes next: either get it quilted by check, or if you are daft enough, quilt it yourself. (Above: measuring and cutting the batting). But the hardest part is coming up with ideas, so then I check Instagram. I found Rebecca Silbaugh of rubybluequilts and generally followed along to what she had quilted for customers’ quilts like mine. It wasn’t exact, but it gave me a roadmap.
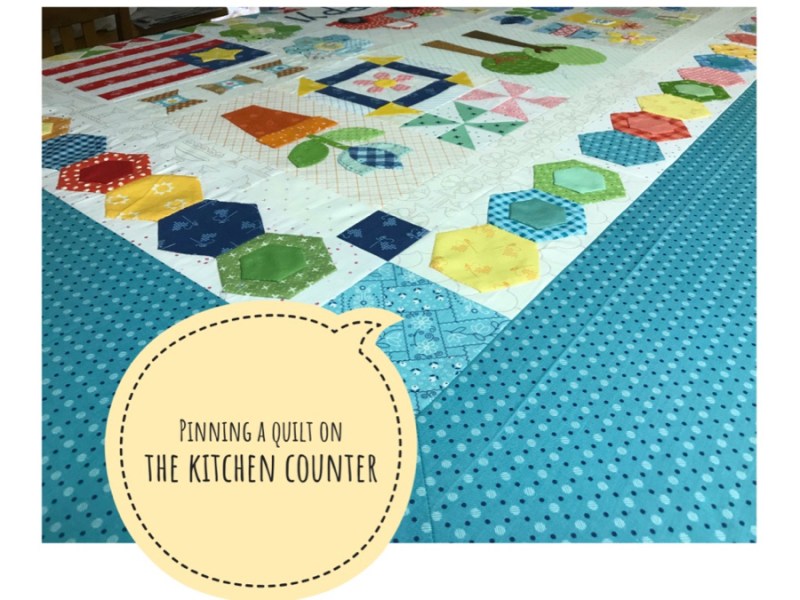

I use a Sweet Sixteen mid-arm, or stationary quilting machine to stitch by quilts, so I have to find some workarounds, and one of them is good use of the disappearing marker. But I need a template to trace to get the design I wanted for the border, and didn’t want to take the quilt downstairs to try out a bunch of plates from the cupboard to find the shape I wanted, or go through all my rulers.
In the early days, when quilters wanted a repeated shape for their border, would often cut a piece of paper the length of the border, and then fold it into parts, using that to mark off the segments. But I had two border lengths to work with and neither were easy measurements, but I figure if I could get a 3 1/2″ petal-shaped something-or-other, I could trace that and make it work. I turned to my Affinity Designer software to get that perfect shape. The steps I took are listed at the bottom of this post, as I didn’t want to interrupt the post, but if you are someone who is learning this software, they may help.

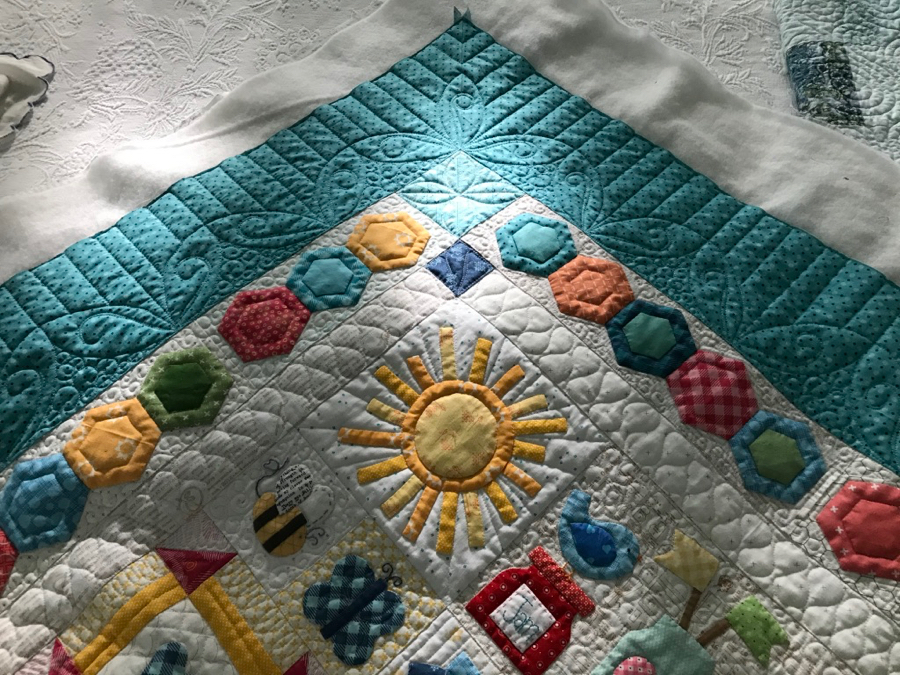
I printed out my shape, but kept a connecter — punching a hole so I could mark through it. I traced one side at a time–using the shape at a perpendicular angle in the middle to fill up the space and arranging it around the corner.


Here’s a picture of the border pattern in soft afternoon light, so you can see the quilting. I used So Fine thread from Superior Thread, color #402 — an off-white — in both top and bobbin for the center of the quilt. Then I switched to a matching Magnifico Thread (also by Superior) to quilt the borders, keeping the bobbin the same.
The quilt — and I — are resting before I tackle the trimming, binding and sleeve. I’m also waiting for inspiration to strike for a name. I’ve called it the Dungeon of Cute all this time (I began the quilt in January of 2019), as I loved the first three or four blocks. Then it was like being chained to a wall, having to make cute blocks over and over and over. (But I don’t think I want to name it this.)
Something will come to me.
Affinity Designer Tutorial for making a petal-shape

I had taken a class at QuiltCon that talked about merging shapes and subtracting shapes, so I started with the left mess, trying to get that curve. Fail. Then I found *this video* and it opened my eyes to possibilities. Go and watch it now. I’ll wait. In figure 2, I drew a constrained square by holding down the shift key to make the sides all the same length (without the shift key, I’d get a rectangle). I put a thicker border on the square so I could see it.
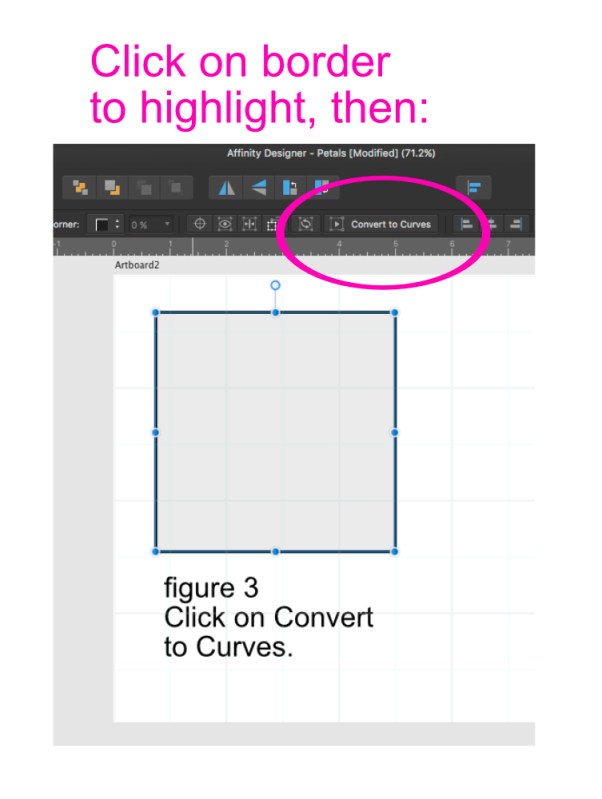
Then I did what it says. I clicked on the border to highlight it, then converted it to curves. That lets each side and each corner move independently of the others.

Click on the corner tool (in the pink circle) and the nodes will change to little boxes. Right by them, not really visible in his illustration is a small red “handle” that you’ll grab. Move your cursor around to locate it for one corner, then drag toward the center of the square.
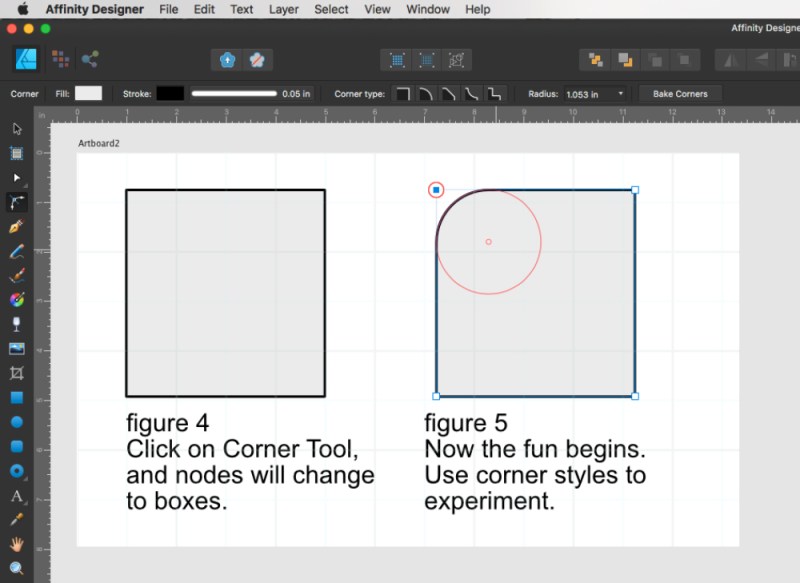
You can see the little red “handle” in this image; it looks like a small circle. The farther the radius of that larger red circle, the flatter the corner.
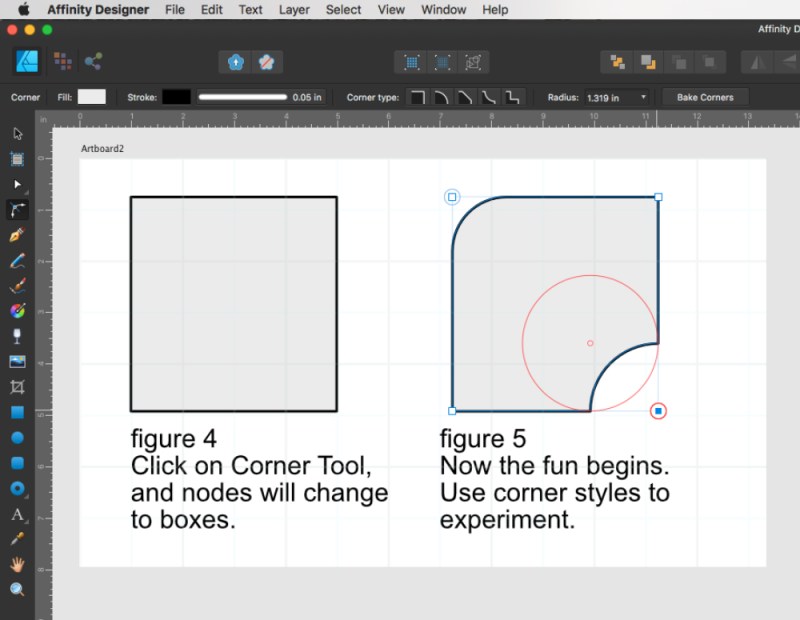
Figure 5 is getting a work out.
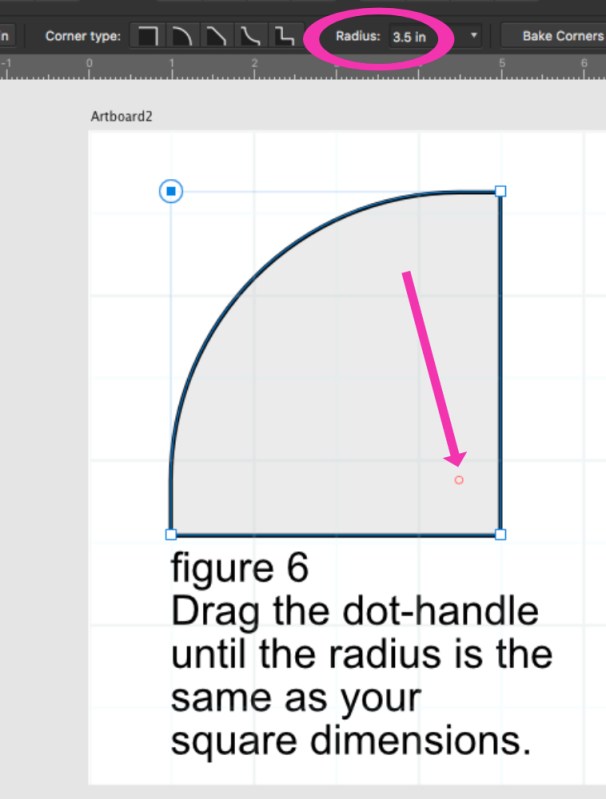
But I really want to make a petal-shape. I dragged the handle until the radius was the same as the square’s side: 3 1/2″ inches. I kept my eye on the measurements, shown in the pink oval.

But I wanted a thinner petal, so I went with a 4″ radius. Then I copied and pasted them together, using Command-G to merge the layers so I could move them as I wanted. I printed them out on cardstock and used that in the marking of my quilt (below).

Good news! All Affinity software is on major sale right now (50%), so if you need any design or photo or pattern-writing software, I can recommend it to you. No subscriptions. And they also have a 90-day free trial, as well. I don’t get any kickback for recommending them to you; click this link for more information.
Happy Quilting!
