Let’s go to the movies! The Oh! Granny movies! If I could wave a magic wand I’d change the world so you could see the congregation of Grannies we’ve all started together, but this screen capture video will have to suffice. If you make a Granny Square, I’ll add you to the group — just tag me on Instagram.
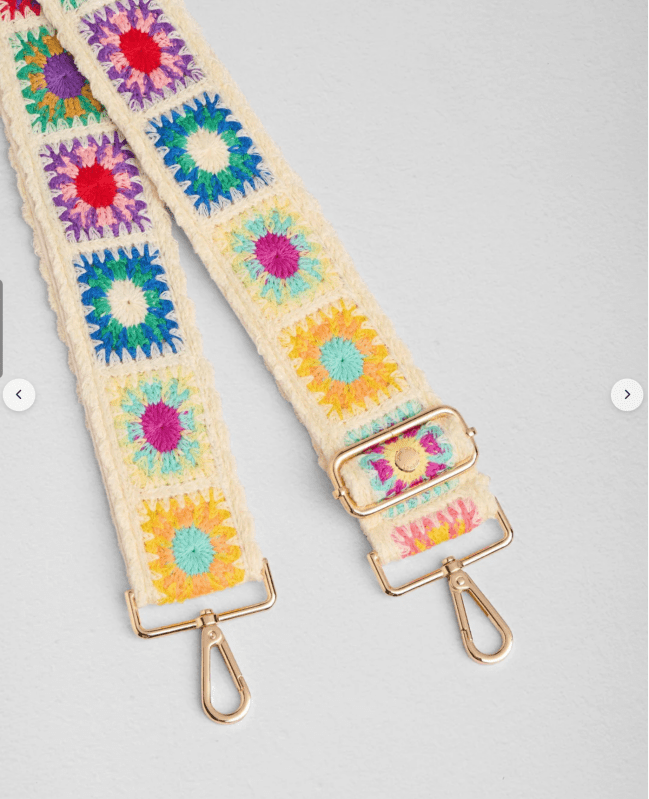
Here are my two starter Grannies for June:
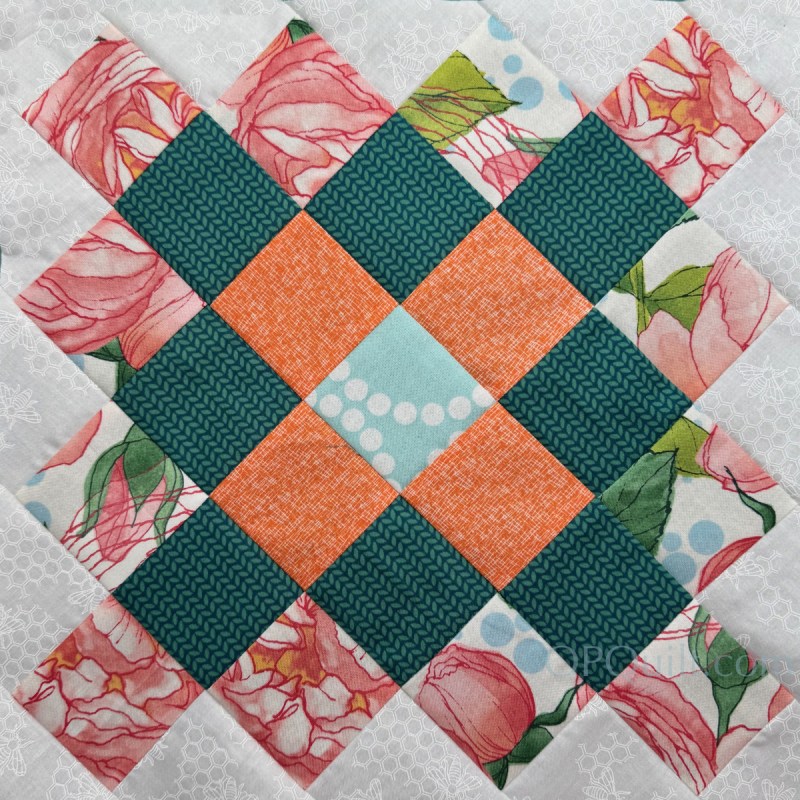
Block #9 (above) and Block #10 (below)
If you want to jump in, it’s never too late. More info is on a previous post, plus a free pattern.
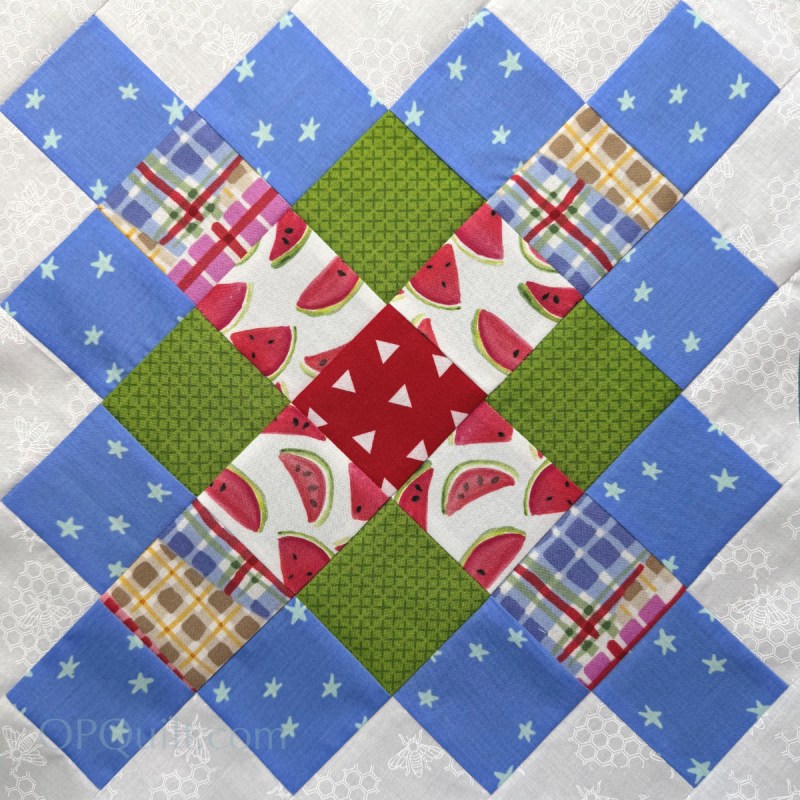
Obviously my micro-season of red, white and blue has influenced this last one. And by the way, I really enjoyed reading all your micro-seasons, left in the comments on the last post. After hearing my stories about my garment sewing (see below), Wendy came up with another micro-season: WWIT, or What Was I Thinking? I find myself in that season often.
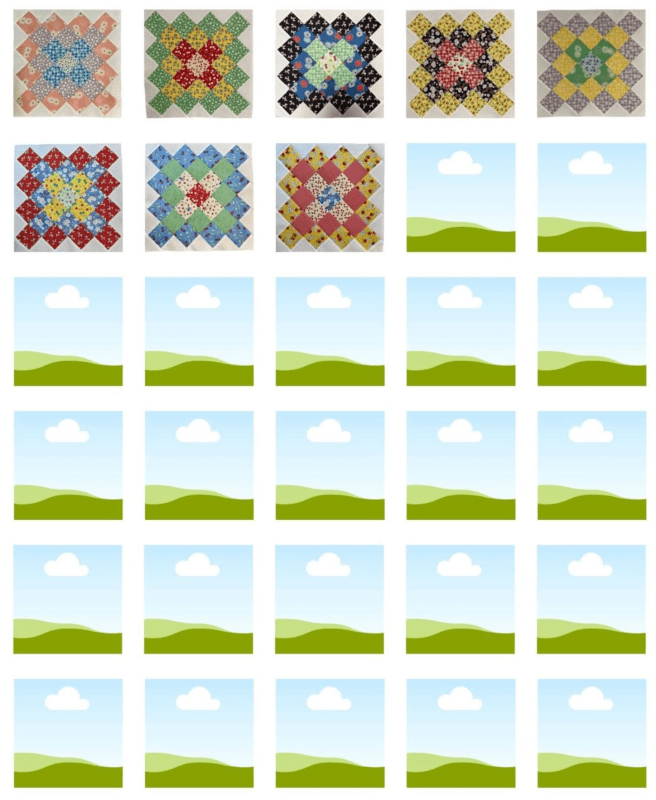
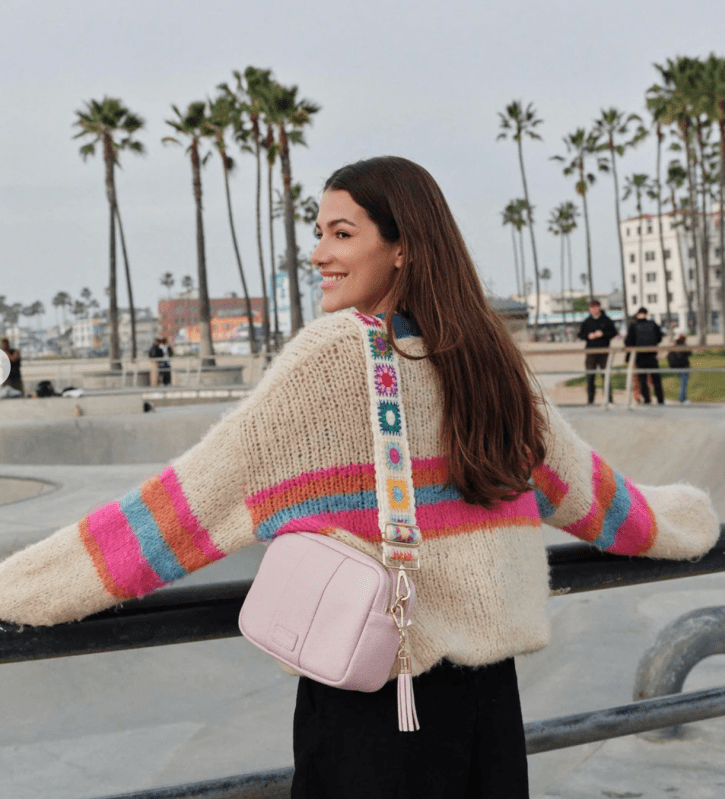
Did you see this one as we rolled the movie? This is from Allison; she made a pictorial chart in Canva, and is adding in her grannies as she makes them.
I’ve got some more squares cut up in my sewing room, and will soon get to making more.
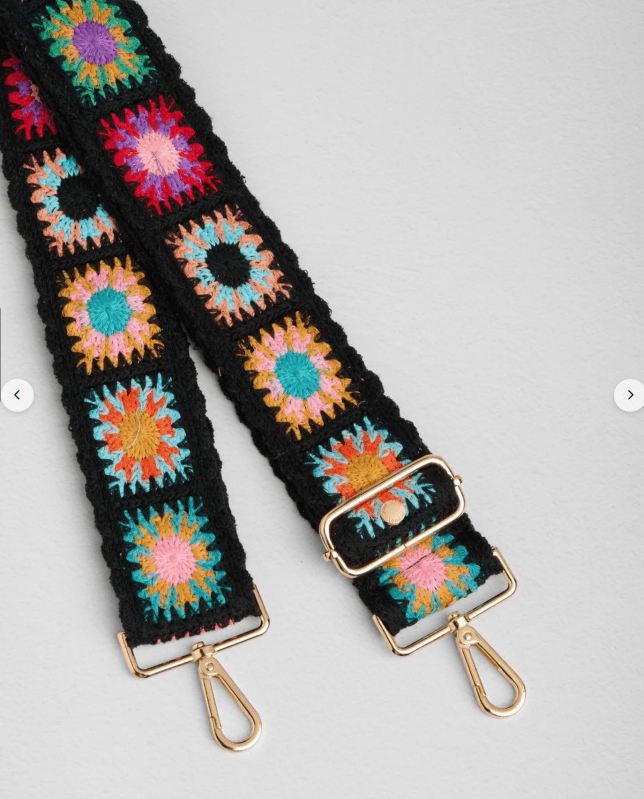
I keep running into Granny Square designs. This is from PomPom London, a purse maker. I may or may not have just purchased a red purse from them.
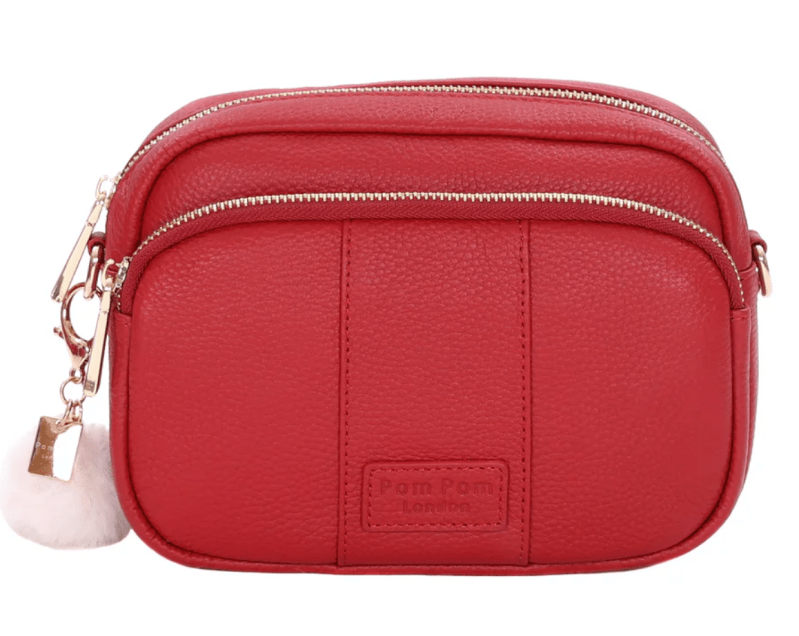
My apologies, this model in this color is apparently sold out, but I also like the one-zip City Bag in blue, if that suits you. I’t ‘ve had it for a few months now, and has the best cross-body straps (hands free!) and I can even fit a small, short water bottle in there. I’d say, if you’re hot for a red purse, check back as they replenish their stock often, or choose another (they have three different reds). I’ve now seen three different copycat ads for purses in my IG feed (see below about junk in our media feeds), but PomPom London is the original. And yes, each bag has a pompom, or tassel or whatever.
Short Story: Hair dryer died. Got a new, different (better) one, based on the dryer in my hotel room in Paris. (PS. I mention these items, but no one is paying me.) This year has seemed to be the Time Of Getting Things Repaired & Fixed/Replaced, and I’m getting a little weary, but there you go.
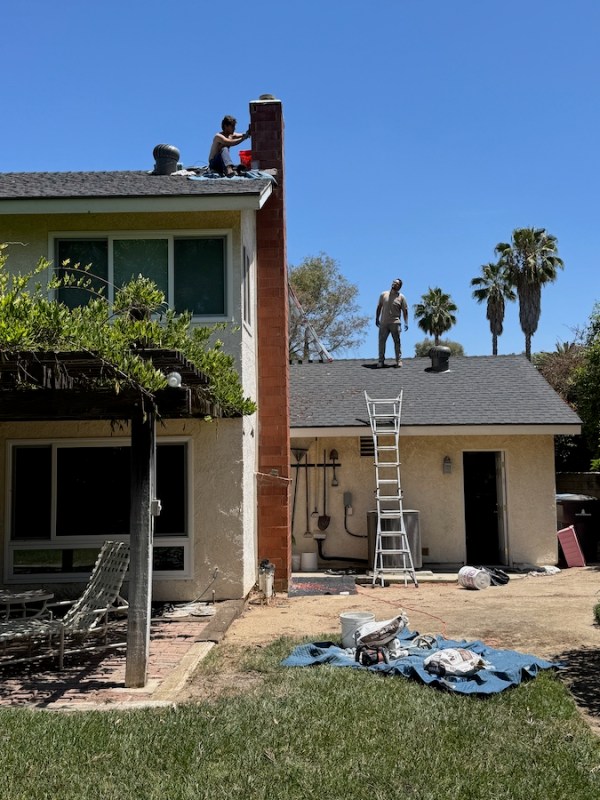
Chimney collar repair, with Tobi on top and David as assistant. And more great news is this:
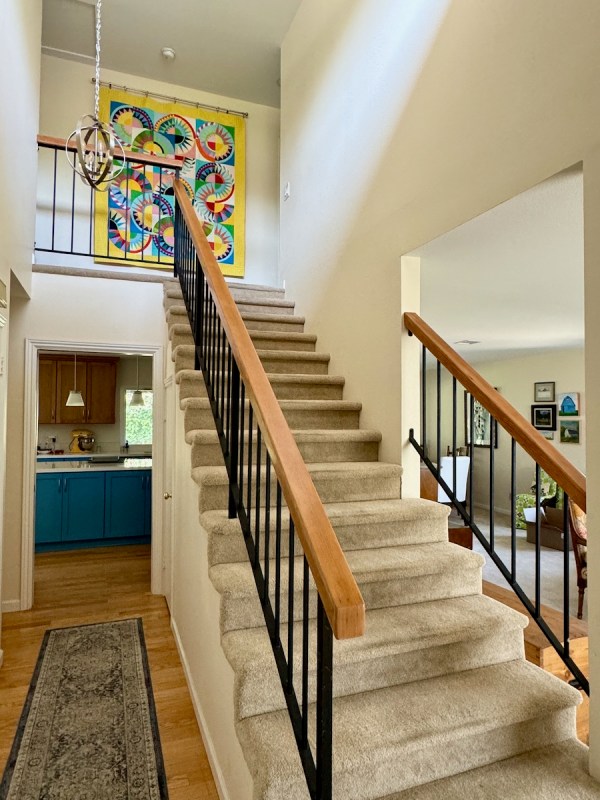
Yes, the stair bannister was finished, and delivered (late one night, felt sorry for Bryan, but he’s a good guy and his IG feed is fascinating to look at, if you love watching other people work).
Short Story: router died.
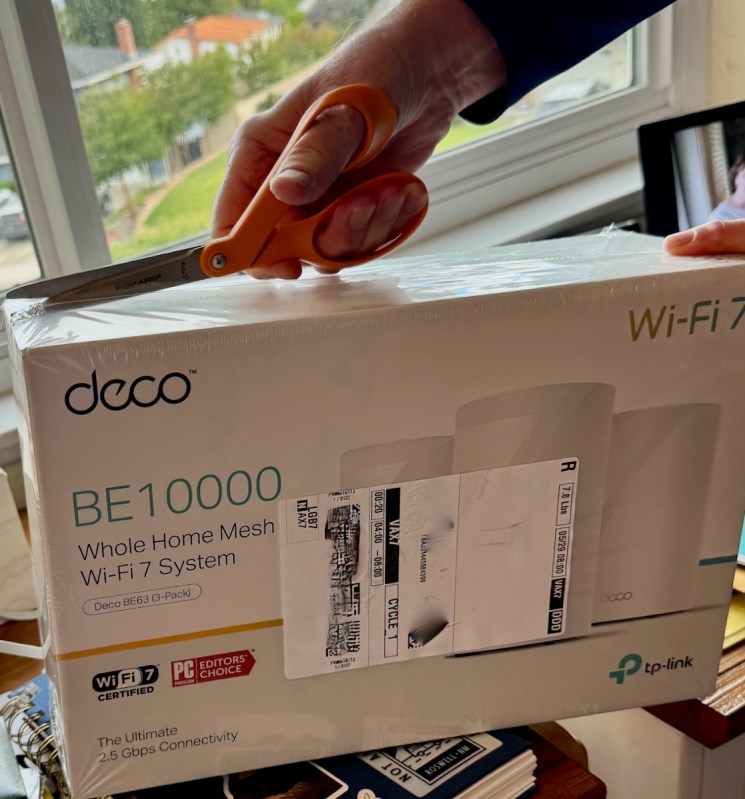
Ending: We’re back on the internets with a new mesh network. The bigger problem is that home repairs TAKE TIME, even when you are not the one doing them. I mean, gawking checking on the guy up on the roof seriously takes away from the sewing, if you know what I mean. And don’t even get me started on the lengthy tale of getting the router up and running.
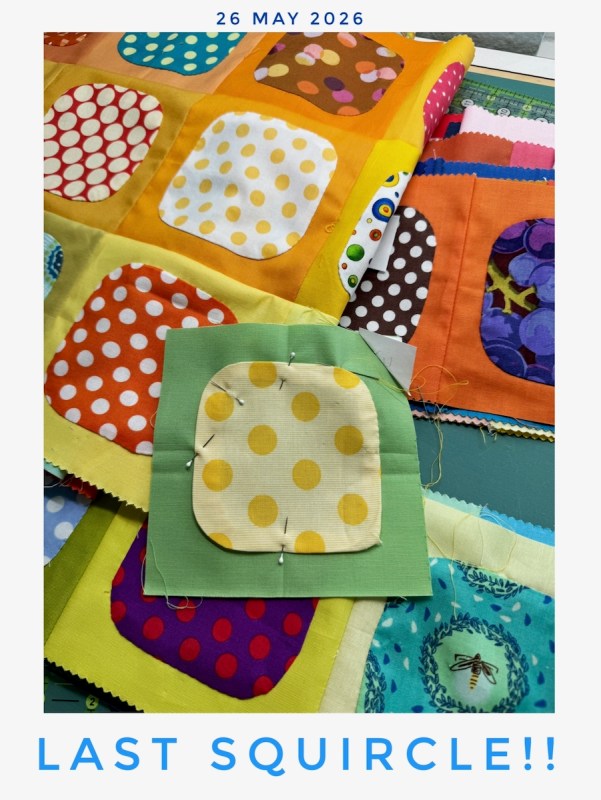
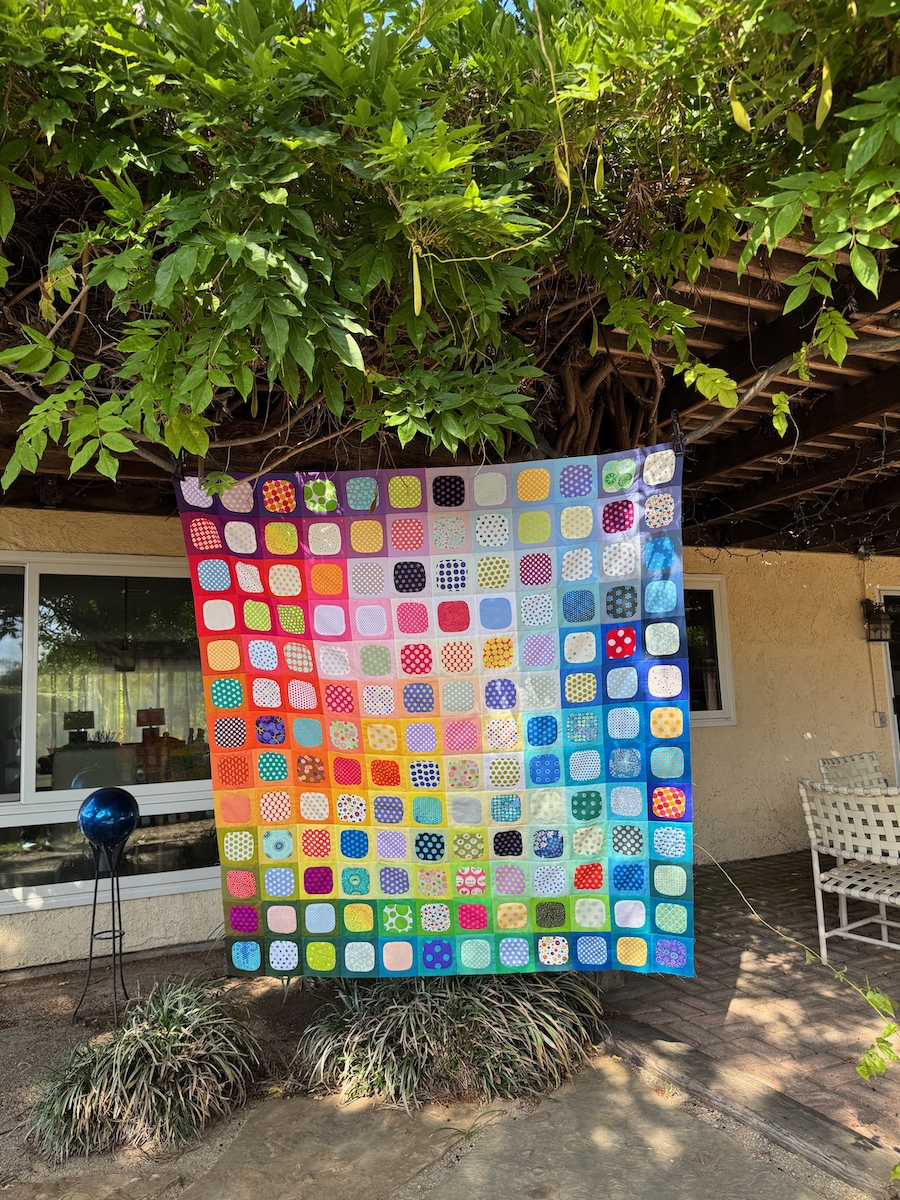
However…I finished up the final squircle!!
I started sewing these nine months ago.
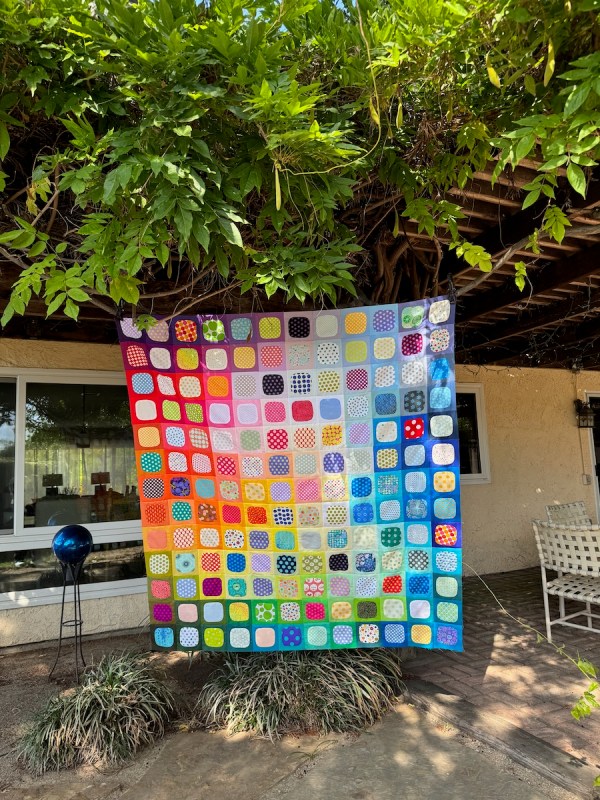
And here they all are, sewn together. (Big smiles.)
Now to consider borders. I have one I’m thinking about, simply because the quilt is intended for a taller person, and more length is needed. Did I mention already that a partner in crime, Gladi, has also finished her squircles?
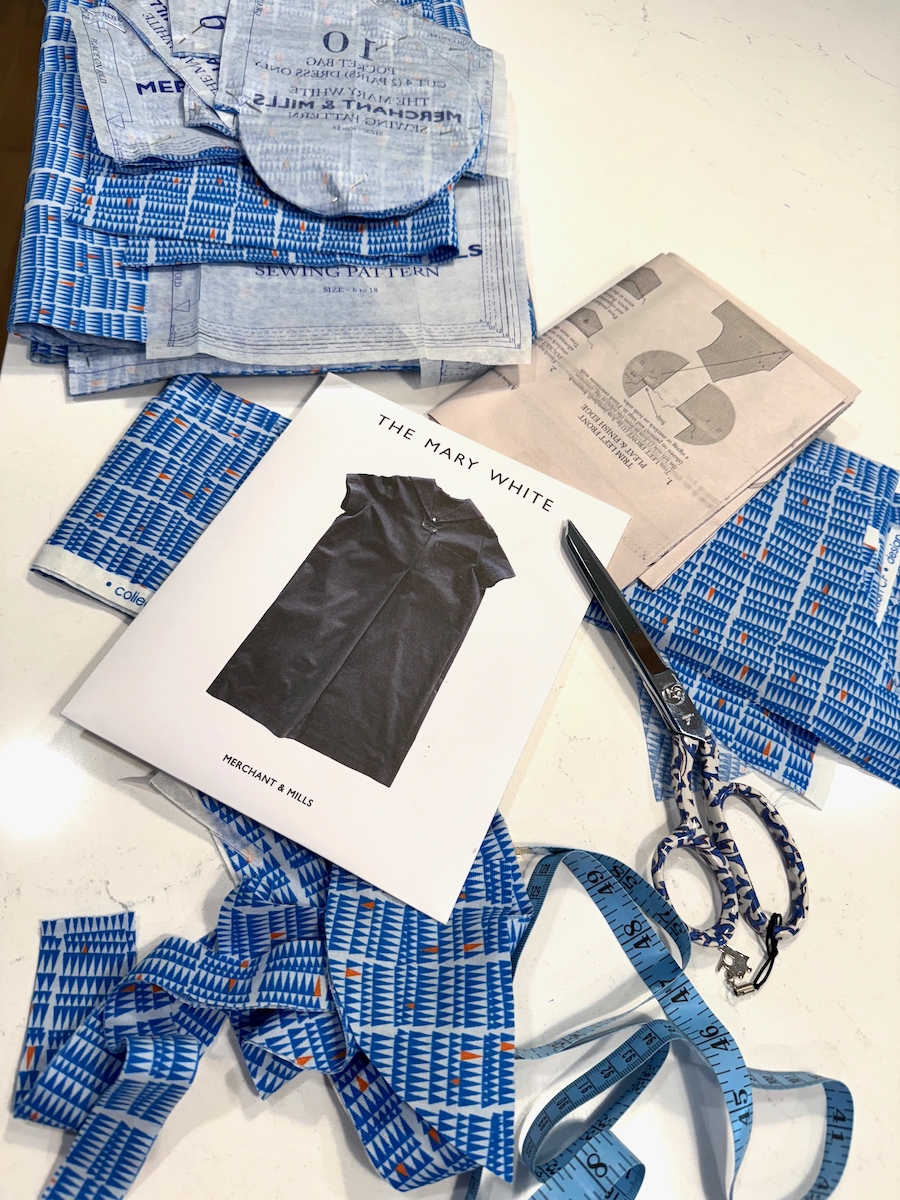
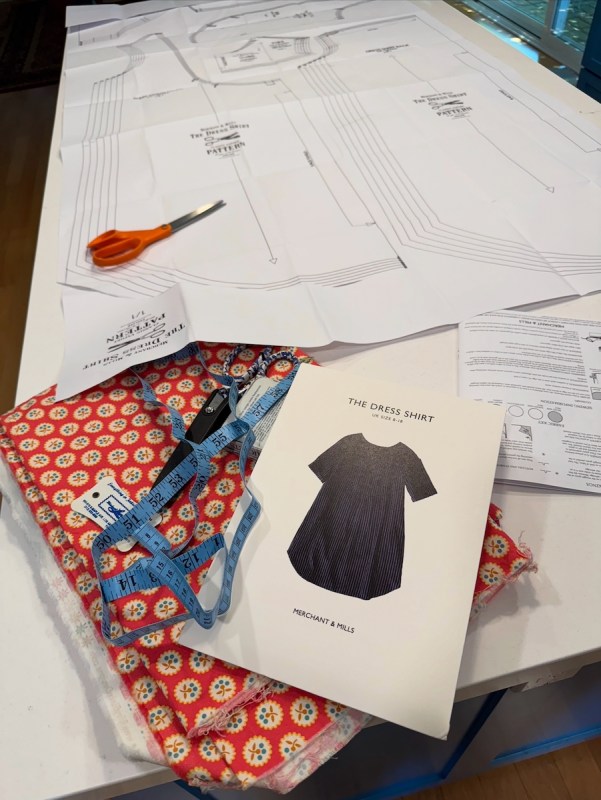
Now for the WWIT micro-season: a pattern review. And pattern-making review.

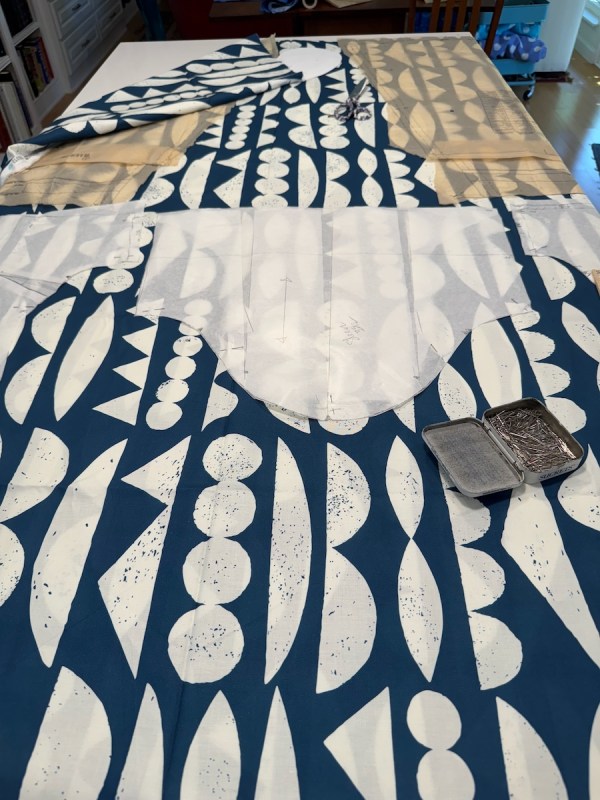
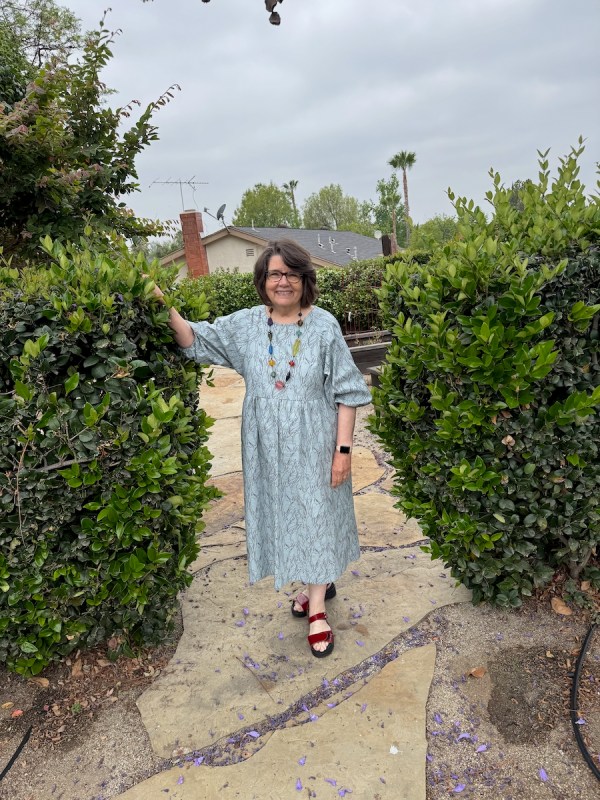
My friend Susan, in Australia, has made two of these jumpers, and because of her success, I decided to try. I was a pretty experienced sewer from back in the day, but my advice for this jumper is: Take Your Time.
First off, find the pattern. I went to the Internets (now that it was fixed) and found the pattern at Lakes Makerie. Usually I print off my PDF clothing patterns at Tape Free Patterns (recommend highly) but Lakes Makerie had an option where they would print it off and send it to me for a small extra charge. I liked this! It didn’t include an envelope for the pattern like Tape Free does, but their service was very convenient and fairly quick.
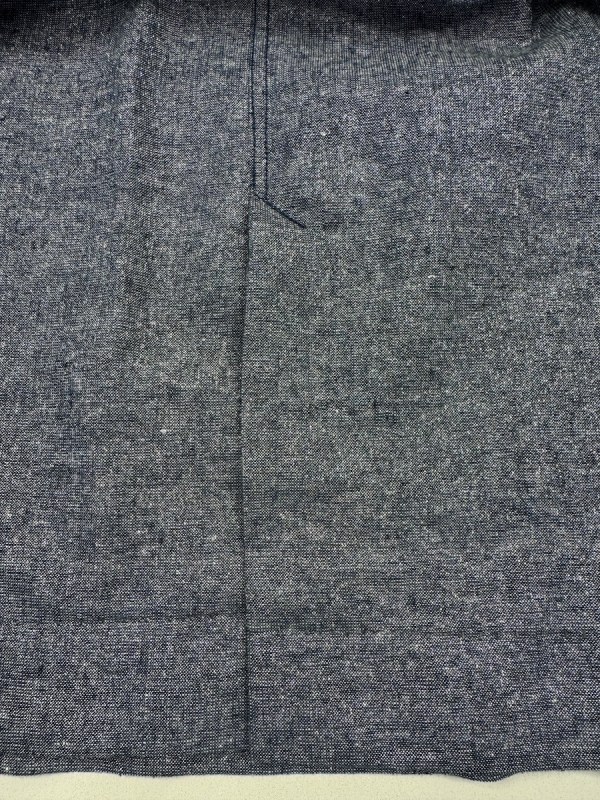
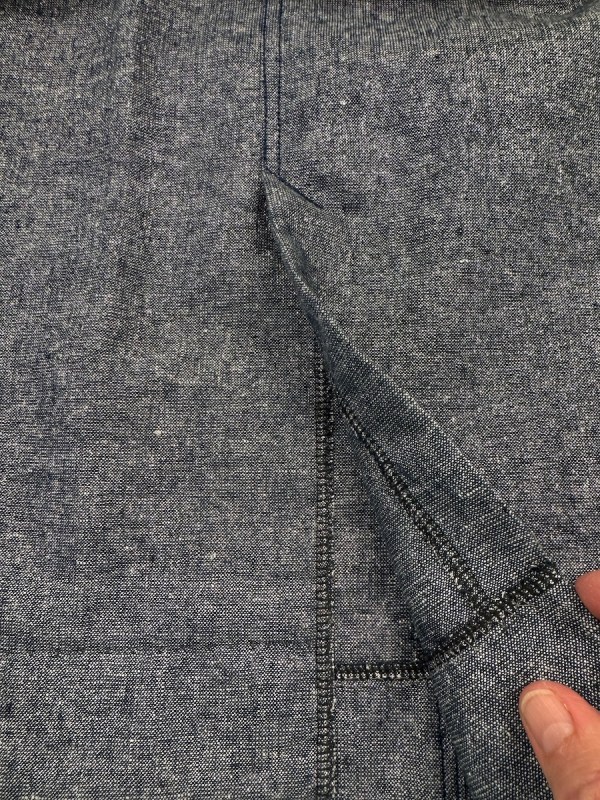
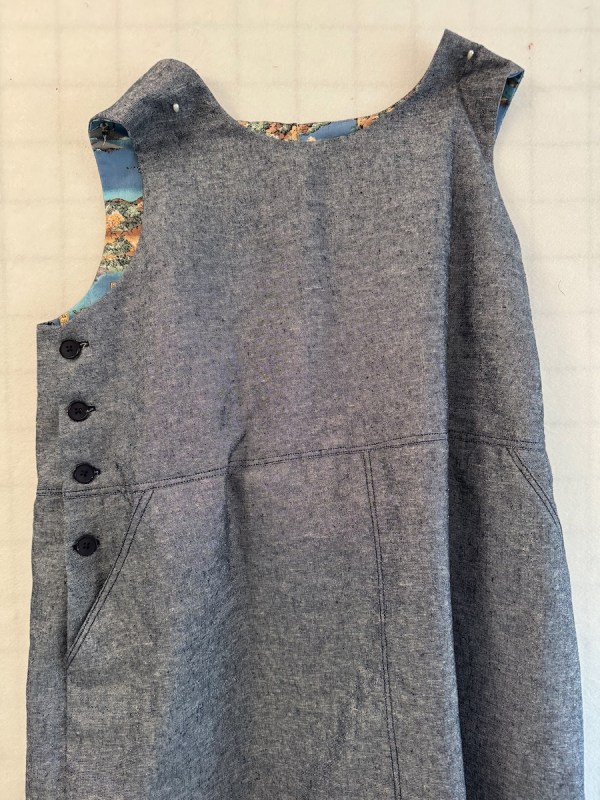

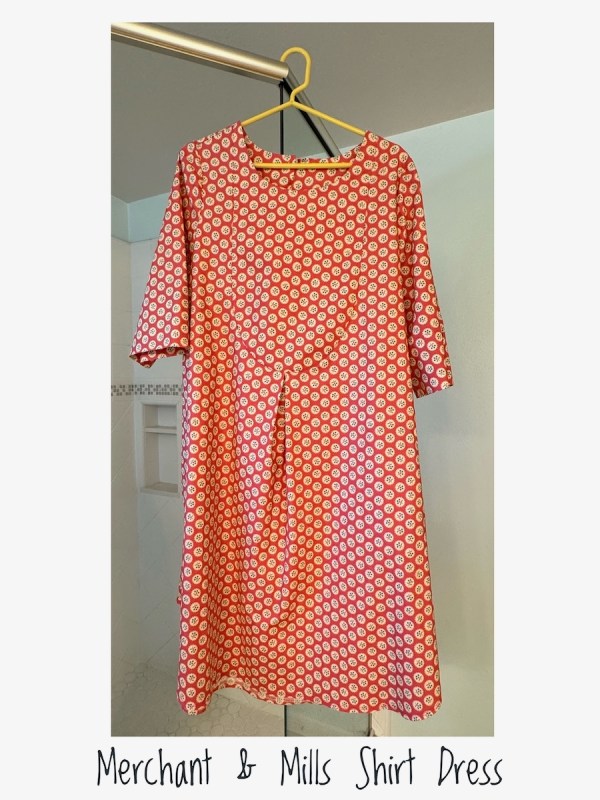
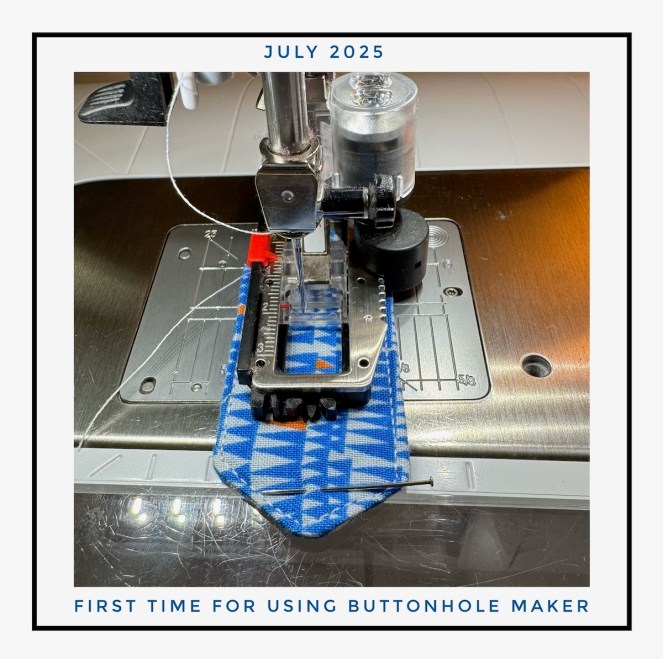
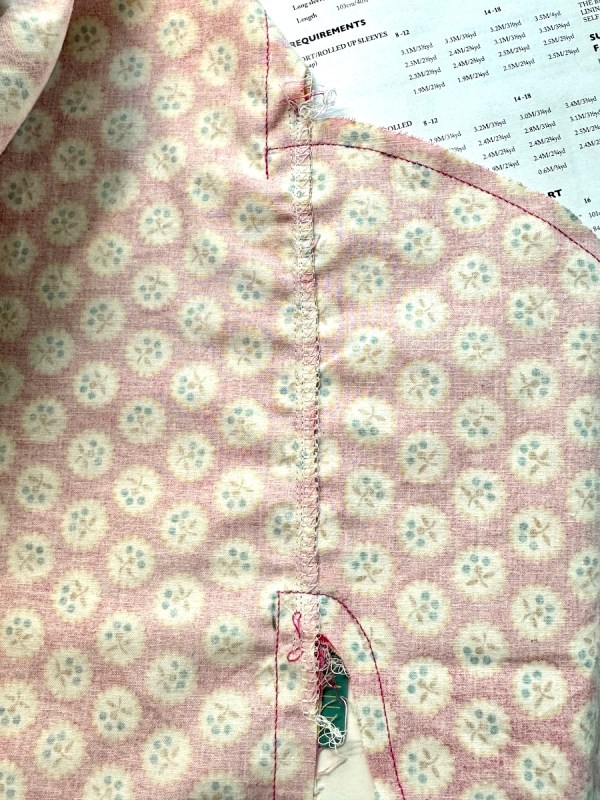
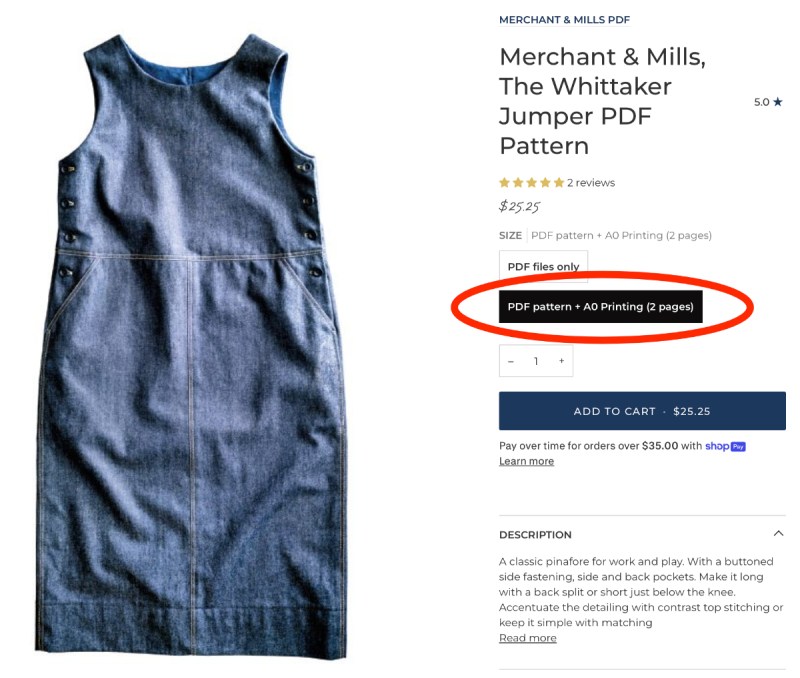
Top two (first two) photos are of the back pleat. I did a modified length — not too short, not too long — and didn’t like how they finished the pleat. I just did a standard finish. Third photo is the inside, and yes, I turned my pocket fabric right side out so I could see the beautiful fabric, hoarded since the Dawn of the Century. This is a navy cotton/linen lightweight fabric, with a metallic thread running through the slubby face (even though it looks grey in the last photo).
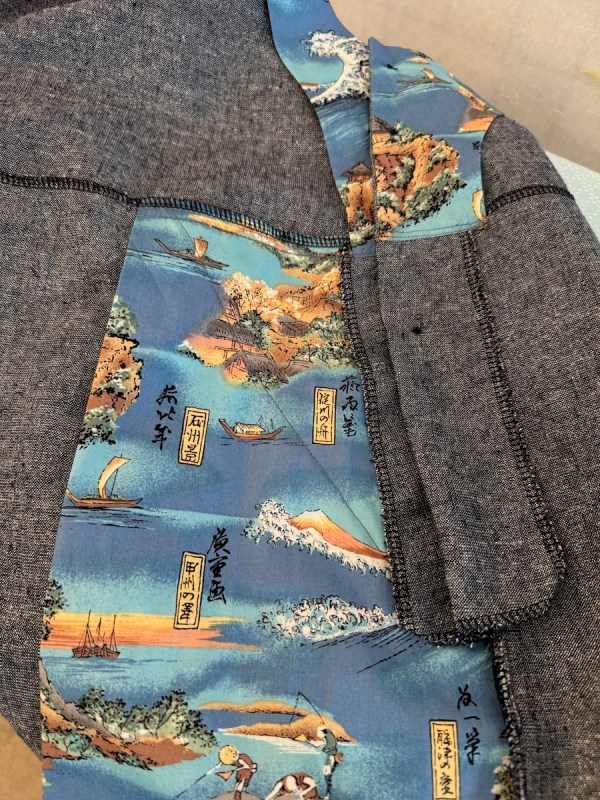
This jumper has a scoop neckline, which I lowered by 1/2″ (upon the advice of those on social media), two button plackets on either side, generous front pockets and (last photo) two back patch pockets which are getting unpicked soon. Why? Because while I tried it on and loved it (and see Susan’s post link for how her sister looks in hers), but on my smaller frame it just looked a bit too blocky; the pockets don’t help.
This is why I make my clothes, so I can make my clothes how I want.
So I added two self ties, and stitched them on about 6″ in from the side seams so they’d line up with the shoulders. They help define the waist area a bit more. Button shopping was a challenge without any sewing shops nearby, but I did find some at Hobby Lobby — cheesy plastic ones — but they’ll keep the dress on. On the advice of others, I also cut a smaller size. Do This.

On the left is the Box Box Dress (Merchant & Mills), and on the right is the Hope Dress (Style Arc). I’ve noticed that I tend to find the next dress I want to make from social media and blogs, so here are two that I have made and enjoyed. I did add pockets to the Box Box dress, as well as modifying the sleeve, as I like my sleeves a bit longer.
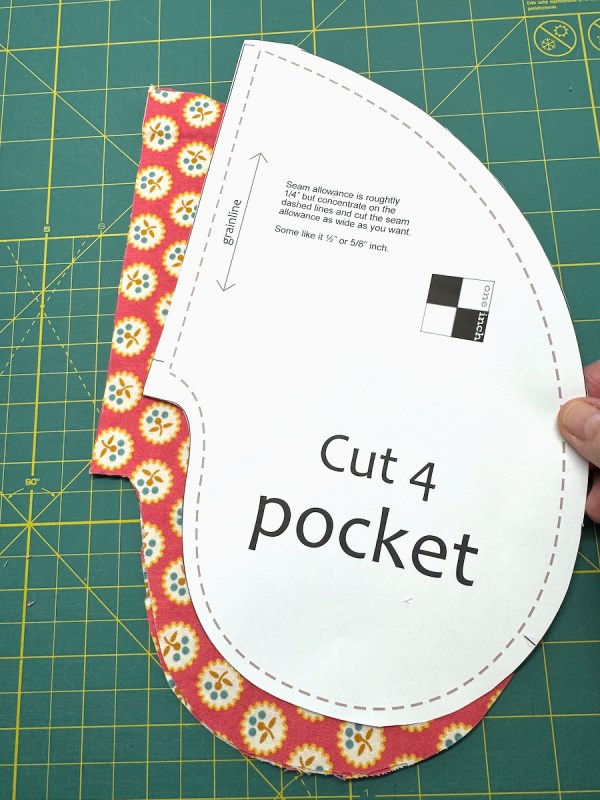
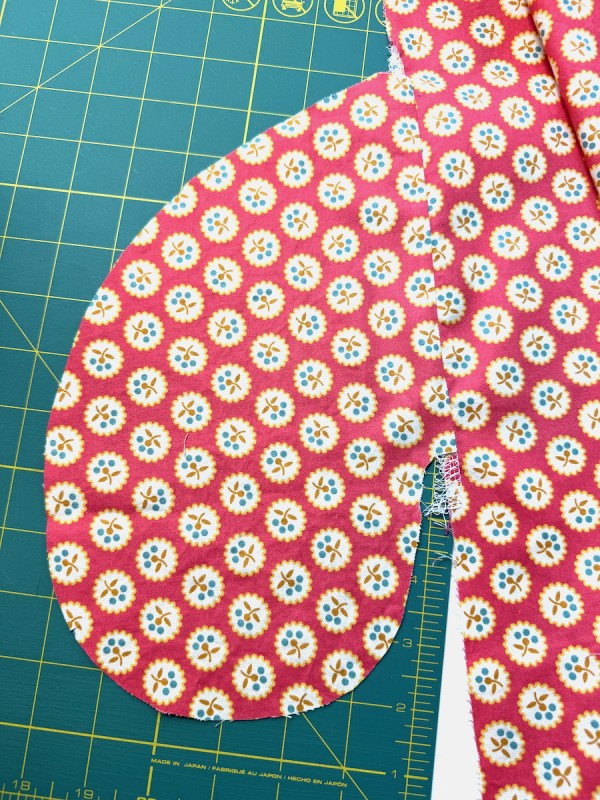
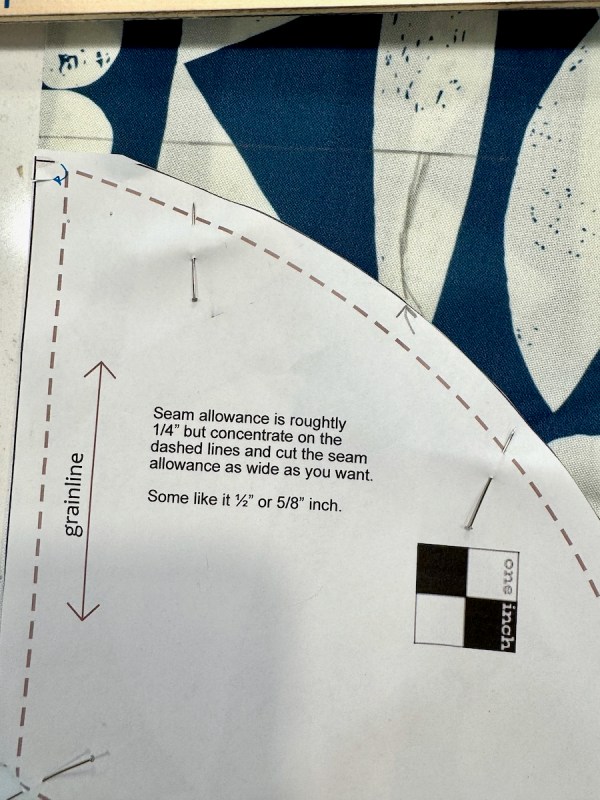
Here’s a pocket pattern (free download) if you need one.
Cut it out, hold it up along the side of your garment, and just try it for where you want it, making sure your fingers can touch the bottom of the pocket bag. I use a different method of putting in pockets these days (shorter video HERE, and the longer video is HERE). My first pocket installation using the newer method was a bit ragged, but now I’m getting pretty good at it, only because the volume of mistakes I initially made sent me on the Path to Knowledge.
Okay, that’s all for garment sewing — I try to put this topic on Instagram, but just couldn’t include a pocket pattern on that site for you. 🙂 According the latest, if we’re smart we’ll all get off of social media, given that most of what we see is ads, even when you think it’s just a someone-or-other showing your their favorite thing:
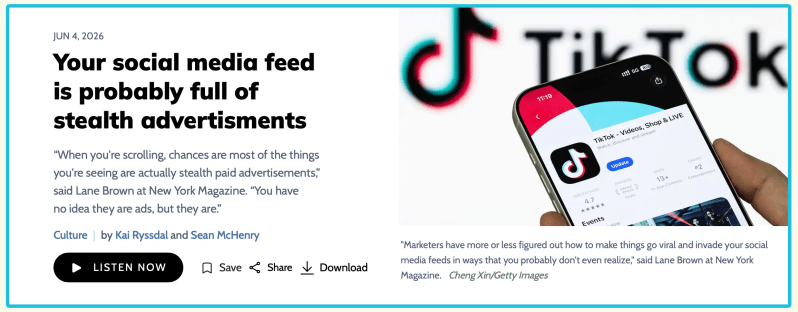
Click HERE to listen. I did want to read the article by Lane Brown, but can’t get past the paywall. Kai Ryssdal is good host on the Marketplace podcast, and the show is not political in the least. Which is how I’ll close.
I said something off-hand last week about the upcoming California Primary Election to a neighbor when we encountered each other during our morning walks. It did not go well. I was upset for days at how it blew up quickly, but then — the quilting world came to my rescue with this:
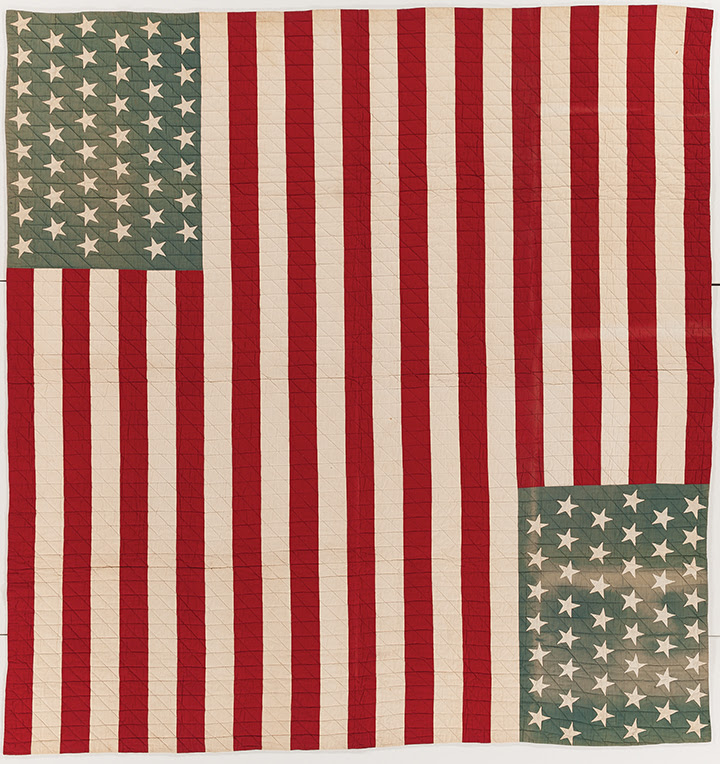
My Stars and Stripes
Probably made by Ella Evans
Made in Tennessee, United States; Circa 1900
Cotton
IQM 2013.025.0001
The International Quilt Museum writes: “In this piece, we see the American flag as an enduring symbol of American patriotism. Made by Ella Evans, this quilt holds identical Unions in opposite corners each with forty-five stars — an accurate rendition of American states in 1900. Evans made this quilt for a man named Otis Golden. Evans cared for Otis and his brothers after their mother passed away.”
Even on opposite sides, we can still be part of one entity. Our church did a nationwide discussion of the Constitution last week, and my husband and I took the opportunity (and reminder) to read the full Constitution. It was instructive, a bit over our heads in some places (the Senate’s interpretations on the side did help), but it reminded me, as does the flag quilt by Evans, that we are all in this together.
Thanks so much for reading, I appreciate you very much–