
Thank you all for your lovely comments yesterday and for visiting the rest of the Four-In-Art quilts. The reveal day is one of my favorite days of all the blog writing I do, as it’s such a shared experience. Today I’ll talk about the technique and the how of the quilt, but first, a little clothing and textiles lesson about four sheer fabrics:
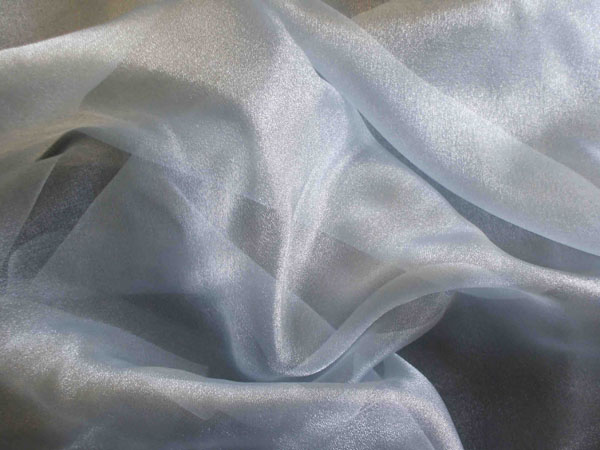
Organza is a thin, plain weave, sheer fabric traditionally made from silk. Many modern organzas are woven with synthetic filament fibers such as polyester or nylon. The Casa Collection of sheers at JoAnn Fabrics is an light-reflecting organza, and it is light and soft with lots of drapability.

You usually encounter this fabric as jewelry, or wedding favor bags.
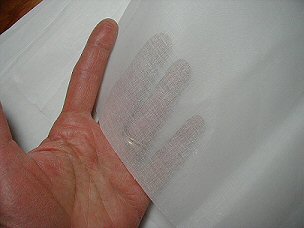
Organdy is a balanced plain weave. Because of its stiffness and fiber content, it is very prone to wrinkling. Organza is the filament yarn counterpart to organdy, meaning it has very thin fibers in the weave, and is used often for interfacing in lightweight clothing construction, or as petticoats or slips for formal wear or wedding dresses. (All images pulled from web.)
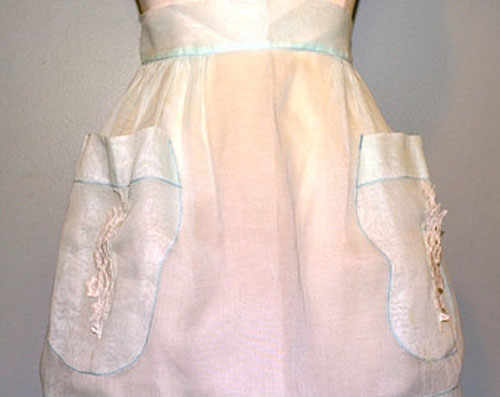
You’ve probably seen it in your grandmother’s or great-grandmother’s aprons–a crisp, sheer construction.

Chiffon is a lightweight, balanced plain-woven sheer fabric woven of crepe (high-twist) yarns. The twist in the crepe yarns puckers the fabric slightly in both directions after weaving, giving it some stretch and a slightly rough feel. Chiffon is made from cotton, silk or synthetic fiber, and under a magnifying glass it resembles a fine net or mesh which gives chiffon some see-through properties, but it is more filmy in its appearance than organza.
Tulle is a lightweight, very fine netting, made of various fibers, including silk, nylon, and rayon. Tulle is most commonly used for veils, gowns (particularly wedding gowns), and ballet tutus.
Lesson over, and this is why I brought those up first: I was a bit stumped on this quilt, feeling like I had no idea where to go. I keep an art quilt journal just for these projects, and began writing down my impressions (see yesterday’s post) and drawing a few possible ideas. Once I knew the general direction of where this quilt would go, I wanted to think about a new technique to try, and I wrote down “use tulle,” as I had seen very successful use of this as an overlay to keep teensy pieces in place during appliqué, used to great success by Karen Eckmeier. But in this smaller piece I thought the texture of the tulle might be a distraction, so decided to explore some alternatives. I purchased chiffon and organza in both white and ivory/off-white.
Now I had the materials I needed, I began.
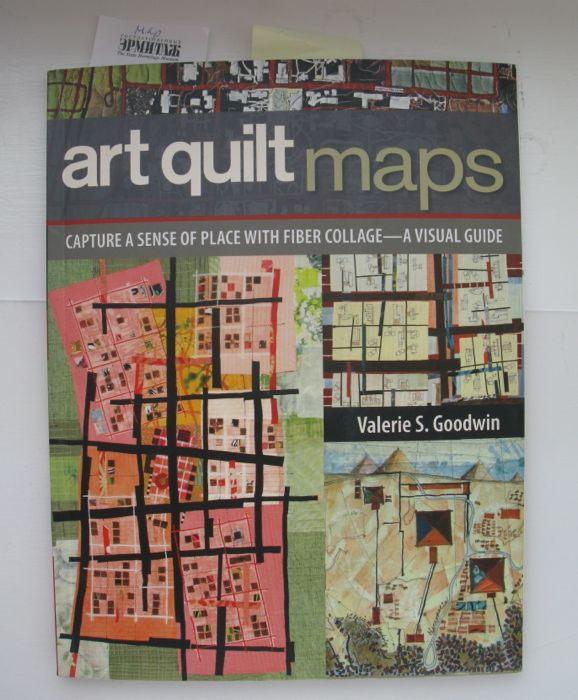
Quite a few of us had seen Valerie Goodwin’s book on art quilt maps; I enjoyed it, but the bigger takeaway for me was to build up the background with texture, in terms of the visual space and use of fabric.
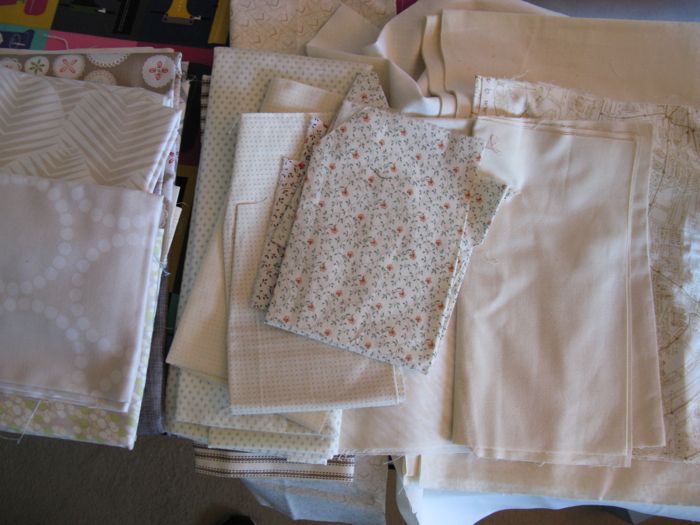
So I pulled all my neutral fabrics (the current vogue term is “low-volume”) and laid them out. Because this was the background, I rejected any that were to figured or obvious in the print. I randomly cut out oblongs, squares and rectangles and laid them out over my base muslin. In my art quilt journal, I had sketched out a few possibilities of layout, and I knew I wanted a clearer left-hand margin of the background for photos.
I auditioned my two colors of chiffon, and my two colors of organza, and decided on an off-white organza as the sheer overlay.

Slipping a piece of paper under the organza so the pen marks wouldn’t transfer to the fabrics, I sketched in my wide avenues, free-handing it (look ma, no rulers!).
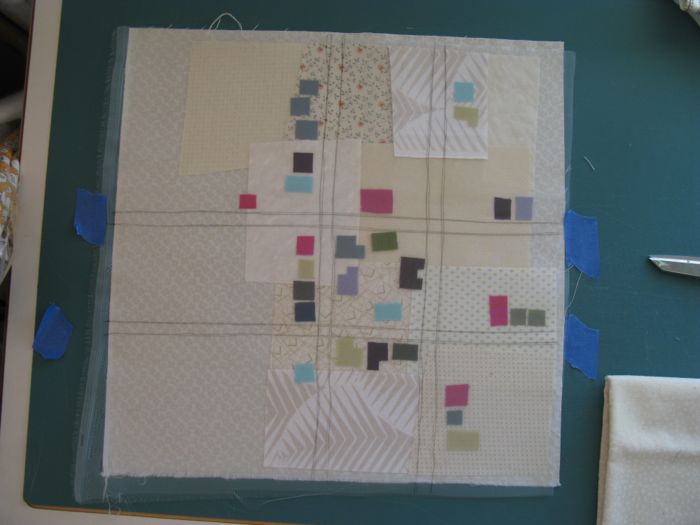
I cut itsy-bitsy little houses, but trying for a variety of shapes. I carefully laid them under the organza, along the avenues. I was temped to draw in streets and lanes, but decided that, for this particular theme, it would only be distracting. The houses kept moving every time I added a few, so I got out my glue stick and stuck them to the background fabrics, which also had a few dabs of glue to keep them in place. You can see I used masking tape to anchor the organza to the composition.

I printed out some family photos, using the usual method (freezer paper-backed fabric, taped to a piece of paper and fed through my trusty Epson inkjet printer), and started to add them. This was the first try. I kept moving them around until I got what I wanted, trimming some edges to make it fit, visually.
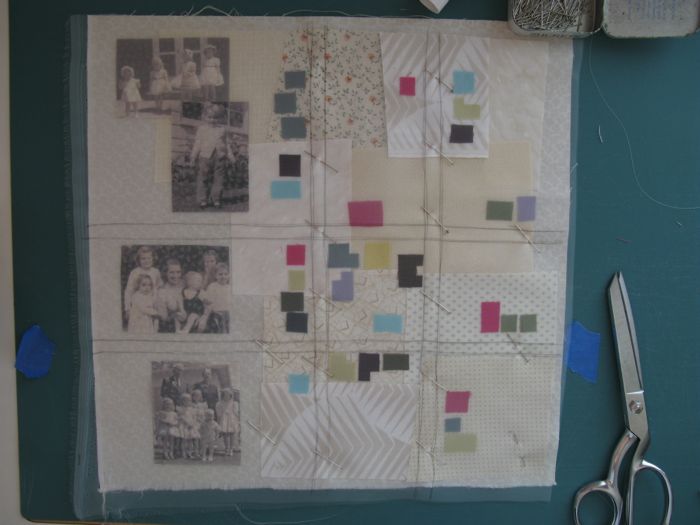
I used straight pins everywhere to secure the organza, and then took it to the machine. Because they are such a small size, it’s easy to manipulate them under the machine.
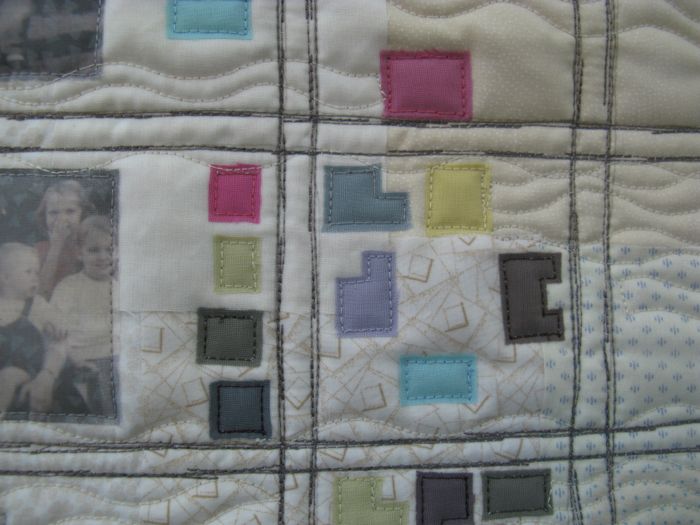
First I used a dark gray and “drew” in the avenues, using the reverse button on my machine to simulate how it might look if hand-drawn. I went over those several times. Then I outlined all the houses, using matching thread.

I quilted in wavy lines that to me represented the flow and movement of the landscape–it could be slight hills, or the movement of grasses, or whatever, but I didn’t want straight lines. Once quilted, the organza overlay began to act and feel like that thick coating that some topographical maps have, and this change in texture was an interesting surprise.
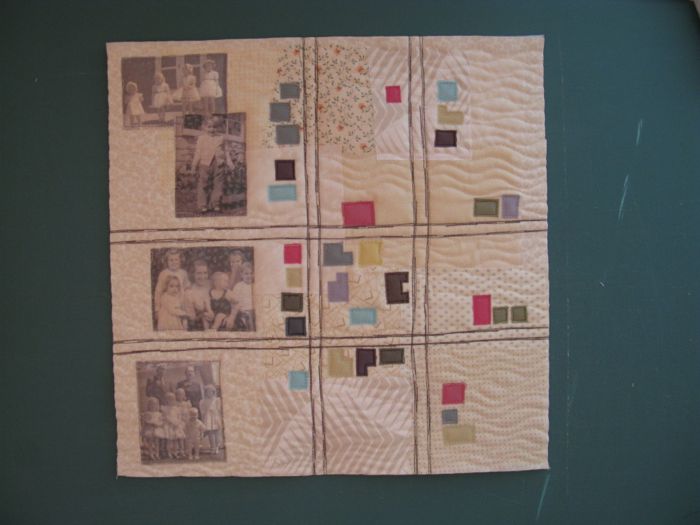
Trimmed up. I auditioned several bindings–and no binding–but decided to go with a stripe, to further echo the idea of roads.

For the backing I chose a taupe-cream fabric which depicts the streets of Paris. . .

. . . then added the label. This is our fifth quilt as Four-In-Art quilters, but I chose to delineate our new series: Urban.
I’m pretty happy with this little quilt, and it joined the others in the Nature series, above my sewing room window in my own little art gallery. I hope, if you haven’t already, will click back to yesterday’s post and go and view all the other quilters’ creations. You’ll see some similarities in our quilts, even though we are geographically located all over North America. And perhaps the interesting differences in our vision of this theme come from the different places we live.

I’m currently reading this book as an adjunct to our study of urban landscapes, and in the introduction the author, Katherine Harmon, notes that maps “can act as shorthand for ready metaphors: seeking location and experiencing dislocation, bringing order to chaos, exploring ratios of scale, charting new terrains.”
In this context of all of the above, I look forward to working with the new theme revealed by Leanne yesterday: Structures.
Discover more from OccasionalPiece--Quilt!
Subscribe to get the latest posts sent to your email.

This is a great technique. I learned the same approach by Yushoki Jinzenji at QuiltCon. She gave us the fabrics and I had just checked my book and all she said was a sheer nylon fabric. She made whole quilts using the same idea of a top layer over the bright coloured fabrics. It is a very effective technique for your quilt, I especially like how it works with the photographs. I am also glad you like the theme.
This is so interesting. I enjoyed all the fabric information and especially the construction process.
Thank you for your deconstruction details. It is enlightening to know what and how others did to come up with their quilts for this challenge. I look forward to the next challenge. So many possibilities in it as well. I am thinking of taking some of my other ideas for maps and turning them into a maps study series as an off shoot. I am so happy to have been chosen to join this group.
Elizabeth,
I love that you are exploring maps in your quilting! Your piece is fantastic, and I loved the connections you made in your last post to an assignment you gave. How fun! I’ve been fixated on maps since moving to Australia. I’ve been picking up old maps at the Salvos (Salvation Army) to use in my crafting. I also saw this website (http://maps.stamen.com/#toner/10/33.9816/-117.3739 – I typed in Riverside) a while back that creates different maps for the place you type in the search box. My favourites are the watercolour versions of the space. Just beautiful. I imagine printing them and framing them to so I could always be reminded of the spaces I have inhabited.
Keep on writing! Keep on making art!
-Carrie
I love the idea of this layering and you used it so effectively. Your deconstructs are always so helpful – it helps me test and think through differently my own methodology. Another wonderful art quilt!
This is a remarkable quilt with such emotion. Maps conjure up the most exquisite of memories for me.
I am in awe of your skill and creativity Elizabeth! This is a stunning work of art!
Thanks, as always, for sharing your process! It’s even cooler now that I know the steps you took…
I’m so glad you posted about the process. It wasn’t at all obvious to me and now I appreciate your quilt and the whole concept even more. The layering is so fitting since our lives are such layers of experiences over time. You’ve inspired me to think outside the box more next time both in terms of concept and materials. Just requested the book you mentioned from the library too. Thanks.
Very coo! I love sheer fabrics and should use them more. This inspires me to put it on my list!
I enjoyed this post so much. As I’ve never been a garment sewer, I’m a quilting cotton girl, I appreciated the terminology and the detailed explanations of what you did. I love it 🙂