
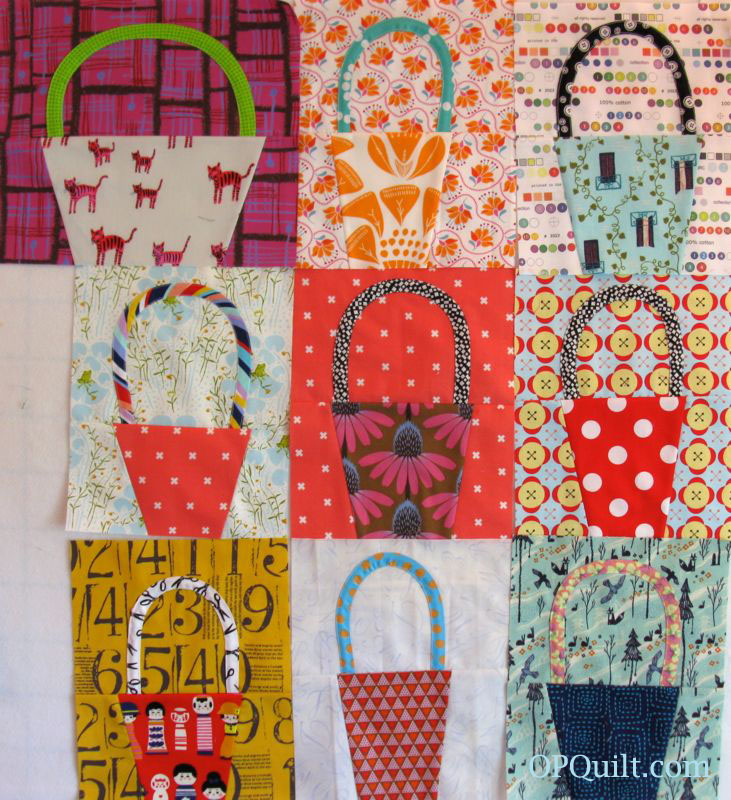
Carla, of Grace and Favour, asked us to make Wonky Baskets for her bee month for May 2015 Mid-Century Modern Bee. She sent us some photos of examples of Gwen Marston’s Liberated Baskets and gave us instructions to make colorful baskets with contrasting handles. I just found my way to completion. I thought I’d share how I proceeded.
This is a result of the process called “Grading Avoidance.” (My final papers just came in and I run upstairs in between each paper and play with the cloth to get my brains back. It’s a skill I’ve learned since becoming a professor.)
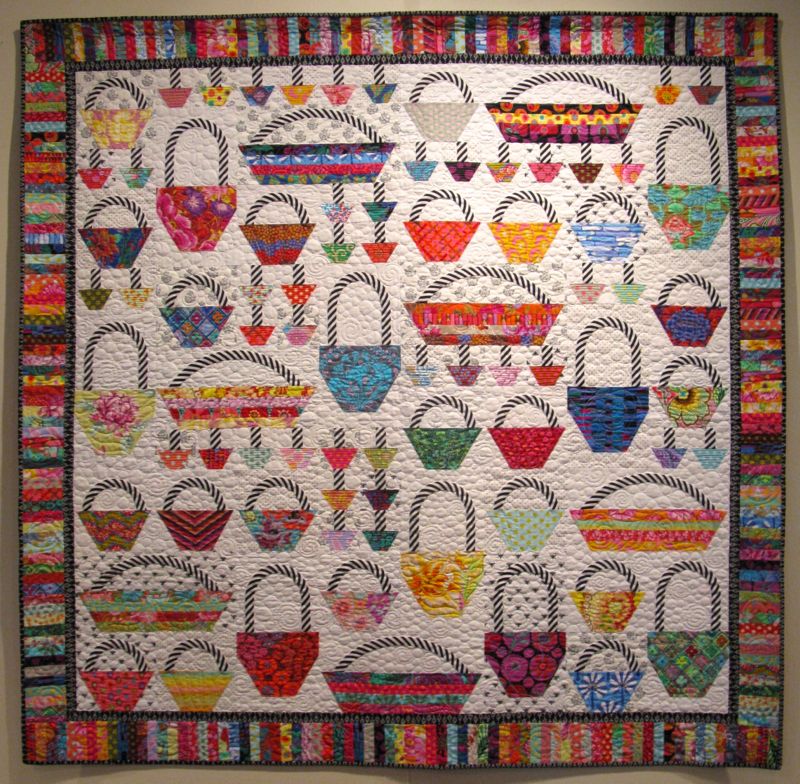
Carla’s request reminded me of a quilt I saw last summer in the Springville Art Museum, Going to Market, by PJ Medeiros (quilted by Amity Golding).

I liked all the different-sized baskets, so I drew up this sketch:

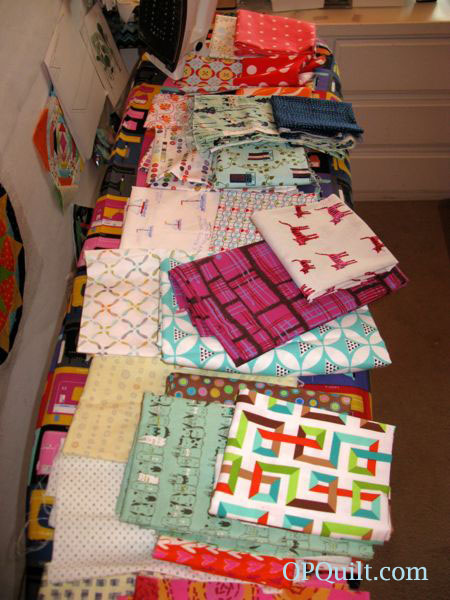
I then pulled up a bunch of two-fabric combinations and laid them all out on my ironing board, and started to cut.
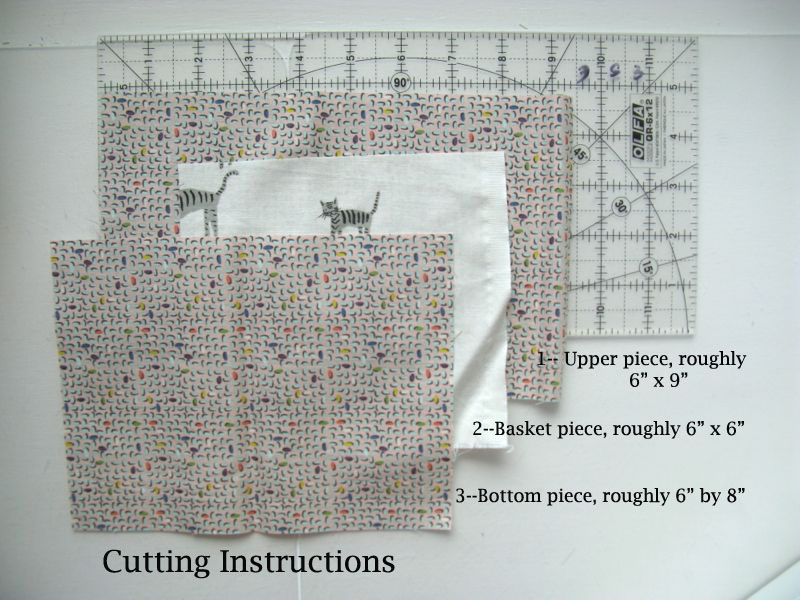

This is how I assemble the basket part, beginning with the bottom piece (or base piece). I lay the basket piece on top, about 2″ from the edge, and placing the ruler at a slant, I cut through both the LEFT base and the basket pieces. Shift the basket piece to the left so it overlaps the righthand base piece by about two inches, then lay your ruler down on a slant, and cut through both pieces. I show you how it looks once you are finished (above).

Pin and stitch, then press towards the basket.
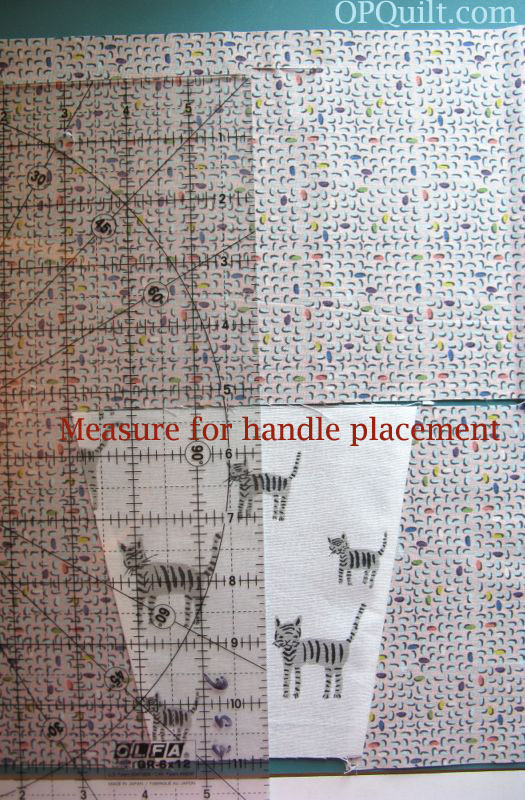
Lay the upper piece and the newly constructed basket bottom piece together, then measure about 11″ from where you will cut the base; place a pin. This is the outer boundaries for the handle.
To make the handles, cut a bunch of bias strips anywhere from 1 -1/4″ to 1-1/2″ wide. Fold in half, wrong sides together, long cut edges aligned and stitch a narrow (1/8″ seam).
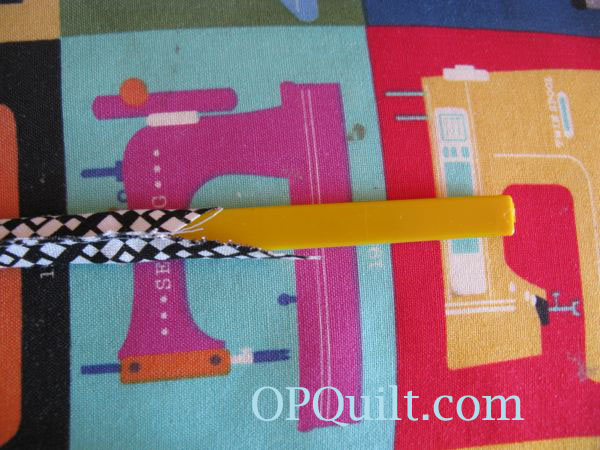
I have these bias strip press bars that help me with the next step: I slide them in, wiggle the seam to the middle back and press. You can just do this with your fingers on your ironing board. Try really hard not to stretch out your bias.
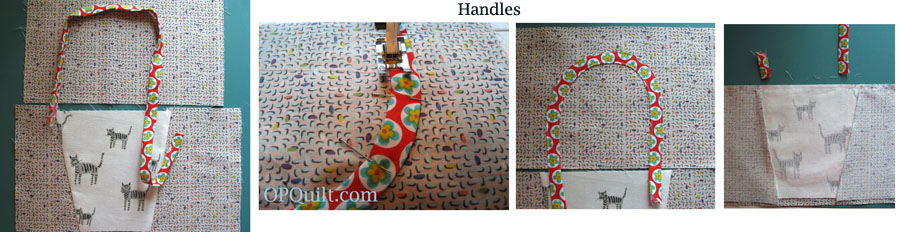
The above weensy picture (click to enlarge) shows me 1) auditioning bias strips for the handle (I have a bunch to choose from ). Go to the ironing board and press, with steam, a curve into your handle, then pin it on (photo below). It’s better to think about easing in the inside curve, rather than stretching the outside curve, but truthfully, both happen at the same time.
Then back to the above photo: 2) stitch on the handle, doing the inside curve first, then the outside curve; 3) handle stitched, and finally 4) the seam between the upper and lower parts are stitched and trimmed.


For the final press, press seam toward basket so the handle will look like it’s coming out of the basket.
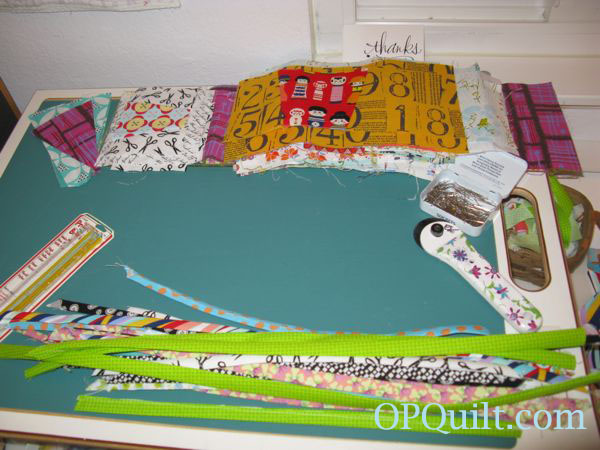
I cut and stacked a bunch so I could slide up here between grading and sew a couple. Bias strips are in the front.
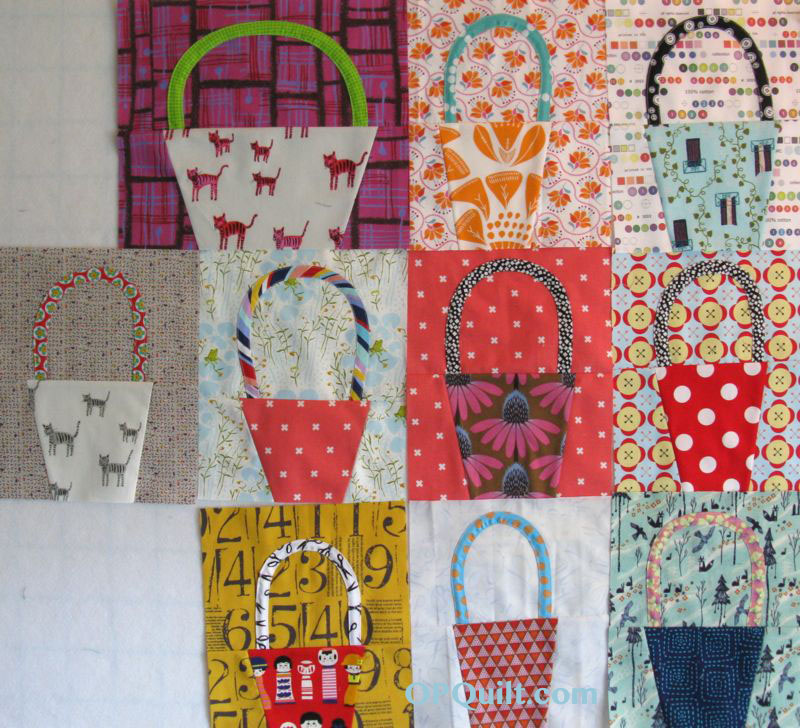
And now I have ten! You can see I’ve made one of them bigger. I also have a couple of midget baskets ready to make, too, to even out the rows. I’m just making them–I’ll figure out how to put them into a quilt later, after these last essays are graded, the final given and grades assigned. A perfect summer project, I think.
