EPP · Shine: The Circles Quilt

Circles Block #12–EPP Sew-A-Long

Circles EPP ButtonCircle Block #12_OPQuilt
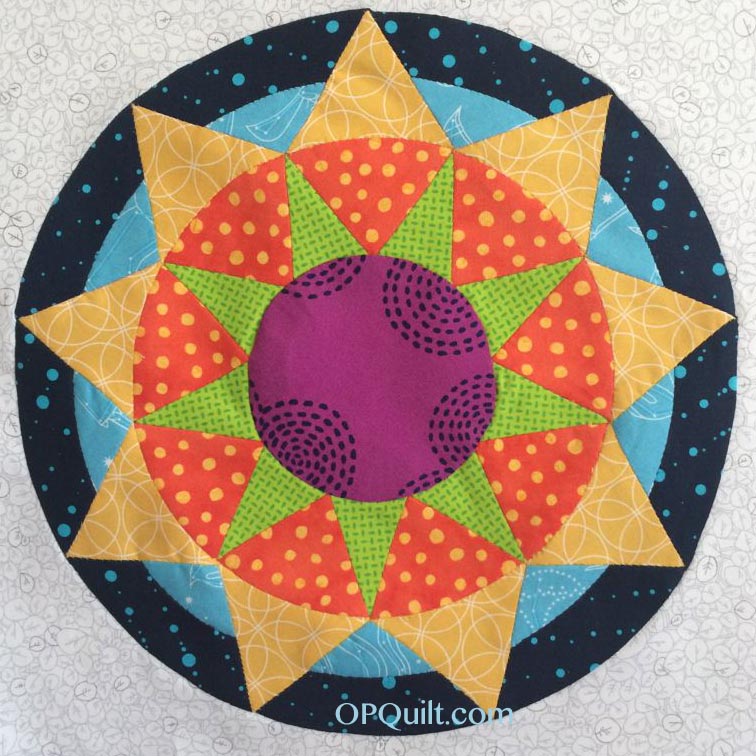
Nine-pointed Compass Rose Block

This is the twelfth block in a series of Circles Blocks.  Why circles?  Mainly because I had done some English Paper-Pieced projects and I was sick of straight lines.  And hexies, although I quite enjoy them both.  The other eleven blocks are available above, under the tab Shine: The Circles Quilt EPP.

Sometimes the inspiration in this series has come from other sources, but this one came out of my head.  And a creative mistake I made when designing another circle, yielding a circle has NINE points, whereas most any other circle you find in the world is divided up into an even number of points.  I liked it and went with it.

shine-rwb-block_12

The free patterns are now returning (Red, White & Blue version is above).  Again, I request that you not distribute them, but send people here to this website to get them.  Click to download a PDF file: 

SHINE Block 12 pattern_opquilt

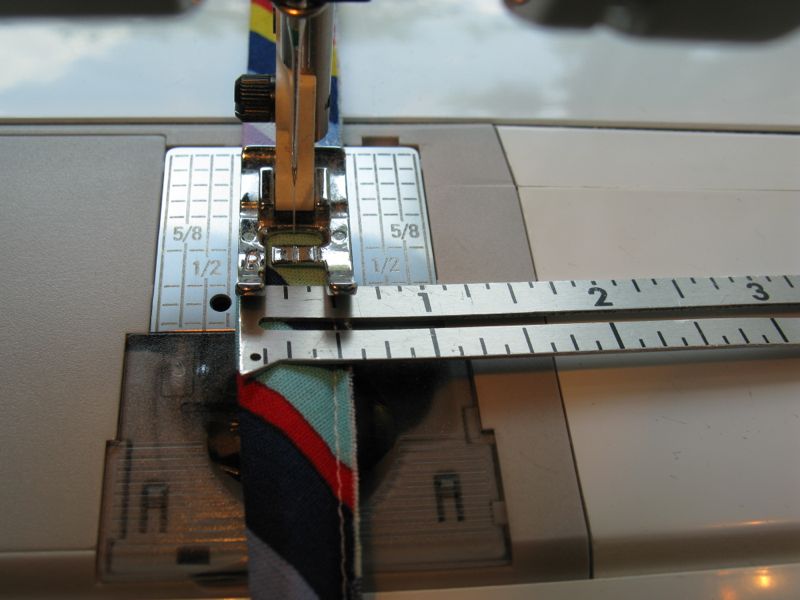
Please remember to set your printer settings to 100% and check the little scale square included on the pattern.  It should measure 1″ in size. Illustrations below are with the OLD version of the pattern, so it may vary from what’s included now.

This is an easy block to sew, I think.

Circles 12_1 OPQuilt

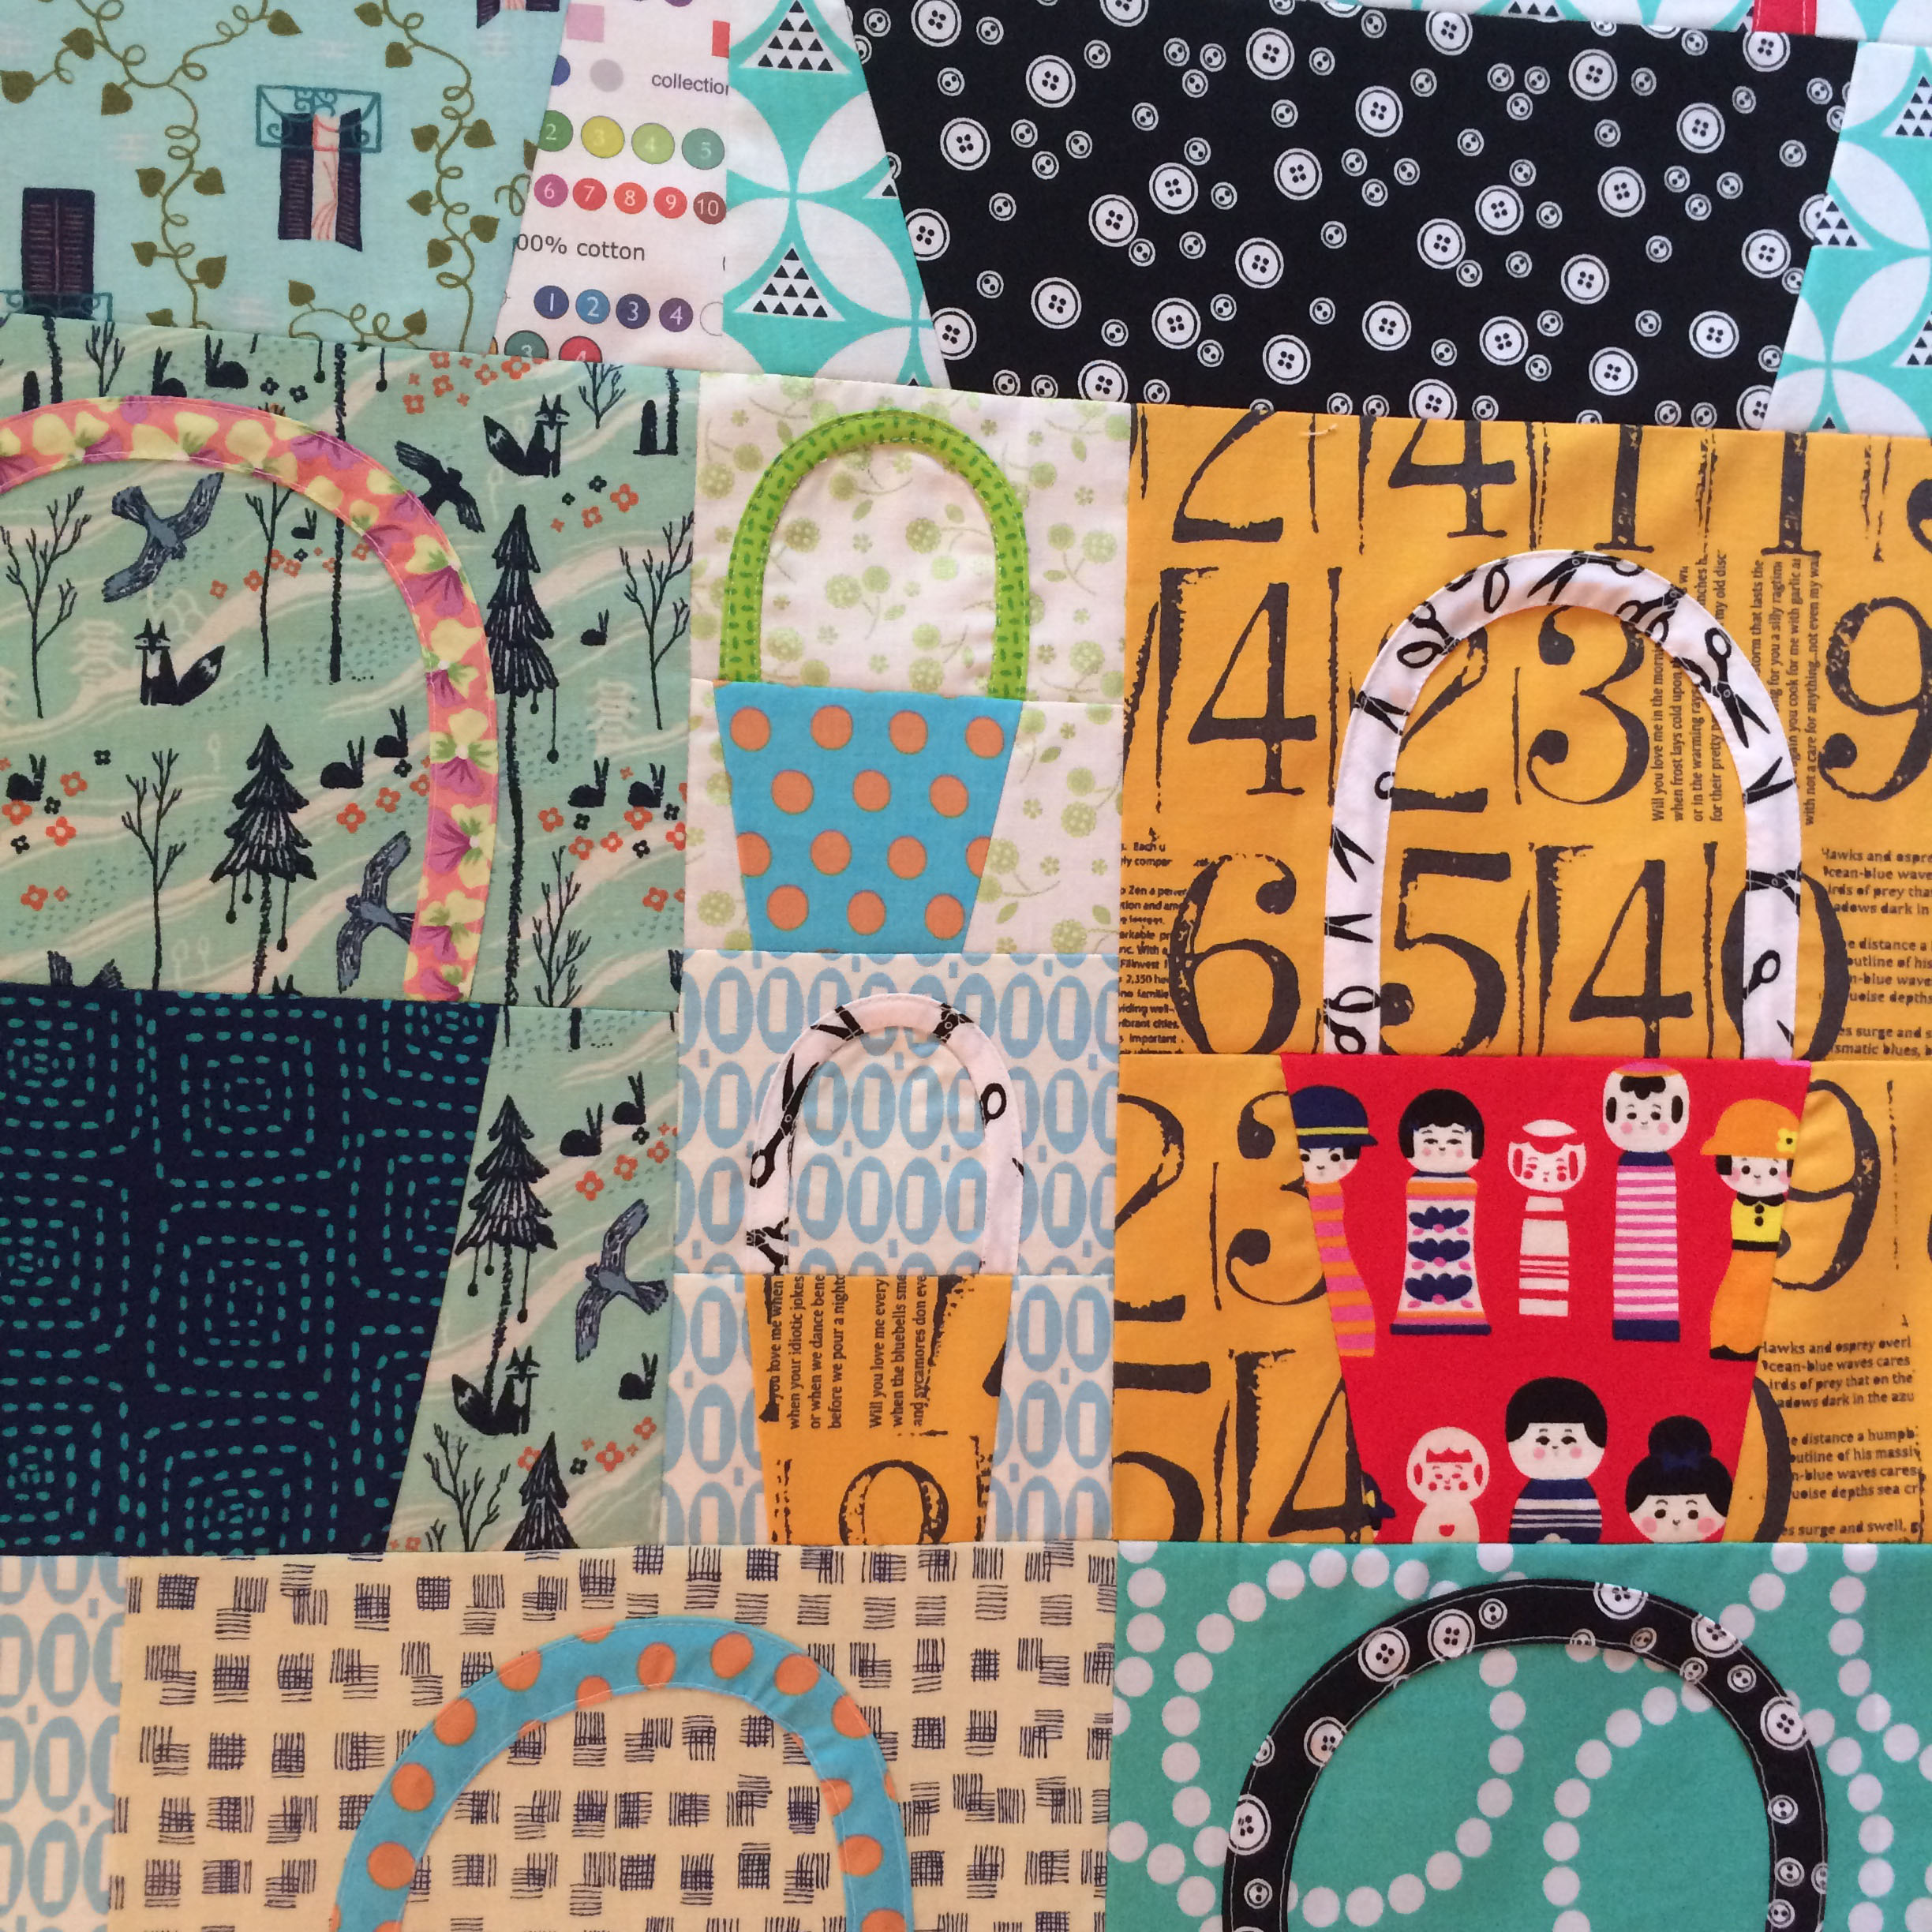
Fabric auditioning.  This one was pretty straight forward, without any substitutions along the line.

Circles 12_2 OPQuilt

I cut out all the pieces, glue-basted them on (see earlier Circles Blocks for tip and tricks for this series).

Circles 12_3 OPQuilt

I like to print out a picture of my circle, gather the threads I’ll use, and collect everything into a ziploc baggie for easy toting.

Circles 12_4 OPQuilt

When hand sewing the curves, it’s okay to let the pieces curve in your hand.

Circles 12_5 OPQuilt

Step one: Sew the smaller “sky” piece (light blue) to the larger “sky” piece (dark blue).

Step two: Stitch the points and wedges together in groups of two (and one three) each, as shown above.

Circles 12_6 OPQuilt

Step Three: Sew the bright orange triangle points to the smaller green triangle points, in groups of two or three.

Step Four: Attach these to a corresponding yellow triangle/sky combo.

Circles 12_7 OPQuilt

Step Five: Start stitching the units together, however, not like I did above.  Keep track of where the orange/yellow units go, so they all mesh together.  It might be helpful if you lay out half of the circle when you start putting the units together, just to keep track.

Remember: I make the mistakes so you don’t have to.  (Although you can make new ones if you want.)

Circles 12_9 OPQuilt

Since EPPing center circles and I don’t get along, I appliqué them all now.  Fluff out the seam allowances on the green so you can appliqué on the large center circle. (I should have thought this one ahead.  Okay.  A new mistake.)

Remove all the papers except those at the outer edge in the dark blue (you’ll need them in the next part when you put the circle onto its background).

Circles 12_10 Point Up

This time, I pinned on the center circle first, then auditioned it on the background, a square cut to 14 1/2.”  Yes, this will give you a little extra room around the edges, handy for when you decide to finish this thing.  Fold the background in fourths, iron a bit of a crease, then align the circle with those creases.  Usually this is easy, but since this is a nine-point star, you may want to measure in from each edge to get it evenly spaced on your background..

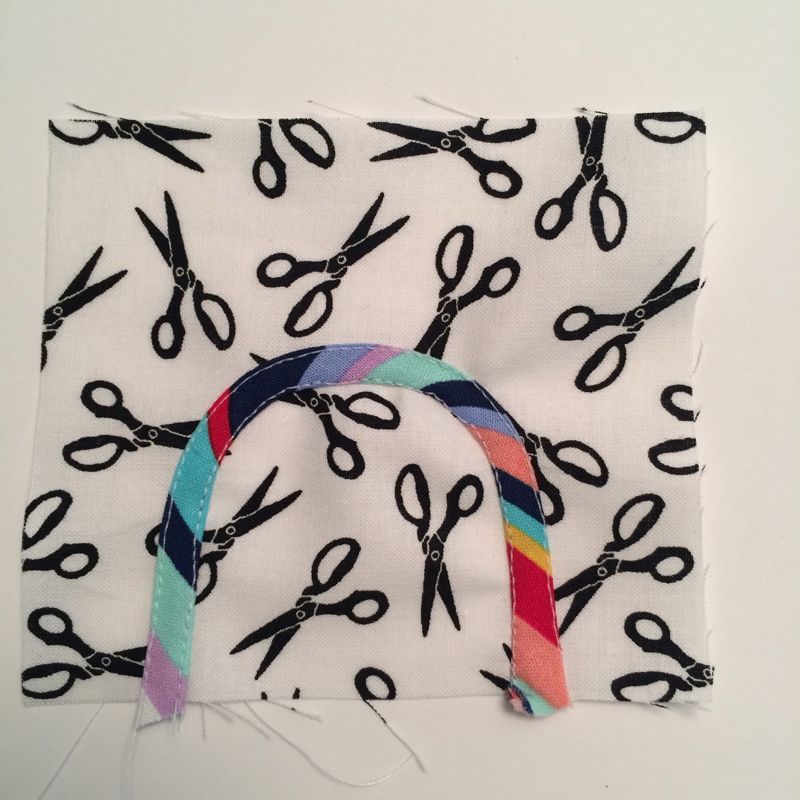
Do you want point up on the upper edge (above), or. . . valley up (below)?

Circles 12_10a Valley Up

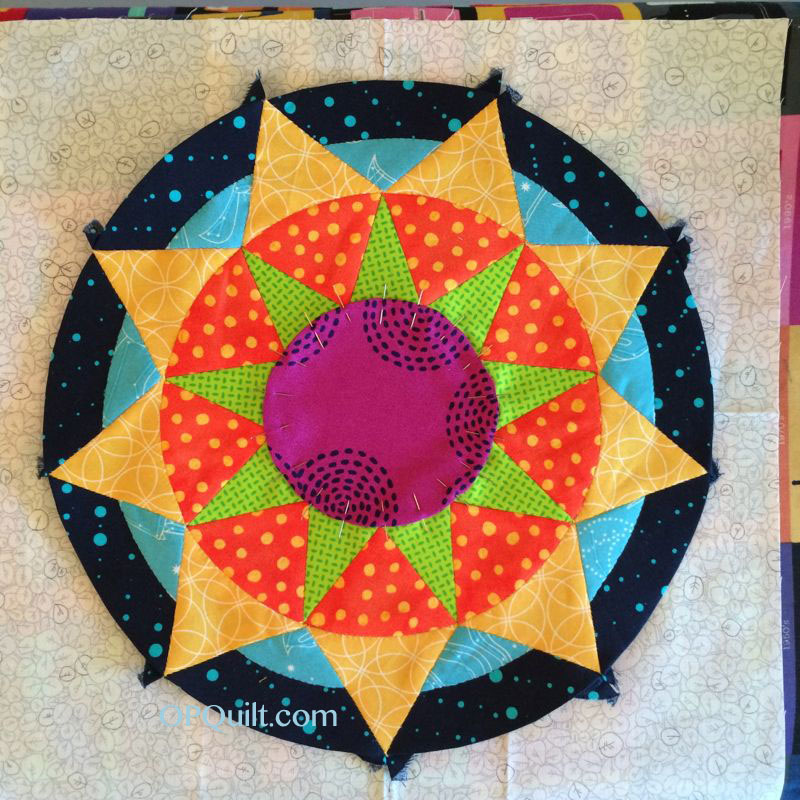
Yeah, okay.  You know I already went point up.

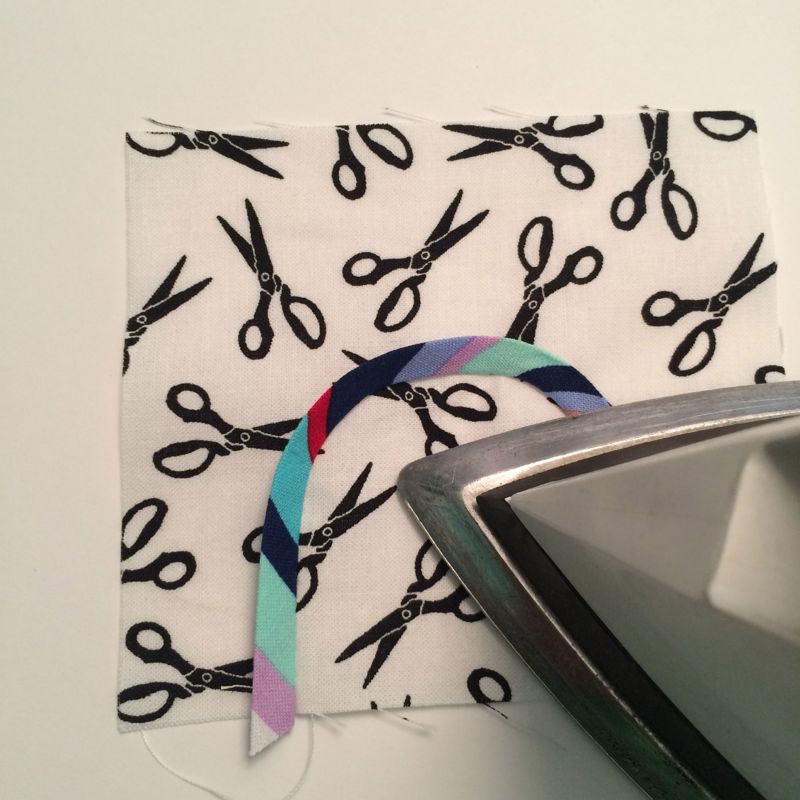
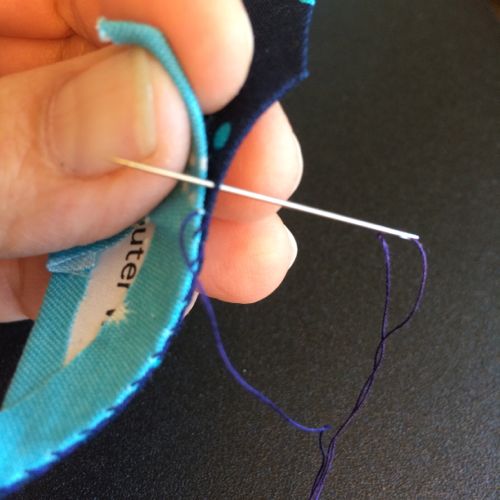
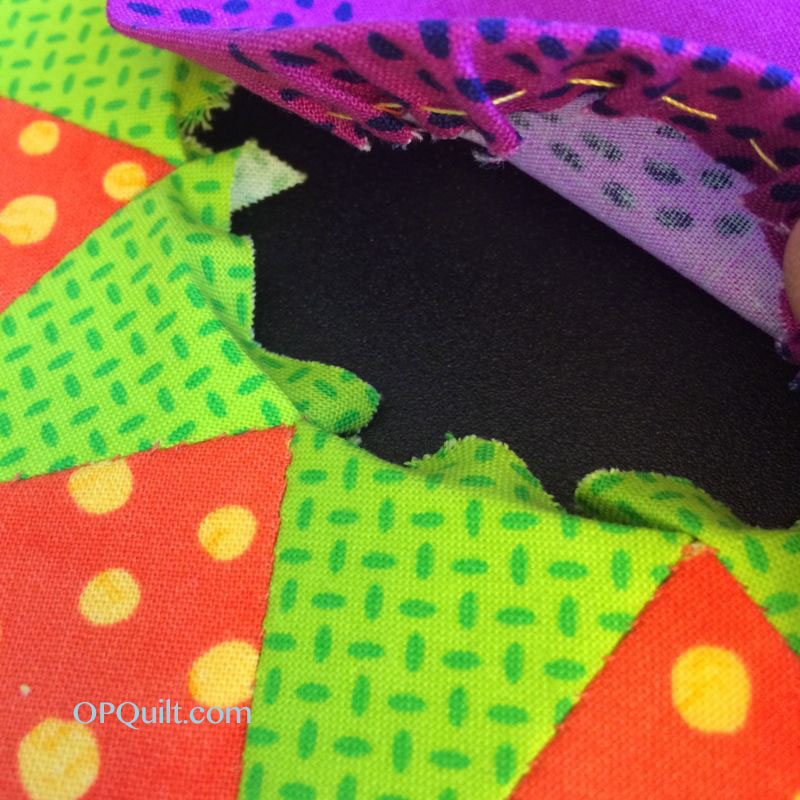
Stitch down the circle to the background, folding in the point areas as you come to them to make a smooth line.  Trim away the background, one-fourth inch away from the appliqué stitching line.

Then appliqué on that center circle.  I also like to trim away fly-away seam allowances, especially on those points, getting rid of unnecessary bulk.

Press lightly (face down on a padded ironing board is probably the best–use a light hand as they are hand-stitched and you don’t want to iron them into oblivion.  Any puckering that you see will be gone after quilting this thing, so no fretting unless you have pleats. . .

Double Sunflower

Here’s the drawing of the block in case you want to print it out for a guide.

Twelve Circle Blocks Shine.jpg
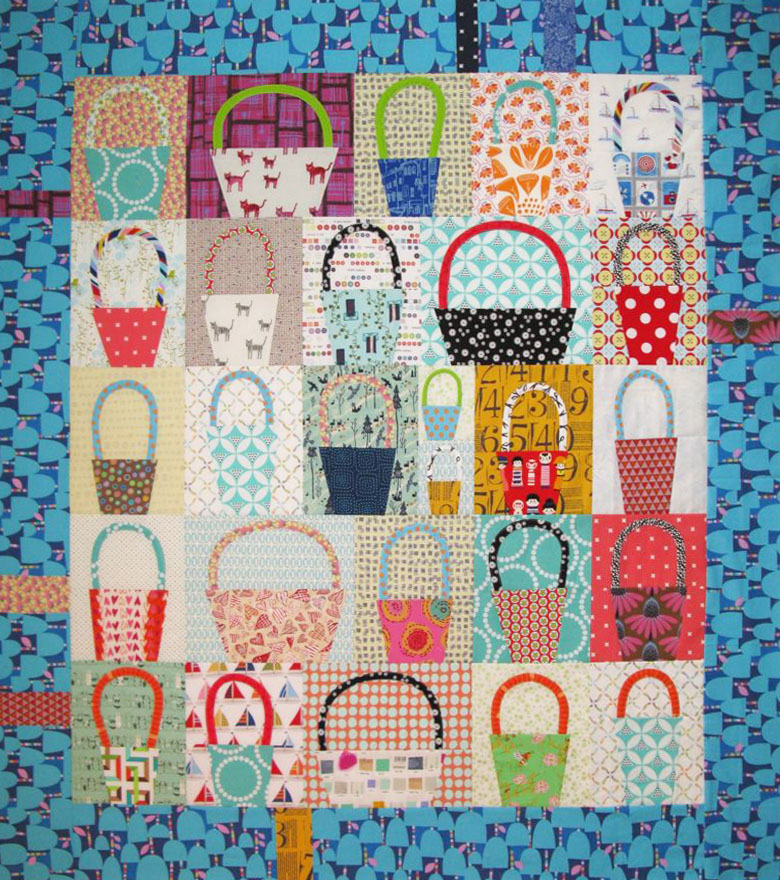
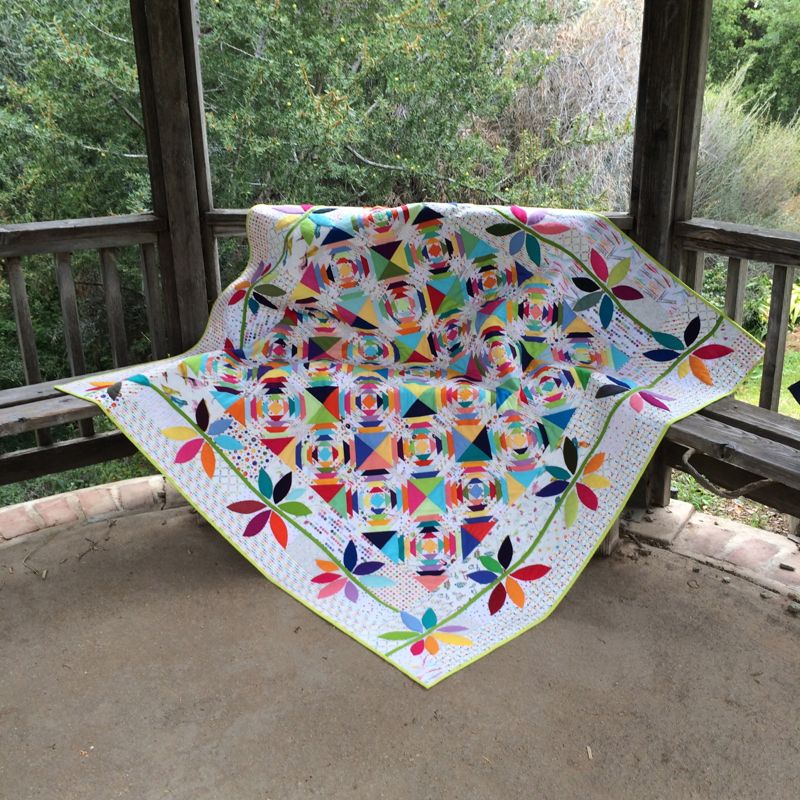
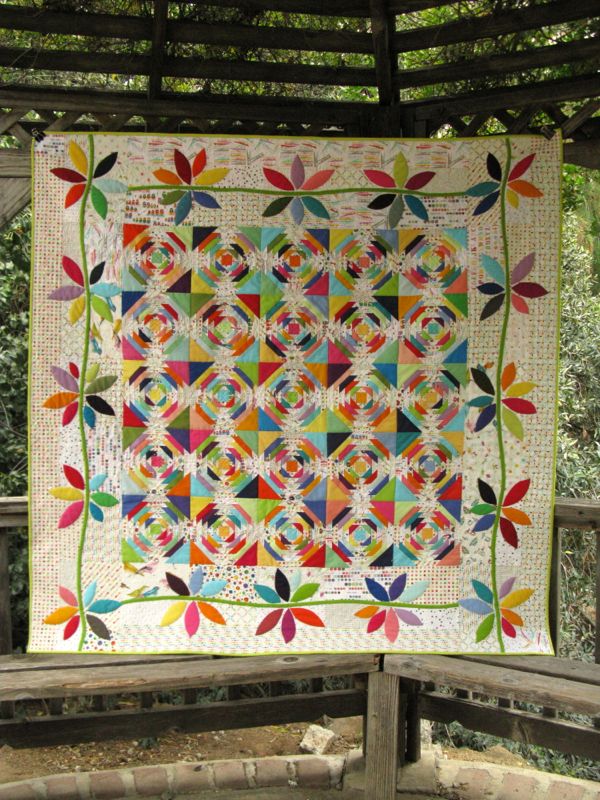
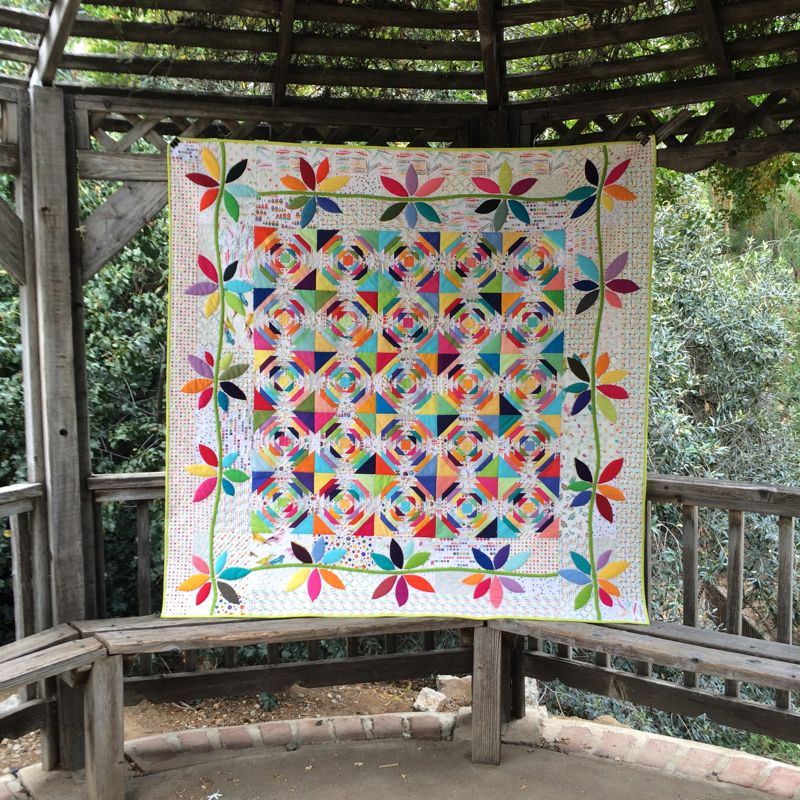
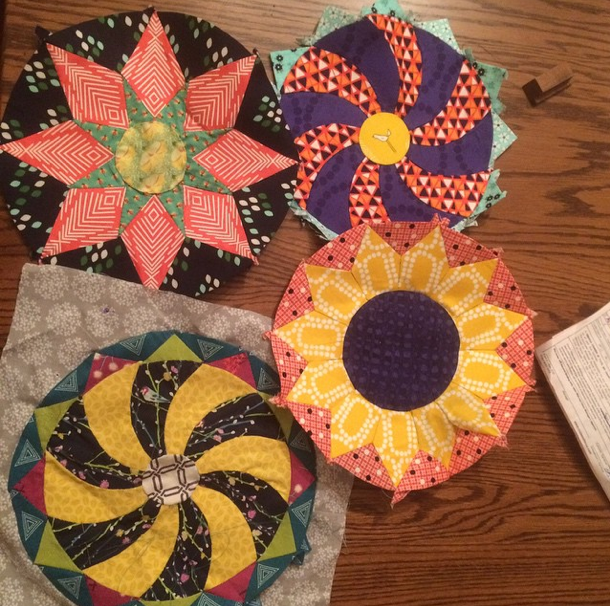
Here are all twelve circles.  You can either finish your quilt now, or keep going.

Shine Nine Extra Blocks

I have designed nine more blocks for SHINE, so you can pick and choose, and some of them are different than what is shown in my quilt.  They are available from my PayHip, my pattern site.

*Full Shine Quilt titled_final I also have a Finishing Pattern, which includes details on how to sew the inner and outer sashing, plus one bonus block. This has also been newly re-designed, but if you purchased it before, you should be able to just download a new version.

I hope you have enjoyed this series of circles as much as I’ve enjoyed creating and sewing them.  Please drop me a note as you make yours, sharing a photo or two.

IG circles blocks

Karen tagged me the other day on Instagram, and I about flipped over with happiness that someone had found these useful.  I love her colors and combos–so fun to see!

Mary_NeedledMomEPP

And here’s another from Mary who blogs at Needled Mom.  I love her colors, too–the pop of that lime in the red star points is terrific against the blues.

There are also Christmas block versions, made by my friend Linda.  You can see them in this post.

Happy Quilting!!

Quilts

Wonky Baby Baskets and Narrow Stem Applique

Vietnam War Memorial Statuette

(momentos left at the Wall–I am grateful to those who have fought in service of our country.)Arlington Cemetary Mem DayHappy Memorial Day, to those of you who are in the United States.  We spent a year back in Washington, DC some time ago, where I toured every monument I could (going to the Vietnam Wall on Memorial Day and waving on the East Coast Rolling Thunder motorcycle riders on the bridge near the Lincoln Memorial; today I’ll be waving on the West Coast Rolling Thunder).  I also joined a lovely little quilt guild, named the Mt. Vernon Chapter of Quilters Unlimited (which covered the entire state of Virginia), where I learned this technique.

Basket Blocks Quilt Top

I recently made a wonky basket quilt with some baby baskets (below).  Here’s some basic guidelines for the baby baskets.

Baby Baskets

Baby Basket Dimensions

Follow the directions for the Wonky Baskets, cutting the base pieces smaller, as the finished size is shown above.  So maybe cut the upper part in the 5″ by 3″ range, and the lower part the same (it will be bigger after you splice in the basket).

Sewing the handles mini baskets

Follow the instructions for the bias strips for the bigger basket, but sew these narrower–about 3/8″ wide.  I’m using leftover handles strips for the big baskets. The woman who taught me this. in our Mt. Vernon Guild, made very narrow stems for her flowers by using this method.  So I call this the Narrow Stem Method.

trimming the handles baby basketsTrim close to inner stitching.

pinned handles baby baskets

Laying the basket below (to gauge for the width), pin on the handles with the raw edges facing towards the outside.  Place the handle edges at least 1/2″ inside the basket to allow for turning.

Narrow Stem Applique 1

Stitch on sewing line.

Narrow Stem Applique 2

Narrow Stem Applique 3

Now press the bias strip outward–letting the fabric fall back over the stitched line and the raw edges.

Narrow Stem Applique 4

Narrow Stem Applique 5Stitch down both edges, then finish block as for the bigger wonky block.   If you were doing a stem, you would hand-stitch down that outer edge invisibly.

Trim as shown in above photo–to 4 1/2″ by 5 1/2″.  I combined two to fill out those rows without the wider basket blocks.

Dumpling Bags

I had some leftover little baskets, so used them to make tiny Dumpling Bags, using a free pattern from Michelle Patterns.

Basket Blocks in the garden

WWII Lincoln Memorial One of my favorite memorial sites in Washington, D. C.  

My mother remembers this day not just for the Veterans, thinking instead of its original purpose: that of taking a day to remember our own deceased relatives.  She still calls it “Decoration Day.” My parents would go around to all the graves of their deceased ancestors and leave flowers.

Memorial Day 2014

I went up last year to see them on this weekend, but they’d already done most of the graves.  I did get to go with them for a couple of my great-grands, my father anchoring the pot of mums with bamboo skewers so it wouldn’t tip over.

Mother

This week is also my mother’s 87th birthday, and so I celebrate her as well.
Happy Birthday, Mom!


Quilts

Baskets Finished!

Basket Blocks Quilt Top

You know, I think I have had more fun with this little quilt than I have in a long time.  Of course, maybe the fact that last Monday I taught my last class of the semester may have something to do with it.  (At church this past week, I was flanked by two K-12 teachers from two different districts, and they knew practically to-the-minute how long before school let out for the summer.)

Baskets wo border

Here they are without the borders.

Border Try One

The suggestion I’d seen for a border was a piano key border, so I whacked up a bunch of 6″ wide, random-width strips and put them together.  I just couldn’t figure out why I didn’t like it.  I thought it was the fact that there were a lot of light-colored pieces in there.  So I ripped all the borders apart (which is why I have a photo of only one border–on the bottom) and took out the lights.  Still didn’t like it.

I had this older piece of blue fabric laying on the board so I could cut it up for darker “keys” for the piano key border, and pinned it up to the quilt and liked it!  Not quite enough, so I pieced in some random pieces to hint at the idea of a piano key border, and went with it.

Baby Baskets

Tutorial for the big baskets is *here.*  Tutorial for the baby baskets is in the next post.

Quilts

Pineapples and Crowns–Blogger’s Quilt Festival

AmysCreativeSide.com
Pineapples and Crowns made it into the Viewer’s Choice section of the Festival.
Please remember to vote for your favorite this week!
Pineapples and Crowns_lounging around
Pineapples and Crowns, 61″ square
Pineapples and Crowns_front
I am entering in Amy’s Blogger’s Quilt Festival, and I apologize for my regular readers who have already seen this quilt.  But she requests a blog post written the week of the festival, so as some one who is totally rule-bound (*cough, cough*) I am writing a new post.  The original post is *here.*
Pineapples and Crowns_front iphone
The inner pineapple blocks were made for me by two sets of bees, but the outer border, of the pineapple crowns is all hand-appliqued.  I went back and forth between all the categories, looking for the “mixed technique” category, but finally entered it in the appliqué category, if you want to help this quilt become a winner–that’s where to go (*shameless plug*).
Pineapples and Crowns_detail1
It could have gone in “scrappy”  or “large” for just like our children, we can categorize our quilts as one thing or another, depending on if they’ve kept us up all night, sick and crying, or if we see them decked out in their Sunday best, playing the timpani drums at the end-of-school concert, like my eldest granddaughter just did. (Way to go, Keagan!)
Pineapples and Crowns_detail2
But, as always, the best thing to call quilts is done, ready for display or enjoyment or to take to a botanic garden and take pictures of them, which I did recently.  I love the mix of scrappy white-background fabrics and the rainbow of brights.  I placed warm bright petals in the outermost border, and cool petals in the inner border.  It’s not really noticeable overall, but I needed to organize these blossoms somehow, and I chose to do it with color.
Gazebo with two quilts
I hope you’ll take a few minutes and head back to Amy’s Blogger’s Festival to see all the other terrific quilts that are showing up there, and to vote for your favorite in each category.  The voting begins May 22nd, and you can also vote for Viewer’s Choice as well.  Enjoy the online quilt festival!