
If you say “Cereus” it sounds like “Sirius” which is a legit star in our heavens. And if you spell it slightly differently — like Cerus (which I think it was started out to be) — that is the largest object in the asteroid belt between Mars and Jupiter. But no, it’s Cereus, which is a night-blooming cactus, usually only for one night. Most all the names of these New York Beauties have a name related to light or the sun, but this one is related to the moon — when it shines, the cereus flowers open up and bloom.
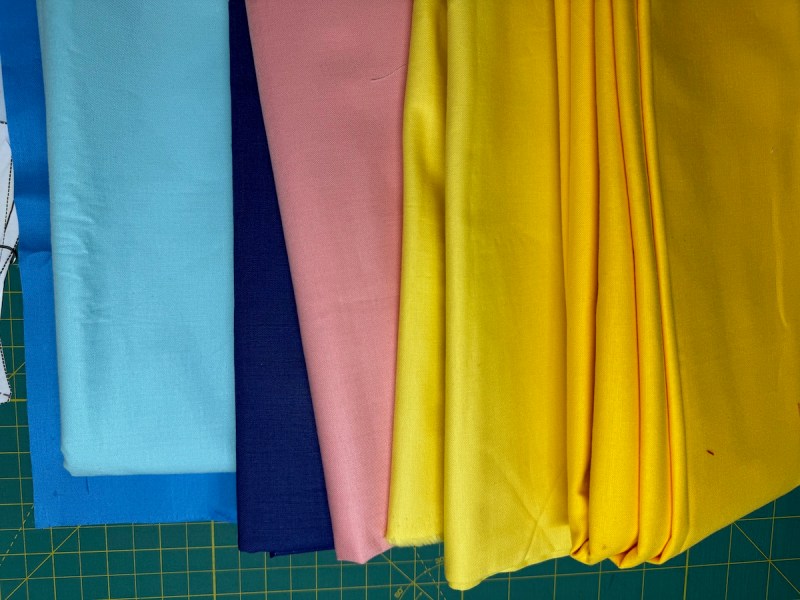
I start, as always, by layering up the fabrics. I use Painters Palette Solids, by Paintbrush Studios, and since two of our fabric shops have closed recently, I purchase them from Keepsake Quilting online. I have updated the colors chart online, where you can find this pattern. The colors chart is a free print-out: find the Preview Icon just underneath the buttons for purchasing, and you can download it to get the colors I used for the blocks. Since we are doing the blocks bit by bit, I’ll update them as we sew.


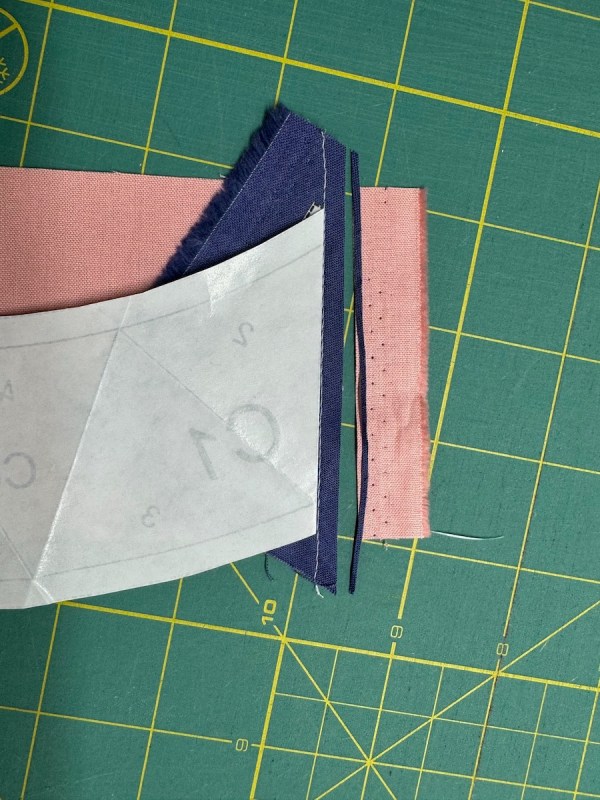
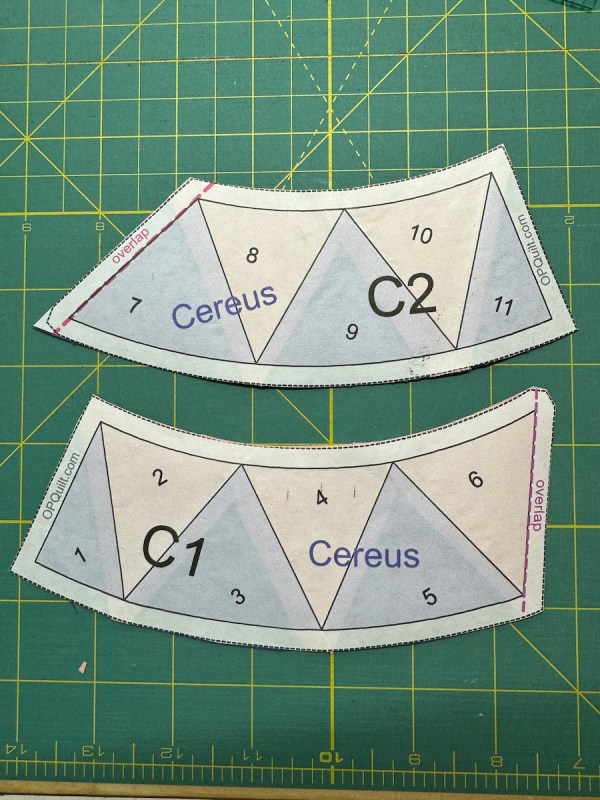
From Left to Right: Section 1 is ironed onto the purple, paper is folded back and like Photo 2, we are ready to sew that seam just to the wide of the fold of the freezer paper. In Photo 3, I trimmed it a little narrower than 1/4″ wide, maybe somewhere between an 1/8″ and a 1/4-inch. I have many seams on this section, so I don’t want a lot of huge seam allowances clogging up the works. But this is the only section that is pieced, making Cereus a quick block to make.
I have become completely besotted with the freezer paper method. Some quilters are using regular paper, dabbing glue on it, and continuing as if it were freezer paper, but I’ll put up with the prep work as I like how the freezer paper adheres well as I’m working. Plus I’m not a fan of glue (but maybe that’s because I worked on the collage fruits quilt in between sewing this block, and…ugh).
I lift the folded edge between section 1 and section 2 and iron the fabric toward the dark, then lay it down and iron section 2 onto the fabric. There are many tips on the other blocks I’ve sewn; a complete listing is here, at the tab at the top of the blog. But you can count on the freezer paper lasting for about 4-5 times of use.
Here I just press the freezer paper section straight over onto the fabric.

And here again, I lift the fold, slip the seam allowances under the paper, and press into place.

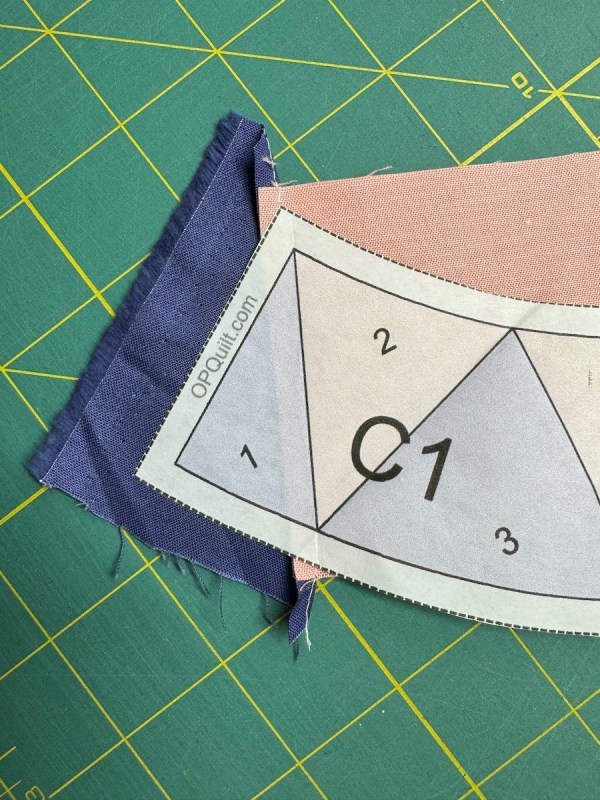
One trimmed up.
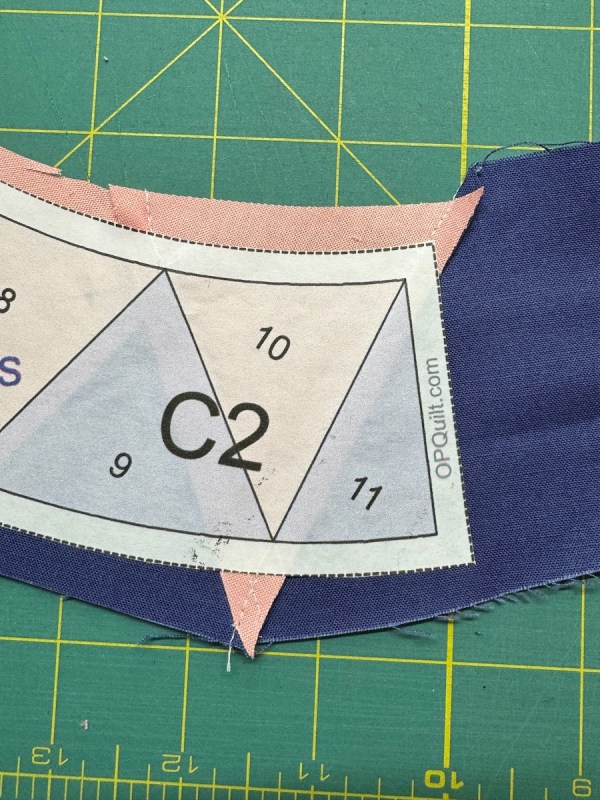
Both trimmed up.

Fold back the sections at the ends, and pin to join the C1 and the C2 pieces together. Make sure you don’t sew the paper anywhere (fold the bits of it out of the way if needed).
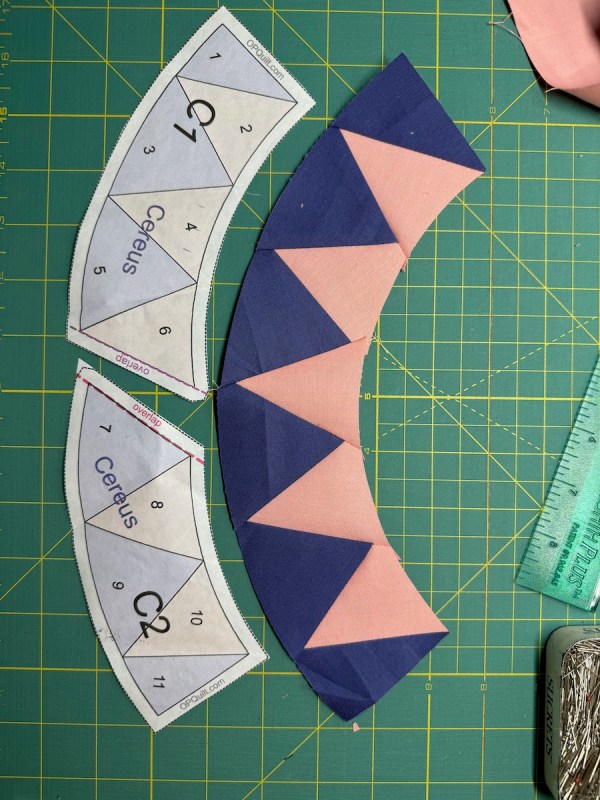
Press and there you are!

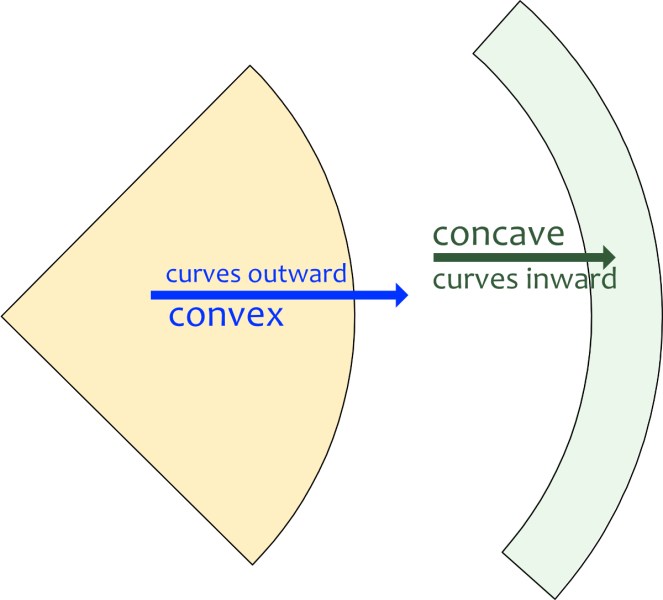
I always place the C-curve shape on top with the reverse-C-shape on the bottom. The correct term is the Convex on the bottom, and the Concave (now backwards as it is right sides together…and looks like a “C”) on the top. I mark it into sections with pins, match those up, and sew slowly, nudging the edges into place.

I was sewing these on the weekend that the Northern Lights came really low on the hemisphere, during the recent magnetic sun storms. When I stepped outside to see if we had any, alas, we were too low on the globe. I have really enjoyed all the photos I’ve seen of them. I saw the Northern Lights when I was a child, but it’s too far back in the memory bank for me to have any recollection. So I’ll just have to continue with these!

Six blocks mock-up.

How I pressed the different arcs. I like dimension in my quilts.

We need three blocks, but I made four…just because it looks really fun this way.
Enjoy making Cereus!

Yes, I’m a bonafide freezer paper enthusiast. Remember this one? When I about lost my marbles with that outside edge? (although I like the block a lot). Hurry if you want to sign up and get all their blocks — it ends in June.) I printed out the remaining blocks on my freezer paper, and will tackle those soon.

Discover more from OccasionalPiece--Quilt!
Subscribe to get the latest posts sent to your email.

you have made me a convert! Although I used regular paper and a glue stick. So much better not to have to print, in my case, 64 copies of the pattern. I only used 6! And NO RIPPING OUT OF PAPERS! I was worried that it would not be as exact as regular FPP, But it really is just perfect!
It’s another beautiful block. I love watching it come together. Your piecing hints are wonderful. We had minimal pink swirls in our sky, but there was too much fog to get a good viewing here. I, too, loved seeing the photos from others.
Your blocks are stunning and you make a very good case for freezer paper. I thought we would be too far south for the northern lights so I just had a quick look but then lots of people south of us saw them and took incredible photos and I wished I’d stayed up longer and made more effort! I think we are expecting them again in twenty years…
I really enjoy seeing the new blocks added to your layout. It’s such a nice color scheme plus interesting variations with the stripes and gradations. It will be wonderful.
Your NYB are looking more loevely together every time you add to it! I agree with Anne (Springleaf Studios) that the colour palette is so fresh and happy! And it is a game changer of a method too! So much cleaner and crisper.
I have not become a freezer paper convert but I do love your New York Beauty blocks!
Your blocks are beautiful. Of course I love them because they are solids, wink wink. I hope to start mine by the end of summer, after I get some other projects off my list.
Your block is beautiful, as always. I’ve now postponed my NYB class again due to my schedule. I’m thinking maybe January–I doubt anybody wants to undertake such an endeavor in the fall, and I’m teaching beginning quilting then anyway. I look forward to the rest of your blocks!